Last Updated on November 12, 2026
You notice the 14 boat design details that only true enthusiasts notice by looking beyond the boat’s profile to the small choices that shape its ride, handling, and upkeep. Hull angles, deck fittings, and drainage paths all reveal how a boat was designed for life on the water.
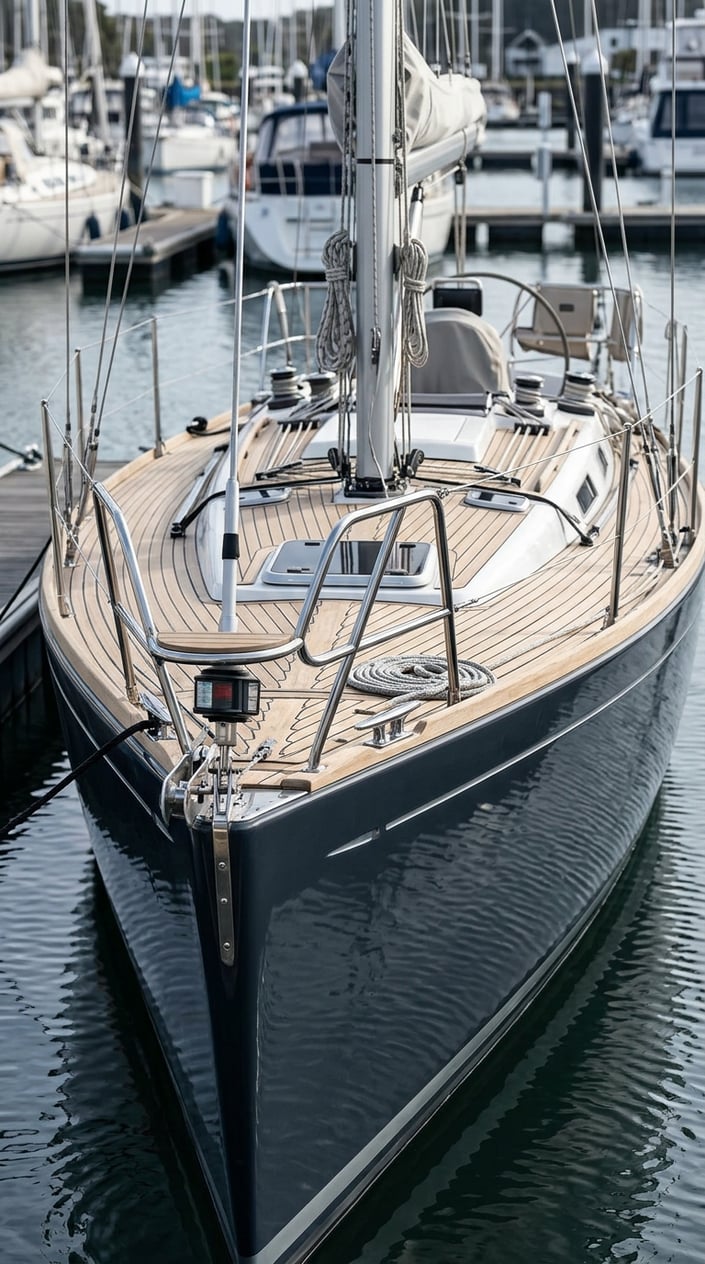
When you know what to look for, a walk around the boat tells you plenty. You can spot features that affect how confidently it handles waves, how well it sheds water, and how easy it is to maintain.
1) Deadrise Angle at the Transom
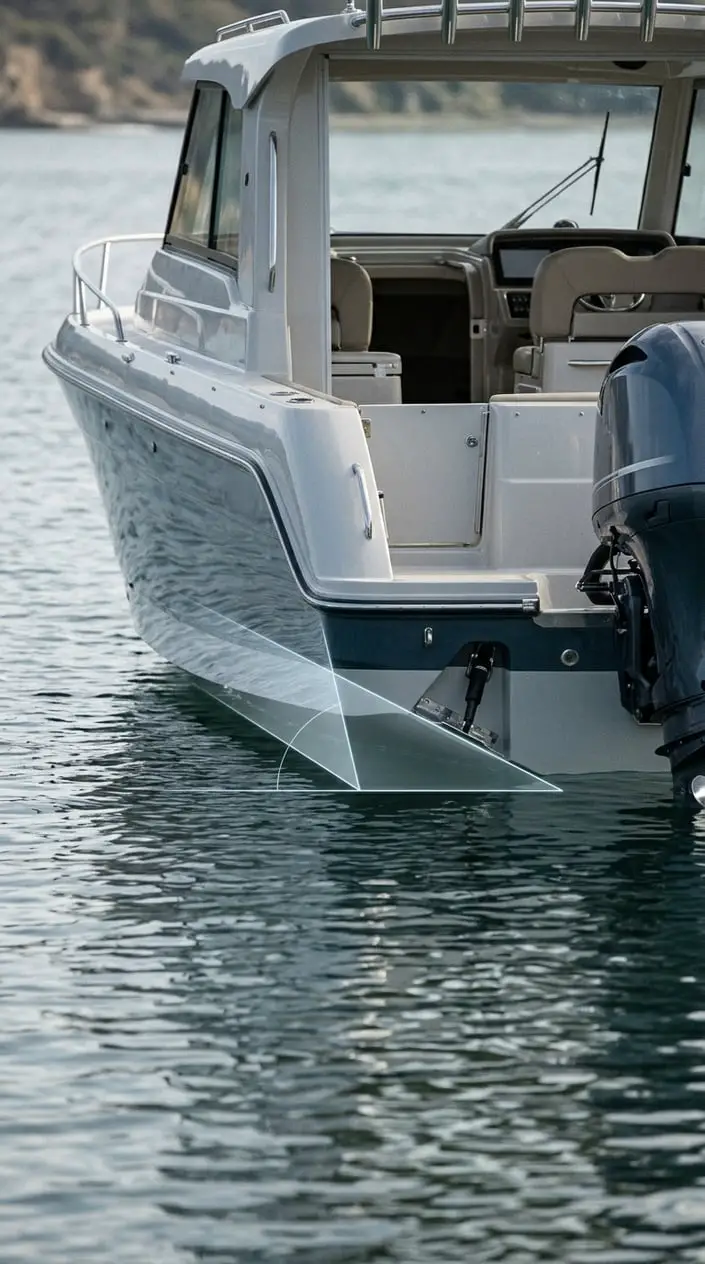
The deadrise angle at the transom gives you a useful clue about how a powerboat is set up to meet the water. It is the angle between the hull bottom and a level line across the stern, measured where the hull meets the transom. A deeper V has a steeper angle, which helps the hull cut through waves; a flatter bottom offers a broad surface for lift in calmer water.
As you inspect a boat, look at the hull from behind and compare the angle with the boat’s size and intended use. The angle alone does not tell you how a boat rides. Hull width, weight, and speed also play a part.
You can use the transom view as a starting point, then check the bottom shape farther forward to see how the V develops.
2) How the Chine Changes Along the Hull
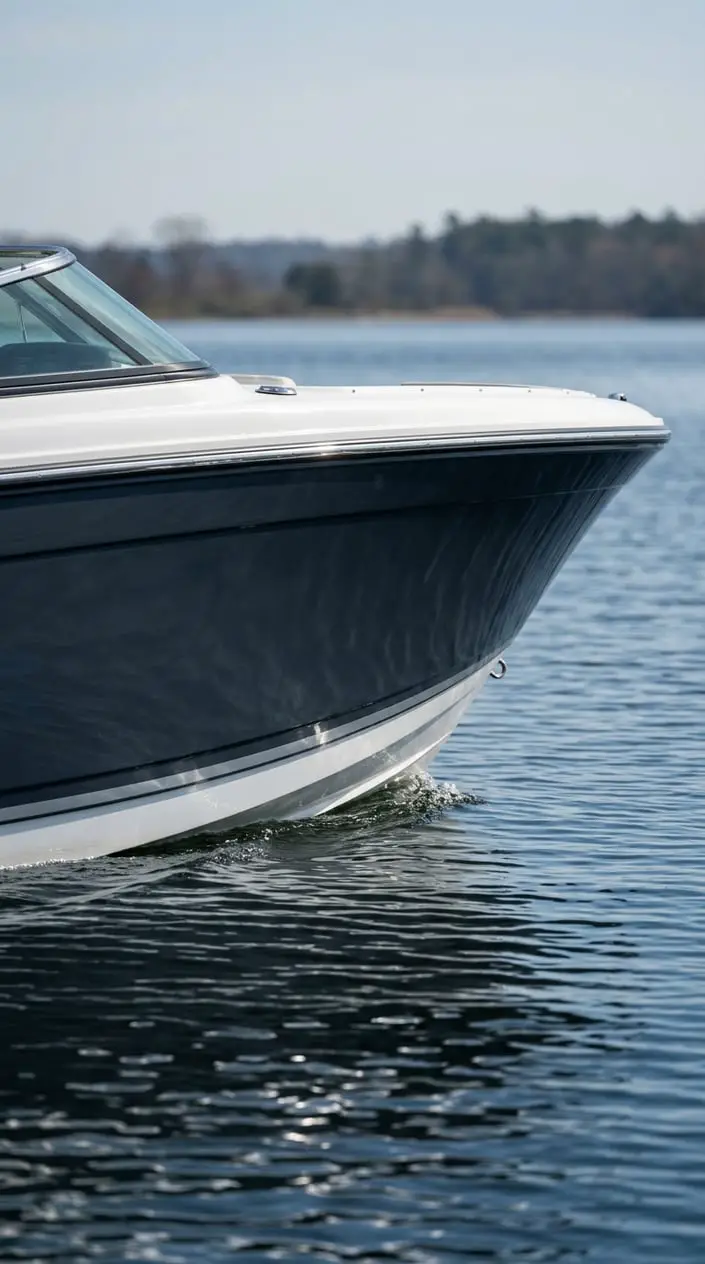
A chine that changes along the hull helps show how the designer balances stability, spray control, and handling. The chine is the line where the bottom meets the side. On some boats, it runs sharply from bow to stern; on others, its angle or height shifts as the hull widens or narrows.
Follow that line from the bow toward the transom. A chine that sits close to the water near the stern can add lift and a steady platform at rest. Farther forward, a raised or softened chine can help the hull meet waves smoothly.
You can also check whether both sides match. A clean, even line gives you a better sense of the hull’s shape than a quick glance at its paint or graphics.
3) Spray Rail Placement and Shape
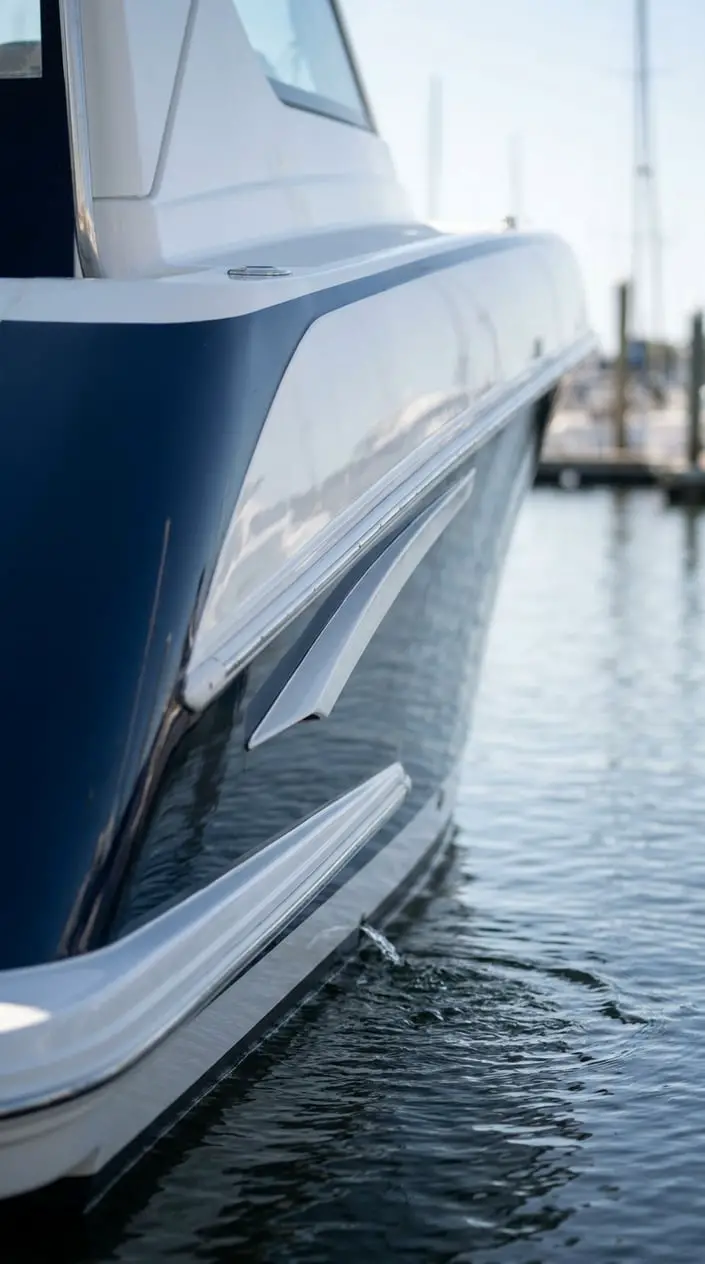
Spray rails guide water away from the hull, and their placement affects where that spray travels. These narrow ledges run along the hull sides, often above the chine. As the boat moves, they deflect water outward and help keep some spray from climbing toward the deck.
Look at how far the rails extend and whether they stay straight or taper near the bow. A rail that ends too abruptly can leave a visible change in the water flow. The rail’s angle also affects how it releases spray, so you can compare its shape with the hull beneath it.
When you inspect a boat, check that the rails look even on both sides and show no cracks or damage that could disturb the flow.
4) The Bow’s Entry and Flare
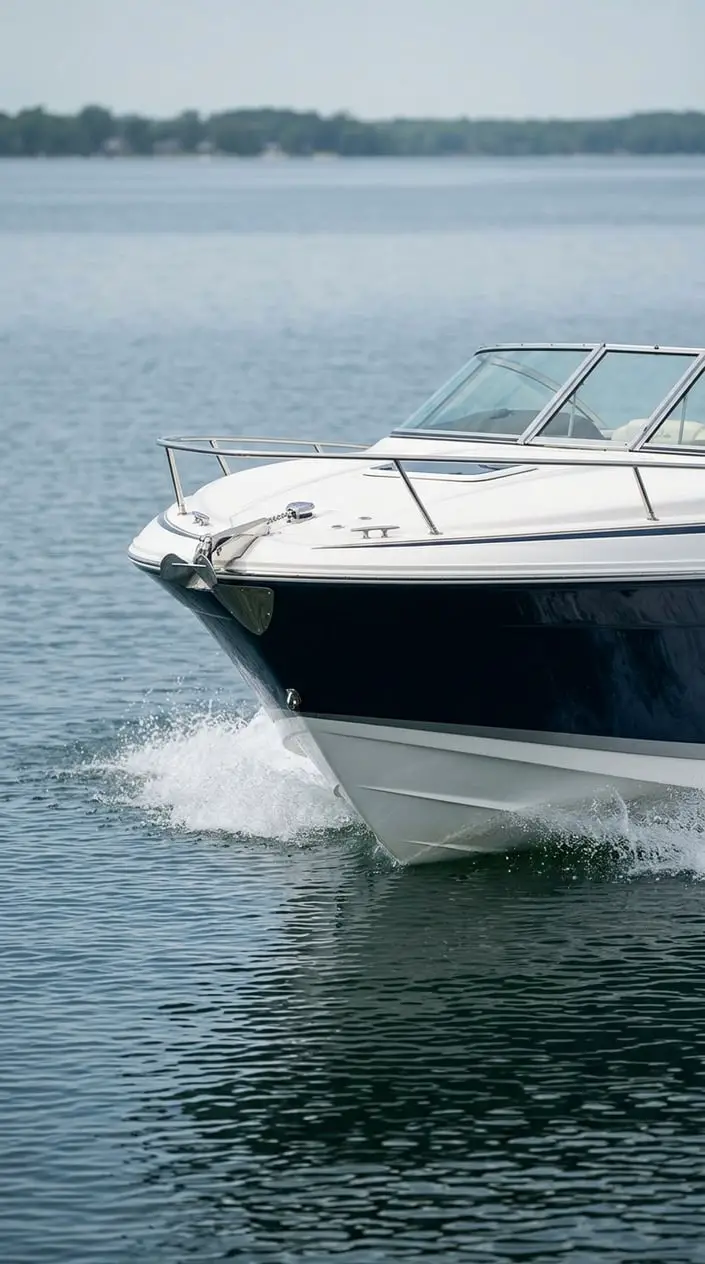
The bow’s entry tells you how its forward hull meets the water, while its flare shows how the sides turn outward above the waterline. A fine entry cuts into waves with less abrupt contact. Flare adds width higher up, helping direct water away from the foredeck when the bow meets chop.
View the bow from the front and from the side. From the front, you can see how quickly the hull widens above the waterline. From the side, you can follow the stem’s angle and notice how the bow rises.
Those curves work together, so one detail does not tell the whole story. If you walk around the boat, also check that the bow’s shape looks balanced from port to starboard and that the deck sheds water toward its edges.
5) The Sweep of the Sheerline
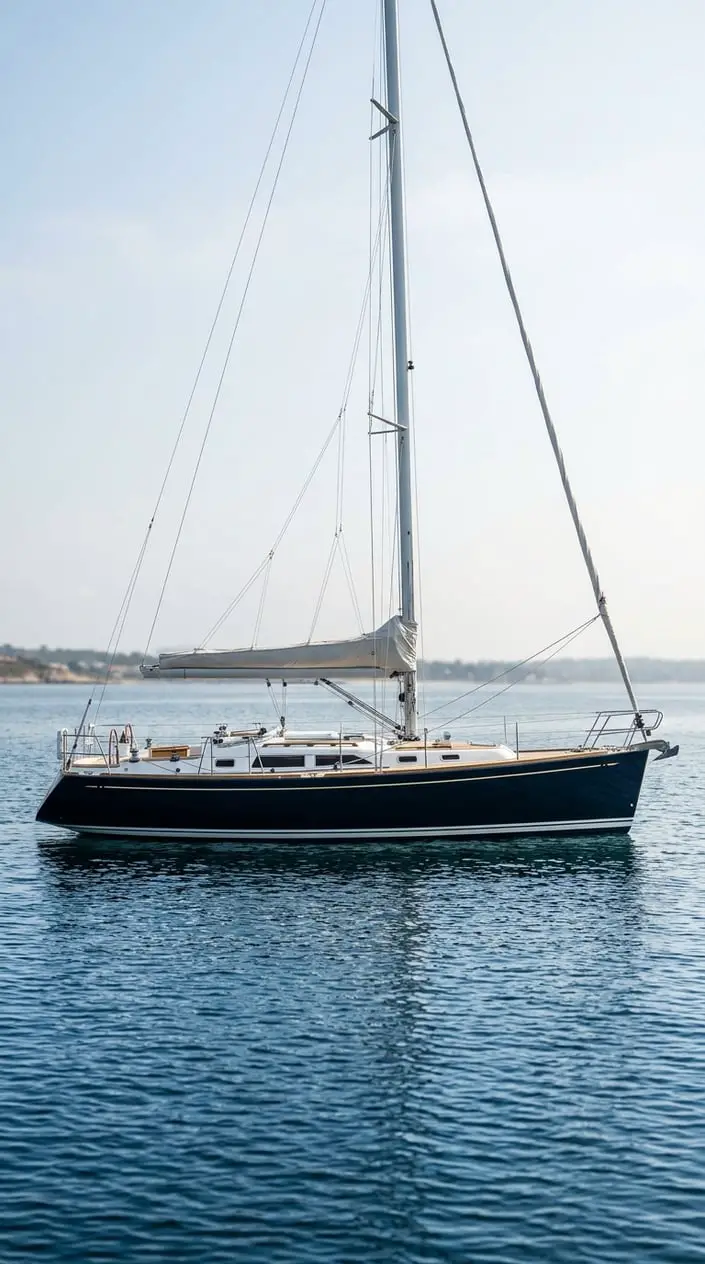
The sheerline’s sweep gives you a clear view of how the deck edge rises or falls from bow to stern. This line shapes a boat’s profile, yet it also relates to practical details such as freeboard and the height of the bow above the water. A pronounced rise toward the bow can help keep the foredeck higher as the boat meets waves.
Look along the deck edge from several steps away, since a side-on view makes the curve easier to read. A smooth sweep usually appears continuous, while abrupt changes can make the profile feel visually unsettled. Compare the sheerline on both sides and note how it meets the transom.
You can also trace nearby railings and windows to see whether their lines follow the hull’s main curve.
6) Transom Shape and Hull Tuck
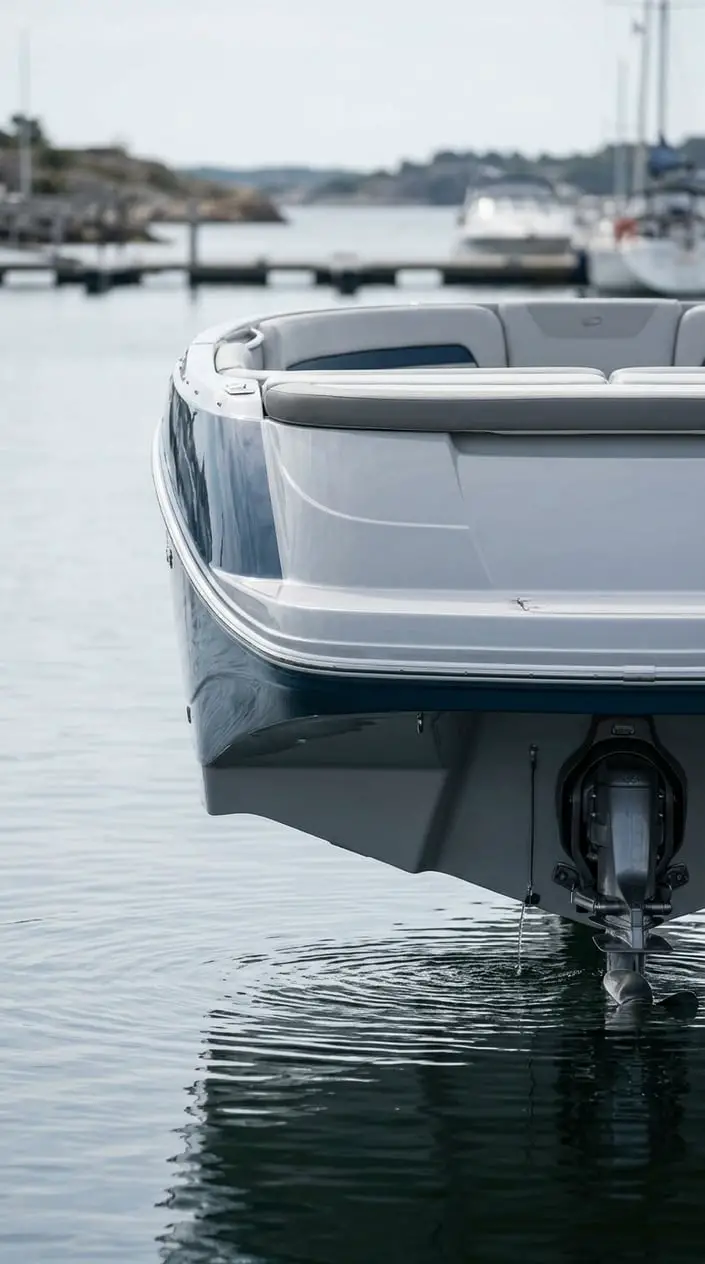
The transom’s shape and the hull’s tuck give you clues about stern clearance and the way the bottom runs aft. A tucked section curves inward as it approaches the transom. This contour affects how water leaves the hull and how much space sits between the hull and nearby gear.
From behind, check whether the transom is vertical, angled, or shaped with steps and recesses. Then look along the hull bottom to see where it draws inward. Pay attention to the fit around an outboard bracket, swim platform, or exhaust opening, since these features share limited space.
You can also look for a smooth finish across the transom and consistent lines where the hull sides meet it. Those details help you read the stern as a working structure, not only a flat back panel.
7) The Hull-to-Deck Joint
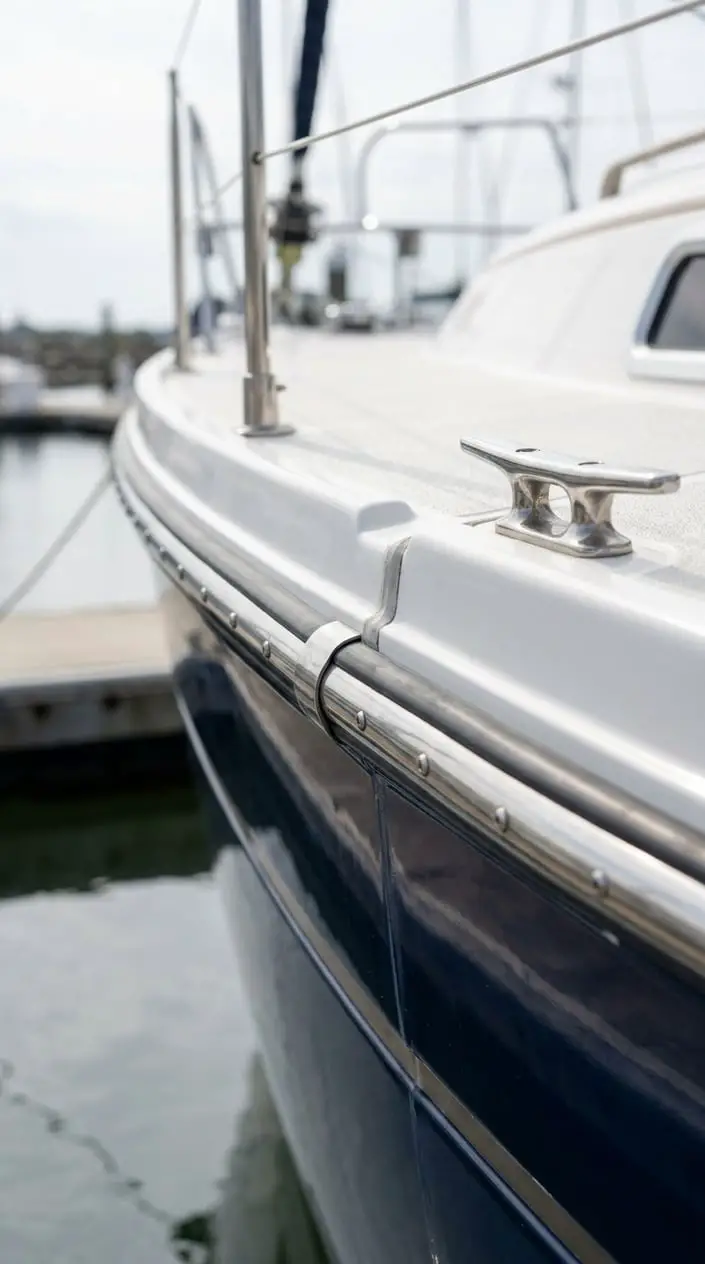
The hull-to-deck joint shows how the two main molded parts of a boat are connected and sealed. The joint may sit beneath a rubrail, inside a molded flange, or along a visible seam. Its design affects access for inspection and the protection of the area from water entry.
Walk the full perimeter and look for a consistent fit. Gaps, raised sealant, or uneven edges deserve closer attention, especially around corners and hardware. If a rubrail covers the seam, inspect its attachment points and end caps too.
You can look inside lockers or under removable panels to see whether the joint is visible from the interior. A neat exterior line helps the boat’s finish, while a well-sealed connection protects the structure behind it.
8) Deck Camber and Water Runoff
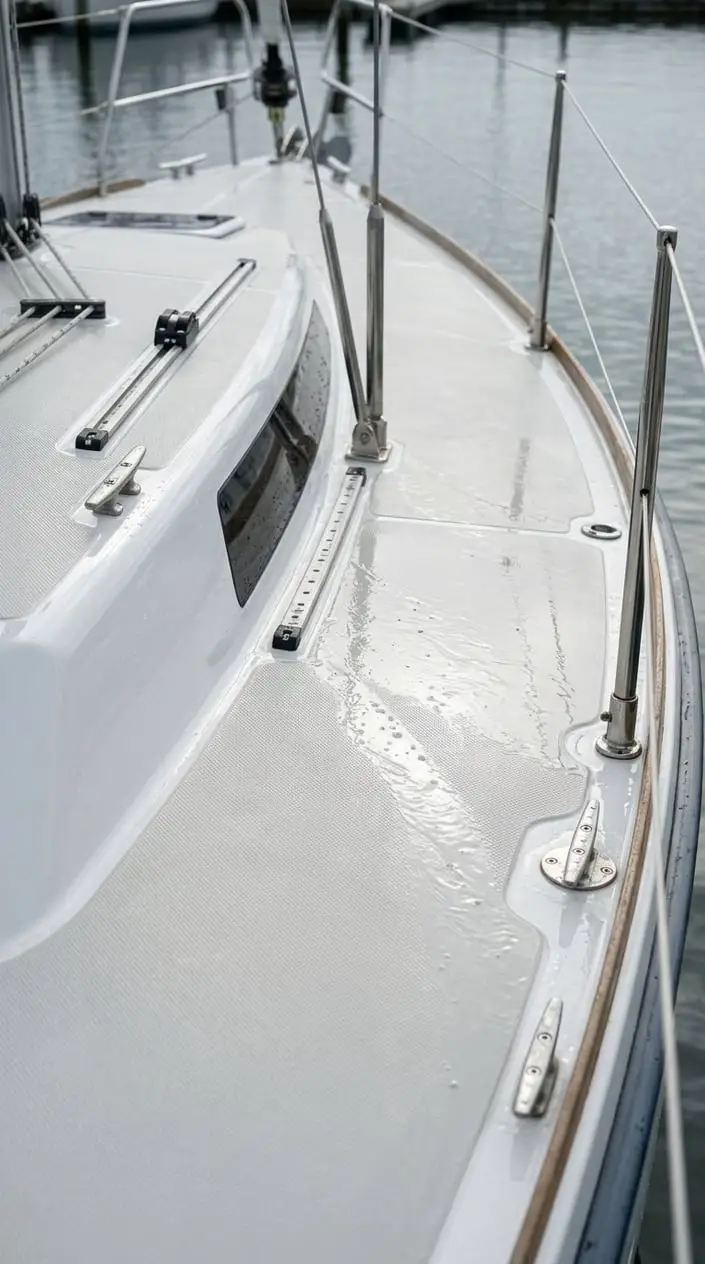
Deck camber gives the surface a slight crown so water can run toward drains or deck edges. You can spot it by looking across the deck from one side: a cambered surface rises gently near the center. That curve helps prevent standing water, which can collect dirt and make walking areas slippery.
Check how the deck’s crown relates to nearby hatches, rails, and seating bases. These features interrupt the surface, so their seals and edges need to work with the runoff path. A hose test can show where water travels, though you should follow the owner’s guidance before using water near electrical fittings.
Look for low spots where puddles form and for outlets that lead water safely overboard. The direction of the camber matters most around the cockpit and foredeck, where people and gear spend time.
9) Scupper Size and Cockpit Drainage
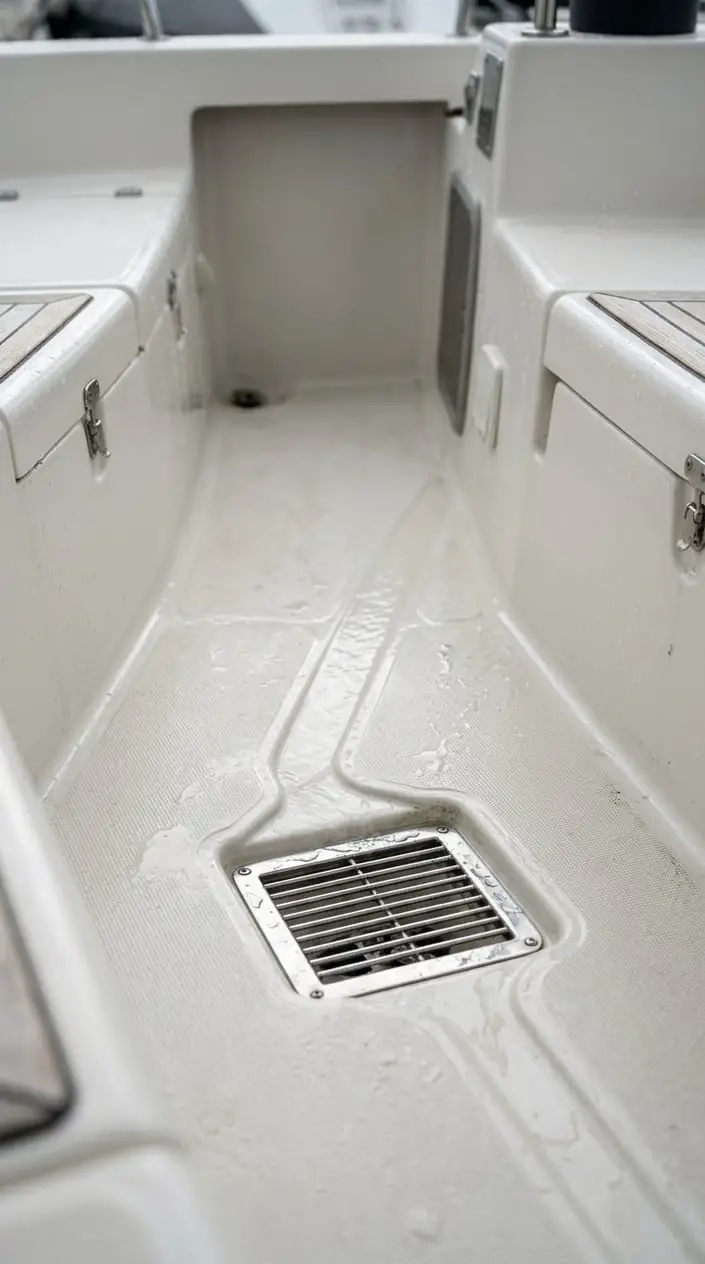
Scupper size and placement determine how water leaves the cockpit and reaches the sea. A scupper may drain through a fitting in the transom or through a hose connected to an outlet. The cockpit floor should guide water toward it, so you can inspect the slope as well as the opening.
Check that each drain is clear and that its screen or flap moves freely if fitted. A cockpit that holds water away from the scupper may have a blocked path or a low spot. You can inspect the hose and clamps from inside the boat, where accessible, and look for signs of leaks or corrosion.
Also note whether the cockpit drains sit high enough above the waterline for the boat’s design. Drainage details are especially important when the boat carries crew or gear that can block an opening.
10) Propeller Aperture and Rudder Alignment
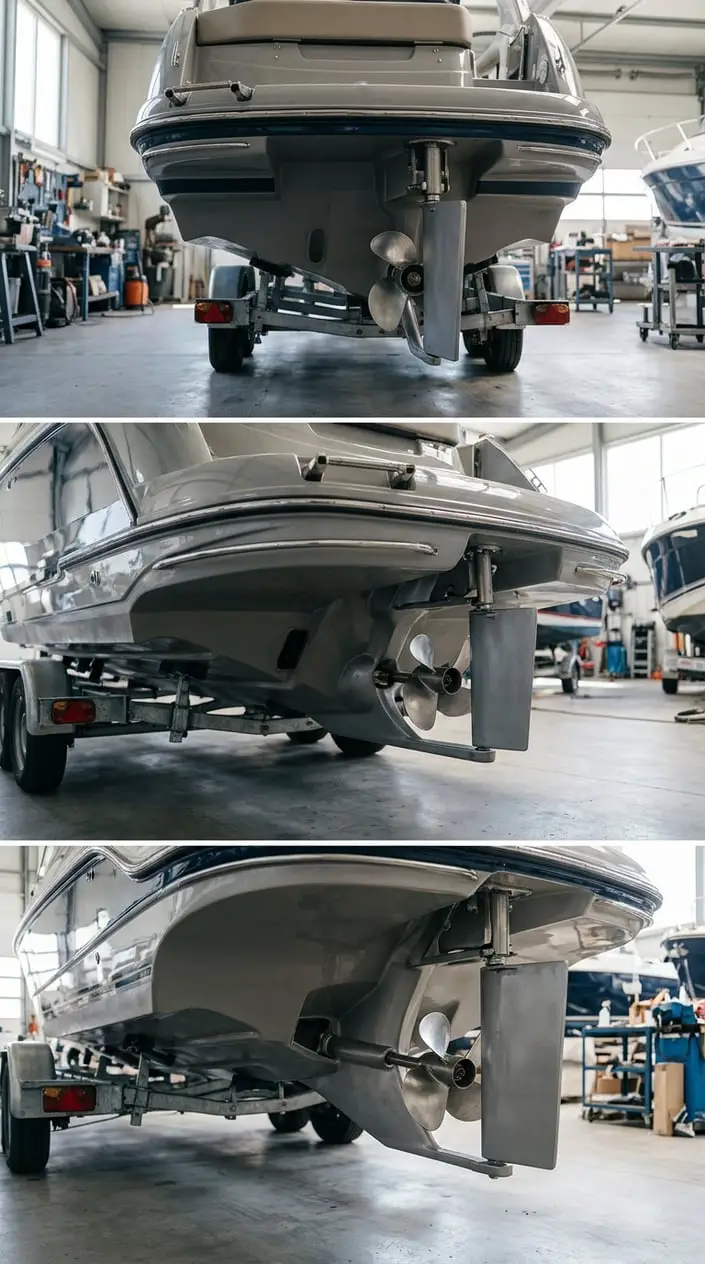
The propeller aperture and rudder alignment reveal how carefully the drive gear fits into the hull’s available space. An aperture is the opening or recessed area around a propeller on some inboard boats. Its shape provides room for the blades to turn, while the rudder sits in the propeller’s flow to steer the boat.
From behind, check that the propeller appears centered in its opening and that the rudder lines up with the boat’s centerline. Clearance between the blade tips and surrounding structure should look even. The exact setup varies with the hull and propulsion system, so avoid judging it by one measurement alone.
You can also check the propeller for nicks and the rudder for visible bends or loose fittings. This arrangement becomes especially easy to read while the boat is out of the water.
11) Skeg Shape and Propeller Protection
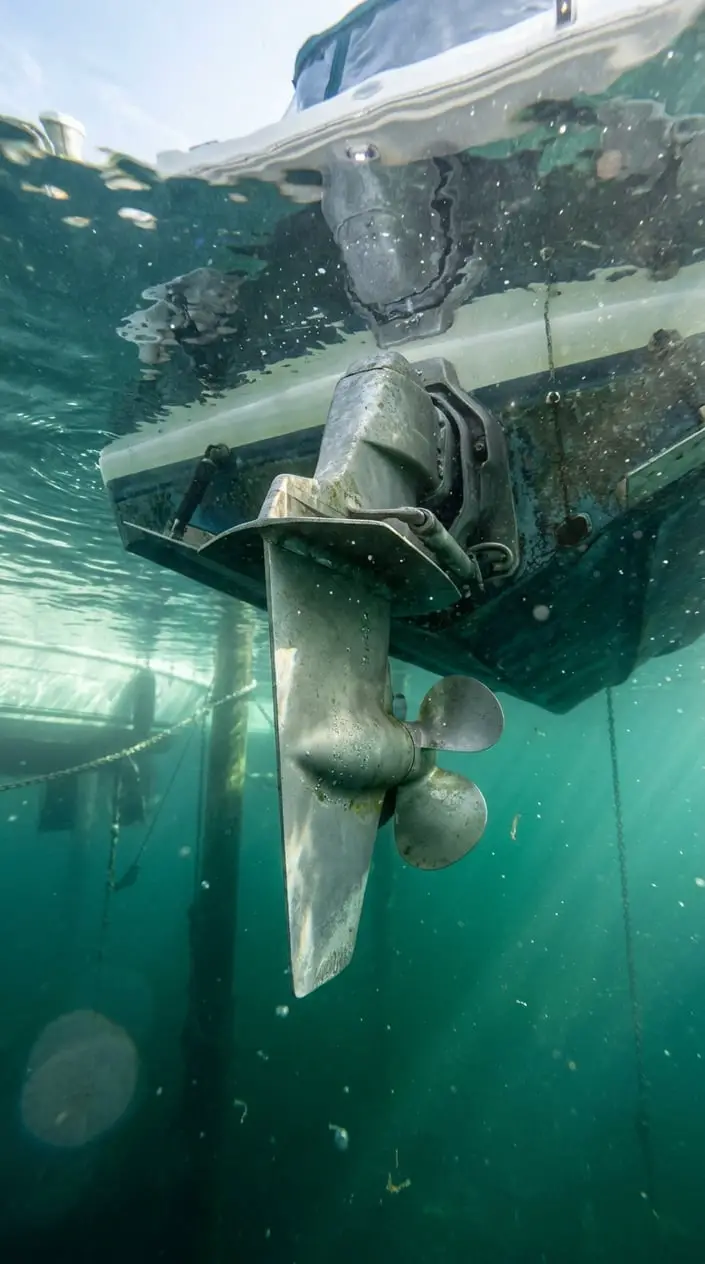
A skeg adds a protective fin along the hull bottom and helps you see how the boat’s underwater gear is supported. On an outboard or sterndrive, the skeg sits below the gearcase and helps shield the propeller area from contact with underwater objects. Its shape also contributes to tracking through the water.
Inspect the skeg’s lower edge for dents, cracks, or repairs. A damaged fin can signal an impact, and a poor repair may change the gearcase’s shape. Notice how the skeg tapers and whether it sits in line with the propeller shaft.
On a boat with an inboard keel, the keel and its aft section play related protective roles, though the arrangement differs. You can get a useful view of these parts when the boat is on a trailer or lift, with the engine safely tilted as directed by its maker.
12) Anchor Roller Integration at the Stem
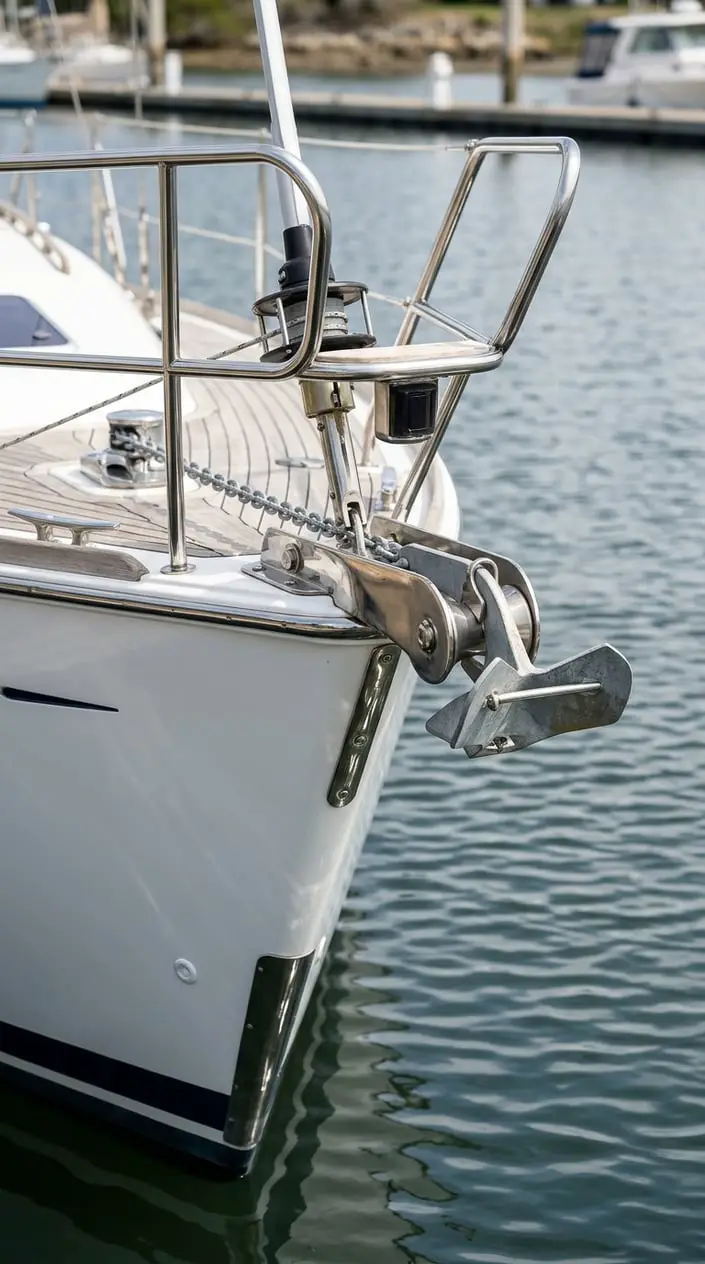
An anchor roller integrated at the stem guides the anchor over the bow and supports its movement in and out of the water. Its position should align the anchor shank with the roller and give the flukes room to clear the hull. The roller assembly also needs a strong mounting point because anchoring loads pass through its base.
Look at how the roller sits in relation to the bow pulpit, forestay, and deck edge. Check that the anchor rests securely when stowed and that the chain or rode has a clear path. A retaining pin or lashing helps keep the anchor in place underway.
You can also inspect the fasteners and backing beneath the deck if access allows. A carefully integrated setup reduces scraping at the stem and makes it easier to handle the anchor from the foredeck.
13) Cleat Placement and Backing
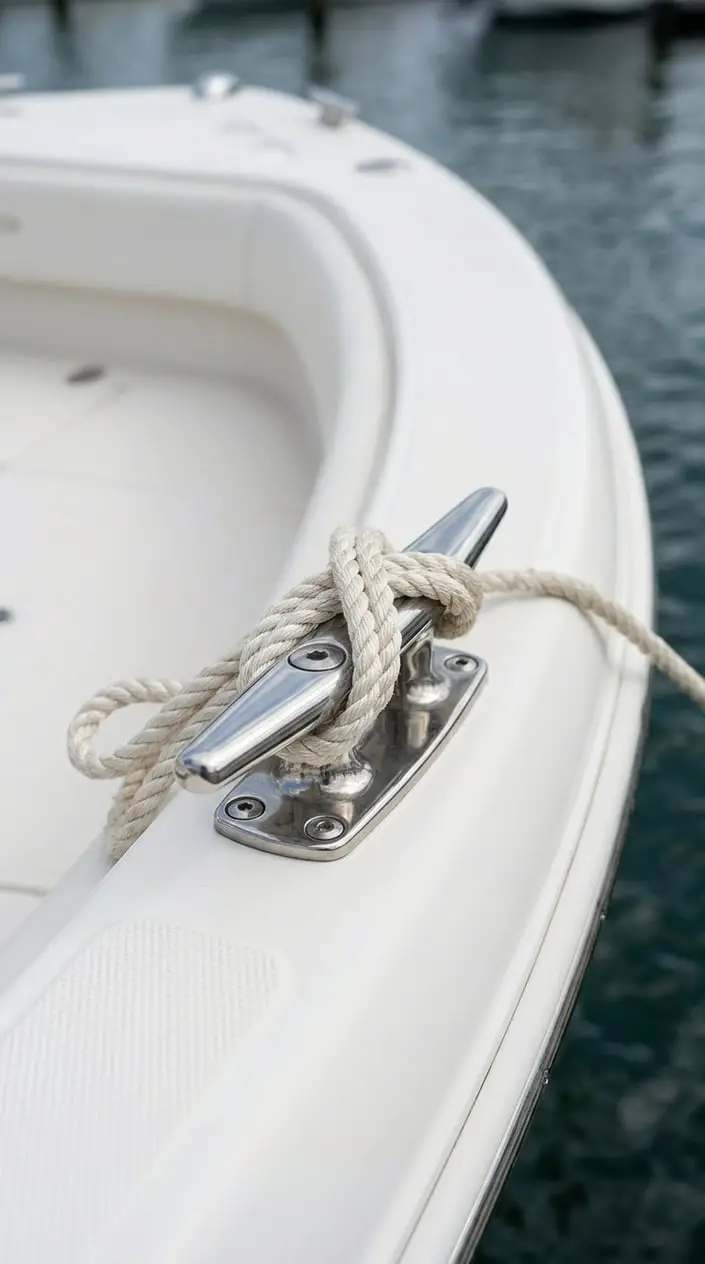
Cleat placement and backing tell you how well the deck is prepared to handle dock-line loads. A cleat should sit where a line can lead cleanly toward a dock without rubbing across a sharp edge. Its fasteners need support below the deck, often from a backing plate or reinforced structure.
Trace the likely path of a bow, stern, or spring line from each cleat. A fair lead helps the line work without sawing against the hull or rail.
Check that the cleat base sits flat and that its bolts show no rust stains or movement. If you can reach the underside, look for a backing plate that spreads the load across a wider area.
The cleat’s size should suit the lines used on the boat, and open deck space around it makes tying and releasing easier with cold or wet hands.
14) Rubrail Joints and End Caps
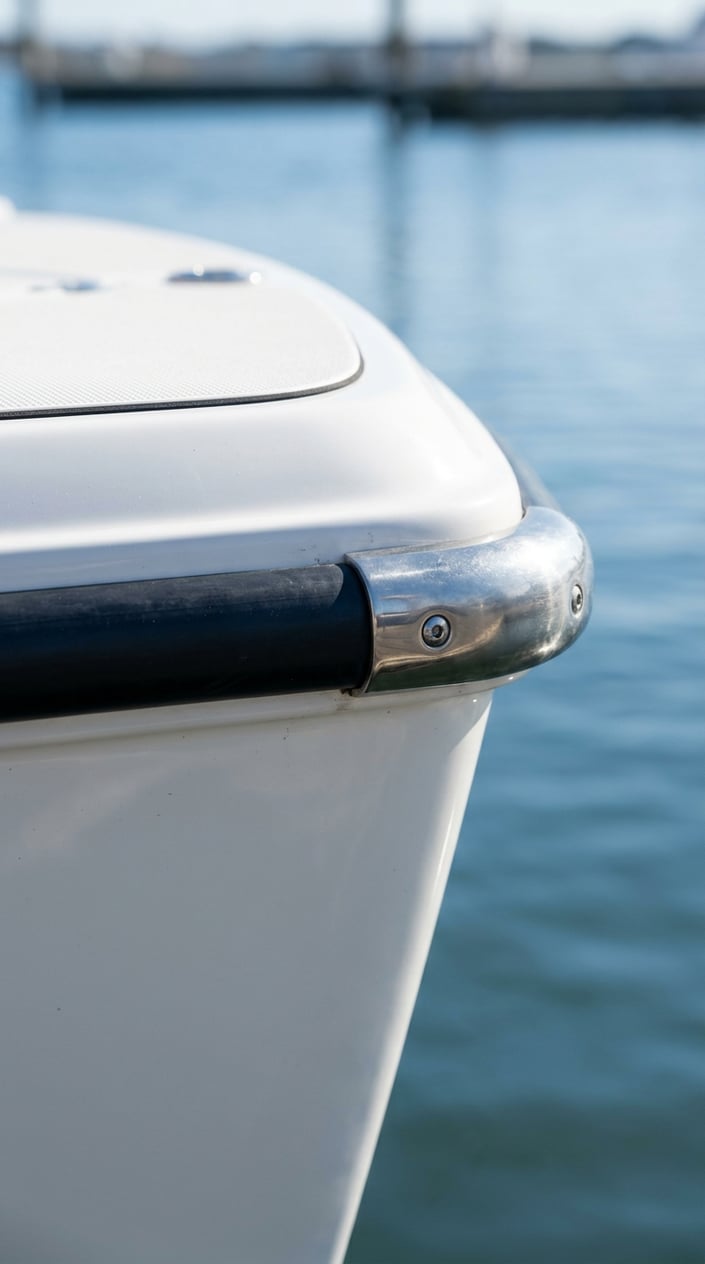
Rubrail joints and end caps show how the boat’s protective trim finishes at its corners and seams. The rubrail covers the hull-to-deck edge and takes contact from docks or other boats. Its ends need secure caps, and its joints should meet cleanly so the trim stays in place.
Follow the rubrail around the boat and inspect the corners, fasteners, and splice points. A loose section may shift under pressure, while a sharp or raised edge can catch a line or clothing. Check for gaps between the trim and hull, along with cracked sealant around an end cap.
Materials differ: flexible vinyl absorbs light contact, while metal and rigid profiles provide a firmer edge. You can note how the rail sits against the hull and whether its fasteners remain snug at the bow and stern.