Last Updated on February 4, 2026
Ever wanted to make something cool with just a piece of paper? Well, you’re in luck! This guide will show you exactly how to make a boat with paper. It’s a fun, simple project that anyone can do, and you’ll have your own little paper boat ready to float in no time. Let’s get started!
Key Takeaways
- Pick the right paper, like standard printer paper, for the best folding results.
- Make sure your folds are sharp and precise; this helps the boat hold its shape.
- Transforming the paper through a ‘hat’ shape to a ‘diamond’ is a key step.
- The final steps involve carefully pulling apart the paper to form the hull.
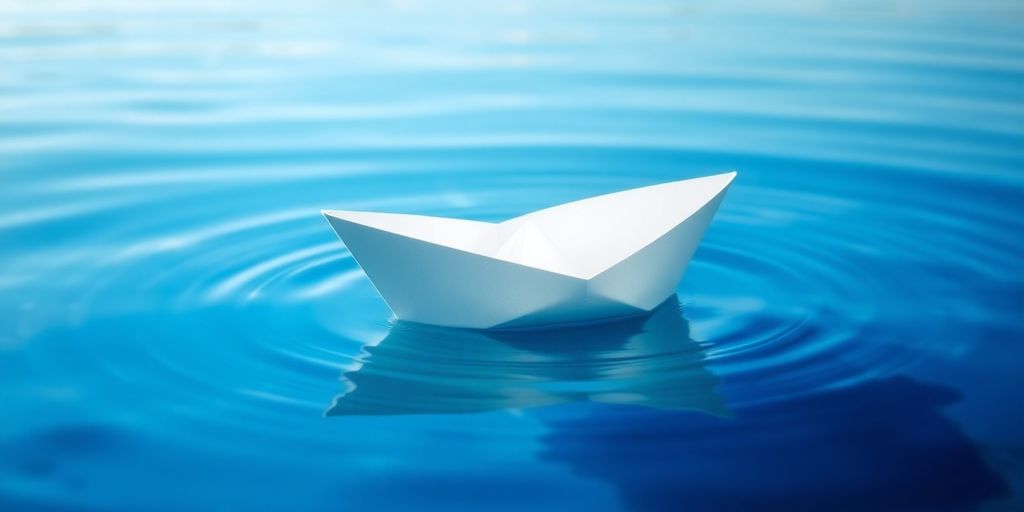
- Test your finished boat in water and make small adjustments for better floating.
Gathering Your Materials
Before we get started on our paper boat adventure, it’s important to make sure we have everything we need. Trust me, there’s nothing worse than getting halfway through a project and realizing you’re missing something! So, let’s gather our supplies and set ourselves up for success. It’s a simple craft, but a little prep goes a long way.
Selecting the Right Paper
Not all paper is created equal when it comes to origami. You’ll want to choose a paper that’s easy to fold and holds a crease well. Regular printer paper works just fine, but if you’re feeling fancy, you could try origami paper. It comes in all sorts of colors and patterns, which can make your boat extra special. Just avoid anything too thick, like cardstock, as it can be difficult to work with. For a tiny boat, you can even use a sticky note paper.
Essential Tools for Folding
Okay, so technically, you don’t need any tools to make a paper boat. Your hands are the most important tool! However, there are a couple of things that can make the process a bit easier:
- A Ruler or Bone Folder: These can help you make crisp, clean creases, which will result in a neater boat.
- Scissors (Optional): Depending on the design, you might need scissors to trim the paper. But for this simple boat, we shouldn’t need them.
- Pencil (Optional): If you want to mark any lines before folding, a pencil can be helpful. Just make sure to erase the lines afterward so your boat looks nice and clean.
Having the right tools can really improve the final product. It’s like cooking – you can technically make a meal with just a pot and a spoon, but having a good knife and some measuring cups makes things a whole lot easier.
Preparing Your Workspace
Now that we have our materials, let’s get our workspace ready. Find a flat, clean surface where you have plenty of room to spread out. A table or desk works great. Make sure there aren’t any crumbs or spills that could get in the way. Good lighting is also important so you can see what you’re doing. And that’s it! With a little preparation, you’ll be ready to start folding in no time.
Initial Paper Folds

Folding the Base Crease
Okay, so first things first, you gotta get that initial fold right. This is the foundation of your whole paper boat, so don’t rush it. Grab your rectangular piece of paper. It doesn’t matter too much what kind, printer paper works fine, but construction paper gives it a bit more heft. Fold it in half lengthwise, what some people call "hot dog style." Make sure the edges line up perfectly, and then press down firmly to create a sharp crease. A crisp crease is your friend here; it’ll make the next steps way easier. Run your fingernail along the fold a few times to really set it. This simple paper boat craft is going to be awesome!
Creating the Central Fold
Alright, now unfold that first fold you just made. You should have a nice line running down the middle of your paper. Now, rotate the paper 90 degrees. You’re going to fold it in half again, but this time the other way – "hamburger style," as some say. Again, line up those edges and make a sharp crease. This fold is going to give you the center line you need for the next few folds, so make it count. When you open it up, you’ll see two lines crossing each other. These lines are your guide.
Forming the Triangular Top
Now, with the paper unfolded, lay it flat. You’re going to take the top two corners and fold them down towards that center line you just created. Make sure the edges of the folds line up with the center crease. You’re basically making a triangle at the top of the paper. Press those folds down nice and firm. You should now have something that looks a bit like a house. This triangular top is what will eventually form the pointy front of your boat. Getting these folds precise is key for floating your origami boat later on.
Shaping the Boat’s Structure

Now that we’ve got our initial folds in place, it’s time to really start seeing that boat shape emerge. This part can feel a little tricky, but don’t worry, just take it one step at a time, and you’ll get there. We’re basically going to transform our folded paper into something that resembles a hat, and then flatten it out into a diamond shape. This diamond is the foundation for the boat’s hull, so getting these folds right is important.
Folding the Bottom Edges
Okay, so with your triangular top facing up, you’ll notice two loose bottom edges. Fold each of these edges upwards, aligning them with the bottom edge of the triangle. This creates a sort of brim for our soon-to-be hat. Make sure your creases are nice and crisp; this will help with the boat’s overall structure. Think of it like you’re making a paper airplane, but instead of wings, we’re building the base of a hat. It’s kind of fun when you think about it that way.
Transforming to a Hat Shape
Now, carefully reach inside the folded edges you just created and gently open up the paper. You should be able to push the sides outwards, transforming the paper from a flat shape into something that looks like a hat. This is a crucial step, so take your time and be gentle. If the paper tears, don’t panic! Just grab another sheet and start again. We’ve all been there. The goal is to have a symmetrical hat shape, ready for the next step.
Flattening into a Diamond
With your hat shape formed, carefully flatten it down on a flat surface. You’ll want to flatten it so that the point of the hat becomes a straight line. This will give you a diamond shape. This diamond is the base from which we’ll create a paper boat. Make sure the diamond is symmetrical and the creases are well-defined. This will make the next steps much easier. If it’s not quite perfect, don’t worry, you can always adjust it slightly. The key is to have a solid foundation to work with.
This part is all about precision. The more accurate your folds, the better your boat will look and float. Don’t rush it; take your time and enjoy the process. It’s all part of the fun!
Refining the Boat’s Form
Folding the Diamond’s Base
Okay, so you’ve got your diamond shape now. This is where things start to look more like a boat. Take one of the bottom points of the diamond and fold it upwards to meet the top point. Try to make the fold as even as possible. It doesn’t have to be perfect, but the closer you get, the better your boat will look. This fold creates the first part of the boat’s hull.
Repeating on the Reverse Side
Now, flip the whole thing over. You should see another point at the bottom of the diamond on this side. Just like before, fold this point upwards to meet the top point. Again, try to make the fold as even as you can. This second fold will complete the basic shape of the boat’s hull. It’s starting to come together, right?
Opening the Diamond Shape
This is the slightly tricky part, but don’t worry, you can do it! Gently put your fingers inside the diamond shape, where you just made those folds. You’re going to carefully pull the two sides apart. As you pull, you’ll see the boat shape start to emerge. It might take a little finessing, but keep at it. If it doesn’t want to cooperate, just gently unfold and refold the previous steps. You might find some origami types that are easier to work with.
Finalizing Your Paper Boat
Okay, so you’ve folded and creased, and hopefully, you’re looking at something that resembles a boat. Now comes the fun part – making sure it actually works (or at least looks good trying!).
Pulling Apart to Create the Hull
This is where the magic happens. Gently reach inside the diamond shape and begin to pull the two points apart. You’ll see the sides start to form the hull of the boat. Be careful not to rip the paper! It’s a delicate operation, especially if you’re using thinner paper. As you pull, the boat will naturally take shape. It might look a little wonky at first, but don’t worry, we’ll fix that.
Smoothing Out the Creases
Now that you have a basic boat shape, it’s time to refine it. Go around the edges and gently smooth out any sharp creases. This will not only make the boat look better but also help it float more evenly. Pay special attention to the bottom of the hull; you want it to be as flat as possible. You can also try gently pressing down on the top edges to give the boat a wider, more stable appearance. Think of it like giving your paper boat a makeover.
Ensuring a Stable Base
Finally, check the base of your boat. Is it even? Does it wobble? If so, you might need to make some adjustments. Gently push down on any high spots to flatten them out. You can also try folding the bottom edges slightly inward to create a more defined keel. A stable base is key to a successful voyage (even if it’s just in the bathtub!).
Getting the base right is super important. If it’s too uneven, your boat will just tip over. Take your time and make sure it’s as flat as possible. A little patience here will save you a lot of frustration later.
Here are some things to consider:
- Check for symmetry. Is one side higher than the other?
- Make sure the bottom is relatively flat. No major bumps or folds.
- Consider adding a small weight (like a coin) to the center of the hull for added stability.
Testing Your Creation
Alright, you’ve folded, creased, and probably muttered to yourself a few times. Now comes the moment of truth: will your paper boat actually float? Let’s find out!
Floating Your Origami Boat
Okay, find a suitable body of water. A bathtub, sink, or even a large bowl will do. Gently place your origami boat onto the water’s surface. Watch closely to see how it behaves. Does it sit upright? Does it immediately tip over? Or does it slowly start to sink like a poorly made soufflé?
Making Adjustments for Stability
So, your boat isn’t exactly sea-worthy? Don’t worry, it happens. Here’s what you can do:
- Check for uneven folds. Sometimes a slight asymmetry can throw the whole thing off.
- Gently reshape the hull. A little tweaking can make a big difference.
- If one side is consistently lower, try adding a tiny fold to the opposite side to act as a counterweight.
It’s all about trial and error. Think of it as a miniature naval engineering challenge. You’re not just folding paper; you’re mastering the art of buoyancy!
Reinforcing for Durability
If your boat floats, that’s awesome! But how long will it last? Paper and water aren’t exactly best friends. Here are some ideas to make your boat a bit tougher:
- Carefully apply clear tape to the seams and edges. This will help prevent water from seeping in.
- Consider using thicker paper next time. Cardstock will hold up much better than thin printer paper.
- For a more advanced approach, you could try coating the boat with a thin layer of wax or sealant. Just be careful not to make it too heavy!
Now go forth and test your paper boat craft!
Wrapping It Up
So, there you have it! Making a paper boat is pretty simple, right? It’s one of those cool little projects that doesn’t need much, just a piece of paper and a few minutes. You can make a whole fleet of these things, and it’s a fun way to pass some time. Plus, it’s always neat to see something you made yourself actually float. Give it a try, and maybe even add some color or decorations to make it your own. Who knew a simple piece of paper could turn into something so cool?
Frequently Asked Questions
What simple items do I need to make a paper boat?
Making a paper boat is a fun and easy craft that doesn’t need many supplies. All you really need is one piece of regular printer paper. That’s it! You can also use a flat surface like a table to help you make nice, crisp folds.
Can I actually float my paper boat in water?
Yes, you definitely can! Once you’ve finished folding your paper boat, fill a sink or a small tub with some water. Gently place your boat on the water’s surface to see if it floats. It’s a really cool moment to watch your creation sail!
How can I make my paper boat stronger so it doesn’t sink?
If your boat seems a little wobbly or starts to get soggy, you can make it stronger. Try putting clear tape along the edges and around the bottom. This helps keep the paper dry and makes the boat last longer in the water.
What kind of paper works best for making a boat?
The best paper to use is regular printer paper, like the kind you use for school or at home. It’s easy to fold and holds its shape well. Thicker paper can be harder to fold neatly, and very thin paper might get wet too quickly.
Is it hard to make a paper boat, or can anyone do it?
Don’t worry if your first boat isn’t perfect! Origami, which is the art of paper folding, takes a little practice. The key is to make your folds as sharp and neat as possible. Just keep trying, and you’ll get better with each boat you make.
Is making paper boats a good activity for kids?
Absolutely! Making paper boats is a fantastic activity for kids. It helps them learn about following steps, being careful with their hands, and even a little bit about how things float. Plus, it’s a great way to be creative and have fun.


