Last Updated on January 23, 2026
You want your RV ready for every mile ahead, and a good spring checklist keeps small issues from turning into big problems. This article gives you 22 clear maintenance tasks to inspect, clean, and test the systems that keep your rig safe, comfortable, and road-ready.
Use this guide to focus on key areas like tires, roof, plumbing, batteries, and safety devices so you can hit the road with confidence. PRO TIP
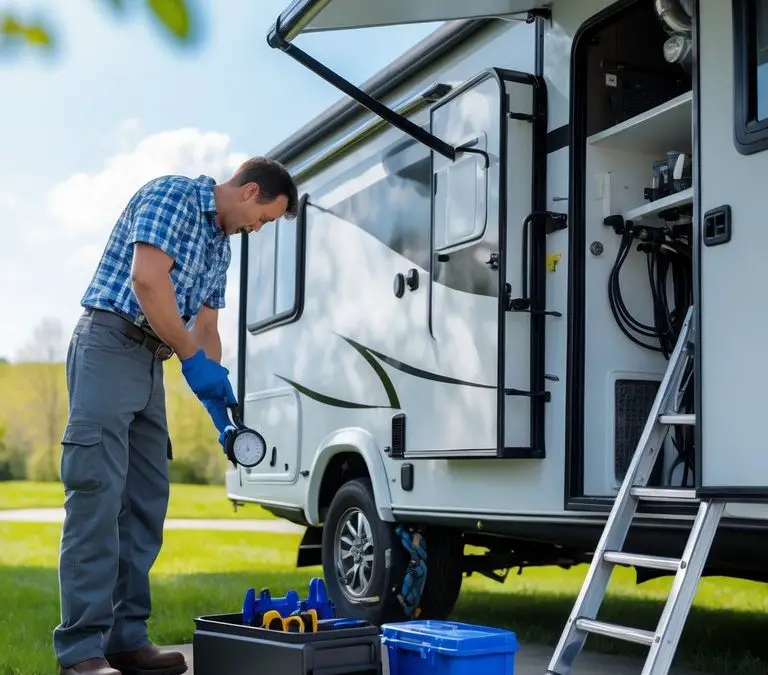
1) Inspect and inflate tires to recommended pressure
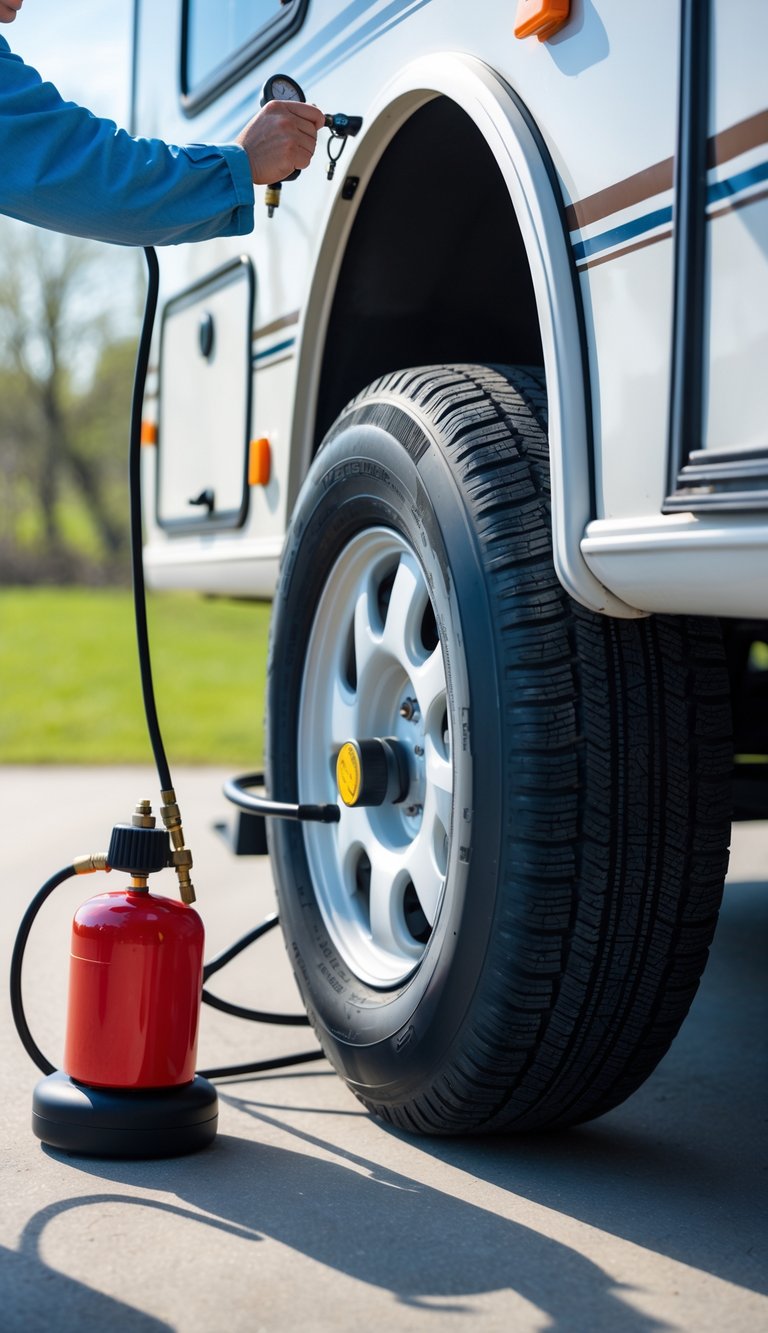
You should check tire pressure when tires are cold, before driving. Use a reliable gauge and follow the PSI listed on your RV or trailer door jamb, not the tire sidewall.
Look for cracks, bulges, nails, or uneven wear as you inspect each tire. Even small damage can lead to bigger problems on the road.
Measure tread depth and compare it to safe limits. Replace tires that are old, worn, or show sidewall damage.
Torque the lug nuts to the manufacturer’s specs after inflating. Also verify that the tire-pressure monitoring system, if equipped, is working.
PRO TIP
Keep a portable air pump and spare gauge in your RV. Check pressures before every long trip and monthly during storage.
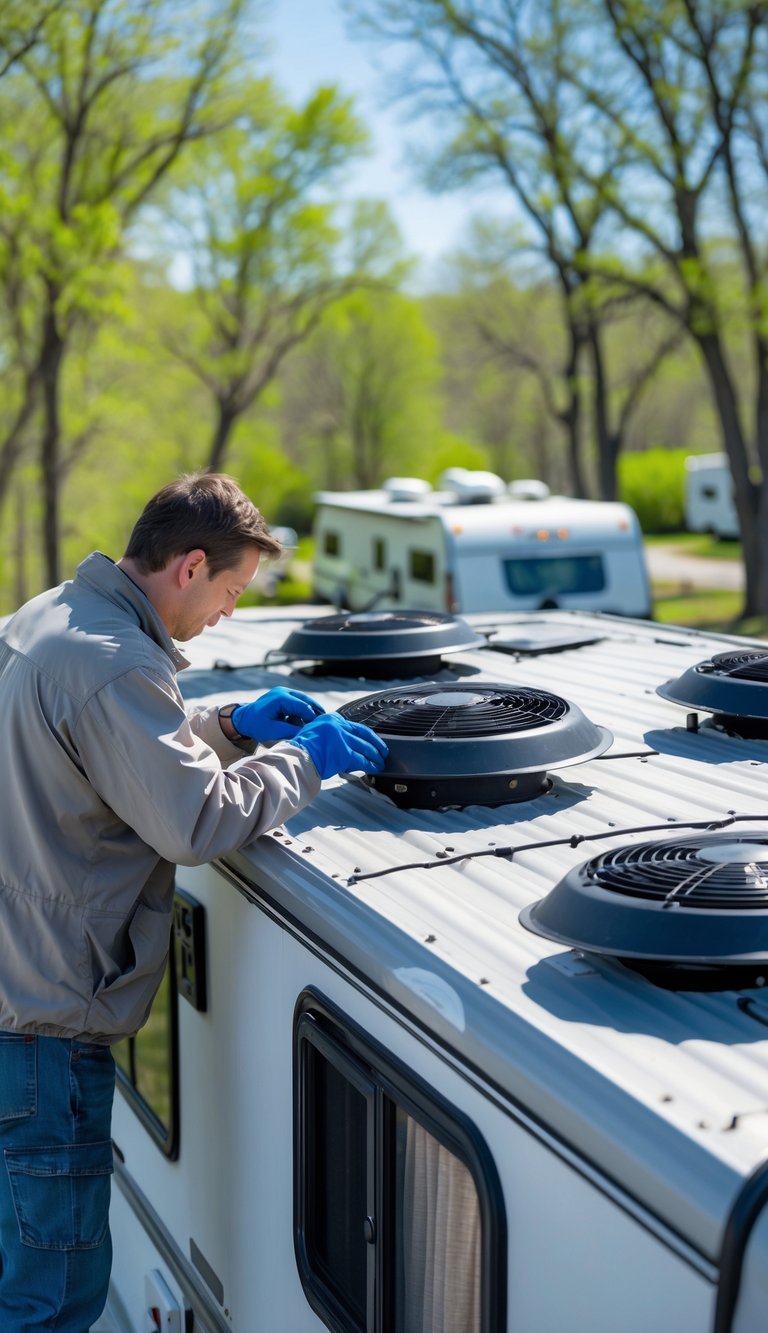
2) Check RV roof for cracks, leaks, or damage
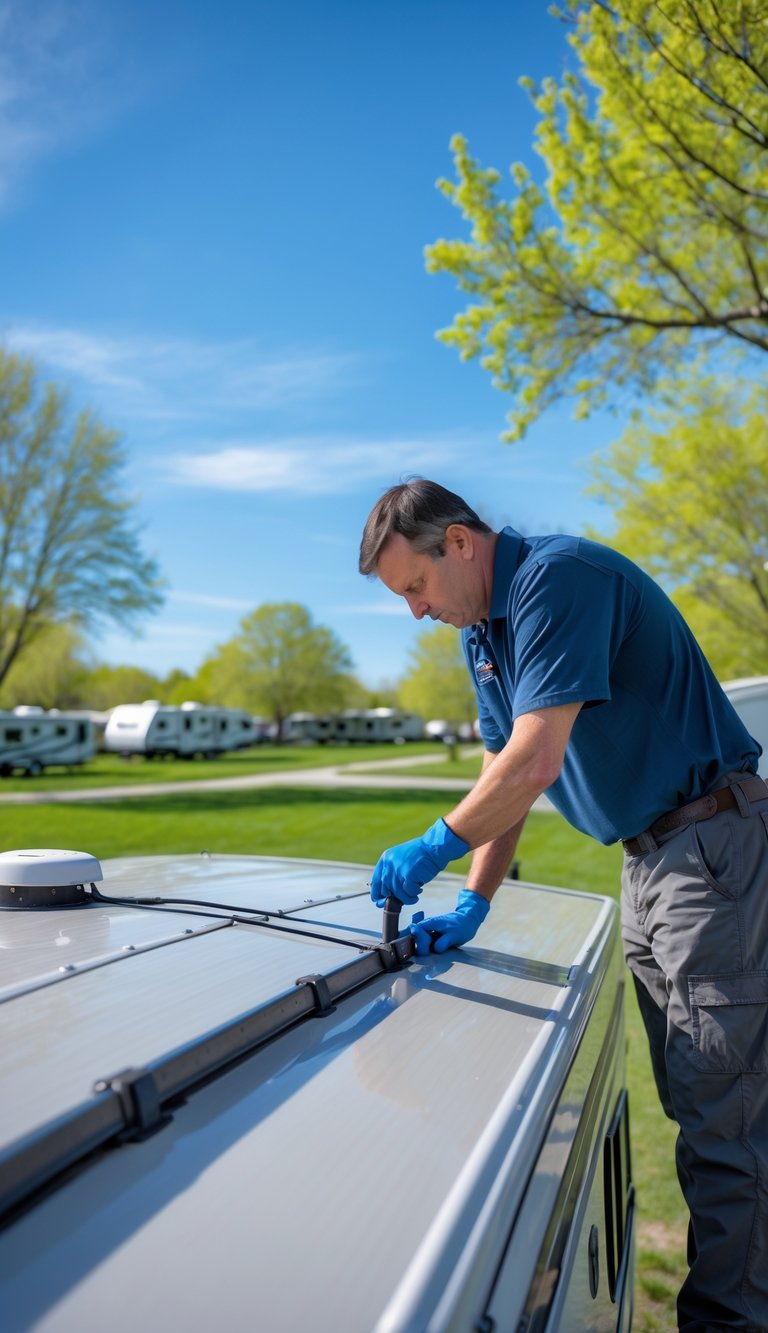
Climb onto your RV safely and look along the roofline for cracks, punctures, or gaps in the sealant. Pay special attention where the roof meets vents, skylights, and edges, since those spots often start leaks.
Run your hand over seams to feel for soft spots or trapped moisture. Small cracks can let water in and cause rot or mold if left alone.
Check the condition of caulk and roof tape and note any peeling or shrinkage. Replace worn sealant before it fails to avoid bigger repairs later.
PRO TIP
Walk the roof after a rain with a flashlight inside to spot light coming through. That makes leaks easier to find.
3) Clean and lubricate door hinges and locks
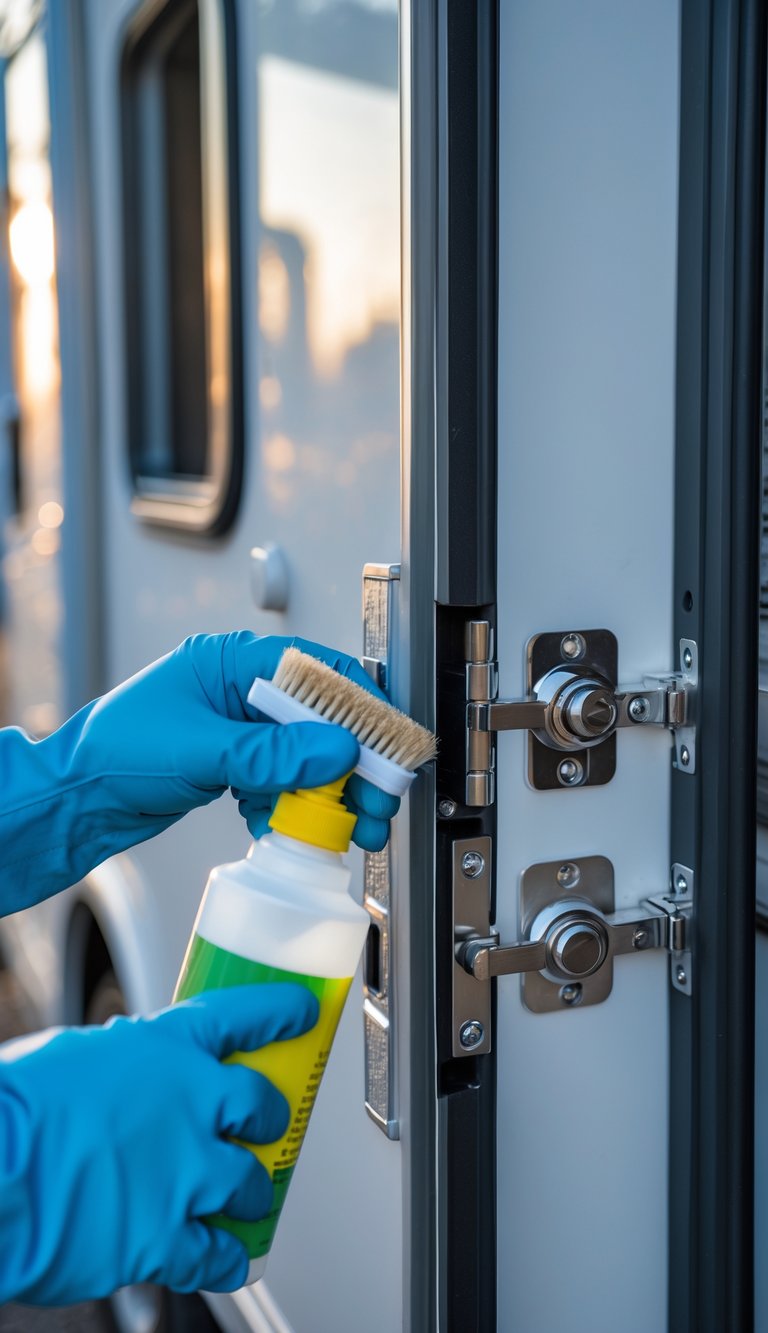
Doors and storage latches see a lot of use and can get sticky or noisy fast. Start by wiping away dirt, dust, and old grease with a damp cloth and a mild cleaner to expose moving parts.
Use a silicone spray or graphite for locks and a light machine oil or silicone lubricant for hinges. Spray sparingly, work the mechanism, and wipe off excess to keep grime from building up.
Check the strike plates and latch bolts for wear or misalignment. Tighten loose screws and replace any parts that look worn so doors close securely and smoothly.
PRO TIP
Keep a small tube of lubricant and a rag in your RV. Quick spot lubes before trips prevent bigger problems on the road.
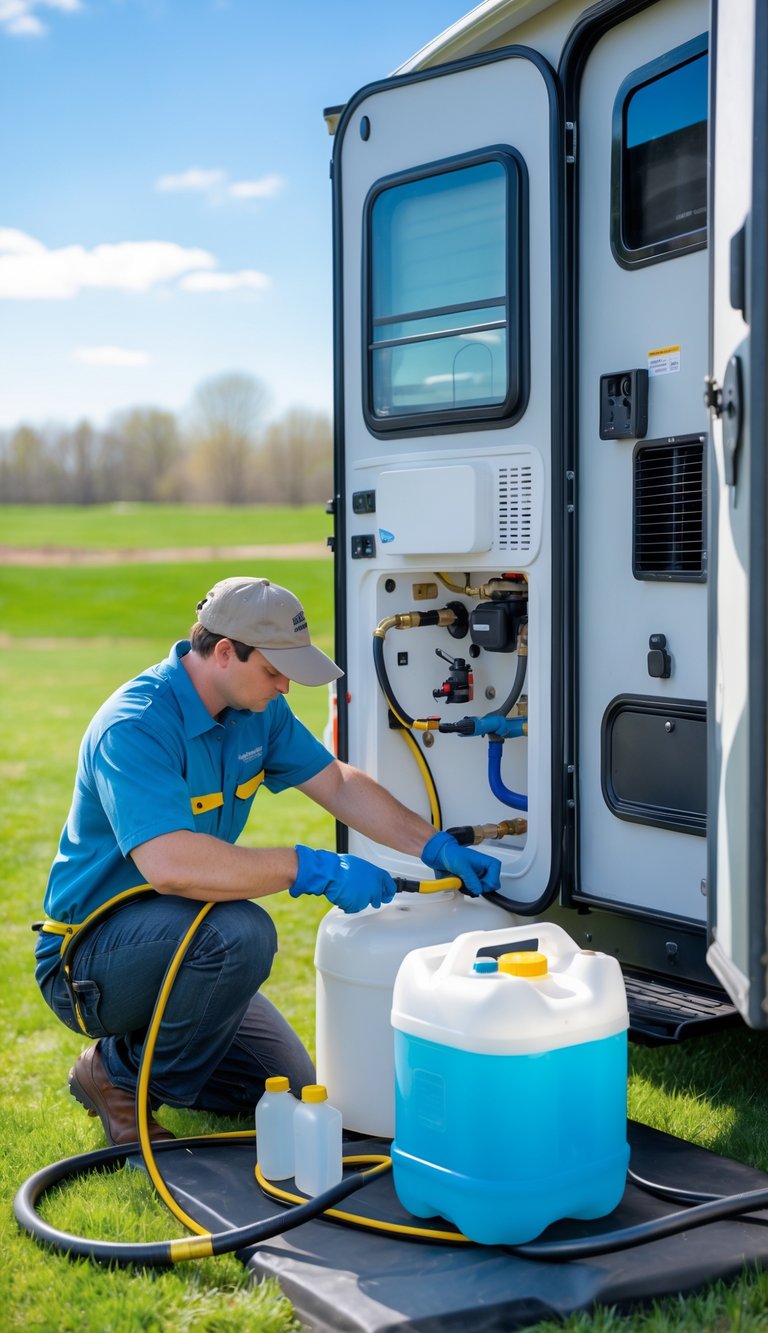
4) Sanitize fresh water tanks and plumbing systems
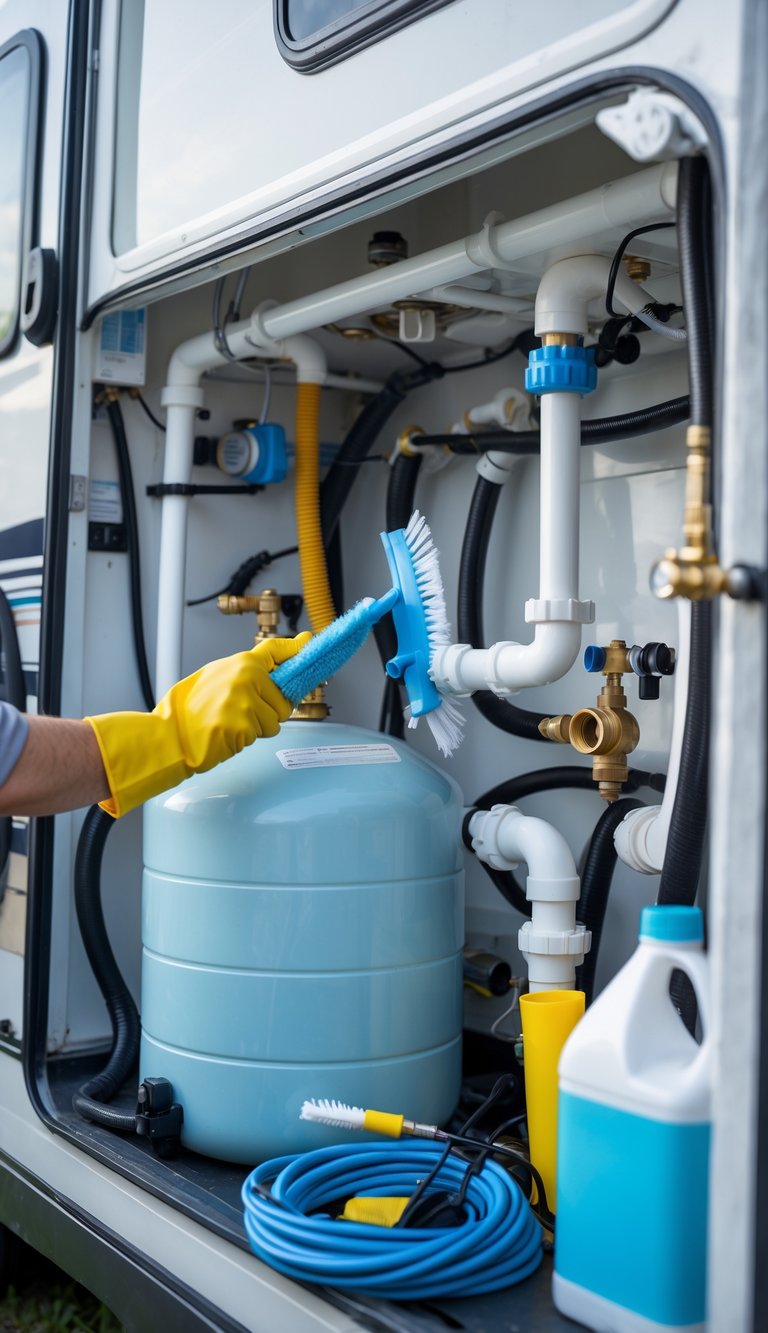
You should sanitize your RV fresh water tank and plumbing every season or after the coach sits unused for several weeks. This removes bacteria, algae, and stale tastes that can make your water unsafe or unpleasant.
Use a bleach solution or an RV-safe sanitizer and follow the manufacturer’s mixing guidelines. Run the solution through all faucets, then let it sit in the system for the recommended time before flushing.
Flush thoroughly until the bleach smell is gone. Don’t forget ice makers, water filters, and any inline hoses that can trap contaminants.
PRO TIP
Label the date you sanitized and set a reminder for the next cleaning. Keeping a simple log helps you stay on schedule and protects your health.
5) Test propane tanks and check for leaks
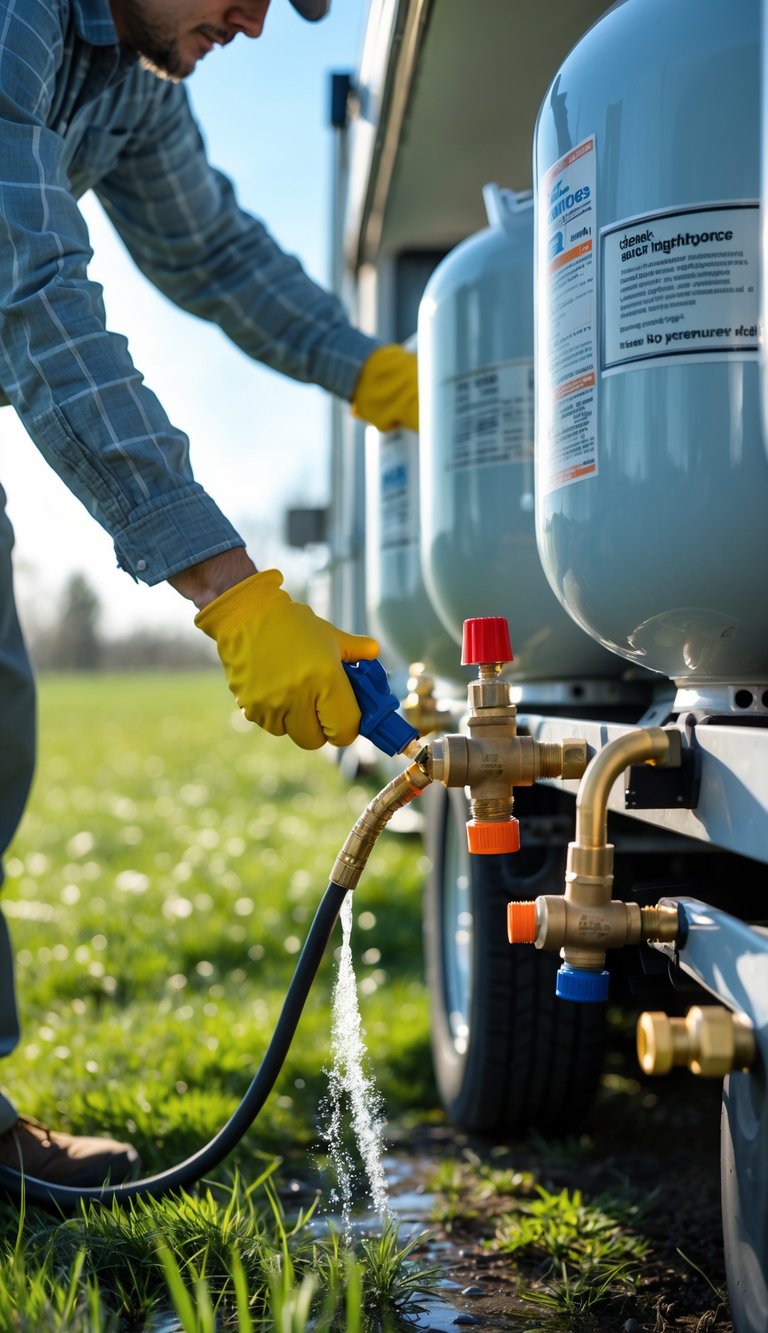
Before your first trip, inspect your propane tanks and fittings. Look for rust, dents, or expired certification dates on the cylinder. Replace tanks or get them recertified if needed.
Check the regulator and hoses for cracks, stiffness, or damage. A cracked hose can fail under pressure and cause a leak. Make sure vent openings and screens are clear.
Use a soapy water solution to test all connections. Turn on the propane (outside) and watch for bubbles at fittings and valves. If you see steady bubbles, tighten the fitting or replace the part and retest.
Turn on each appliance briefly to confirm proper operation and smell for gas. If you detect odor or persistent leak signs, shut off the tank and get professional service.
PRO TIP
Keep a small spray bottle of soapy water in your RV and check connections after any hose or tank work.
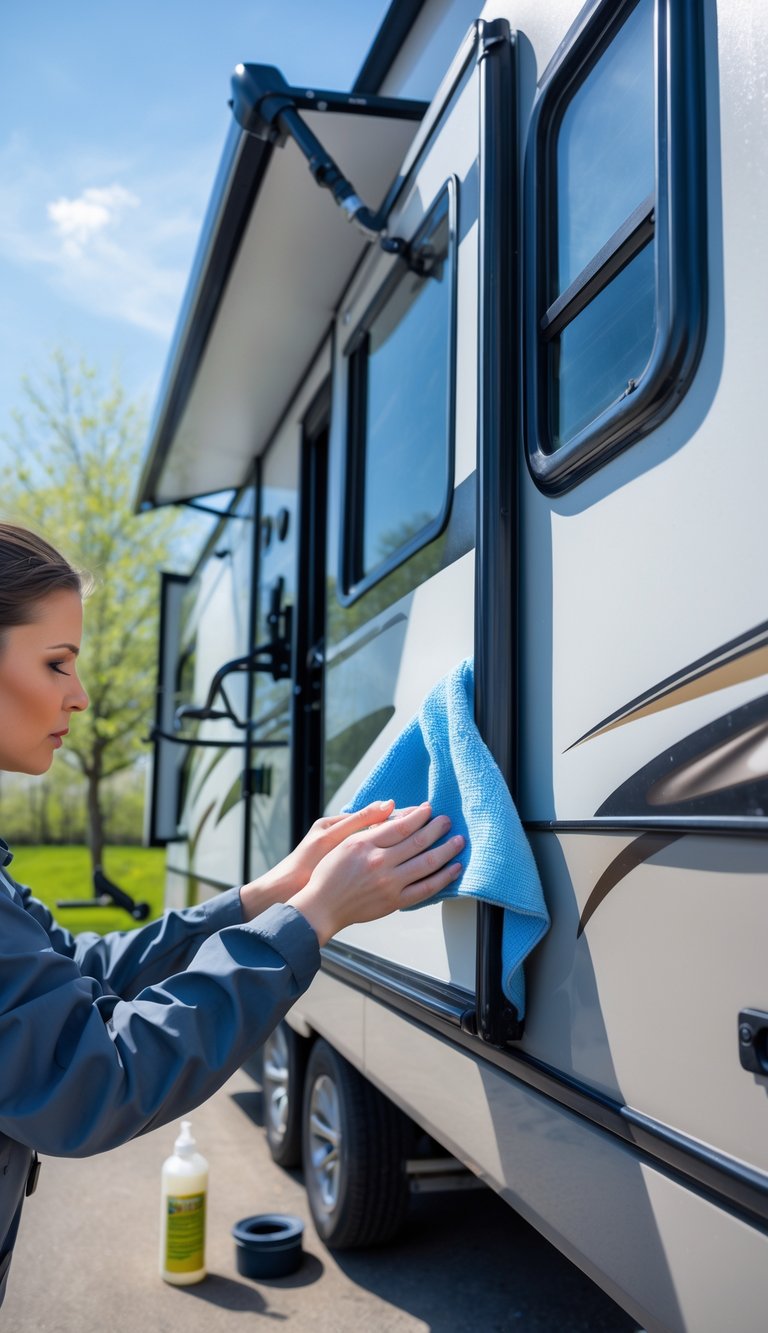
6) Inspect and clean RV awning fabric and mechanisms
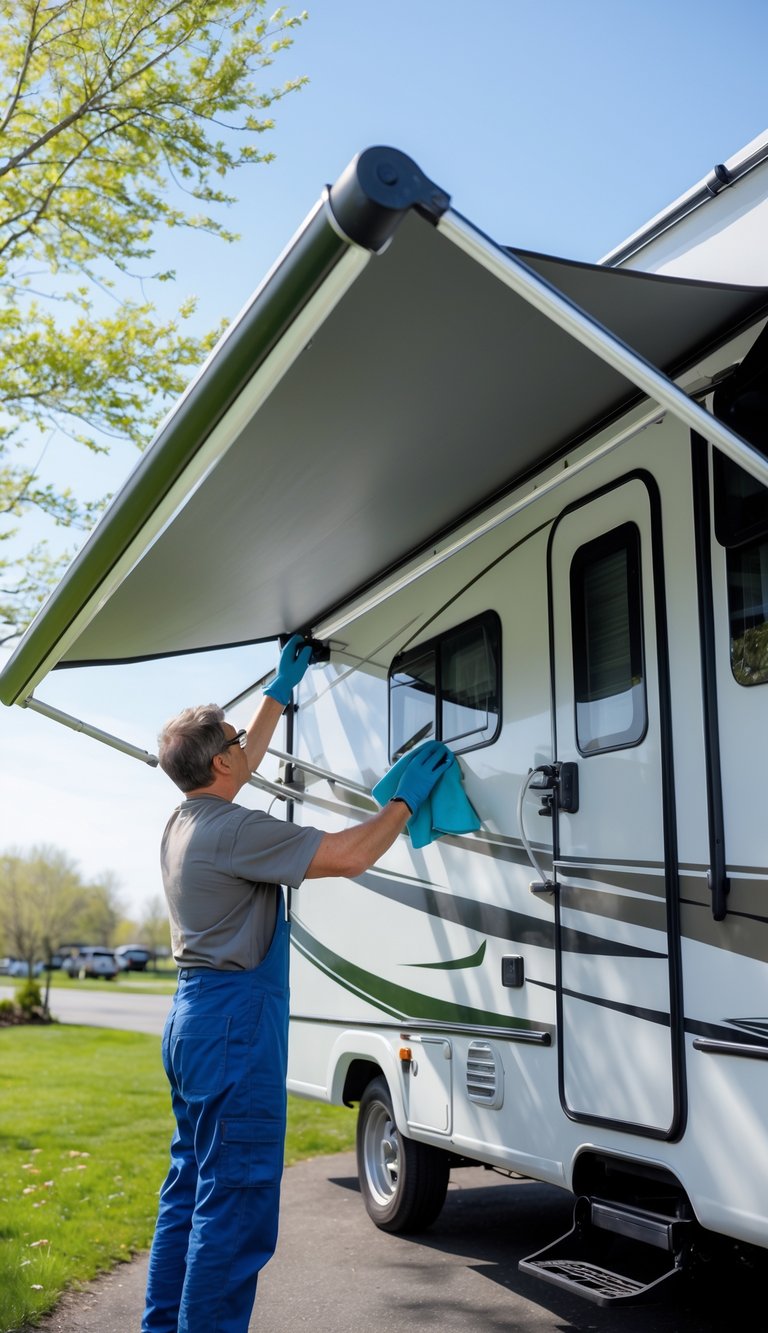
Check your awning fabric for stains, mold, rips, and worn seams. Small tears catch wind and grow, so address them quickly.
Roll out the awning and inspect the arms, springs, and roller for rust, bends, or loose bolts. Operate the awning slowly to listen for grinding or binding in the mechanism.
Use a soft brush and mild soap or a cleaner made for awning fabric to remove dirt and mildew. Rinse thoroughly and let the fabric dry fully before rolling it up to prevent mold.
Lubricate moving parts with a silicone spray or light oil on pivot points. Tighten hardware as needed and replace any frayed straps or broken components.
PRO TIP
If mold returns or stains are tough, use a diluted mildew cleaner and test it on a small patch first.
7) Replace windshield wiper blades
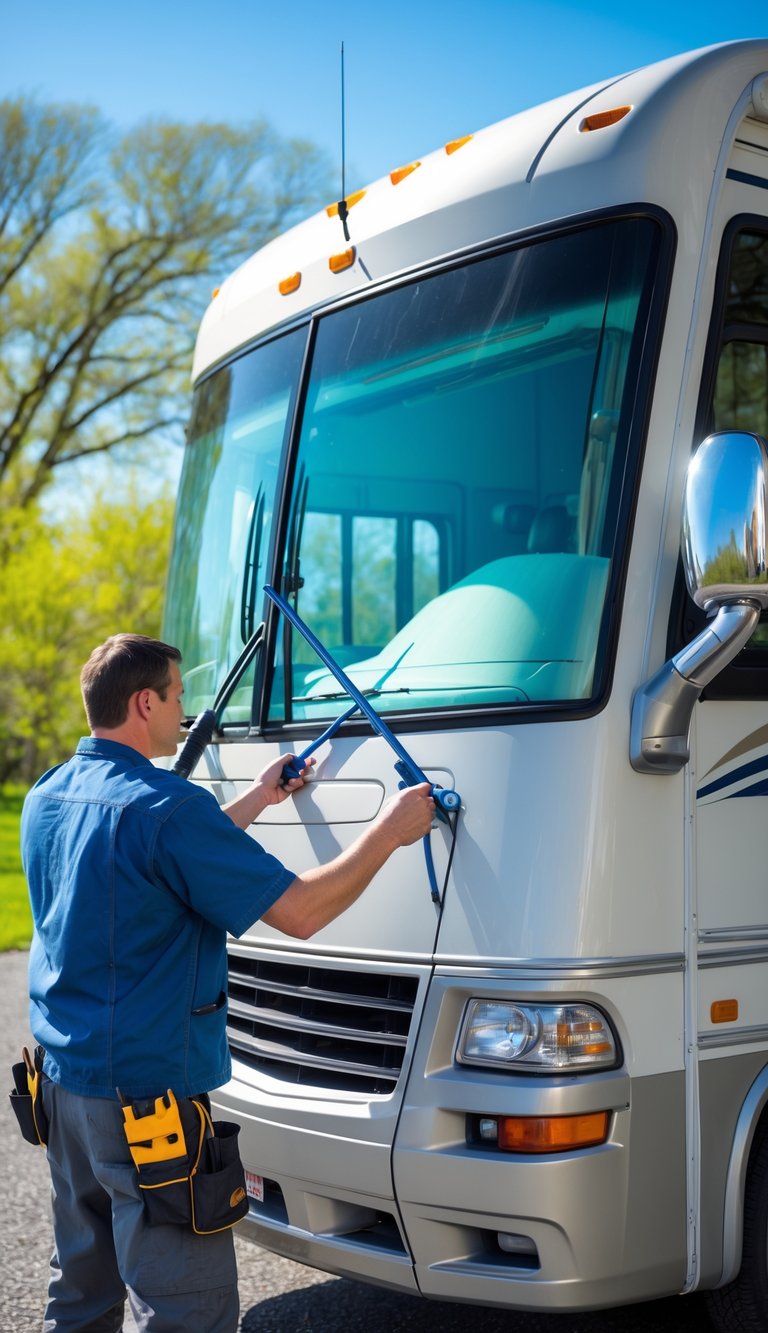
Worn wiper blades reduce visibility and make driving in rain or snow unsafe. Check for cracks, stiffness, or streaking when you run the wipers; any of those signs means it’s time to replace them.
Choose blades that fit your RV’s windshield and follow the vehicle manual for size. Many RV blades need different lengths or mounting adapters than a car, so confirm fit before you buy.
Replacing blades is usually quick and can be done with basic tools or by hand. Clean the windshield and wiper arms during the swap to extend blade life and improve performance.
PRO TIP
Replace blades every 6 to 12 months, or sooner in hot, dry, or salty climates where rubber degrades faster.
8) Examine brake system for wear and responsiveness

You should check brake pads, rotors, shoes, and drums for wear or damage. Thin pads, deep grooves, or rusted rotors mean parts may need replacing soon.
Test brake pedal feel while the engine is off and the wheels are chocked. The pedal should feel firm and not sink slowly when held down.
Inspect brake lines and hoses for cracks, leaks, or bulges. Any fluid spots under the RV or a low brake fluid level are signs to fix the system before a trip.
For RVs with air brakes, drain the tanks and test the air compressor and valves. Check parking brake operation, too.
PRO TIP
If you hear grinding or smell burning when braking, stop driving and have a pro inspect the brakes immediately.
9) Check battery condition and clean terminals
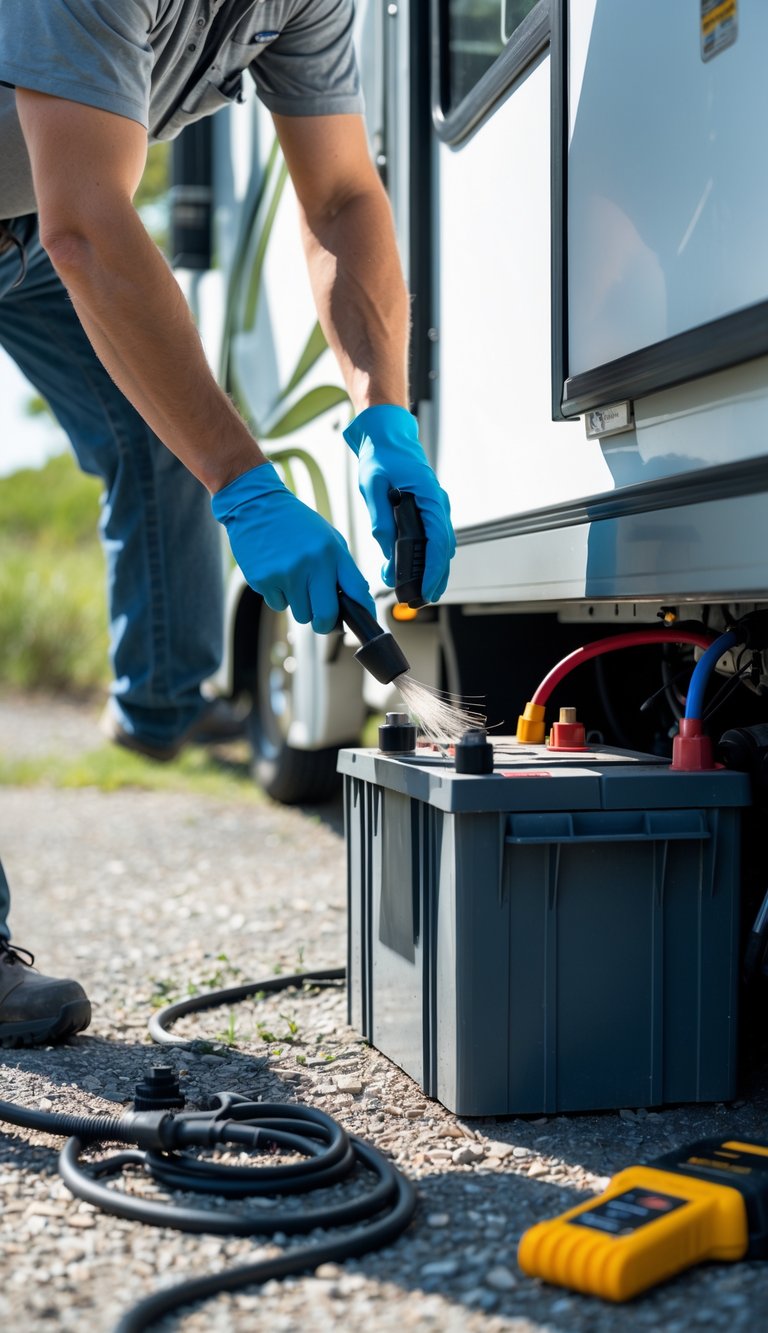
You should inspect your RV batteries every spring for cracks, swelling, or leaks. Look at the case and hold the battery to see if it feels loose in its tray.
Clean the terminals if you see white or green corrosion. Disconnect the negative cable first, then the positive, and use a wire brush or battery cleaner to remove buildup.
Check the battery voltage with a multimeter and compare it to the manufacturer’s specs. For lead-acid batteries, check fluid levels and top with distilled water if needed.
Wear gloves and eye protection while you work to stay safe. Tighten connections after cleaning and apply a terminal protectant to slow future corrosion.
PRO TIP
Keep a small bottle of distilled water and a terminal-cleaning kit in your toolbox for quick maintenance on the road.
10) Inspect exterior lights and replace bulbs as needed
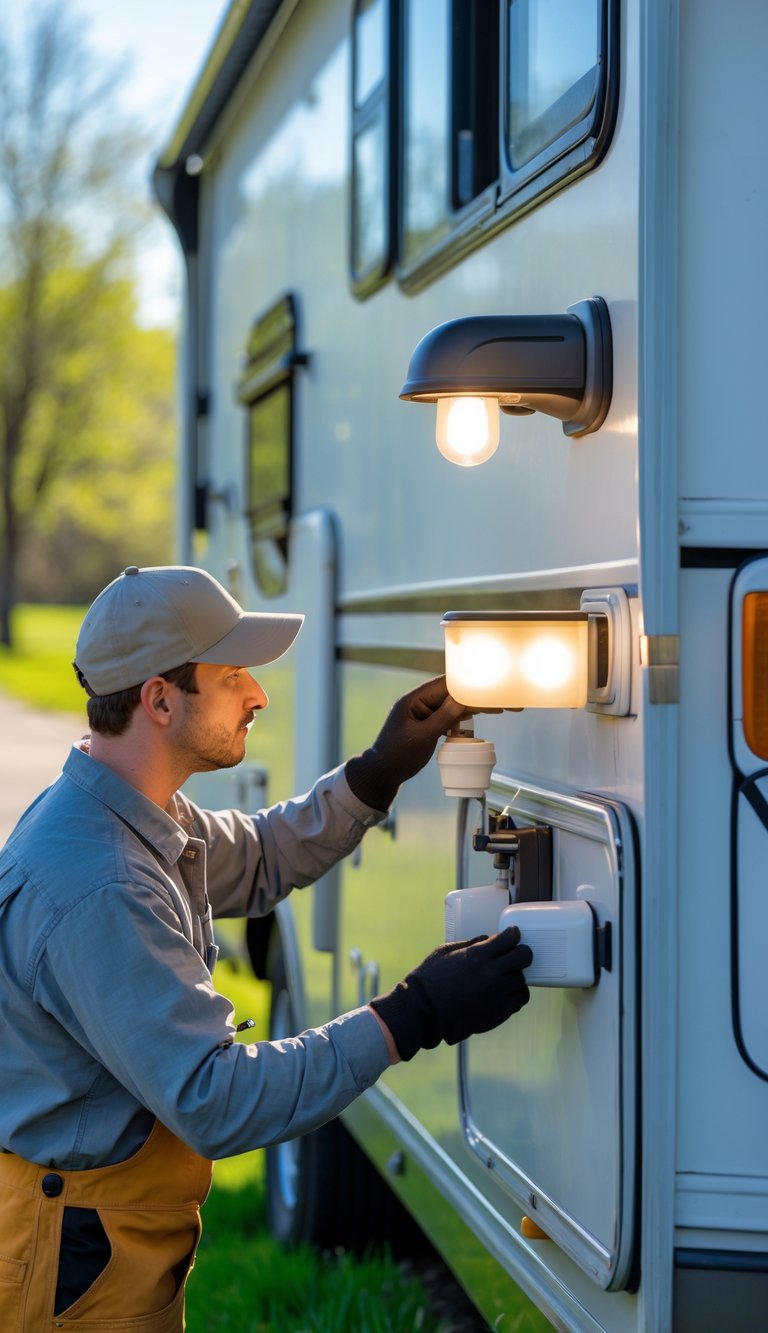
Walk around your RV and check every exterior light: headlights, taillights, brake lights, turn signals, clearance lights, and porch lights. Test them with the engine running and with accessories on so you catch any weak bulbs or wiring issues.
Look for cracked lenses, fogging, or corrosion at connectors. Replace burned-out bulbs and clean contacts; a little corrosion can cause flicker or failure.
Don’t forget the marker and license plate lights. Good lighting keeps you visible and helps avoid traffic tickets.
PRO TIP
Carry a small kit with spare bulbs, fuses, dielectric grease, and basic tools. It saves time and keeps you safe on the road.
11) Dewinterize water heater and test operation
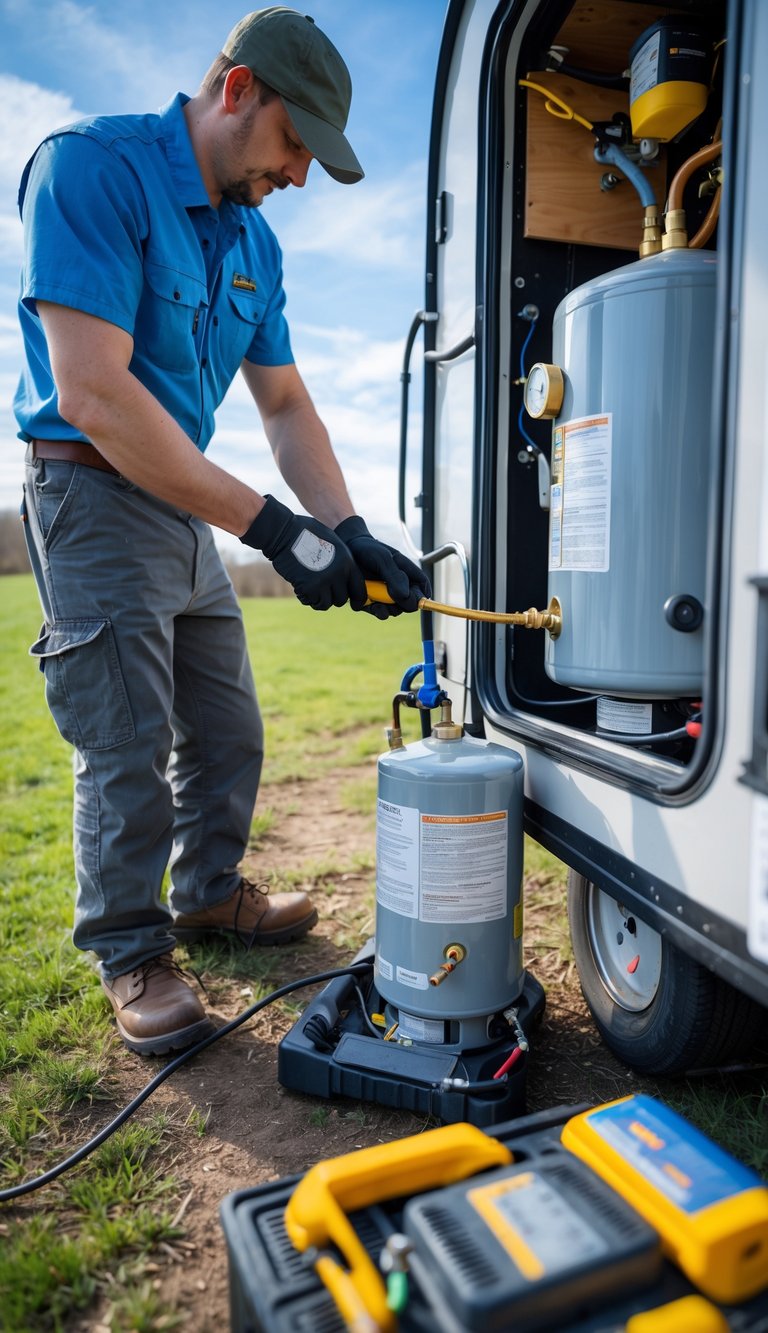
Turn off power and drain the tank before you do anything. Open the pressure relief valve and anode access if your model has one, then remove any antifreeze and clear sediment.
Refill the tank with fresh water using city water or the pump. Watch for leaks at fittings and around the drain valve while it fills.
Restore power or propane and light the pilot per the owner’s manual. Let the heater run long enough to reach temperature, then check hot water at a faucet.
Test the pressure relief valve by lifting it slightly and watching for water flow. If it sticks, leaks, or fails to heat properly, have a qualified tech inspect the unit.
PRO TIP
Keep a bucket and towels handy when you first drain and refill. It makes cleanup easier and helps you spot small leaks fast.
12) Clean and seal slide-out seals for smooth operation
Check your slide-out seals for cracks, gaps, or dirt every few months. Clean them with mild soap and water and a soft cloth so grime won’t wear them down.
After cleaning, apply a rubber conditioner or seal lubricant to keep the seals flexible. This helps prevent leaks and keeps the slide operating quietly.
Inspect the seal attachment and the slide-out rails while the seal is exposed. Tighten loose screws and clear debris from the tracks to avoid binding.
Test the slide-out slowly after maintenance to make sure it seals evenly. Watch for uneven gaps and address them before water can get in.
PRO TIP
Use baby powder on dry seals to reduce sticking, or silicone spray sparingly if the manufacturer allows it.
13) Test generator and change oil if necessary
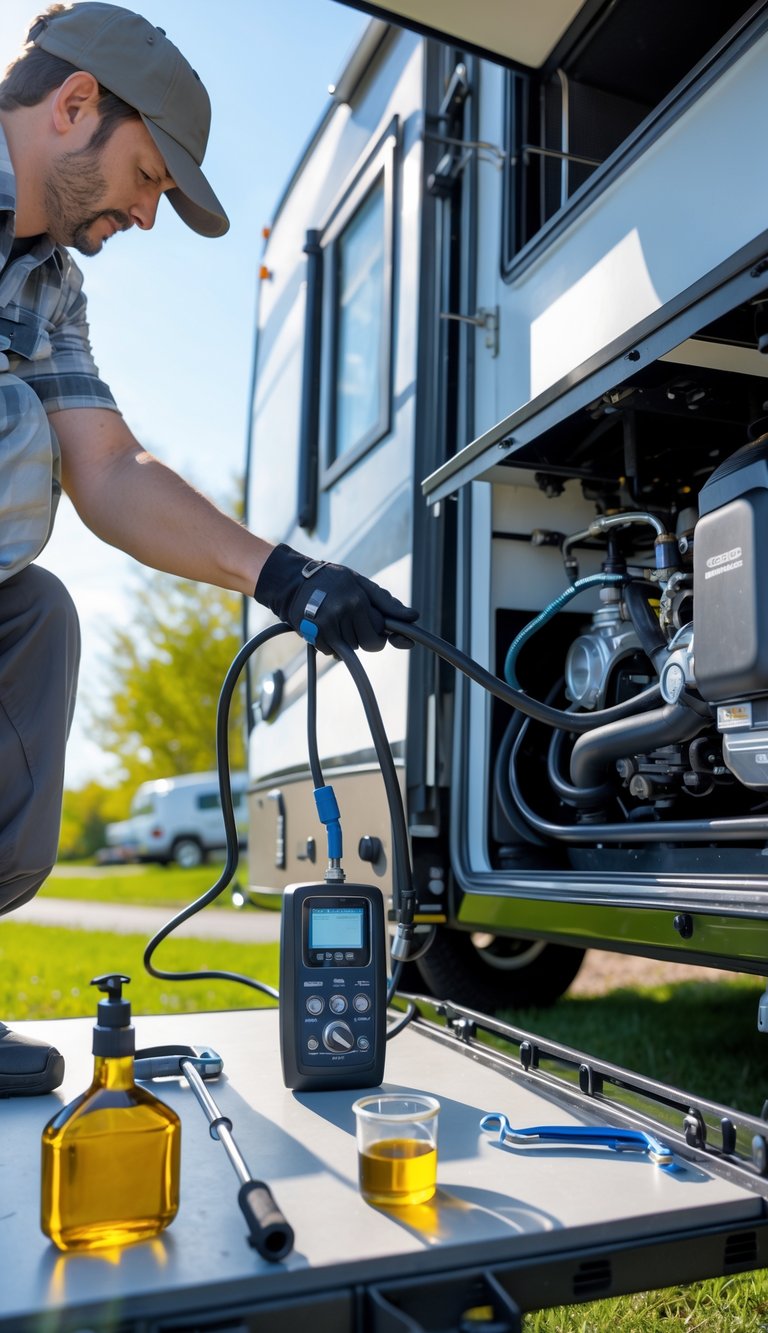
You should start by reading your generator’s owner manual for oil type and change intervals. Check oil level with the dipstick while the generator is off and on level ground.
Run the generator for 10–20 minutes under load to warm it up and circulate oil. Listen for odd noises and watch for smoke or leaks.
If the oil is dark, gritty, or low, change it and replace the oil filter per the manual. Also inspect air and fuel filters, and clean the compartment of debris or signs of rodents.
Keep a small log of run hours and oil changes so you know when service is due next. Regular checks keep your power reliable when you need it.
PRO TIP
Warm oil drains faster and carries more contaminants, so change oil right after a short run.
14) Clean and inspect refrigerator seals

Check your refrigerator door gaskets for cracks, gaps, or hardening. A poor seal lets cool air escape and forces the fridge to run more, wasting power and shortening appliance life.
Wipe the seals with mild soap and warm water to remove dirt and sticky residue. Use a soft brush to get into folds, then dry thoroughly so mold and mildew don’t take hold.
Press a sheet of paper between the door and gasket to test the seal; it should hold when you pull. Replace any gasket that shows gaps, tears, or does not form a tight seal.
PRO TIP
Keep a spare gasket handy or know the model number of your fridge before a trip. Small fixes now save you from spoiled food and repairs later.
15) Lubricate chassis and moving parts
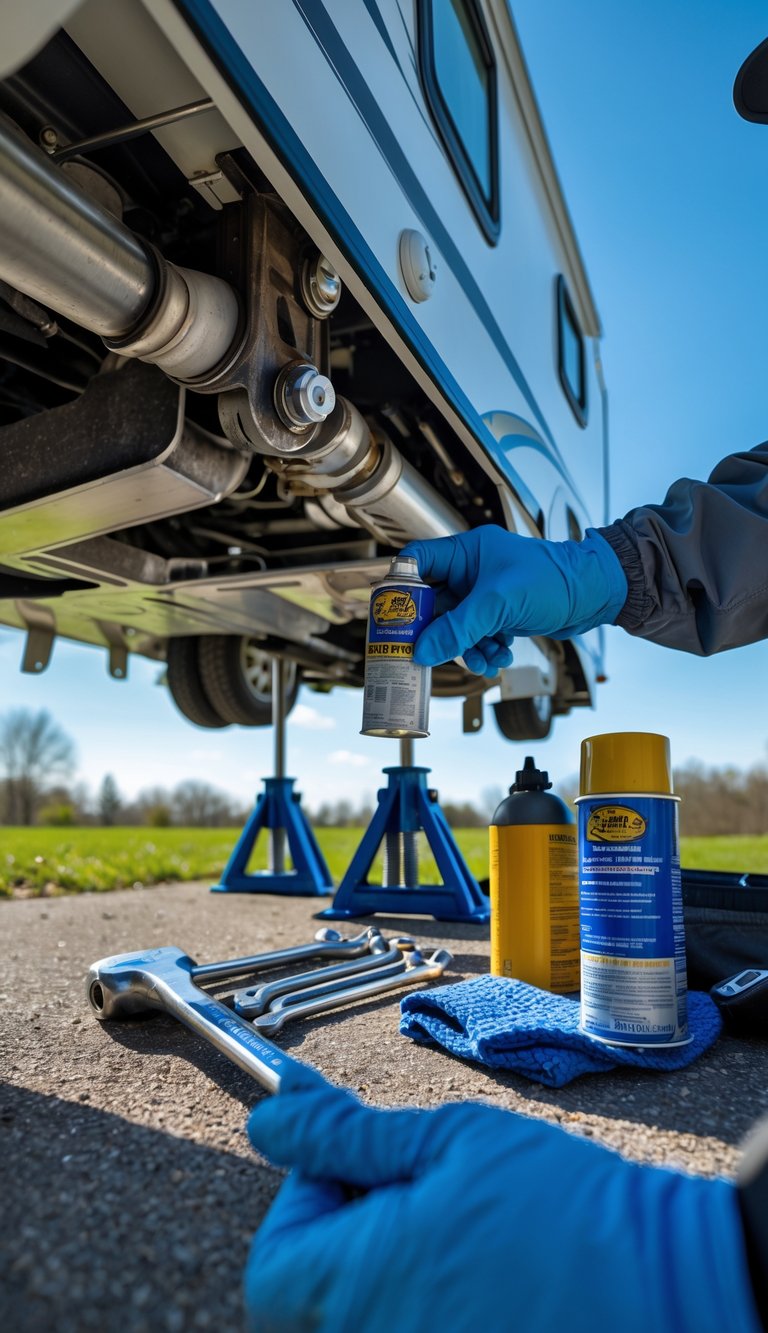
You should lubricate the chassis and all moving parts before you hit the road. Grease fittings, suspension components, door hinges, and swivel points need attention to prevent wear and noise.
Use the correct lubricant for each part. Chassis grease goes on fittings and suspension; silicone or lithium spray works for hinges and latches. Apply sparingly and wipe away excess.
Check slide-out mechanisms, awning arms, and steps too. Lightly lubricate rollers and tracks so they move smoothly and seal correctly.
PRO TIP
Work from front to back and keep a small grease gun and aerosol lube in your kit. Regular touch-ups save time and costly repairs later.
16) Flush and refill antifreeze in holding tanks if applicable
If you winterized your RV with antifreeze, flush the tanks now to remove it before you use the system. Run fresh water through the tanks and open each drain until the water runs clear. This prevents antifreeze taste and protects your plumbing.
After flushing, decide if you still need antifreeze for short-term protection. Some owners add a small amount to the black tank to slow odors during storage. Use RV-safe antifreeze only and follow product directions for amounts.
PRO TIP
Dump and rinse at an approved RV dump station, not a home septic. This keeps chemicals out of household systems and stays within local rules.
17) Inspect sewer hose and fittings for cracks
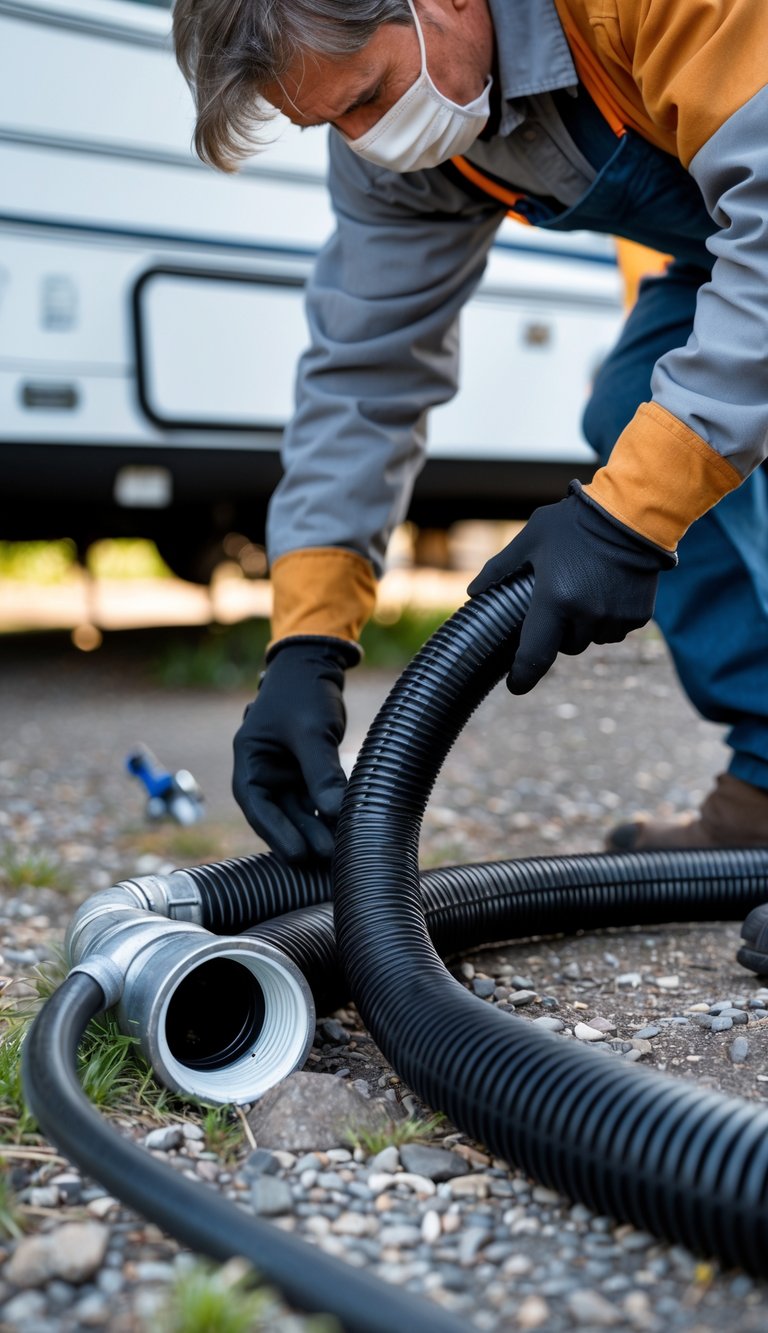
Check your sewer hose and fittings every spring for cracks, soft spots, or brittle areas. Small tears can grow into leaks that cause odors and messy cleanups.
Disconnect and lay the hose flat to look for damage along the entire length. Pay special attention to the ends and the threaded or cam-lock fittings where stress and wear are most likely.
If the hose feels stiff or has hairline cracks, replace it before your first long trip. Replace damaged fittings or use adapters that fit snugly to prevent leaks and cross-contamination.
PRO TIP
Carry a spare hose and an extra set of fittings. Replacing a bad hose at home is easier than dealing with a failure at a dump station.
18) Check roof vents and fans for functionality
You should inspect every roof vent and fan after storage. Look for cracks, broken covers, and loose fasteners that let water in.
Turn each fan on and listen for unusual noises or vibration. Fans that hum, squeal, or spin unevenly usually need cleaning or lubrication.
Open and close vent lids to confirm the actuators and seals work. Replace torn seals to prevent leaks and pests.
Clean dust and debris from fan blades and screens before testing. A gentle brush and mild cleaner remove grime without harming parts.
PRO TIP
Keep a small tube of compatible sealant and a spare vent cover in your kit. Quick repairs at the campground save you from wet gear and bigger repairs later.
19) Clean interior thoroughly, including upholstery and carpets
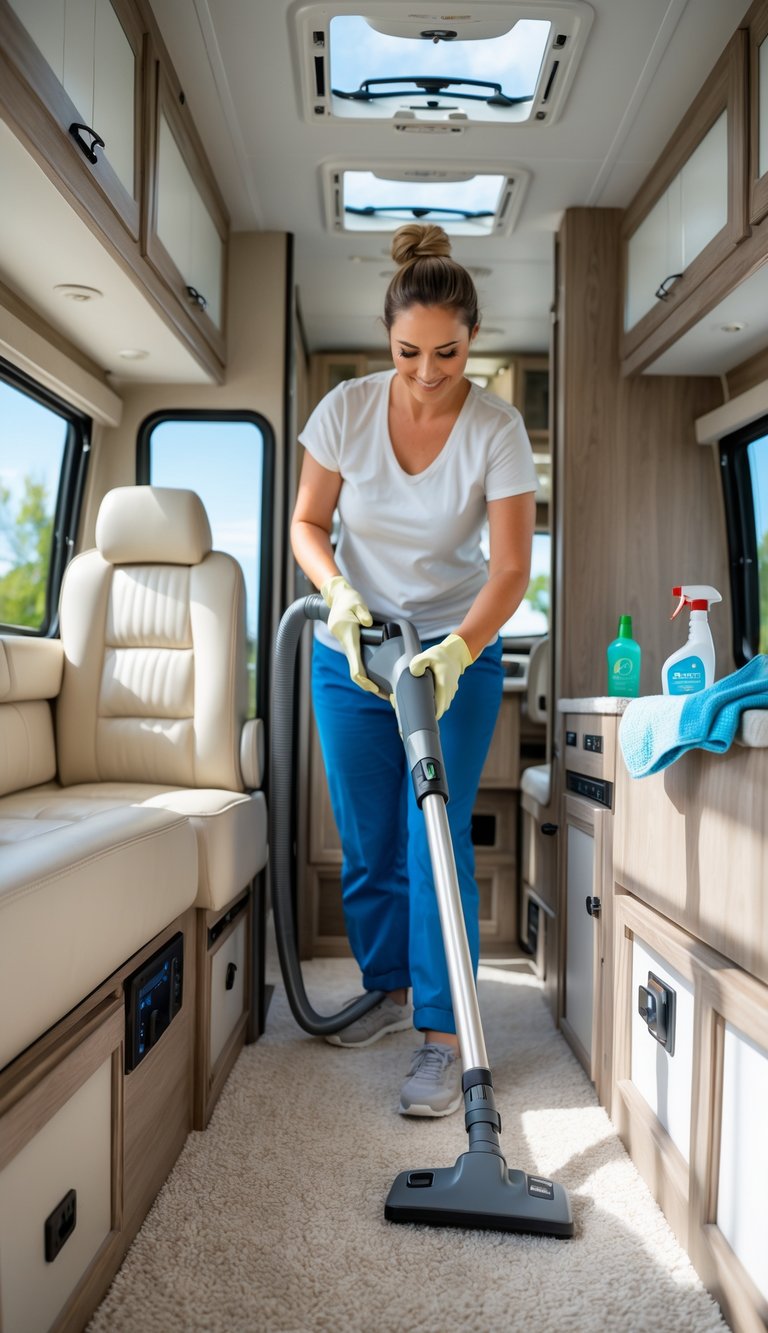
You should start by removing loose items and vacuuming all surfaces. Focus on seat creases, under cushions, and floor edges where dirt hides.
Treat stains on upholstery and carpets with a cleaner made for the fabric type. Test any product on a small hidden area first to avoid damage.
Steam cleaning or a rented carpet cleaner lifts deep grime and odors from rugs and carpets. Keep vents and air intakes closed until fabrics dry to prevent mildew.
Wipe hard surfaces with a gentle disinfectant, especially in the kitchen and bathroom. Open windows or run the vent fan to speed drying and freshen the air.
PRO TIP
If cushions have removable covers, wash them per the label and let them air dry fully. Use baking soda on carpets before vacuuming to reduce odors.
20) Inspect smoke and carbon monoxide detectors
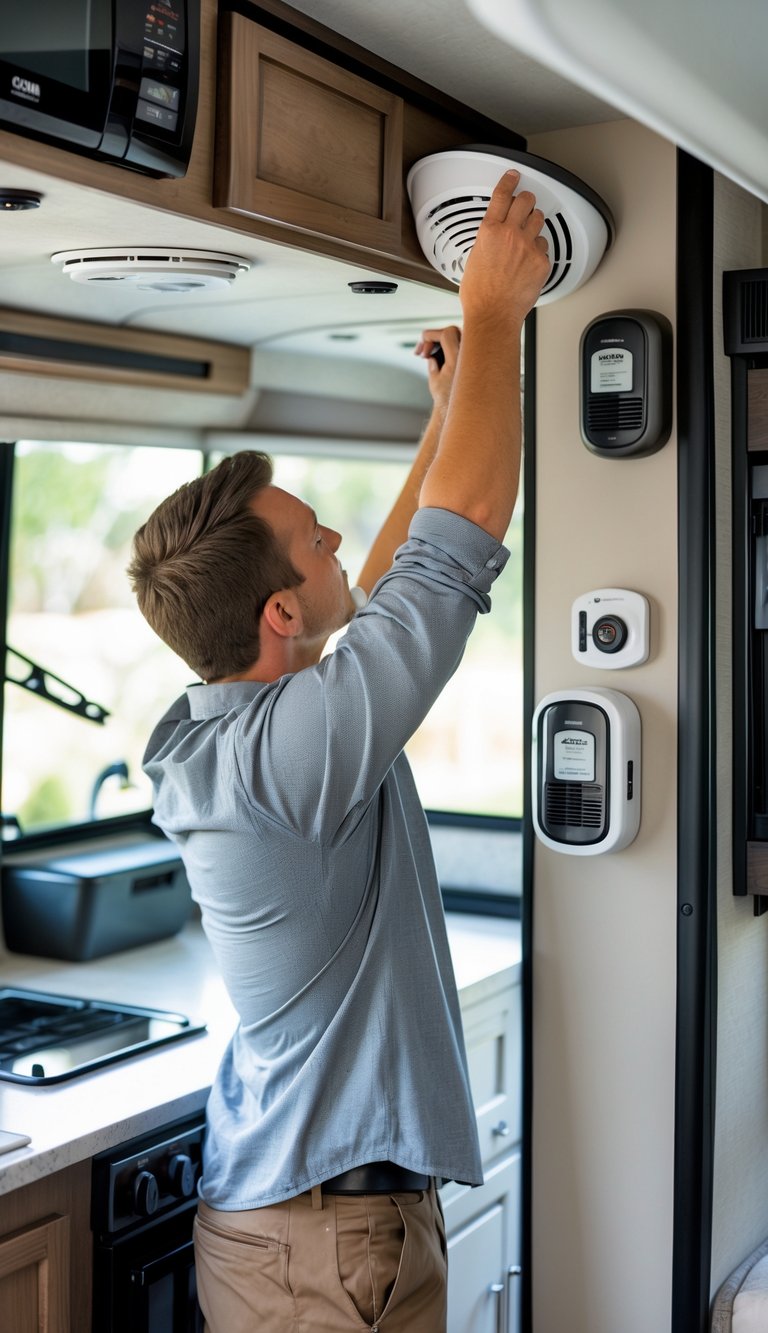
You must test each smoke and carbon monoxide (CO) detector at the start of the season. Press the test button and listen for a loud, steady alarm. Replace batteries if the sound is weak or the unit fails to respond.
Check manufacturing dates and replace detectors that are older than the manufacturer recommends. Most units last about 7–10 years; older devices can fail when you need them most.
Look for physical damage, corrosion, or dirt that could block sensors. Clean gently with a soft brush or vacuum and wipe the exterior with a damp cloth.
PRO TIP
Keep spare batteries and a backup detector on board. Test detectors again after any propane or gas system work.
21) Test and calibrate RV thermostat
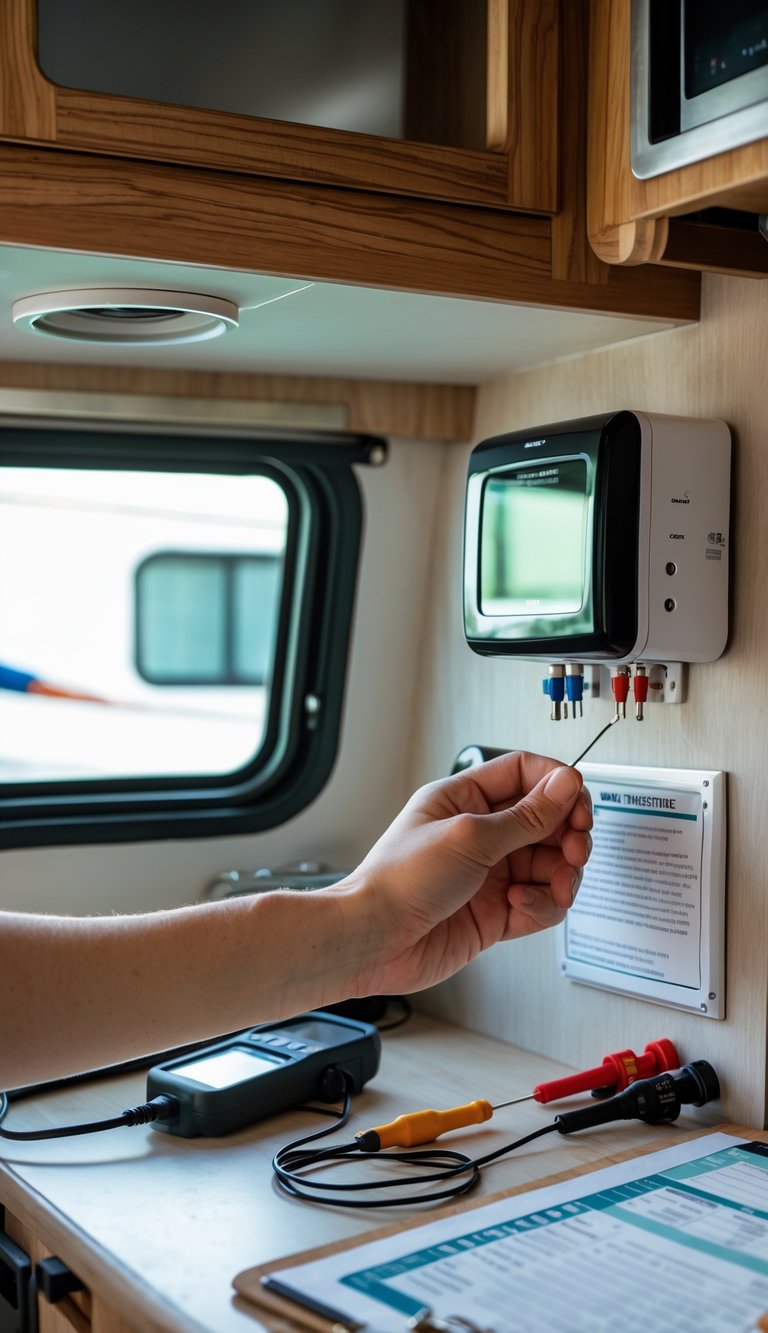
Start by checking that your thermostat has power and the display works. If it runs on 12V, confirm the RV battery and fuse are good before you do anything else.
Set the thermostat to a temperature a few degrees above or below the current cabin temp and listen for the furnace or AC to kick on. If the system doesn’t respond, test wiring and connections at the back of the thermostat with a multimeter or call a tech.
Compare the thermostat reading to a separate room thermometer placed nearby. If readings differ by more than 2–3°F, you should recalibrate or replace the thermostat for more accurate control.
PRO TIP
If your thermostat is older, swapping it for a modern RV-compatible digital unit often improves accuracy and saves power.
22) Check and secure all storage compartment locks
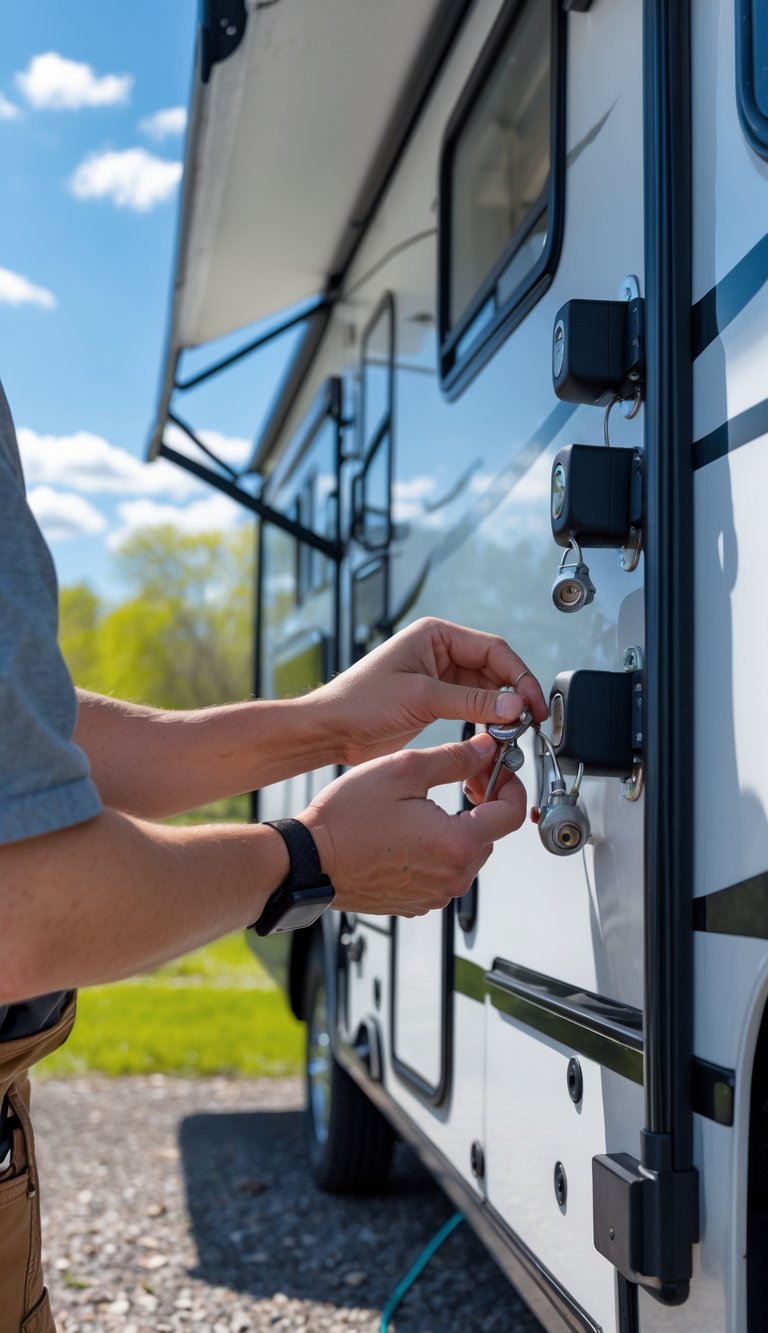
Check every exterior storage door and latch for tightness and smooth operation. Open and close each compartment to feel for sticking or misalignment.
Look for loose screws, bent strike plates, or worn lock cylinders. Lubricate moving parts with a silicone spray or graphite for better action.
Test each lock with the key and the central locking system if your RV has one. Replace any locks that don’t hold or that show heavy rust.
Make sure rubber gaskets and seals around compartments are intact. Damaged seals let in water and dirt, which can ruin stored gear.
Keep a small hardware kit onboard with spare screws, bolts, and a lock lubricant. That way you can fix minor issues before they become road problems.
PRO TIP
Mark compartment keys and keep a set in your travel kit to avoid lockouts.


")