Last Updated on February 17, 2026
Get your garage ready for road trip season so you can leave fast and worry less about last-minute fixes. You’ll find simple ways to sort tools, charge batteries, and stash safety gear so everything you need is easy to grab before you head out.
This article shows practical setups—from pegboards and labeled bins to mobile carts and charging stations—that free floor space and speed up prep time. Use these ideas to make your garage work for you, not against you.
PRO TIP
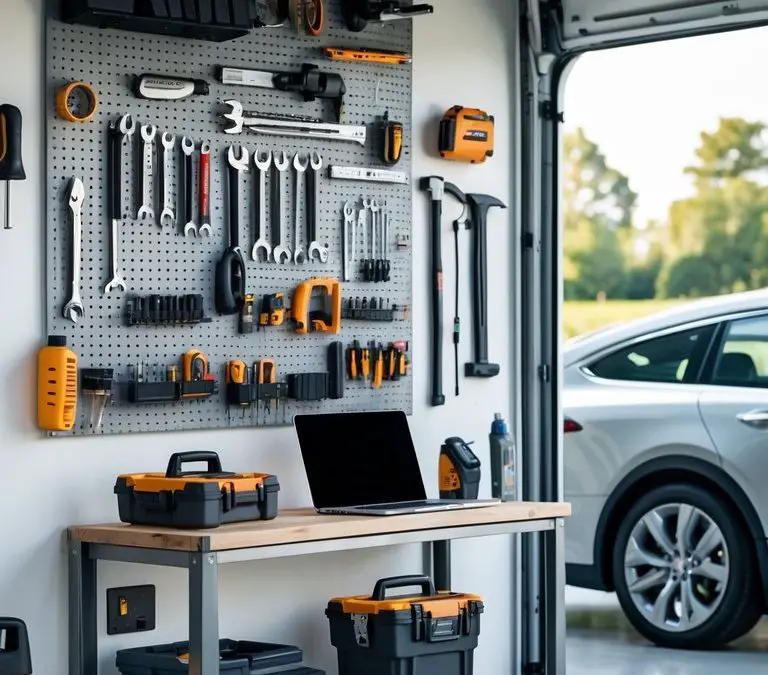
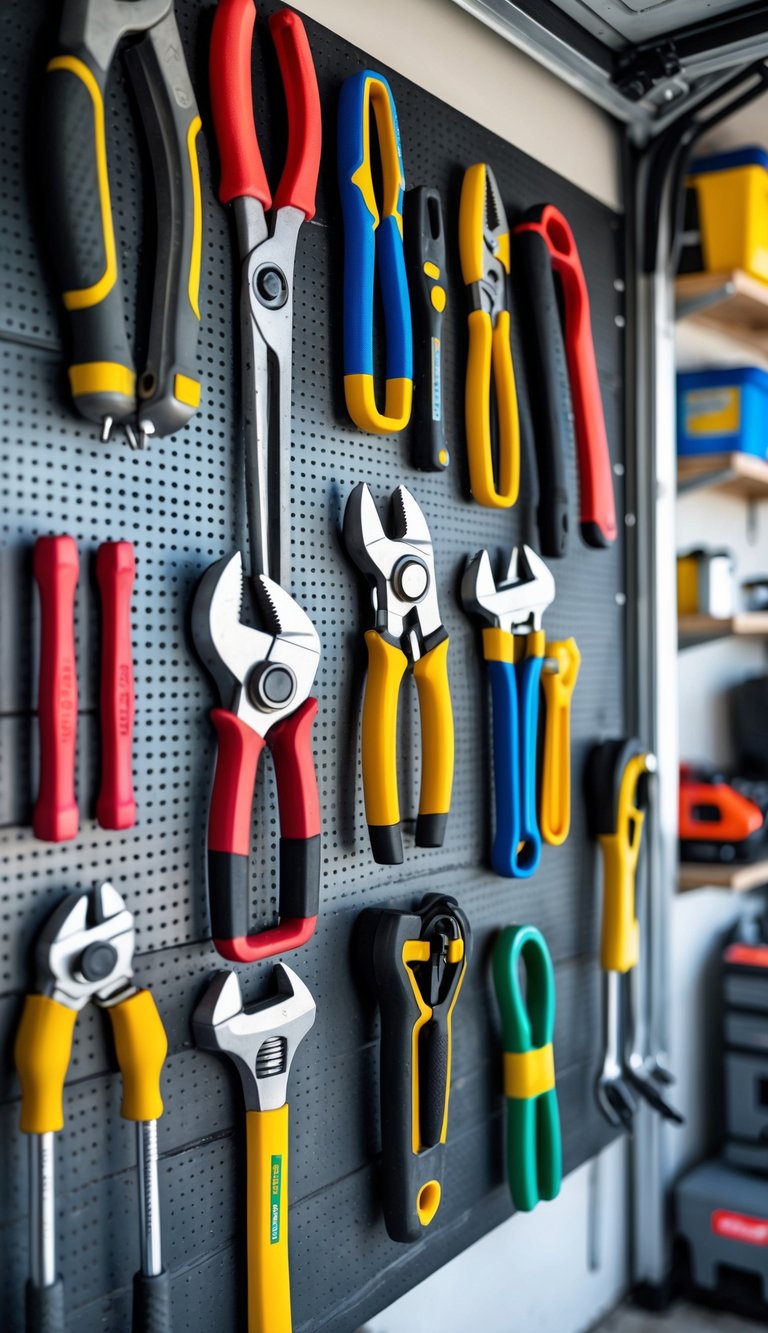
1) Install a pegboard for hanging frequently used tools
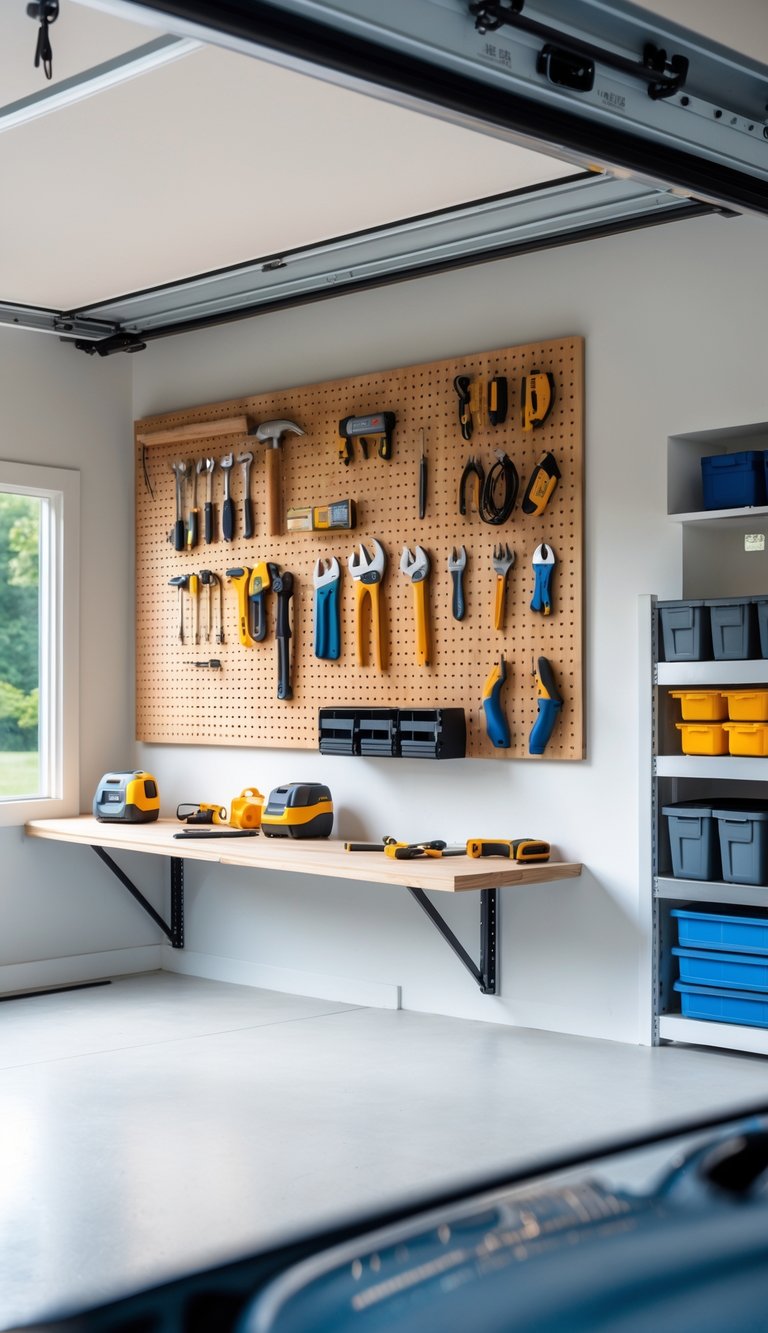
A pegboard gives your tools a clear home on the wall so you can grab what you need fast. Mount it above your workbench or near the garage door to keep often-used items within reach.
Choose a sturdy pegboard and use spacers so hooks sit flush and hold weight safely. Arrange tools by task — keep wrenches together, pliers nearby, and screwdrivers at eye level.
Labels or colored tape help you return tools to the right spot after a job. This keeps your garage tidy and saves time when you pack for a trip.
PRO TIP
Sketch your layout before hanging hooks. Place heavy tools lower and leave space for future additions.
2) Use clear labeled bins for small hardware like nails and screws
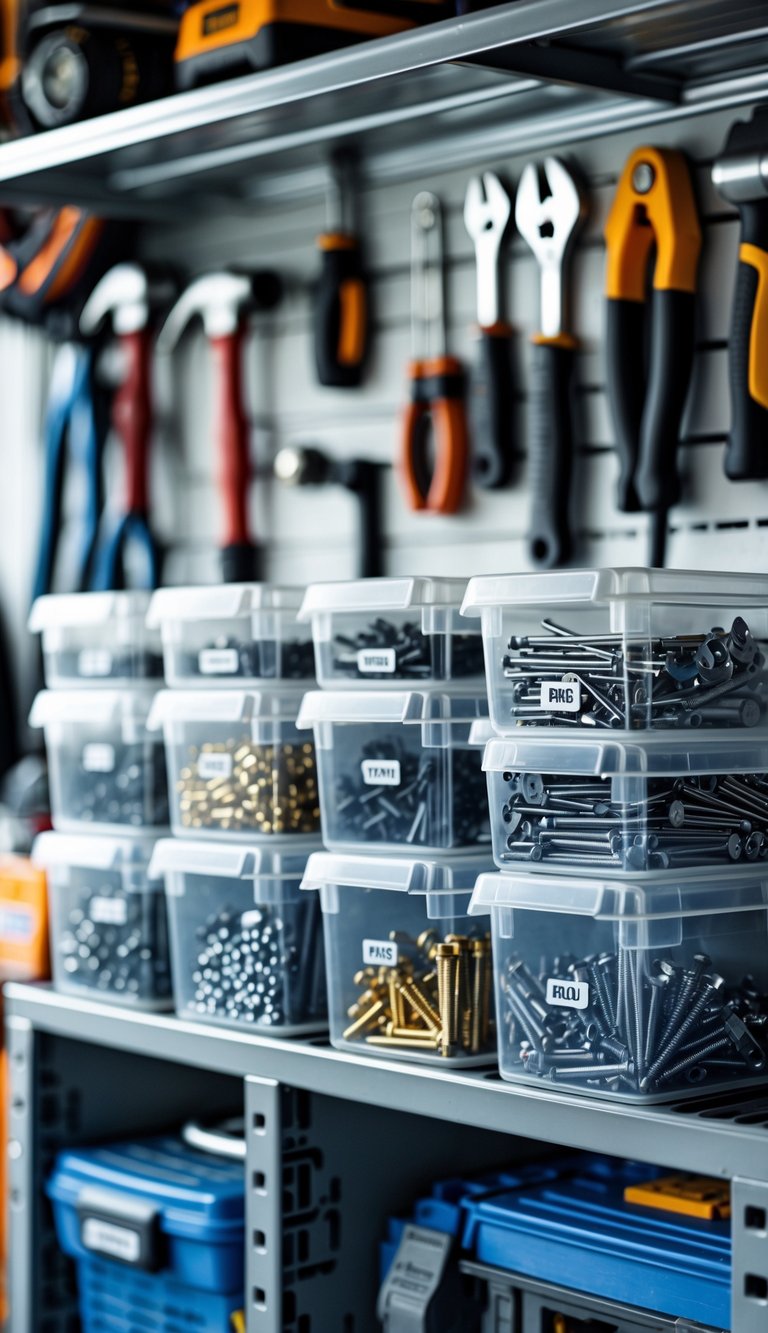
You save time when you can see what’s inside each bin at a glance. Clear plastic bins let you spot sizes and types without opening lids, so you grab the right fastener fast.
Label each bin with size and type. Keep similar items together — wood screws, machine screws, drywall anchors — so you don’t mix them up during a quick repair before a trip.
Stackable bins free up shelf space and make the garage tidy. Use small compartment inserts for tiny items like washers and brads to stop them from getting lost.
PRO TIP
Put a photo or sample screw on the label for fast matching. Rotate stock so older items get used first.
3) Mount magnetic strips to hold screwdrivers and metal tools
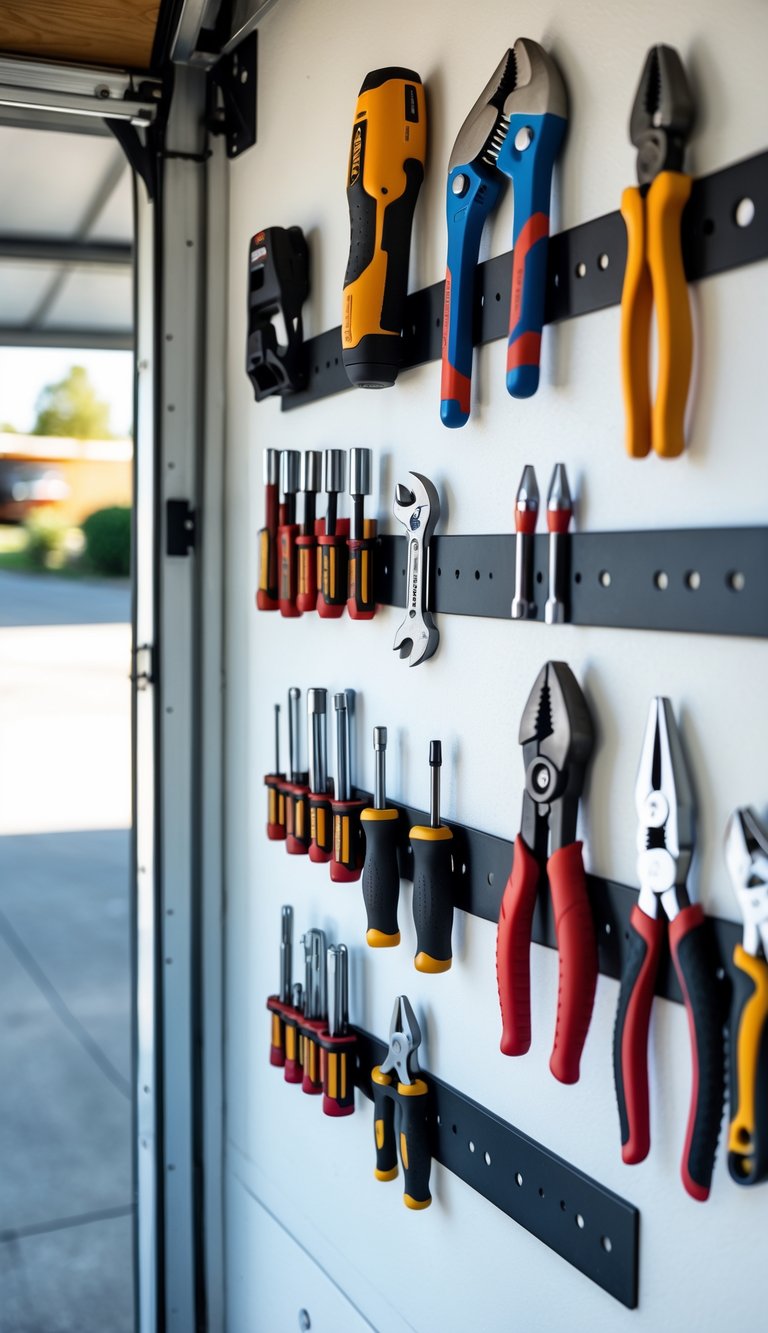
Mount magnetic strips along a wall or the inside of a cabinet to keep screwdrivers, pliers, and wrenches easy to find. You save time by seeing each tool at a glance, and you avoid digging through drawers before a trip.
Choose a strip strong enough for your heaviest tools and place it at a comfortable reach height. Space multiple strips to group tools by type or size so you can grab what you need quickly.
Install with the included mounting hardware and check the strip holds tools evenly. If a tool slips, move the strip or add a second layer to increase pull strength.
PRO TIP
Mount a strip near your car supplies or workbench so you can grab both tools and parts in one spot.
4) Add wall-mounted racks for power tools
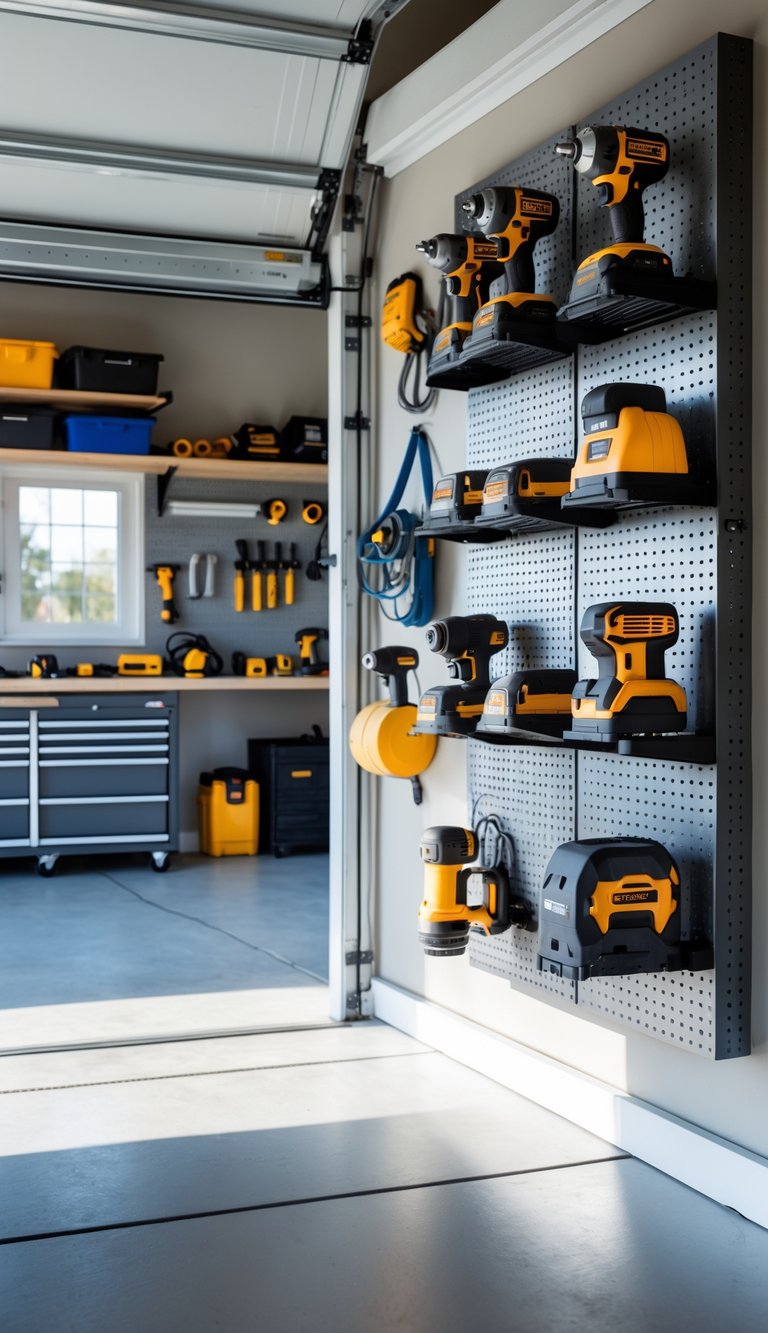
Wall-mounted racks free up floor and shelf space so you can find what you need fast. You can mount drills, saws, and chargers at eye level, which keeps cords tidy and batteries ready for a trip.
Choose heavy-duty racks that match your tool types and weight. Look for models with drill holders, shelves for chargers, and hooks for small accessories.
Install racks near your workbench or entry to the garage for quick access. Use anchors or screw into studs so racks stay secure when you grab a tool in a hurry.
PRO TIP
Label each spot for a specific tool. That makes it easier to return items and keeps your garage organized during busy road trip prep.
5) Create a dedicated space for safety gear like gloves and goggles
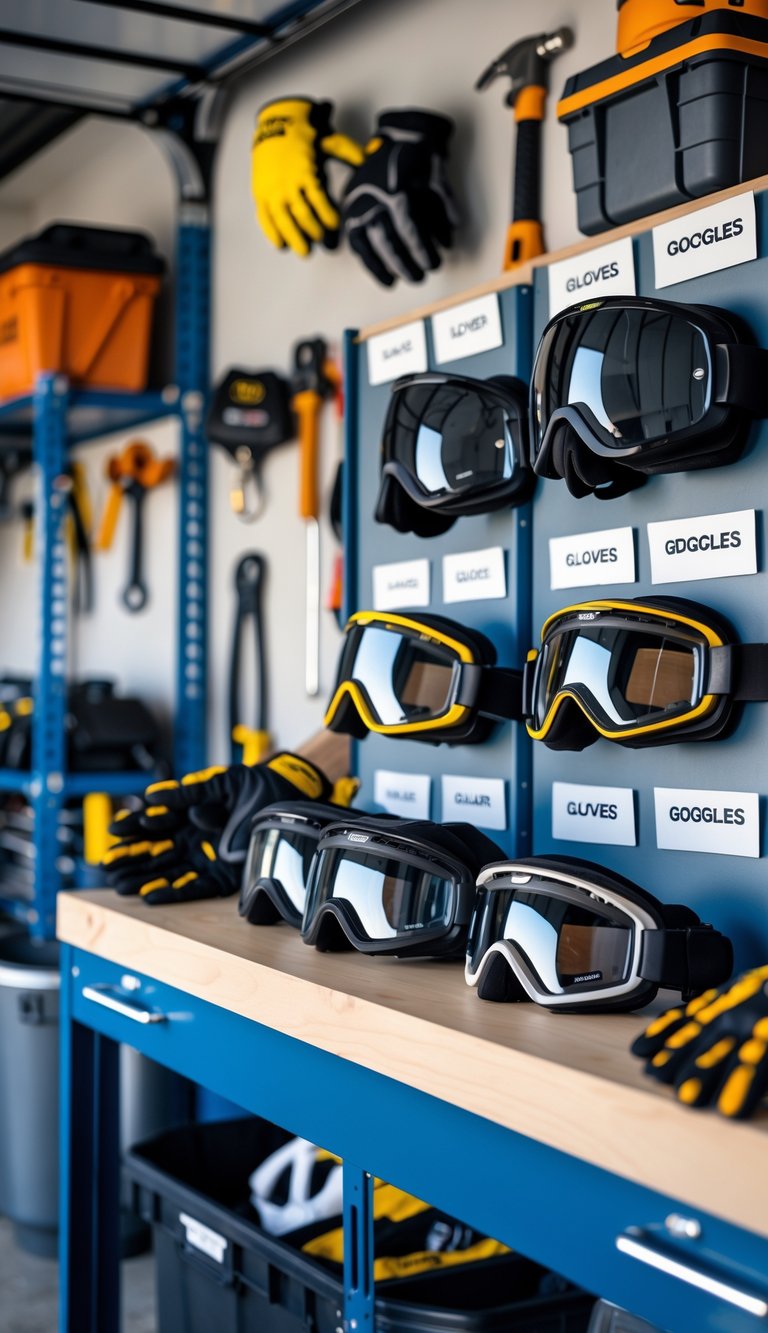
Designate a clear spot for safety gear so you always know where to find it. Use a small cabinet, clear bins, or wall-mounted pockets to keep gloves, goggles, and masks separated and visible.
Label each container or shelf to prevent mix-ups. Keep frequently used items at eye level and heavier or less-used items higher or lower.
Store items that need to air out, like sweat-prone gloves, in an open shelf or vented bin. Replace or clean damaged gear before your trip to keep protection reliable.
PRO TIP
Keep a checklist near the storage area so you can quickly confirm you have all safety items before loading the car.
6) Use stackable plastic drawers for organizing drill bits and attachments
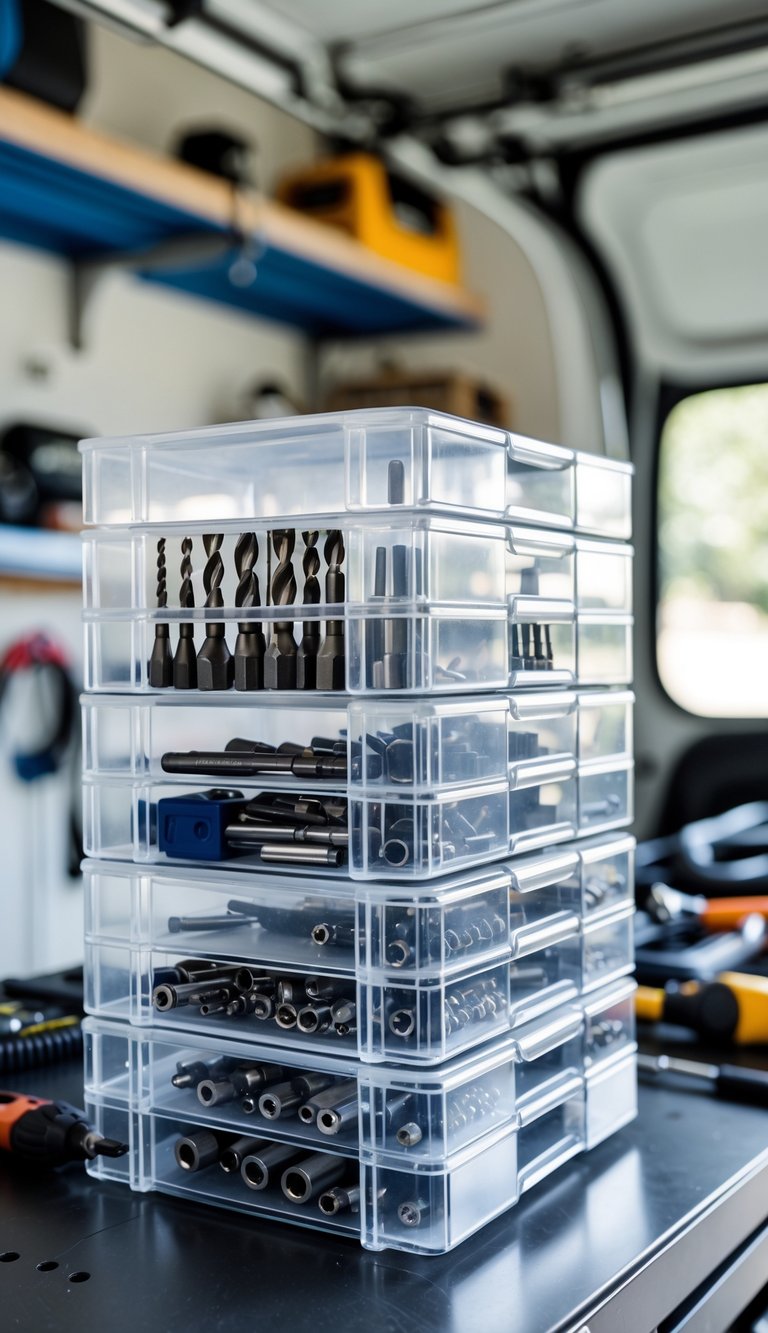
Stackable plastic drawers keep small items visible and dust-free. You can sort bits by size, type, or project, which saves time when packing for a trip.
Choose clear drawers so you can spot what you need at a glance. Label each drawer with simple tags for faster access.
Keep frequently used bits in the top drawers and specialty bits lower down. This prevents you from pulling apart the whole stack when you need one item.
PRO TIP
Use foam or small dividers inside drawers to stop bits from rolling. That keeps edges sharp and prevents scratches on delicate attachments.
7) Hang a fold-down workbench to save space

A fold-down workbench gives you a sturdy workspace without taking floor room. Mount it on a wall, fold it up between uses, and free up space for packing and car prep.
Many models include a pegboard or small shelves so your most-used tools stay within reach. You get a clear surface fast, which helps when you need to lay out maps, check fluids, or pack gear.
Choose a bench with solid hinges and a locking support arm for safety. If you mount it near an outlet, you can plug in a light or a charger while you work.
PRO TIP
Install the bench at a comfortable height for you, usually waist level, to reduce bending and make quick jobs easier.
8) Apply hooks to store extension cords neatly
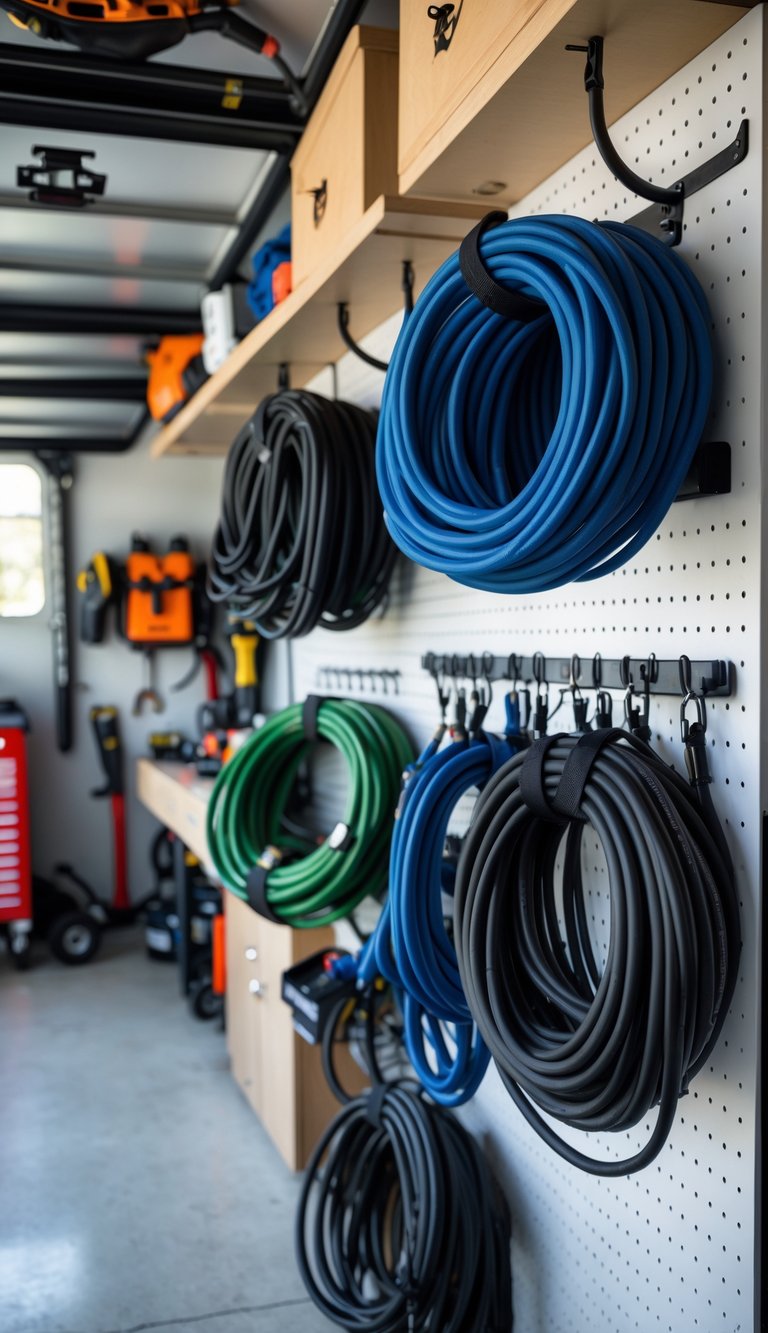
Hooks free up floor and shelf space and keep cords tangle-free. Mount heavy-duty hooks on a stud or use strong wall anchors so they hold the weight of long cords.
Coil each cord in loose loops before hanging to avoid kinks and internal damage. Label the loops with tape or a marker so you can grab the right length quickly.
Place hooks near outlets or workbenches for faster setup. Group similar cords together — outdoor, heavy-duty, and small indoor cords each get their own spot.
PRO TIP
Use double hooks or S-shaped hardware so cords hang securely and don’t slip off when you grab one.
9) Label tool handles with colored tape for quick identification
You can wrap colored tape around tool handles to spot what you need fast. Pick bright, different colors for each tool type — red for cutting tools, blue for measuring, green for wrenches — or make your own system that fits your gear.
Cut short pieces of vinyl or electrical tape and wrap them near the end of the handle. The color stays visible when tools sit in drawers or hang on a pegboard, saving time when you’re prepping for a trip.
Write tool sizes or names on the tape with a permanent marker for extra clarity. Tape is cheap, easy to replace, and won’t damage handles when you remove it.
PRO TIP
Use matching tape colors on storage spots so tools go back to the right place every time.
10) Use slatwall panels for customizable tool placement
Slatwall panels give you a flexible way to place tools where you need them. You can move hooks, shelves, and baskets quickly as your gear or projects change.
Mount panels on studs for strong support. The panels accept many accessory types, so you can arrange small hand tools near your workbench and heavy tools lower for safe access.
You keep tools visible and off the floor, which speeds packing before a trip. The system also makes it easy to label spots so each item returns to its place.
PRO TIP
Start by hanging the items you use most. Place rarely used or seasonal gear higher up to free up prime real estate.
11) Store large tools like lawnmowers on heavy-duty shelving

Put bulky equipment like lawnmowers on sturdy, heavy-duty shelves to free floor space and make your garage safer. Choose steel or thick plastic shelving rated for at least 200–300 pounds per shelf so it won’t sag or fail under weight.
Clear the shelf area before lifting the mower. Drain fuel or disconnect the battery for safety, and lift with help or use a ramp to avoid strain or drops.
Keep wheels chocked or use straps to secure the mower in place. Position heavier items low and lighter ones above to keep shelves stable and easy to access.
PRO TIP
Label the shelf and keep operator manuals nearby. That way you can find the right mower quickly before a trip and keep maintenance info handy.
12) Keep a mobile tool cart for easy access during projects
A mobile tool cart brings your tools to the work area so you don’t waste time walking back and forth. You can roll it next to the car or workbench and keep frequently used tools within arm’s reach.
Choose a cart with sturdy wheels and a top tray for small parts. Drawers help organize sockets, screwdrivers, and pliers so you find what you need fast.
Lockable wheels stop the cart from moving while you work. A lightweight cart that still holds your main tools fits well in tight garage spaces and loads easily into a truck.
PRO TIP
Keep a small parts bin on the top tray for fast access to nuts and bolts. Label drawers by tool type to save time on road-trip prep.
13) Use adjustable shelving units to accommodate different sized items
Adjustable shelving lets you change shelf heights to fit tall items like fuel containers and short items like toolboxes. You can clear floor space by moving bulky gear up and out of the way.
Choose sturdy metal or wood shelves that handle heavy tools and boxes. Shelves that lock in place prevent sagging and keep everything stable during busy packing days.
Place frequently used items at eye level so you grab them fast. Reserve higher shelves for seasonal gear you only need a few times a year.
PRO TIP
Label each shelf or use clear bins so you always know where things belong. This saves time when you’re making a quick pre-trip checklist.
14) Hang bikes vertically to free floor space
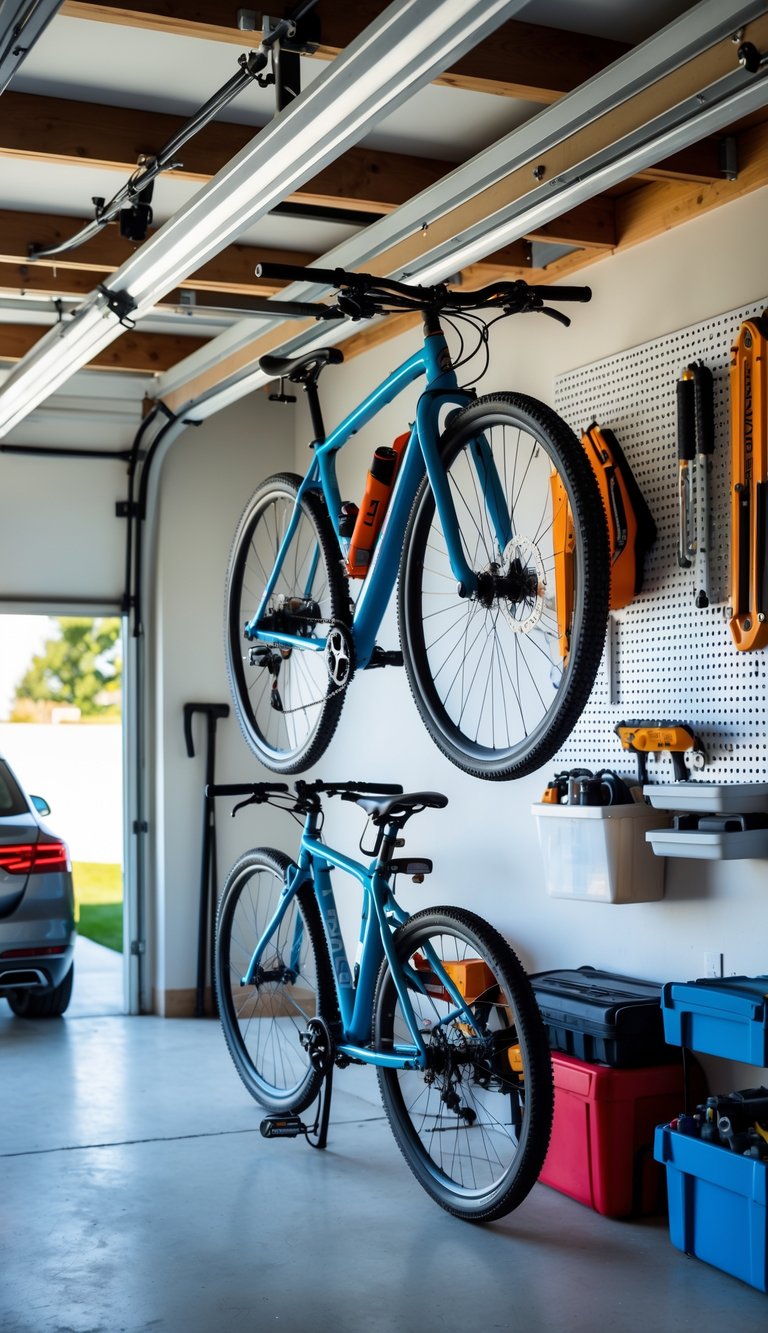
Hanging bikes vertically on the wall saves a lot of floor space and makes your garage look neater. You can store multiple bikes in a small area, which gives you more room for packing and last-minute repairs.
Choose sturdy wall hooks or a vertical rack that fits your bike’s frame and handlebars. Make sure you secure the hooks into studs or use proper anchors to hold the bike’s weight safely.
Lift the front wheel and hang it so the bike rests nearly upright. This keeps the wheels off the ground and prevents scratches to the frame.
Keep cables, helmets, and pumps nearby on hooks or a small shelf. That way you grab everything quickly before you head out on your trip.
PRO TIP
Place heavier bikes lower if you have kids helping. It’s easier and safer for everyone.
15) Create a charging station for cordless tool batteries
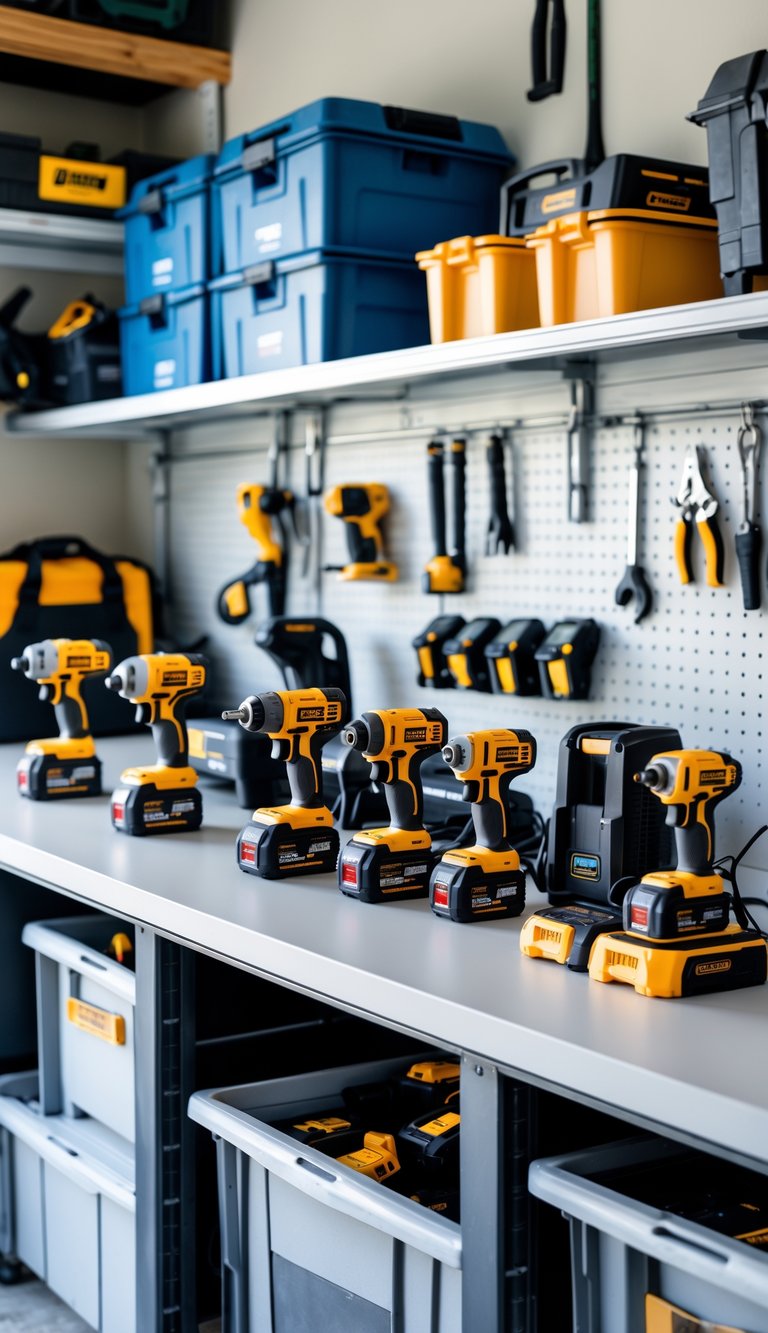
Set up a single spot in your garage to charge and store all cordless tool batteries. Put chargers on a shelf or wall board so cords stay tidy and batteries don’t get left on counters.
Label each charger and battery slot so you grab the right battery fast. Keep vents clear and avoid stacking hot batteries; that helps them cool and lasts longer.
Use a power strip with surge protection and mount it off the floor to avoid spills. If you have many batteries, add a small tray to catch dust and debris.
PRO TIP
Place the station near your workbench and a bright light. That makes swapping batteries quick before you head out on a trip.
16) Install clear jars on shelves for organizing nuts and bolts
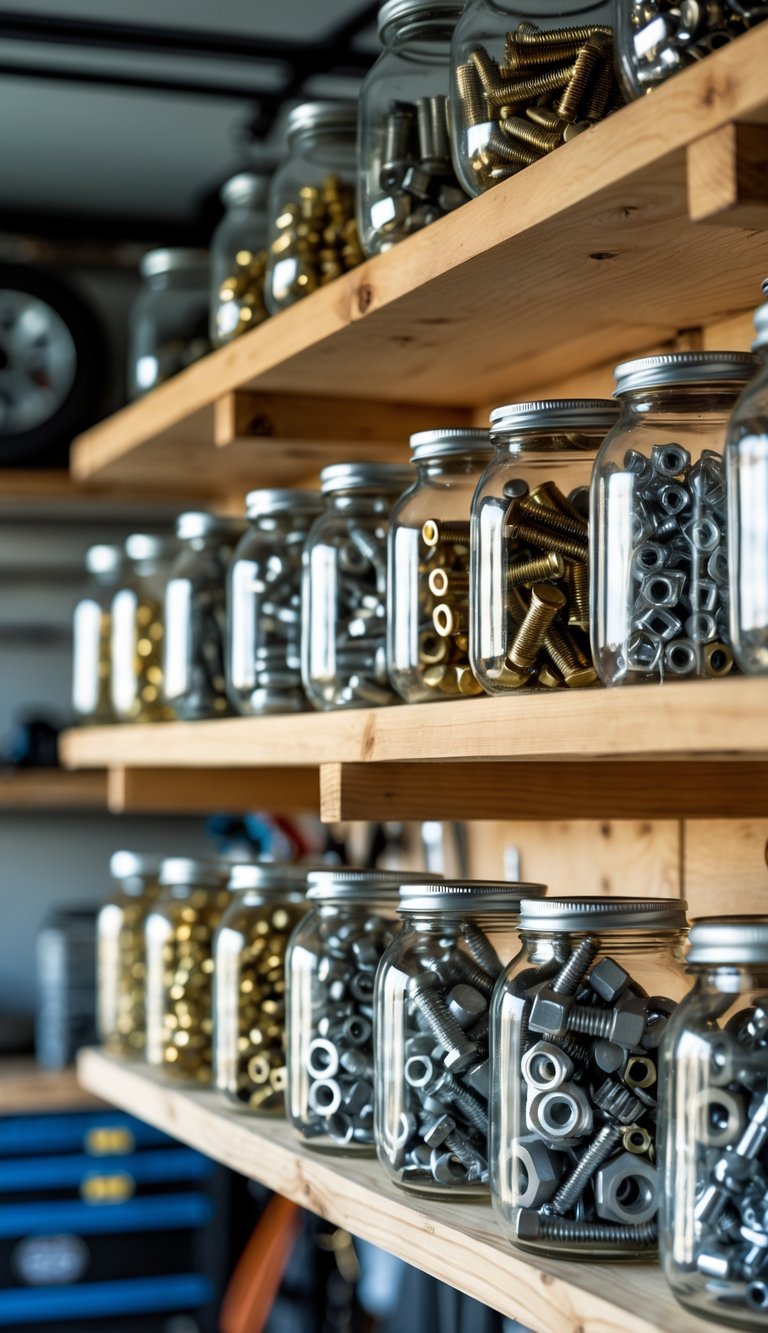
You can use clear glass or plastic jars to see contents at a glance. Screw the lids to the underside of a shelf so jars hang upside down and twist on and off easily.
This setup saves counter space and keeps small parts visible and reachable. Group similar items together and label the lids for faster grabs.
Choose jars with wide mouths for bigger items and small jars for tiny screws and washers. Place the jars within easy reach of your main work area to cut down search time.
PRO TIP
Mount a magnetic strip nearby for quick separation of steel parts.
17) Dedicate a spot for cleaning supplies like rags and lubricants
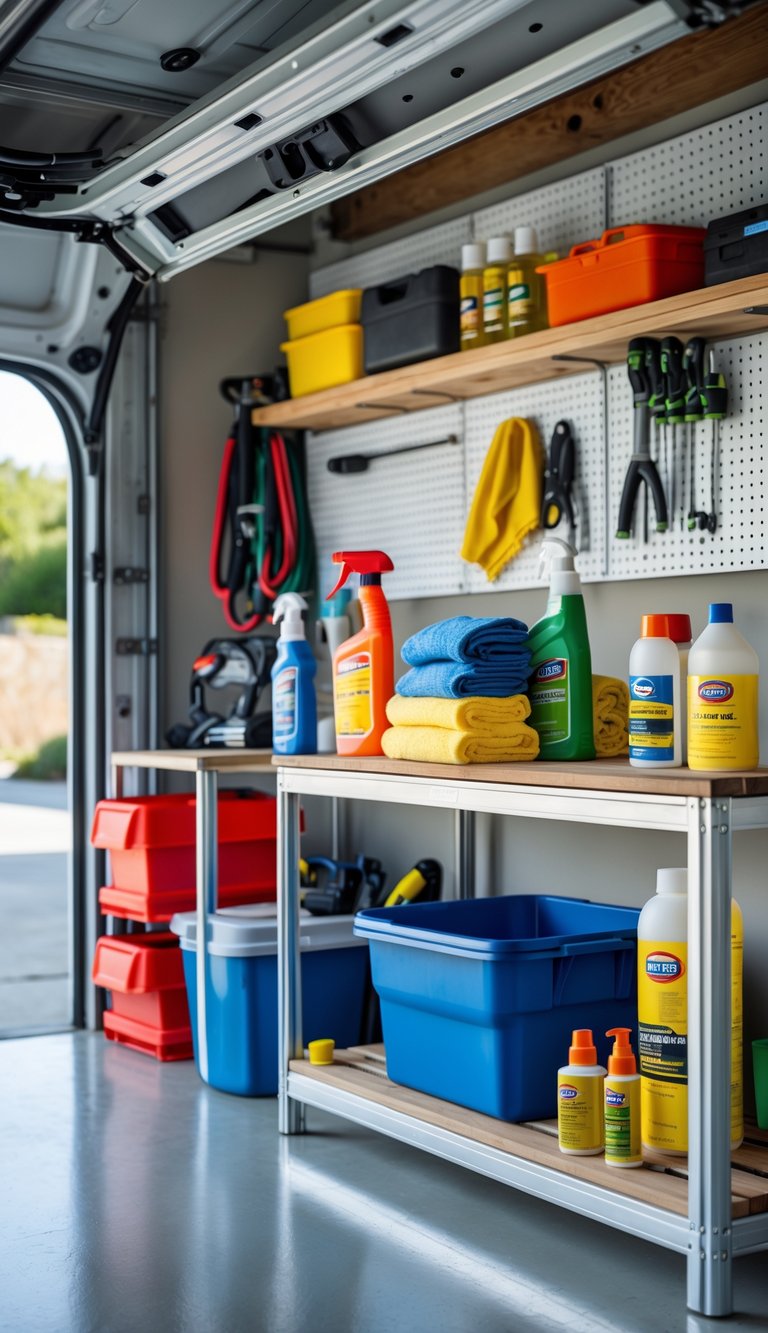
Keep a small, dedicated area for cleaning items you use on your car and tools. Put rags, shop towels, and sturdy gloves together so you can grab them fast before a quick wipe or a deep clean.
Store lubricants, penetrating oil, and silicone spray upright in a labeled bin or on a low shelf. This prevents spills and keeps matching products together so you don’t grab the wrong can when you’re in a hurry.
Use clear bins or small drawers for polish, glass cleaner, and degreaser. That way you can see what you have and replace things before they run out.
PRO TIP
Place absorbent pads or a shallow tray under wet or oily items to catch drips.


