
Last Updated on February 9, 2026
You want your boat to come back from winter ready to go. This article gives 24 practical, easy-to-follow winterizing and storage ideas so you can protect your hull, engine, and gear and avoid costly repairs when spring arrives.
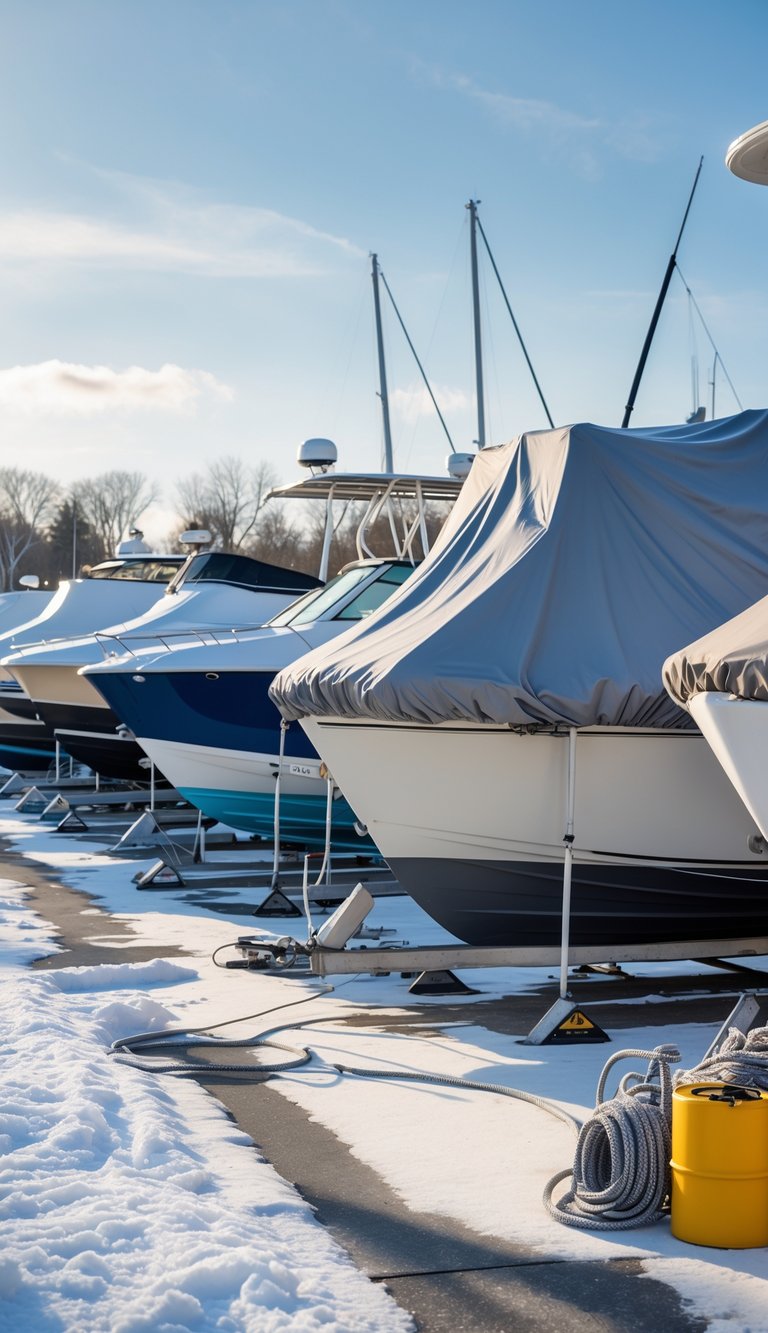
You’ll find simple steps for indoor and outdoor options, from covers and shrink wrap to battery care and moisture control, all aimed at keeping your boat safe through cold months.
1) Drain and winterize the engine
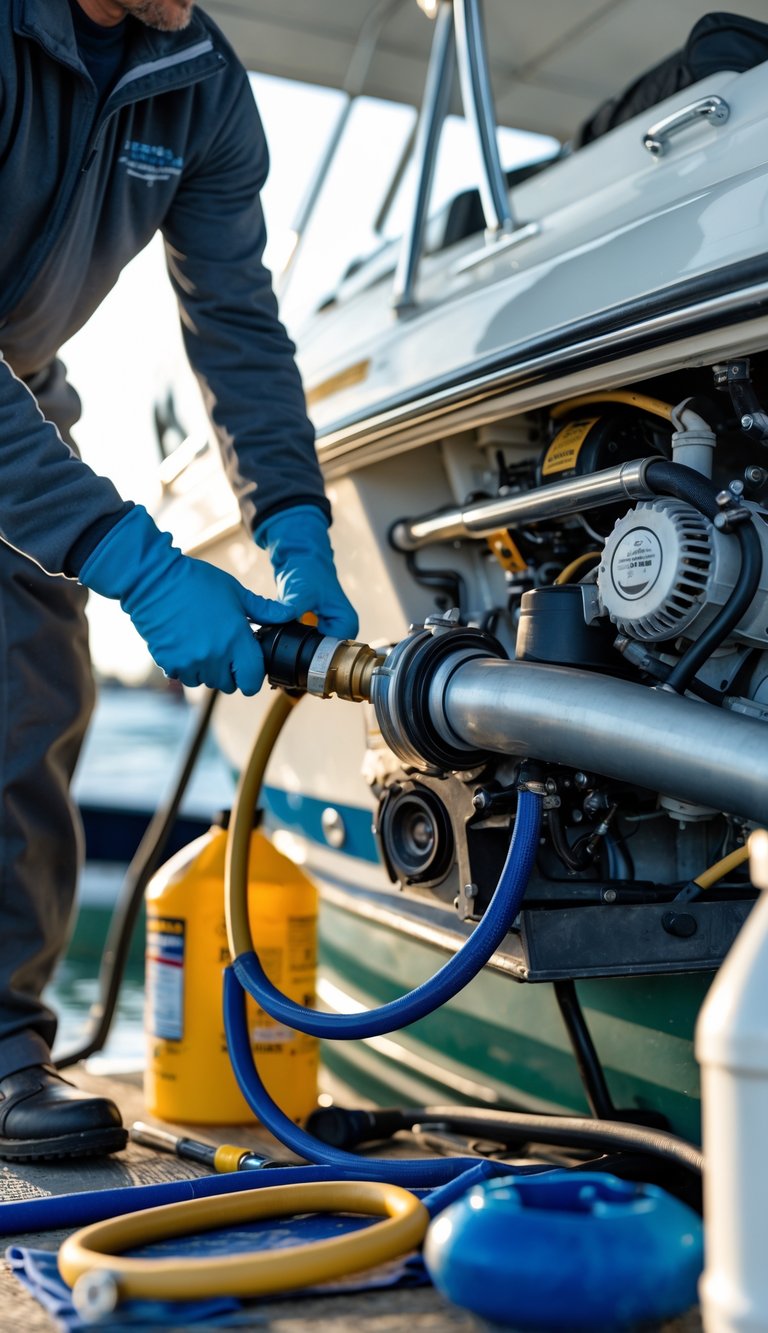
You should start by draining fuel and oil to prevent varnish and corrosion. Old fuel can gum up injectors and carburetors, so either run the tank low and add stabilizer or drain it completely.
Change the oil and filter after running the engine warm. Warm oil carries contaminants out more easily, so this step protects bearings and seals.
Fog the engine cylinders with a marine fogging spray to coat internal parts with corrosion inhibitor. Remove the battery or fully charge and store it in a cool, dry place to protect electrical systems.
Flush cooling passages and add non-toxic marine antifreeze where needed. Follow your engine maker’s guide for exact steps and parts.
PRO TIP
Label hoses and connections before you disconnect them; it saves time and prevents mistakes when you start up in spring.
2) Flush cooling system with antifreeze
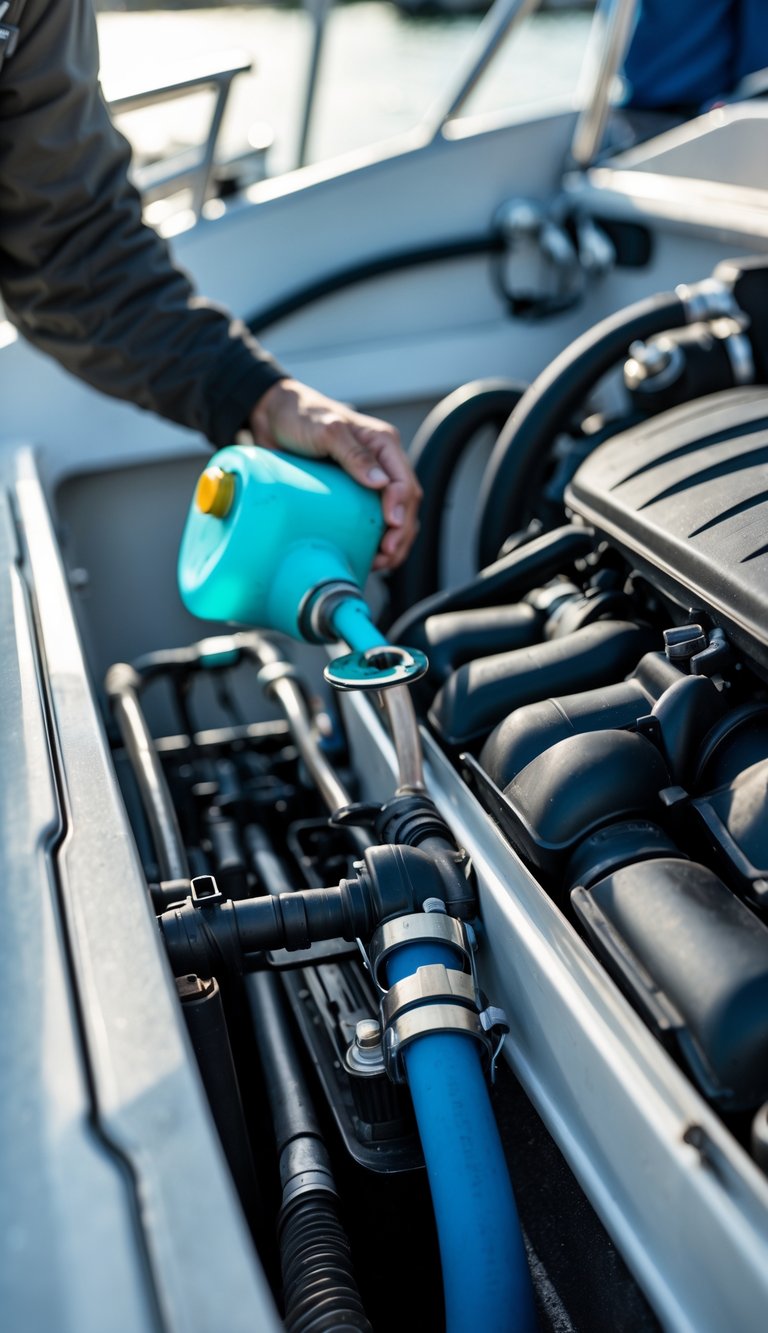
You should flush the engine cooling system with fresh water first. Run water through until it runs clear to remove salt, dirt, and debris that cause corrosion.
After flushing, introduce marine-grade, non-toxic antifreeze into the system. Pump or run the engine so antifreeze reaches the block, manifolds, and any external plumbing that held water.
Drain any trapped water from low points, then top up with antifreeze to protect hoses and passages. This prevents freeze cracks and reduces corrosion during storage.
PRO TIP
Use a flushing kit or flush muffs for outboards and a proper pump-in setup for inboards. Label the coolant type and date so you remember what you used next season.
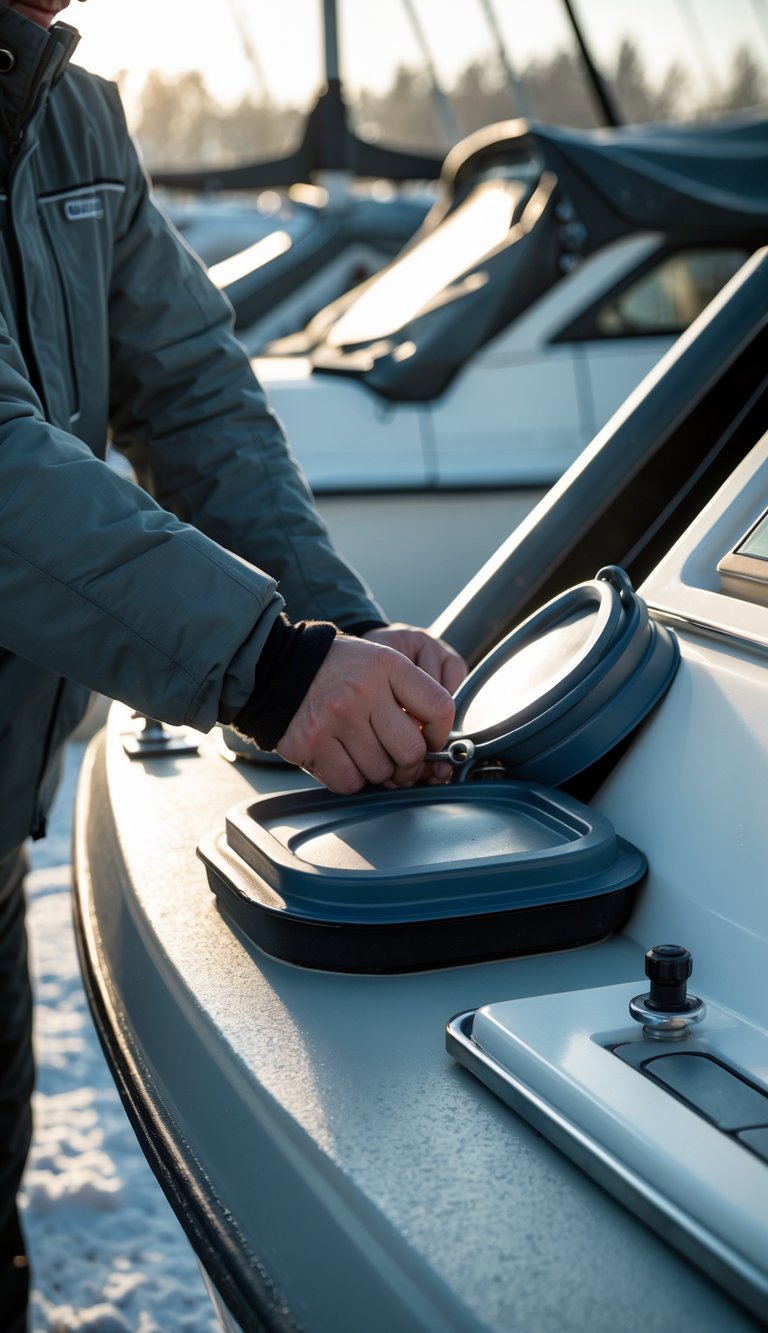
3) Remove and store battery indoors
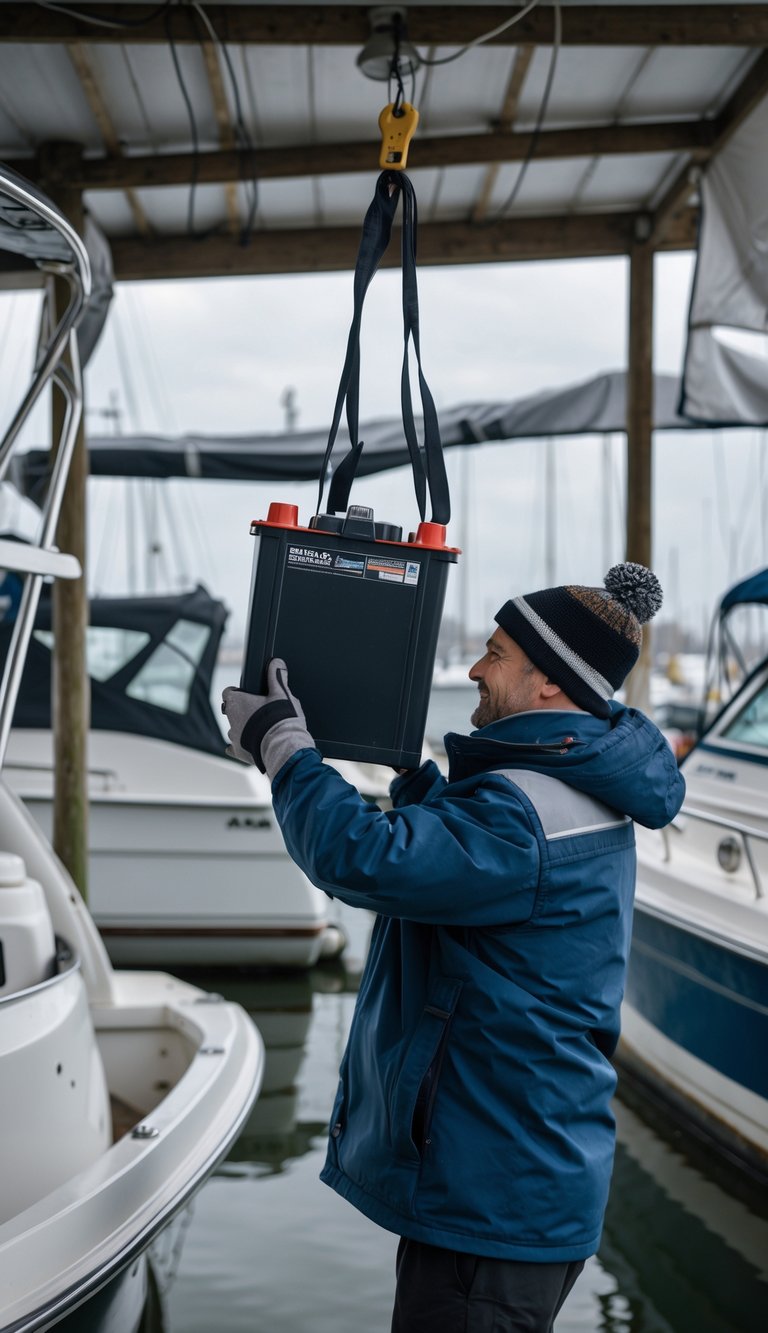
You should take the battery out of your boat before cold weather arrives. Cold can crack cases and drop capacity, so move batteries to a dry, temperature-controlled spot.
Clean terminals and disconnect cables to avoid corrosion. If the battery is flooded lead-acid, top up with distilled water first and wipe away any acid residue.
Store batteries off the concrete, on wood or plastic, and keep them away from direct heat sources. Aim for a cool room between 50–80°F (10–27°C) and avoid freezing temperatures.
Charge the battery to about 50–80% for long-term storage and check it monthly. Use a smart charger or maintainer to prevent sulfation and keep your battery ready for spring.
PRO TIP
Label cables and take a quick photo of connections to make reinstalling fast and error-free.
4) Clean and dry the hull thoroughly
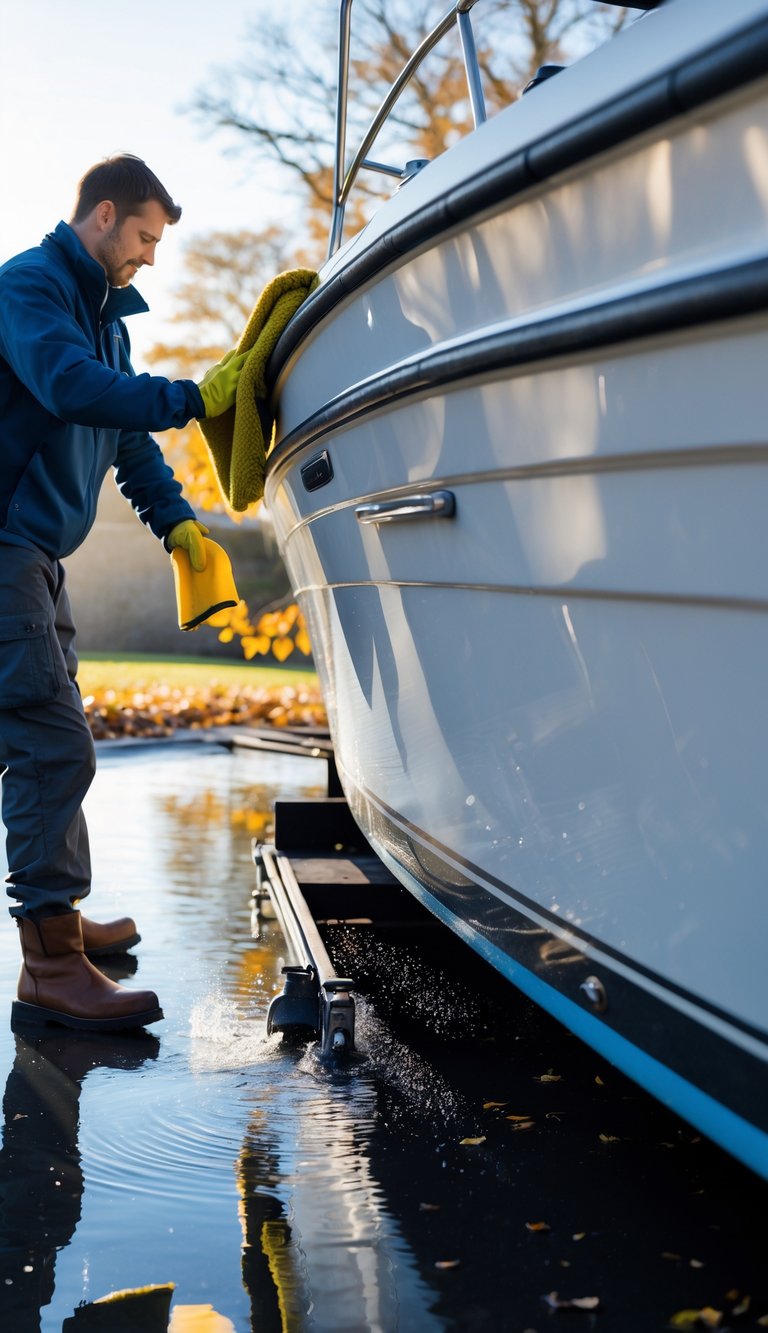
You should start by removing all loose debris, barnacles, and plant growth from the hull. Use a soft brush or plastic scraper to avoid scratching the gelcoat or aluminum.
Wash the hull with marine soap to cut grease and salt. Rinse well and pay attention to seams, prop areas, and under rub rails where grime can hide.
Allow the hull to dry completely before any repairs or waxing. Moisture trapped under covers can cause mold, blistering, or corrosion over time.
Work in a shaded area to prevent soap streaks and spotting. If you find blisters or damage, repair them before applying a protective wax or sealant.
PRO TIP
Lift inspection ports or open lockers briefly to speed drying and check for hidden moisture.
5) Apply marine-grade wax to protect paint
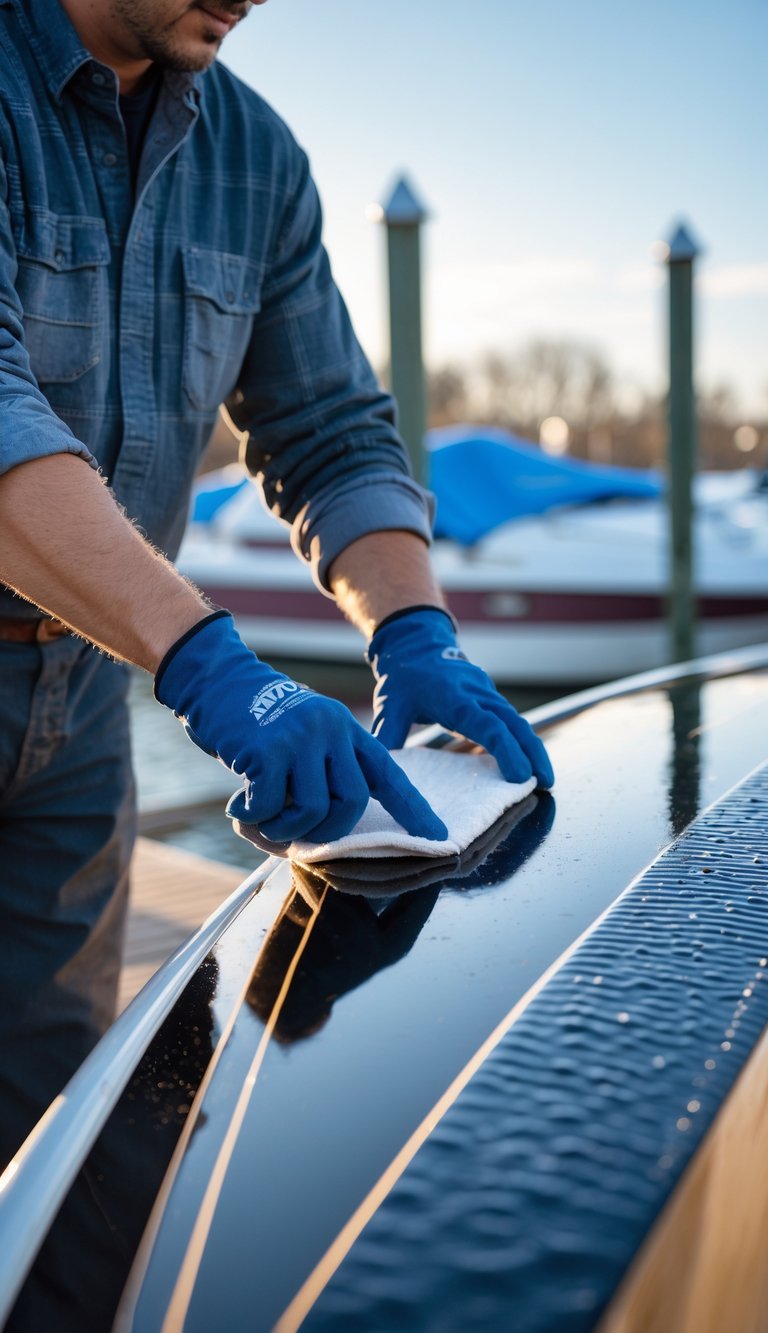
Waxing your boat before winter helps safeguard the paint and gelcoat from UV, salt, and oxidation. A marine-grade wax forms a protective layer that slows fading and keeps grime from bonding to the surface.
Clean and dry your hull first so the wax bonds well. Apply in small sections with a foam pad or cloth, and buff to a smooth finish for best results.
Choose a wax labeled for marine use and for your surface type, whether gelcoat or painted. Some products last longer than others, so pick one that fits how long you’ll store the boat.
PRO TIP
Wax twice if your boat faces harsh winter conditions. This adds an extra barrier and makes spring prep much easier.
6) Cover vents to prevent moisture buildup
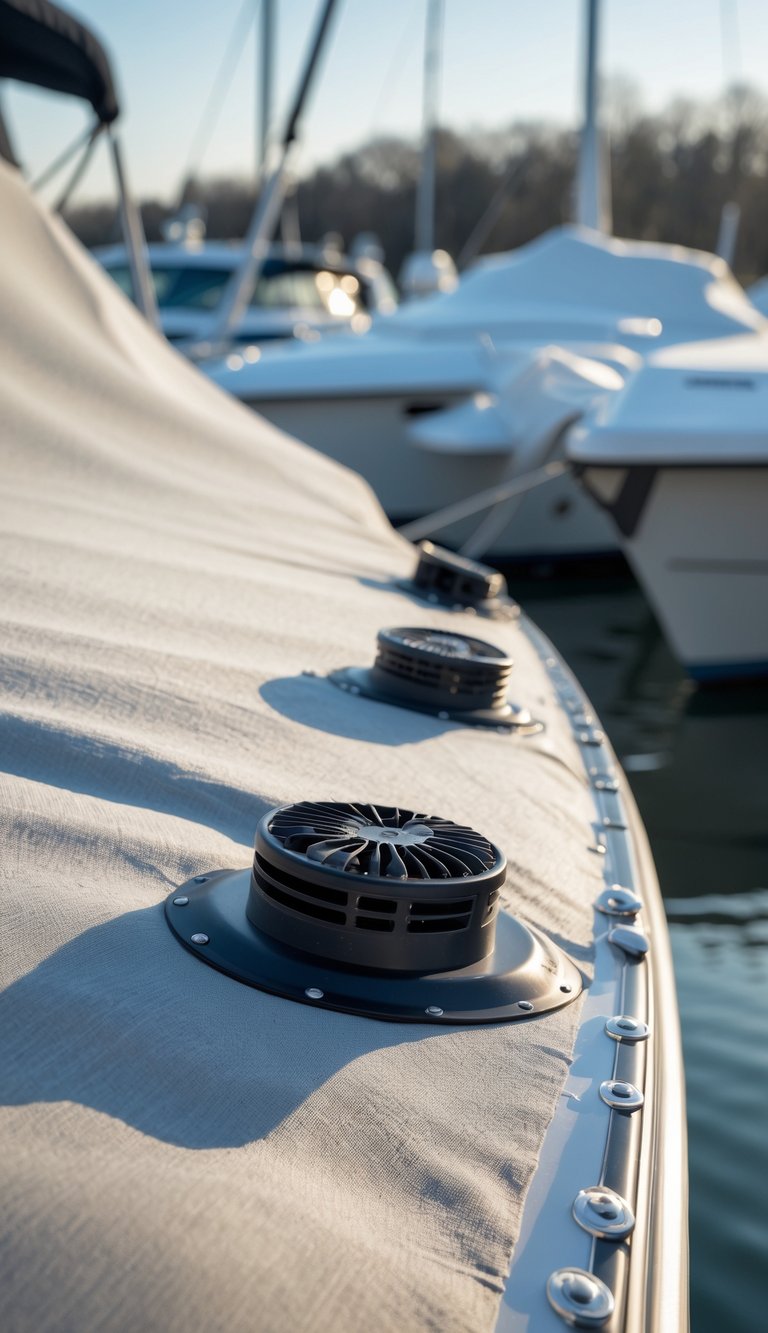
You need vents in your boat cover to keep air moving and cut down on moisture. Stale, trapped air leads to mildew, mold, and rotting upholstery if you skip ventilation.
Install vents near the low and high points of the cover so warm, moist air can escape and cooler air can enter. Choose vents made for marine use; they resist UV and shed water better than cheap alternatives.
Check vents regularly for blockages from leaves, snow, or ice. Replace torn or crushed vents to keep airflow steady and protect seams and zippers from damp damage.
PRO TIP
Place a small desiccant or moisture absorber under the cover for extra protection, especially in humid climates.
7) Use shrink wrap for tight outdoor cover
Shrink wrap gives your boat a snug, weatherproof shell. It keeps out snow, rain, and wind better than a tarp and helps prevent moisture buildup.
You can hire a pro or do it yourself with the right film, straps, and a heat gun. The wrap conforms to hull shapes and holds tight in storms when done correctly.
Check vents and drains before sealing to avoid trapped moisture and mildew. Leave access points for batteries and fuel lines so you don’t disturb winterization work.
PRO TIP
Use a breathable shrink film or add vents to reduce condensation. Reinforce high-stress areas with extra tape or webbing to stop tears. Replace any torn sections quickly to keep the cover effective.
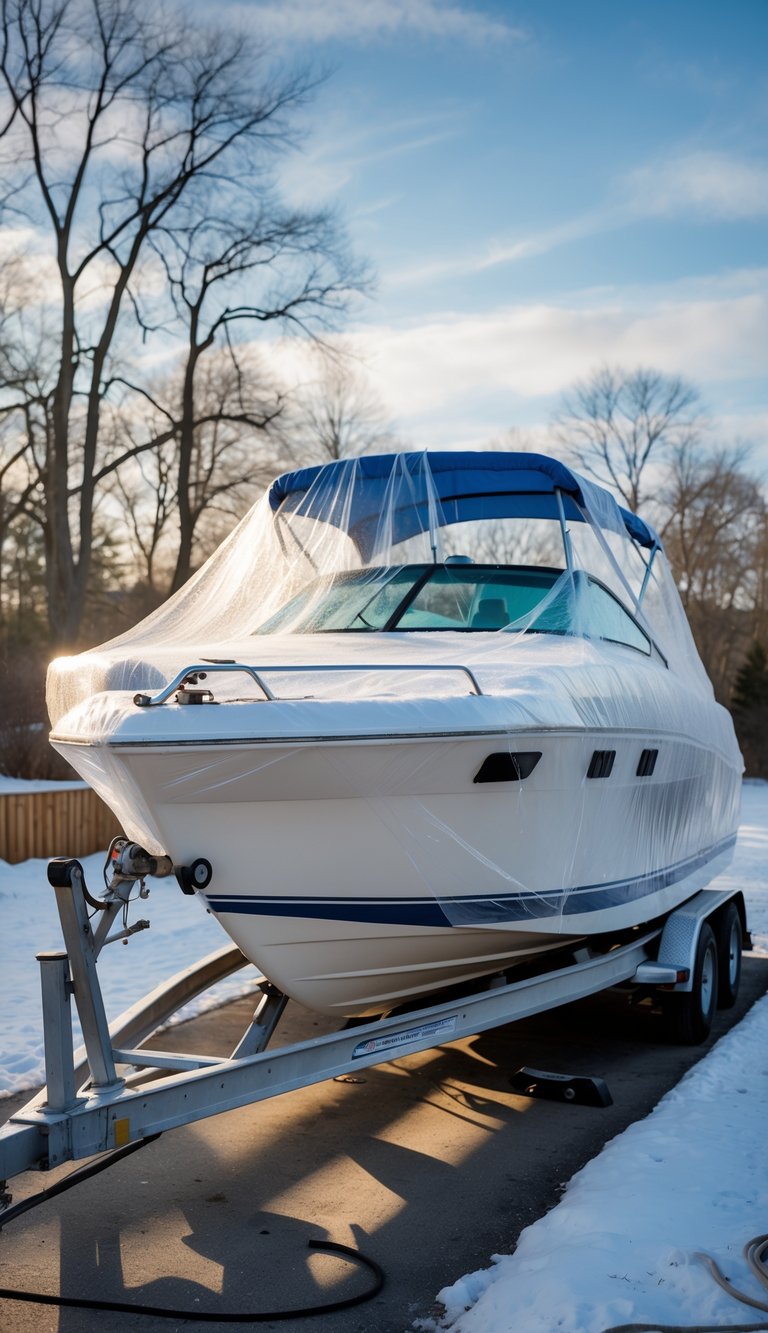
8) Install a breathable boat cover
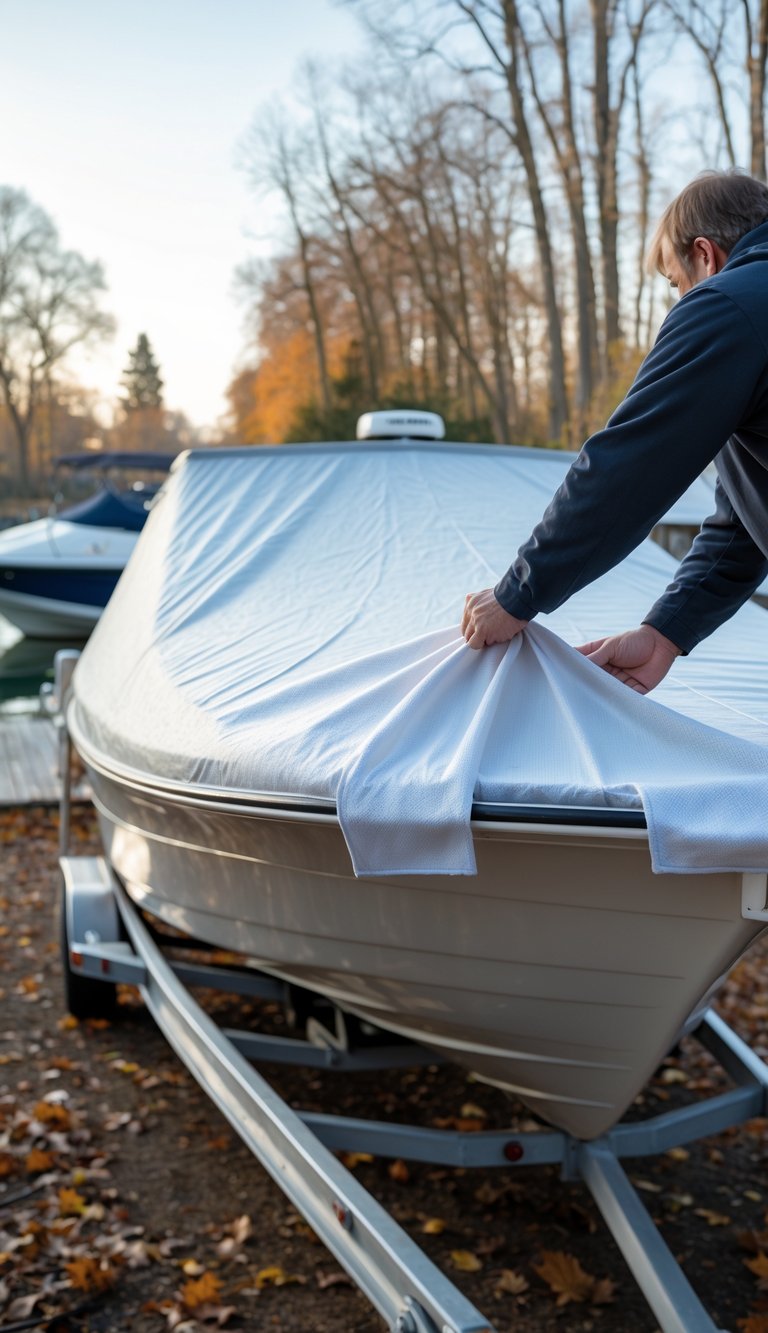
A breathable boat cover keeps moisture from building up while stopping rain and snow. You protect upholstery, electronics, and finishes by letting trapped humidity escape.
Choose a cover made from marine-grade, breathable fabric that fits your hull shape. A snug fit reduces flapping and wear, but avoid too-tight covers that can stress seams.
Add support frames or straps to keep water from pooling on the roof. Good vents and raised support points help airflow and prevent mildew.
PRO TIP
Place moisture-absorbing packs under the cover for extra protection. Check the cover monthly during winter to tighten straps and clear heavy snow.
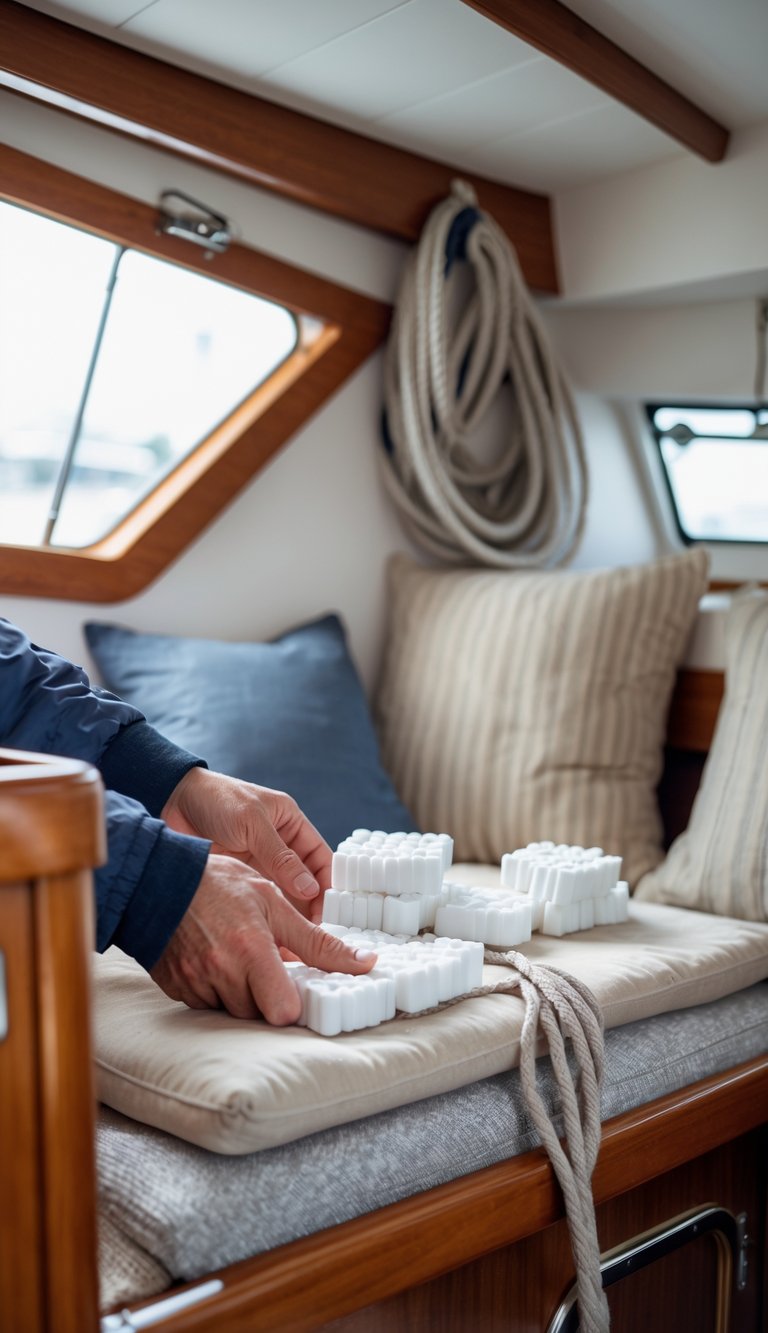
9) Store soft goods in sealed containers
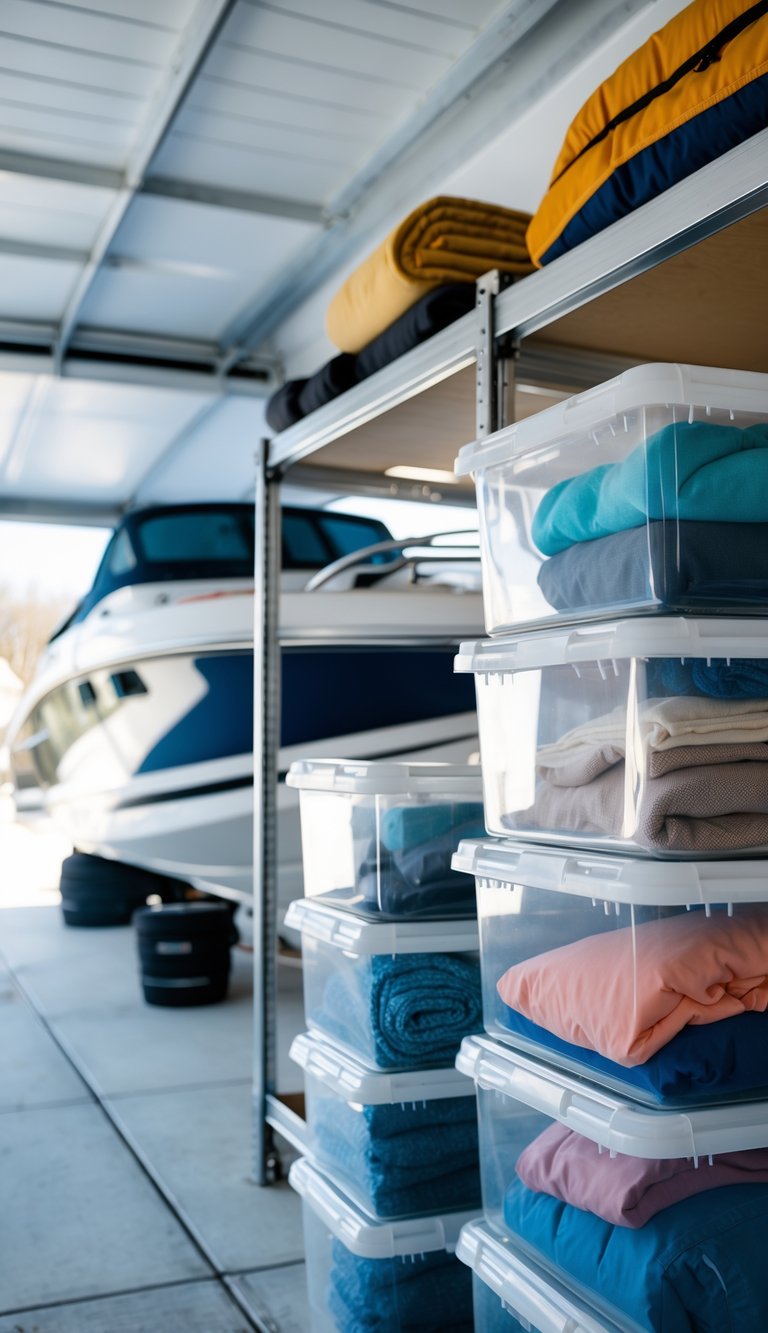
Soft items like cushions, life jackets, canvas covers, and seat pads absorb moisture and hold odors if left loose. Put them in airtight plastic bins or heavy-duty vacuum bags to keep dampness, mildew, and pests away.
Clean and dry everything before sealing. Even a small amount of moisture trapped inside can lead to mold growth during winter.
Label containers so you can find items fast in spring. Stack bins off the floor on pallets to improve air circulation and avoid cold, damp concrete.
PRO TIP
Add silica gel packs or moisture absorbers to each container. They help keep the air dry and protect fabrics without adding bulk.
10) Remove all electronics and store safely
You should remove all portable electronics from your boat before winter. Take out chartplotters, radios, fish finders, and any small instruments you can lift.
Wipe each unit clean and dry. Wrap exposed cable ends with electrical tape to keep moisture and corrosion away.
Store electronics in a cool, dry place at home where temperatures stay stable. Keep items in padded boxes or original cases to prevent bumps and scratches.
Label each piece and its cables so you can reconnect quickly in spring. Include small bags for screws and adapters to avoid losing parts.
PRO TIP
Take photos of wiring before disconnecting. Those pictures will make reinstalling faster and reduce mistakes.
11) Lubricate moving parts and hinges
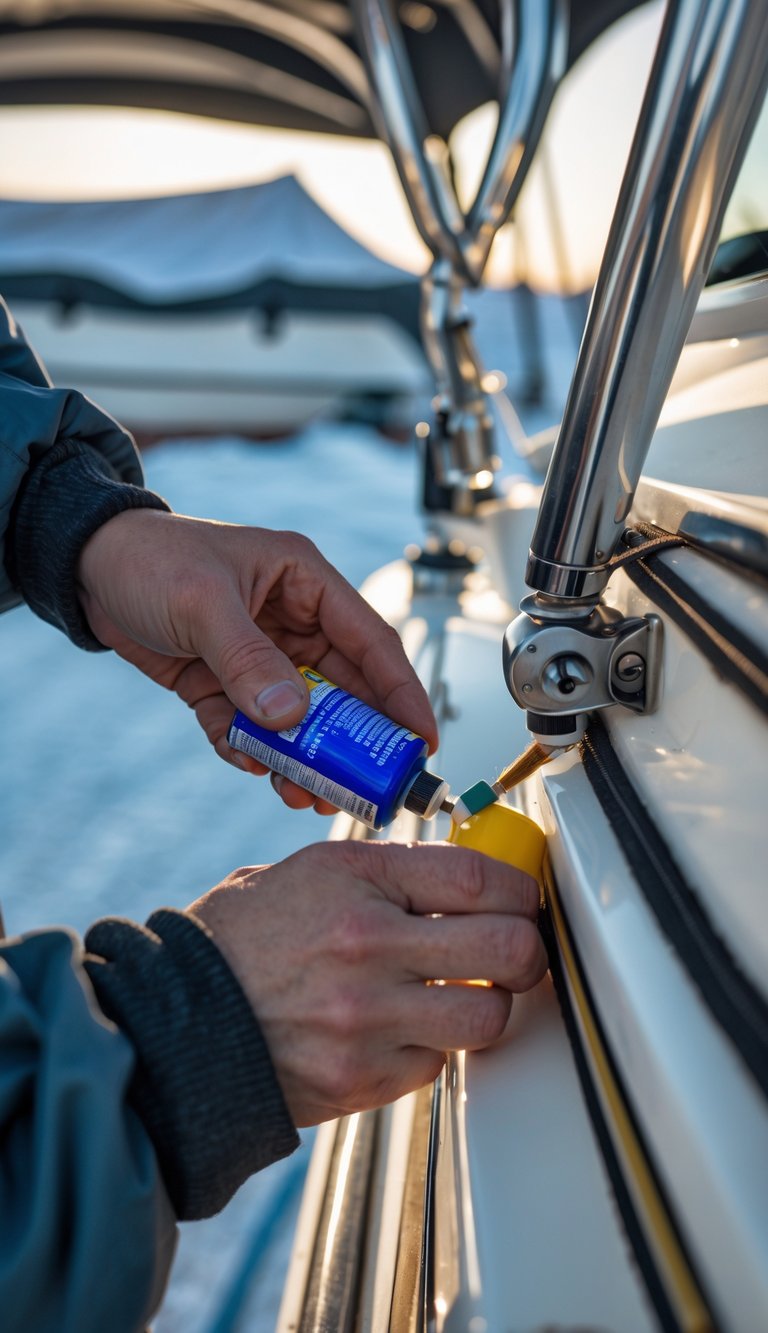
You should lubricate all moving parts before storing your boat for winter. Grease steering linkages, throttle cables, hinges, and latches to stop rust and stiffness.
Remove the propeller to check the shaft and seals, then apply water-resistant grease where needed. Don’t forget wheel bearings on trailers and any exposed fittings that move.
Coat battery terminals with dielectric grease after cleaning to prevent corrosion. Use a moisture-displacing spray on tight spaces to push out water and protect metal.
PRO TIP
Work in small sections and wipe away excess lubricant so dirt won’t stick. Recheck these parts again when you take the boat out in spring.
12) Drain fuel or add fuel stabilizer
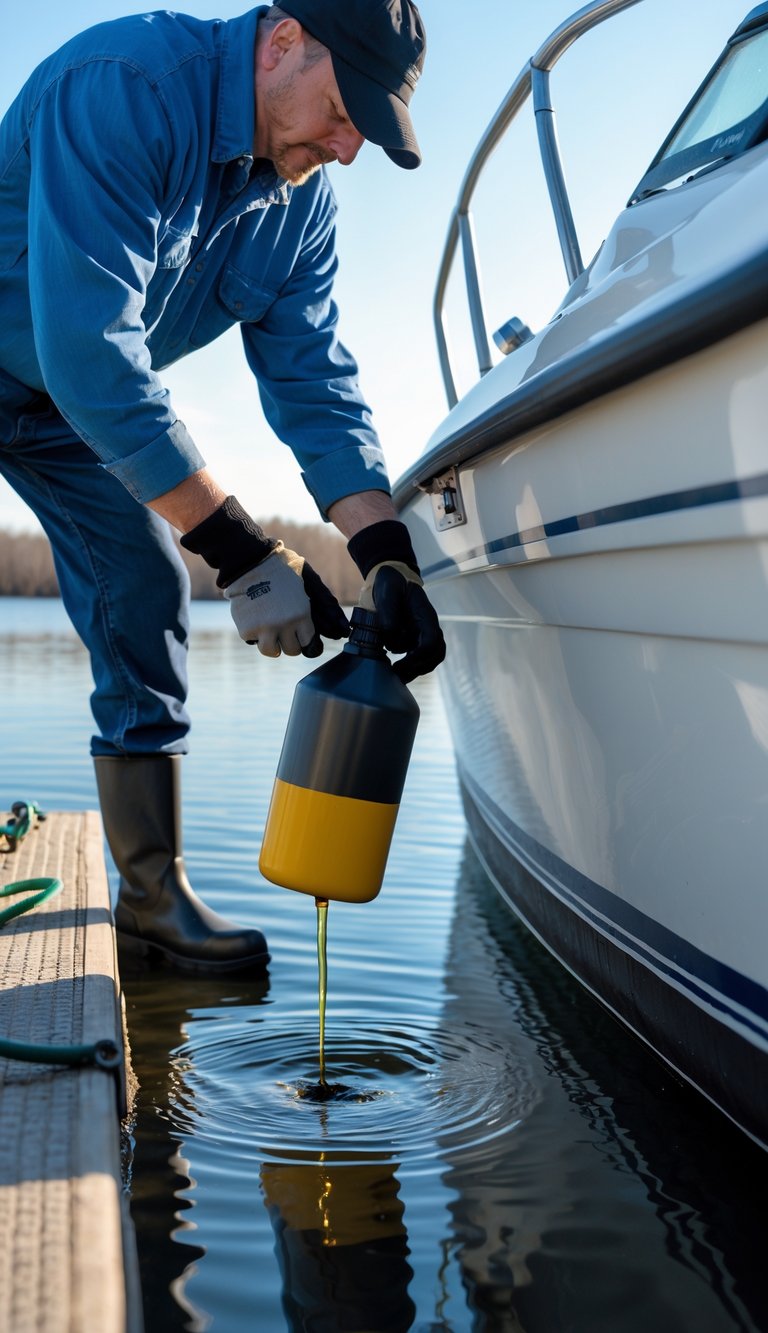
When you store your boat for winter, decide whether to drain the tank or treat the fuel. Old gas breaks down and can clog lines, so emptying the tank removes that risk.
If you keep fuel in the tank, fill it to 90–95% to limit condensation. Then add a marine-grade fuel stabilizer and run the engine for 10–15 minutes so the treated fuel reaches the fuel system.
Changing the fuel/water separator and inspecting lines helps prevent varnish and corrosion. If you have an outboard or carbureted engine, consider draining carbs or fogging the engine after treating the fuel.
PRO TIP
Label the date and product used on the tank or a maintenance log so you know when to refresh or drain before spring.
13) Check and repair hull for cracks
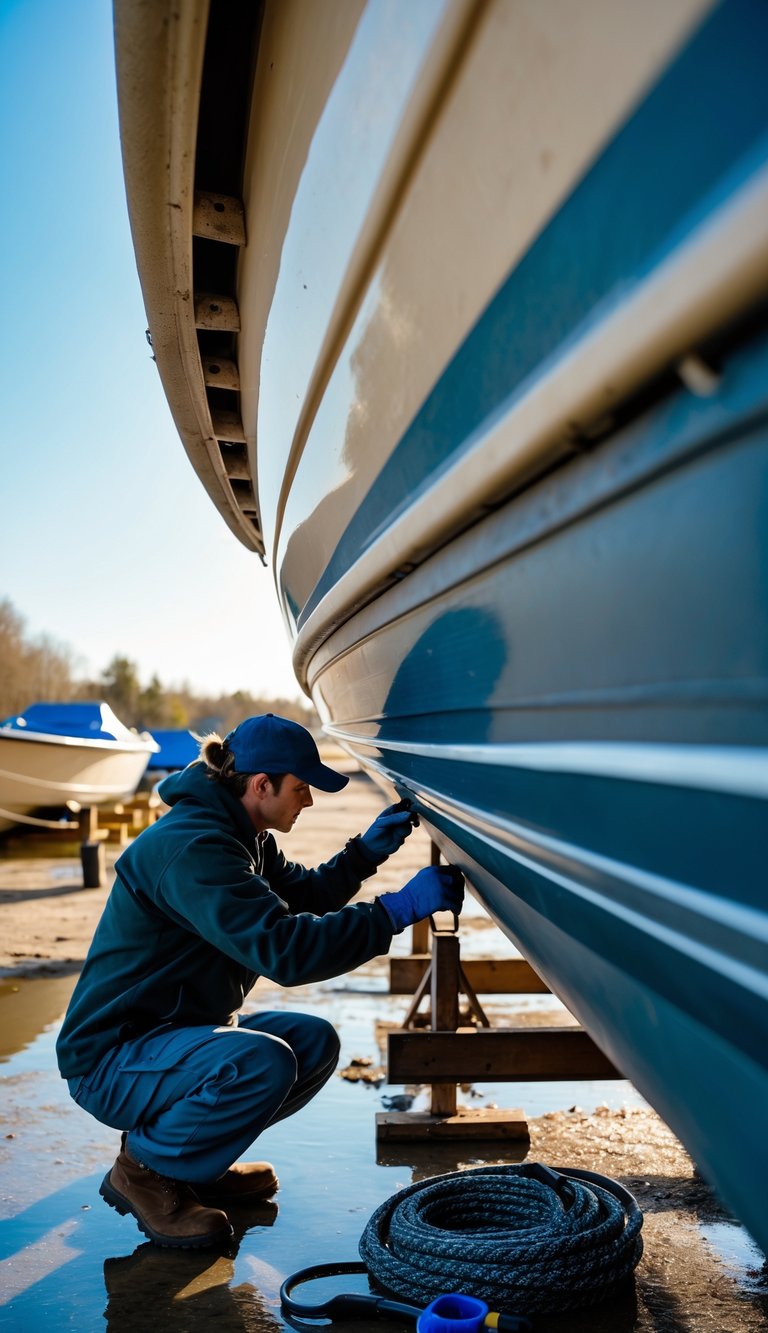
You should inspect the hull carefully before storage. Look for hairline cracks, soft spots, or areas where paint or gelcoat is lifting.
Small cracks can grow over winter from freezing and movement. Repair minor damage with an appropriate marine filler or gelcoat patch so moisture cannot work in.
If you find larger cracks or structural damage, have a professional assess and fix them. Leaving big issues until spring can lead to more costly repairs and unsafe conditions.
Keep the hull clean and dry while you make repairs. A dry surface helps patches bond better and lets you spot other weak areas.
PRO TIP
Use a flashlight and run your hand along seams to find hidden cracks. Photograph damage for records and repair estimates.
14) Use rodent repellents inside storage
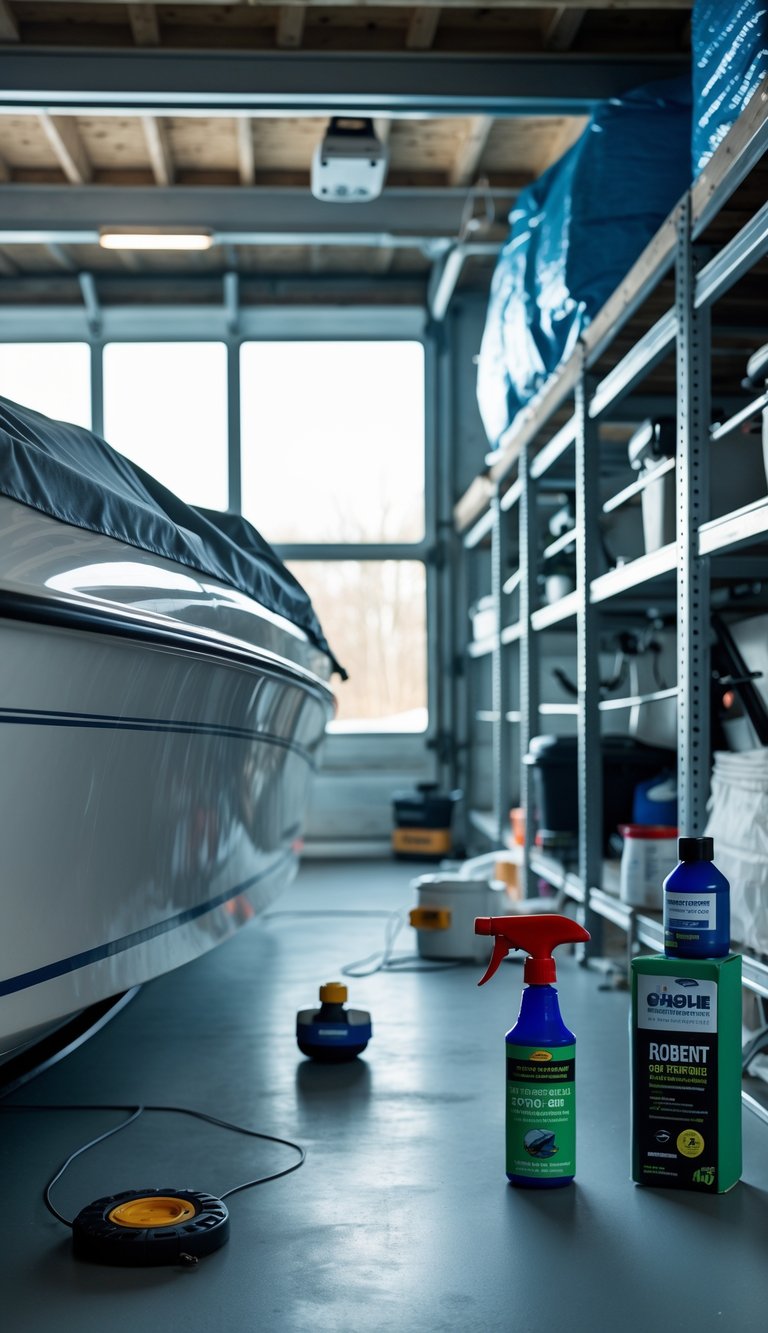
Place repellents in cabins, storage lockers, and engine bays to keep mice and rats away from wiring and upholstery. You can use natural options like peppermint oil on cotton balls or commercial rodent-repellent blocks made for boats.
Ultrasonic devices offer a hands-off solution, but they work best alongside other measures like sealing entry points and removing food sources. Mothballs and dryer sheets sometimes help, yet they can be toxic or only mask smells temporarily.
Check repellents regularly and replace them each season or sooner if they lose scent. Follow product labels and avoid placing anything near bilge pumps or ventilation intakes where fumes could build up.
PRO TIP
Tuck repellents into small mesh bags so they won’t get lost or damage surfaces, and rotate types each year to reduce the chance rodents get used to one scent.
15) Secure mast and rigging for storage
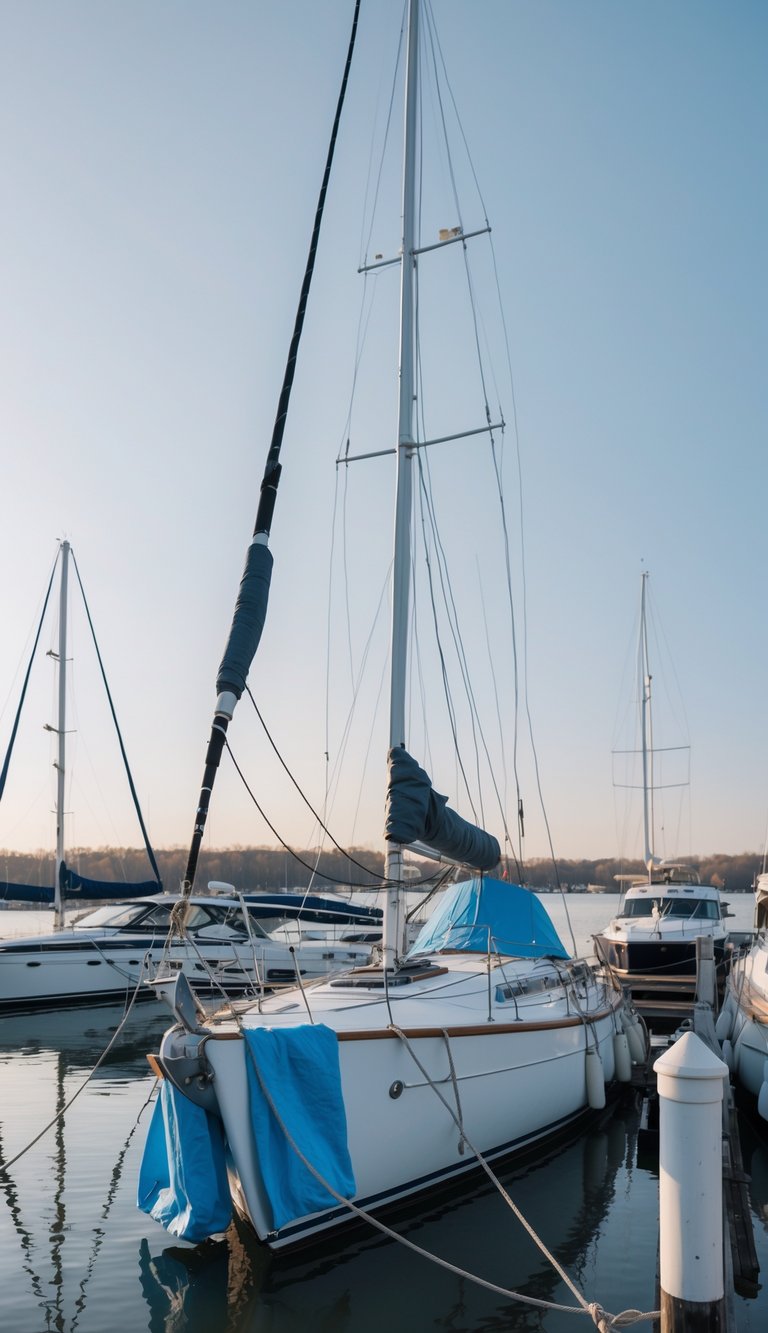
You should lower or secure the mast before storage unless you plan long-term rack storage with professional support. Tension the standing rigging to the correct spec so wires don’t relax and chafe during cold months.
Remove sails, halyards, and loose gear to prevent wind damage and moisture buildup. Coil and bag halyards, then label them so re-rigging is faster in spring.
Protect turnbuckles and swage fittings with corrosion inhibitor and cover exposed terminals. Use chafe guards where rigging contacts the mast or deck to avoid wear while the boat shifts.
PRO TIP
If you leave the mast up, lash it at multiple points and add a safety halyard to prevent movement. Have a rigger inspect fittings every few years to catch hidden issues early.
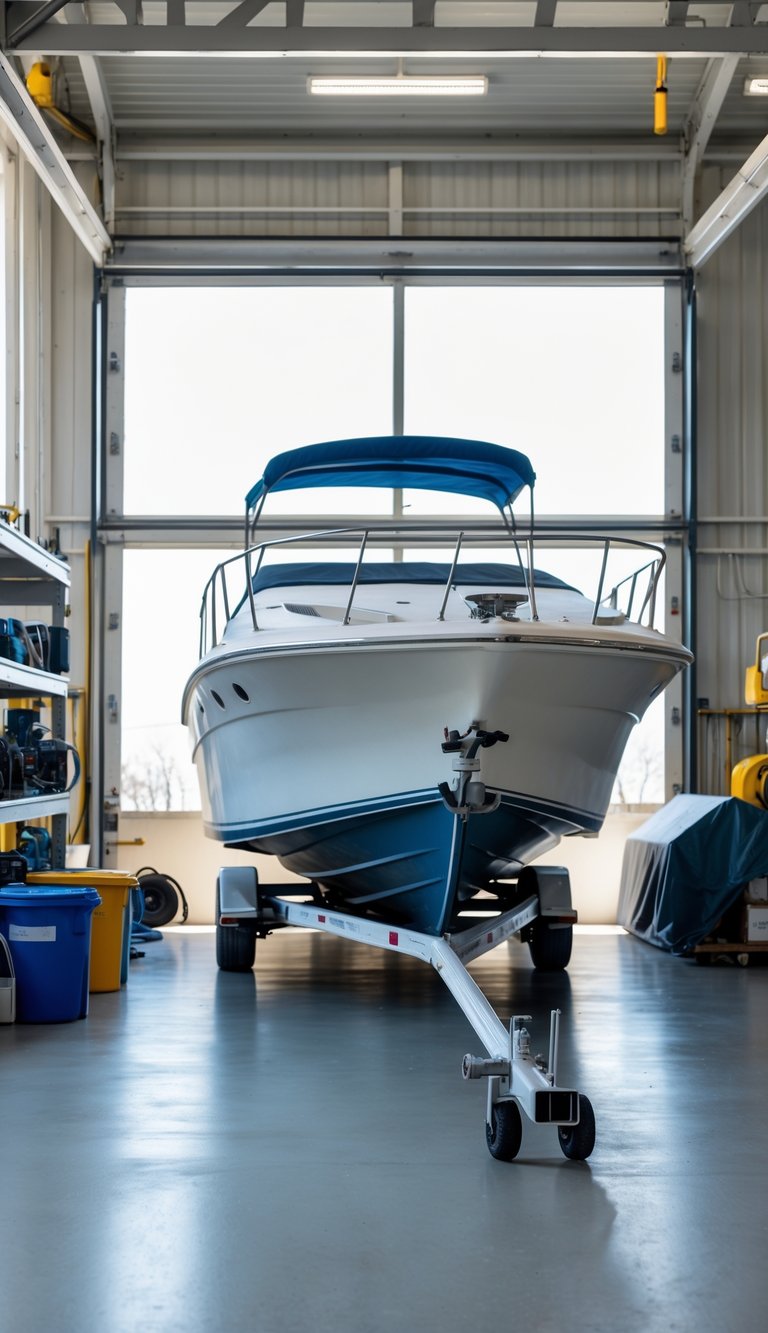
16) Store boat on a dry rack or trailer
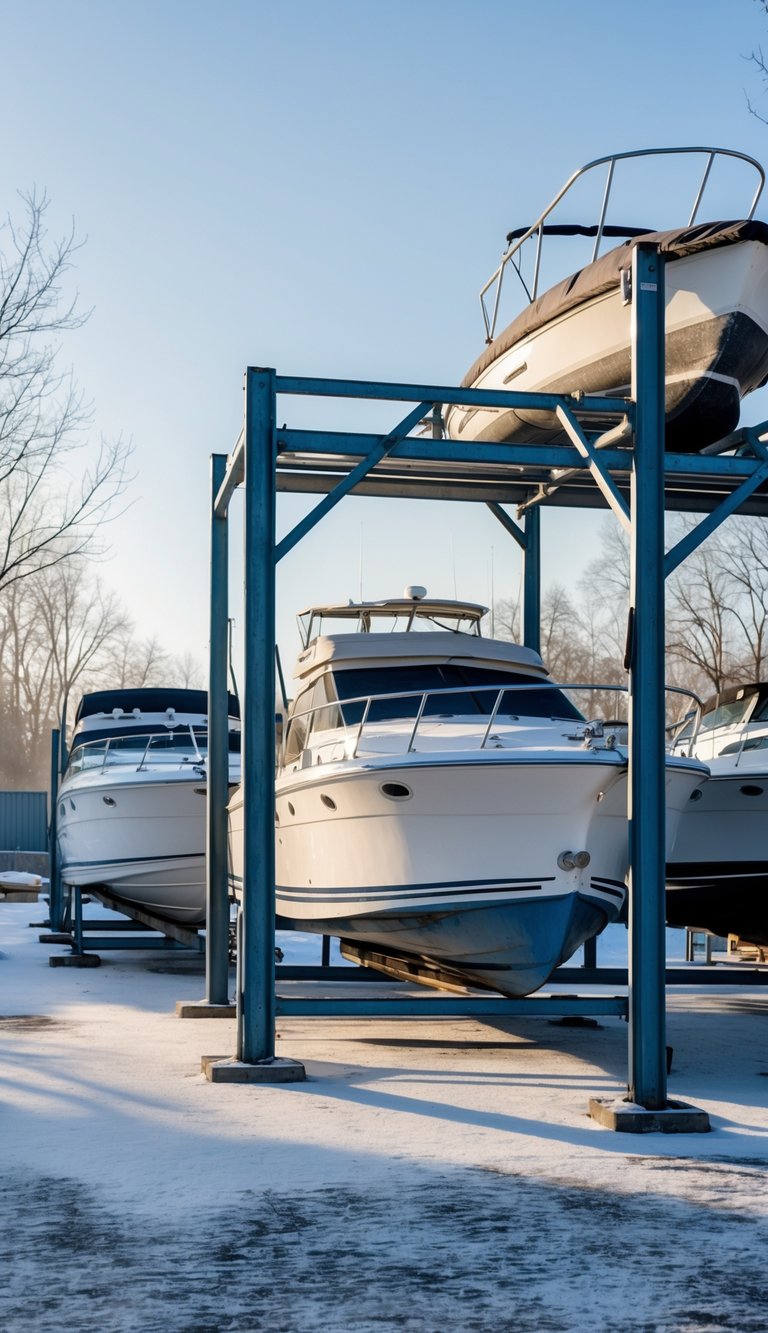
Storing your boat on a dry rack or trailer keeps it off the water and reduces hull damage from ice, algae, and constant moisture. You get easier access for maintenance and winterizing tasks like draining systems and fogging engines.
Dry racks stack boats vertically in a marina and save space. They protect hulls better than slips but often cost more and may limit access during storms.
A trailer lets you move the boat to a garage, storage lot, or driveway. Make sure the trailer frame, bunks, tires, and brakes are in good shape before long-term storage.
PRO TIP
Support the hull at manufacturer-recommended points and use wheel chocks and a cover or shrink wrap to keep out pests and moisture.
17) Elevate boat off the ground if outdoor
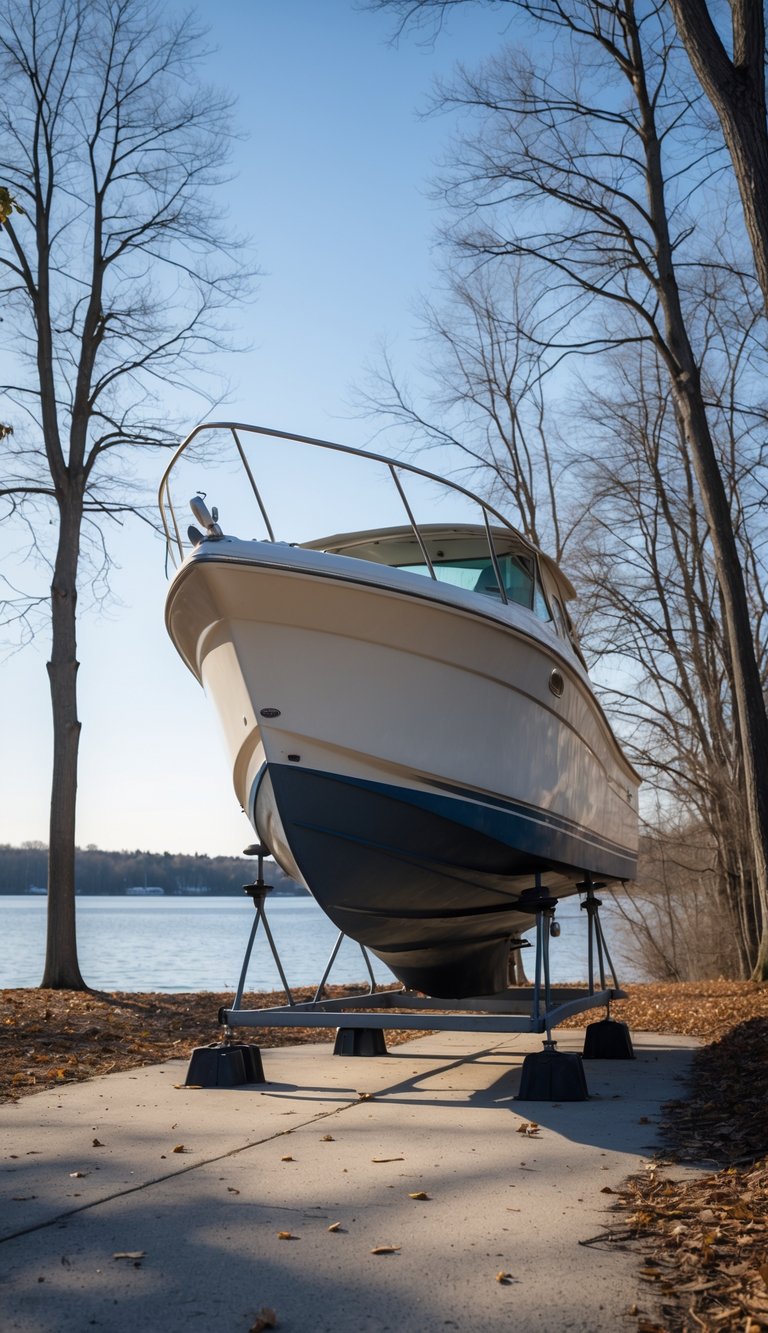
Keeping your boat off the ground prevents moisture from wicking into the hull and helps avoid rot, mold, and rust. Use sturdy stands, blocks, or a trailer to lift the boat and distribute weight evenly.
Place supports under strong points like stringers or keel, not under the hull skin. Check that blocks sit on firm, level ground to avoid shifting during freeze-thaw cycles.
Strip the prop and drain plugs to prevent water buildup, and put breathable padding where supports touch the hull. This lowers pressure points and protects finishes.
PRO TIP
Jack stands rated for the boat’s weight plus wide wooden pads work well on soft soil. Recheck supports monthly and after storms to keep your boat stable.
18) Remove drain plugs after use
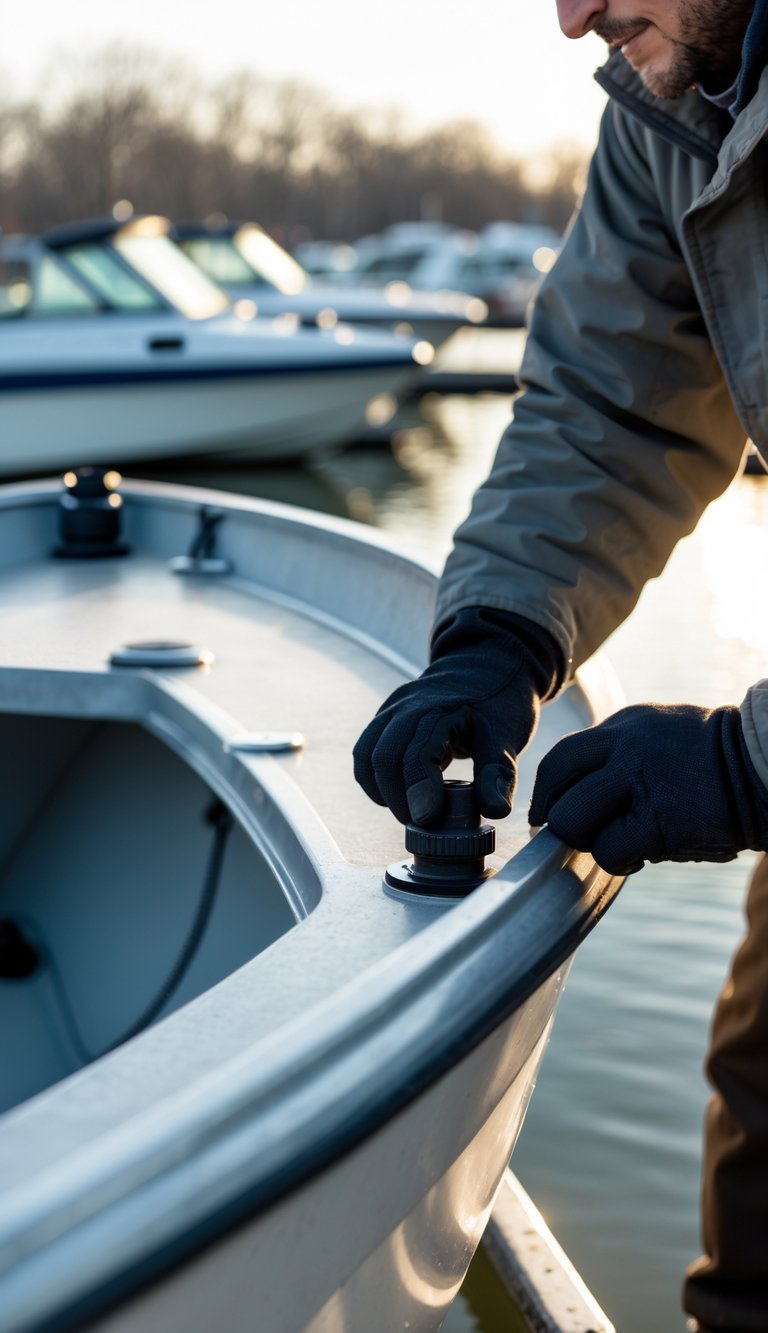
Take the drain plugs out when you store your boat for winter. Leaving them in can let rain or melting snow collect inside the hull and freeze, which can crack fiberglass or damage fittings.
Set the boat so the bow sits slightly higher than the stern to help water run out. Check all scuppers and bilge areas and wipe them dry before you leave the boat.
Keep the removed plugs together in a labeled bag or box so you can find them in spring. Mark where each plug came from if you have more than one size or style.
PRO TIP
Put a small tag on the hull or in your storage checklist to remind yourself to reinstall plugs before launching.
19) Freeze-proof marine toilet systems
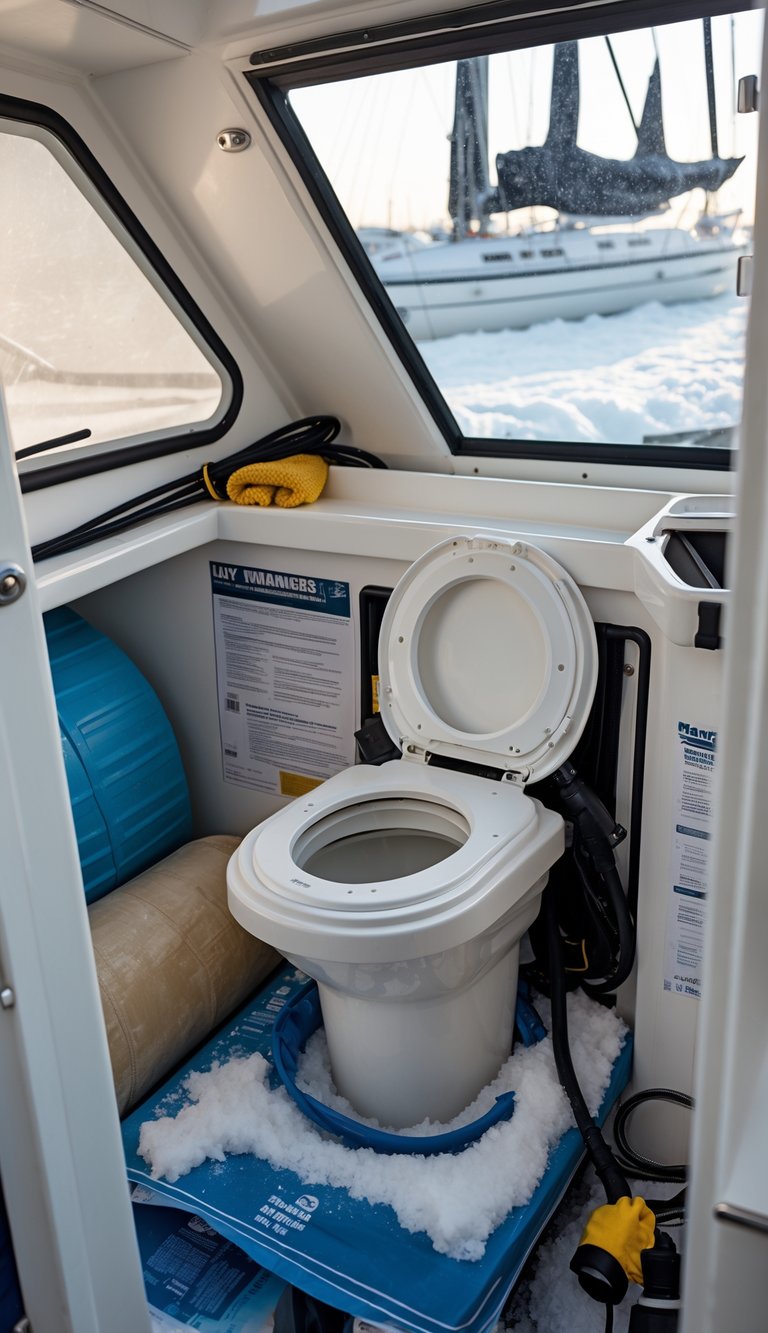
You need to prevent water in the head from freezing. Ice can crack hoses, pumps, and the holding tank, which leads to costly repairs and foul smells.
Choose a toilet system designed for cold storage or winterize the one you have. Drain all water, flush antifreeze through the bowl, pump, and holding tank, and open seacocks or valves to let any trapped water escape.
Remove and store portable units indoors if possible. For installed systems, use non-toxic marine antifreeze and follow manufacturer steps to avoid damaging seals or sensors.
PRO TIP
Label valves and parts you adjusted so you remember how to restore the system in spring.
20) Seal all hatches and ports tightly
You want to keep water, cold air, and pests out of your boat all winter. Check every hatch, port, and deck fitting for worn seals or loose fasteners before you leave the boat for the season.
Clean the sealing surfaces and replace old gaskets or O-rings when needed. Tighten latches evenly to avoid warping, and use marine-grade sealant on any gaps you find.
If you have vents, consider installing removable covers that still allow minimal airflow without letting in moisture. For long-term storage, tape or plug small openings to stop insects and rodents.
PRO TIP
Mark the date when you replace seals so you know when to inspect them next year.
21) Use desiccant packs inside cabin
Place several clay or silica desiccant packs around the cabin to cut down on moisture. They pull humidity from the air and help stop mold, mildew, and musty smells while the boat sits.
Put packs in lockers, under cushions, and inside electronics compartments. Check them every few weeks; many packs change color or feel heavier when saturated.
You can recharge some clay or silica packs by drying them in a low oven per the maker’s instructions. Single-use packs are cheap to replace and work well for long-term storage.
PRO TIP
Put packs in breathable bags or mesh pouches so they don’t leave residue on fabrics. Rotate or replace them before spring to keep the cabin fresh.
22) Inspect and clean bilge pumps
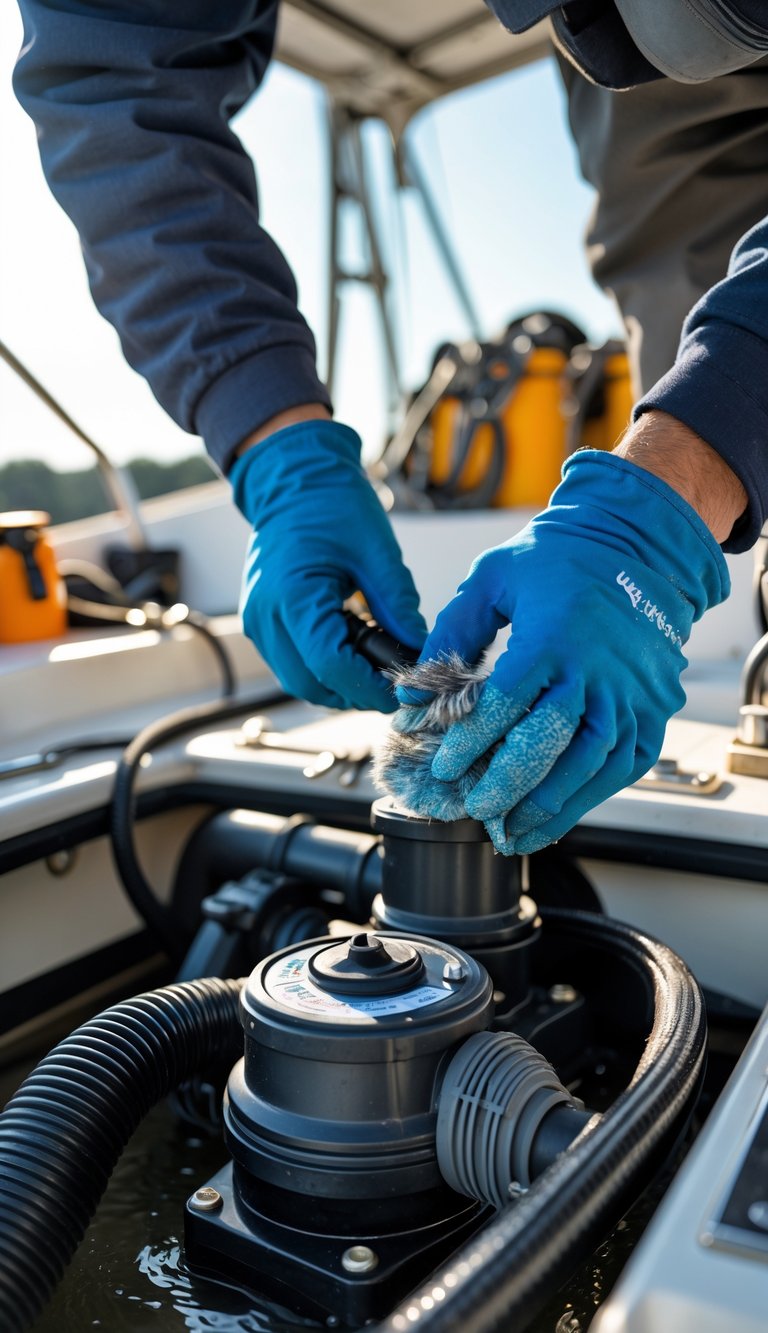
You should check the bilge pump before storing your boat for winter. A working pump prevents water buildup that can freeze and damage fittings or electronics.
Remove debris and wipes from the bilge and test the pump manually. Run the pump with fresh water to confirm flow and listen for unusual noises that signal wear.
Inspect hoses for cracks, clogs, or soft spots and tighten hose clamps as needed. Replace any corroded wiring or corroded terminals to avoid failure during cold weather.
Check the float switch and any automatic sensors to make sure they move freely. If the switch sticks, clean or replace it so the pump will operate when you need it.
PRO TIP
Lift the float by hand while the pump is running to confirm it activates reliably. Small spares like hose clamps and a backup pump can save you from costly winter surprises.
23) Disconnect shore power cables
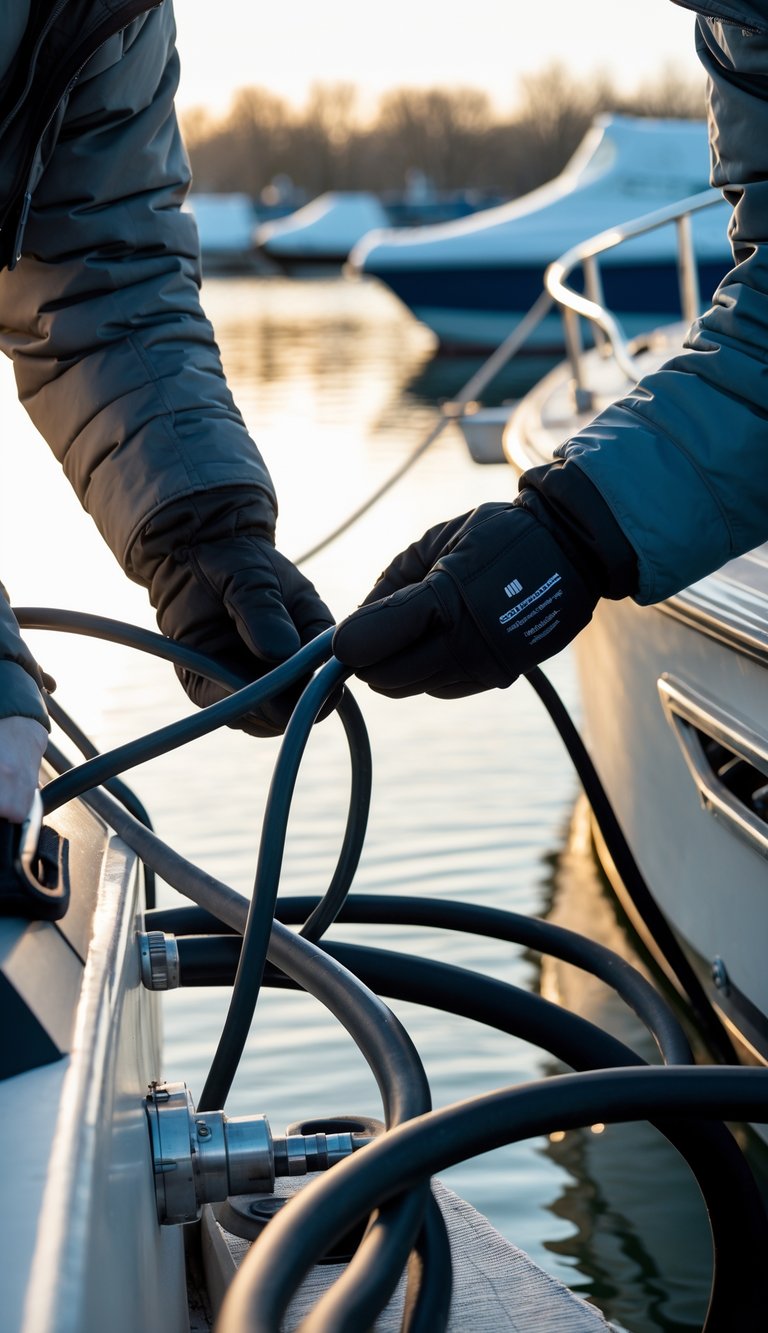
When you store your boat for winter, unplug the shore power cable first. This stops any stray current from drawing on batteries and reduces fire risk.
Label or zip-tie each cable so you know which goes where when you return. Disconnect one terminal at a time and keep the ends clean and dry to avoid corrosion.
Coil the cable neatly and store it in a dry locker or onboard compartment if space allows. Leaving the cable attached to the dock can expose it to weather and theft.
PRO TIP
Take a photo of how cables connect before you unplug them. A quick picture makes reconnection simple and prevents wiring mistakes in spring.
24) Treat canvas and upholstery with protectant
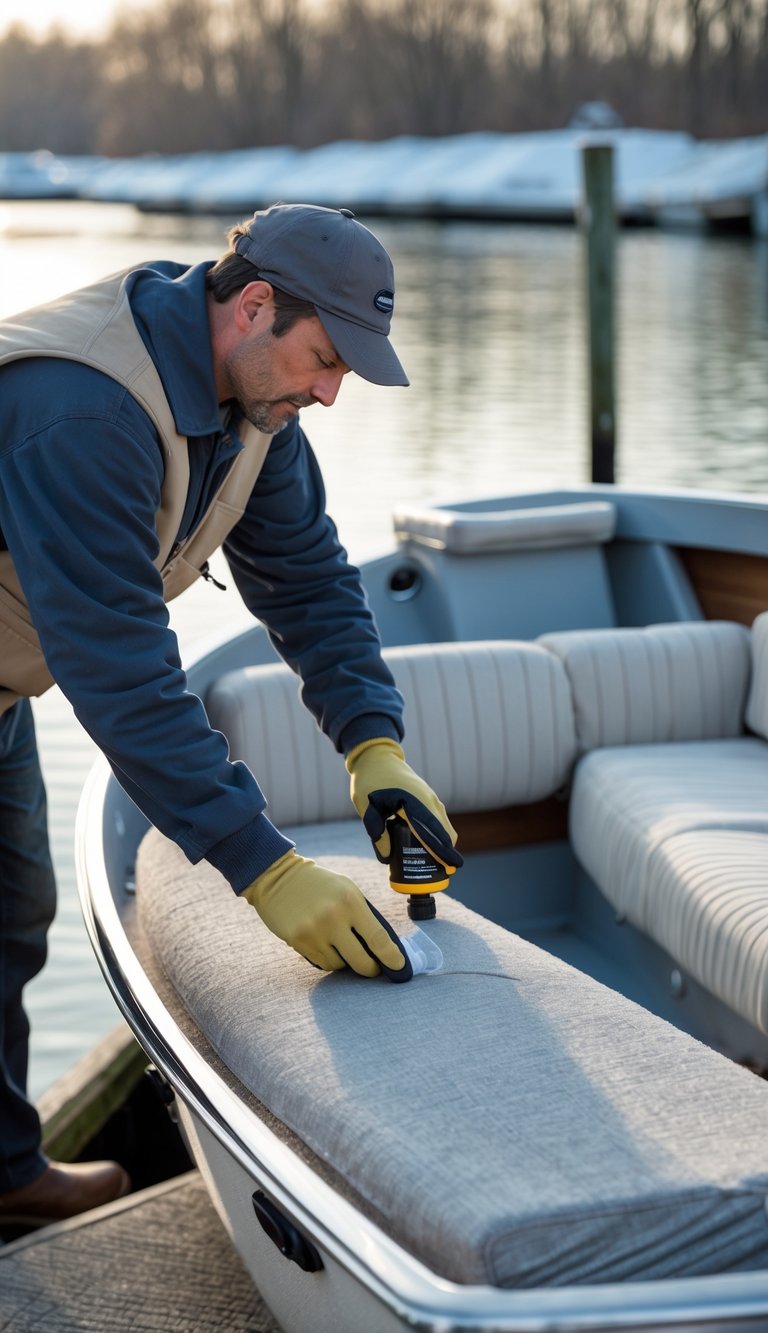
You should clean canvas and upholstery before applying any protectant. Dirt and salt trap moisture and wear down fabric fibers, so start with a gentle marine cleaner and rinse well.
Choose a protectant made for marine fabrics and clear vinyl. These products block UV rays, repel water, and slow mildew growth without changing color or feel.
Apply protectant evenly and let it dry fully before packing the boat away. Work in small sections and follow the product directions for coverage and reapplication intervals.
PRO TIP
Test the protectant on a small, hidden spot first. This prevents surprises and helps you confirm colorfastness and compatibility.


