Last Updated on June 22, 2026
You’ll find simple, practical ways to keep your garage warmer, lower energy loss, and stop drafts this winter. This article walks you through 16 tested insulation ideas so you can choose what fits your budget, tools, and comfort goals.
You’ll learn options that work for quick DIY fixes, full-panel upgrades, and low-cost tweaks that make a real difference.
Expect clear steps and honest pros and cons for each idea, from reflective foil and foam panels to weatherstripping, seals, and recycled materials. Use these tips to make your garage more comfortable, protect stored items, and reduce cold air that seeps into your home.
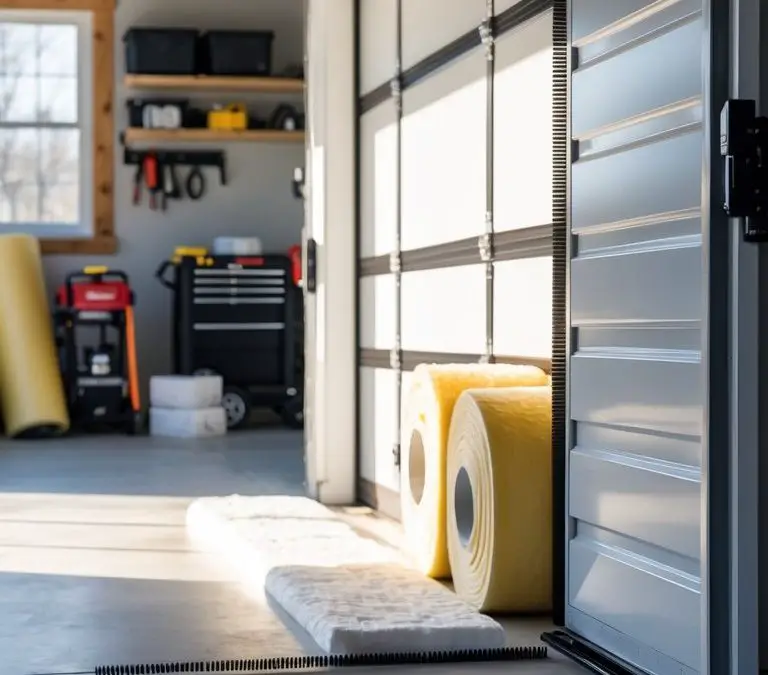
Start by checking where cold air enters and set a small budget for the fixes you can do right away. Measure the door panels, gaps, and any windows before buying materials. Prioritize sealing gaps and adding a bottom seal or threshold to stop the largest drafts first; this often gives the biggest comfort gain for the least cost.
If you plan to work on panel insulation, choose removable options or Velcro mounts so you can open the door for maintenance. For tight spots, use spray foam or insulation tape, and protect pipes with foam insulation to avoid freezing. Keep a checklist of materials and a simple schedule so you tackle the highest-impact items on one weekend rather than spreading tasks out and losing momentum.
1) Use Reflectix Reflective Foil Insulation for easy DIY installation
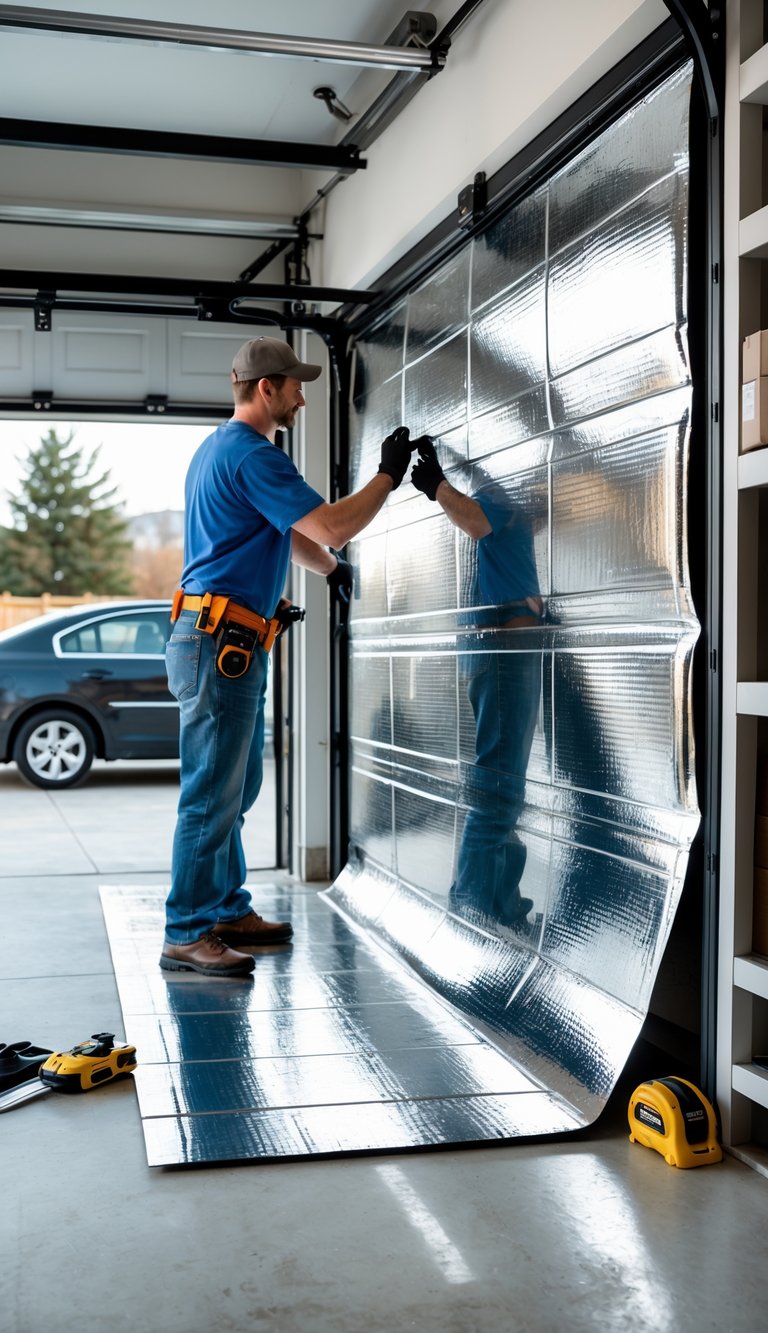
You can cut Reflectix with scissors or a utility knife to fit each garage door panel. It comes in rolls and sheets, so you can work one section at a time without heavy lifting.
Staple tabs or tape hold the foil in place quickly, making installation fast even if you work alone. The reflective surface reduces radiant heat transfer, which helps keep your garage warmer in winter and cooler in summer.
Reflectix is thin and lightweight, so it won’t add much bulk behind the door. That makes it a good option if your door has limited clearance or tracks that could bind.
PRO TIP
Measure each panel before cutting to avoid gaps and overlaps that reduce performance. Use a straightedge and mark the foil lightly so you make clean cuts. If your garage door has windows, cut the foil to fit around them and seal edges with foil tape to prevent drafts. Wear gloves when stapling to protect your hands and use a low-tack adhesive or double-sided tape on tricky spots to keep the foil flat. Check door operation after installing one panel to confirm nothing interferes with movement before finishing the rest.
2) Install Owens Corning Foamular Rigid Foam Panels for high R-value
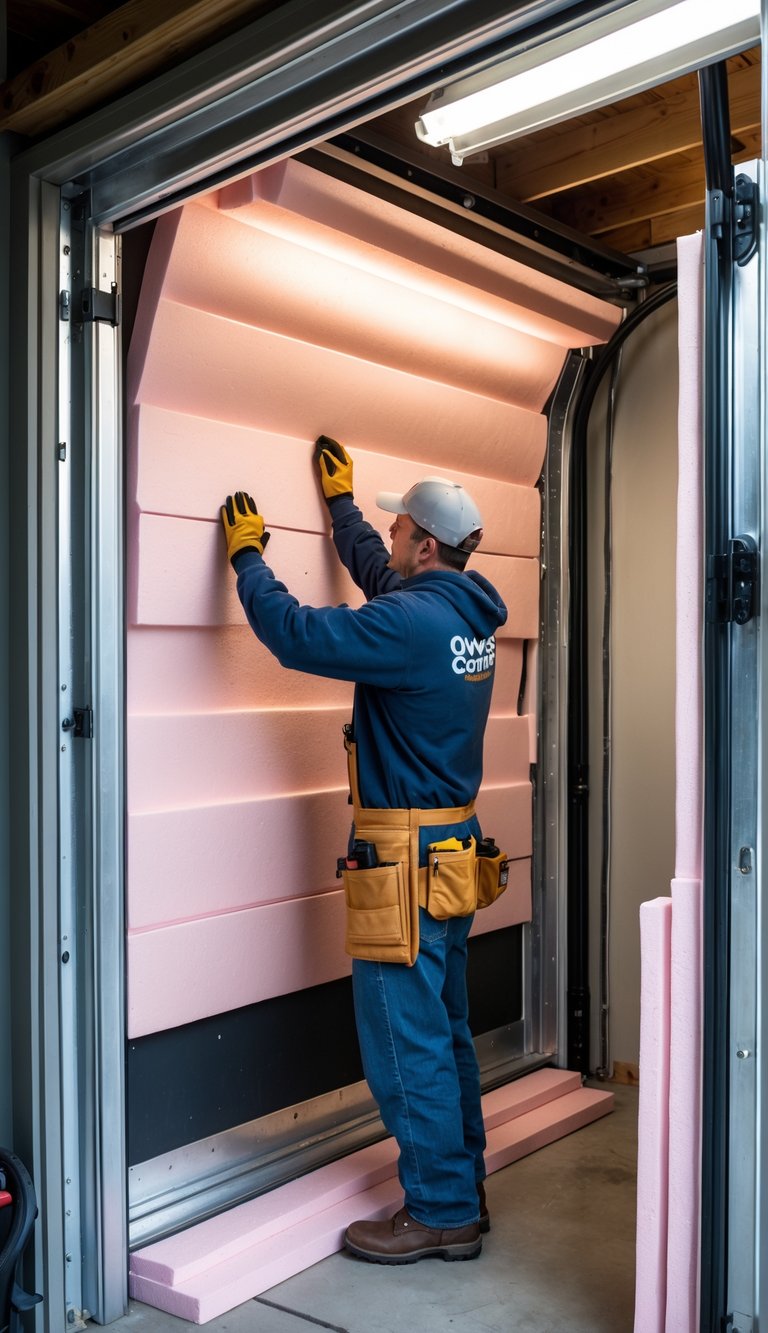
You can boost your garage’s insulation by installing Owens Corning FOAMULAR rigid foam panels. These extruded polystyrene (XPS) boards give high R-value per inch, so a thin panel adds strong thermal resistance without eating much space.
Cut panels to fit between rails or adhere them directly to the door or wall. Seal seams with foam-safe tape or compatible sealant to stop air leaks and improve performance.
Make sure the surface is clean and dry before you apply panels. If you use them on an exterior wall, wait until the roof and wall are water-tight to avoid trapped moisture.
PRO TIP
When installing FOAMULAR, work in a well-ventilated area and wear gloves and eye protection to avoid irritation from cut edges. Measure twice and cut once; a straight edge and utility knife give the cleanest fit for thin panels. For best thermal performance, stagger panel seams and tape joints to create a continuous air barrier. If you need fire protection, cover the foam with a 15-minute thermal barrier like gypsum drywall where codes require it. Store unused boards covered to avoid UV exposure, and follow the manufacturer’s installation instructions for adhesion and fastening.
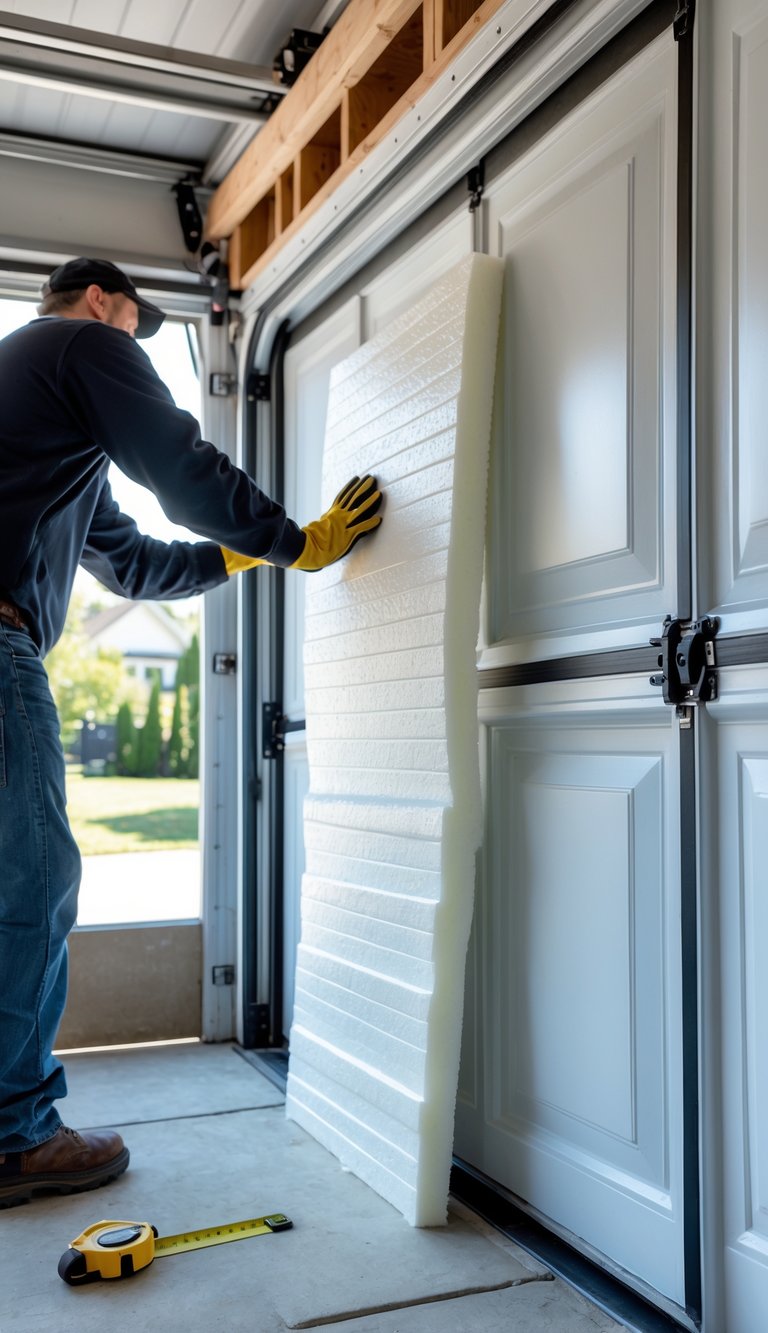
3) Apply M-D Building Products Garage Door Insulation Kit for a complete solution

You can use the M-D Building Products garage door insulation kit to get a neat, full-coverage result. The kit usually includes pre-cut panels and adhesive strips, so you save time cutting and fitting pieces to each door panel.
Measure your door first and dry-fit the panels to check placement. The kit’s panels fit inside the door panels and help reduce heat loss and drafts where the door meets the frame.
Installation is simple: peel the backing, press panels into each section, and trim any excess. This method works well if you want a tidy look and moderate R-value improvement without special tools.
PRO TIP
When you install the kit, wear gloves and safety glasses to avoid cuts from metal edges and insulation fibers. Start at the top panel and work down so panels align and adhesive sticks evenly. If your door has windows, cut panels to fit around the glass and add foam weatherstripping around window edges to stop drafts. Check the bottom seal of your door too; even good panel insulation won’t help if cold air comes in at the threshold. Finally, allow 24 hours for adhesives to set before heavy use and test the door opener to make sure added thickness won’t affect operation.
4) Seal gaps with silicone caulk to stop cold drafts

You can stop most cold drafts by sealing small gaps with silicone caulk. It works well around door frames, trim, and where the garage door meets the wall because it stays flexible when temperatures change.
Clean the area first so the caulk sticks. Use a caulk gun for a steady bead, then smooth it with a wet finger or a tool for a neat finish.
Silicone caulk resists moisture and shrinking, so it lasts through winter cycles. Avoid filling large gaps with caulk alone; use backer rod or foam for wide cracks before caulking.
PRO TIP
When you buy silicone caulk, pick a product labeled for exterior use and low-temperature application so it cures in cold weather. Apply caulk on a dry day above the product’s minimum temperature. Work in small sections and wipe excess with a damp cloth before it skins over. If the gap is bigger than about 1/4 inch, insert foam backer rod first to save caulk and improve insulation. Keep a tube of silicone and a spare caulk gun in your garage kit for quick touch-ups during winter storms.
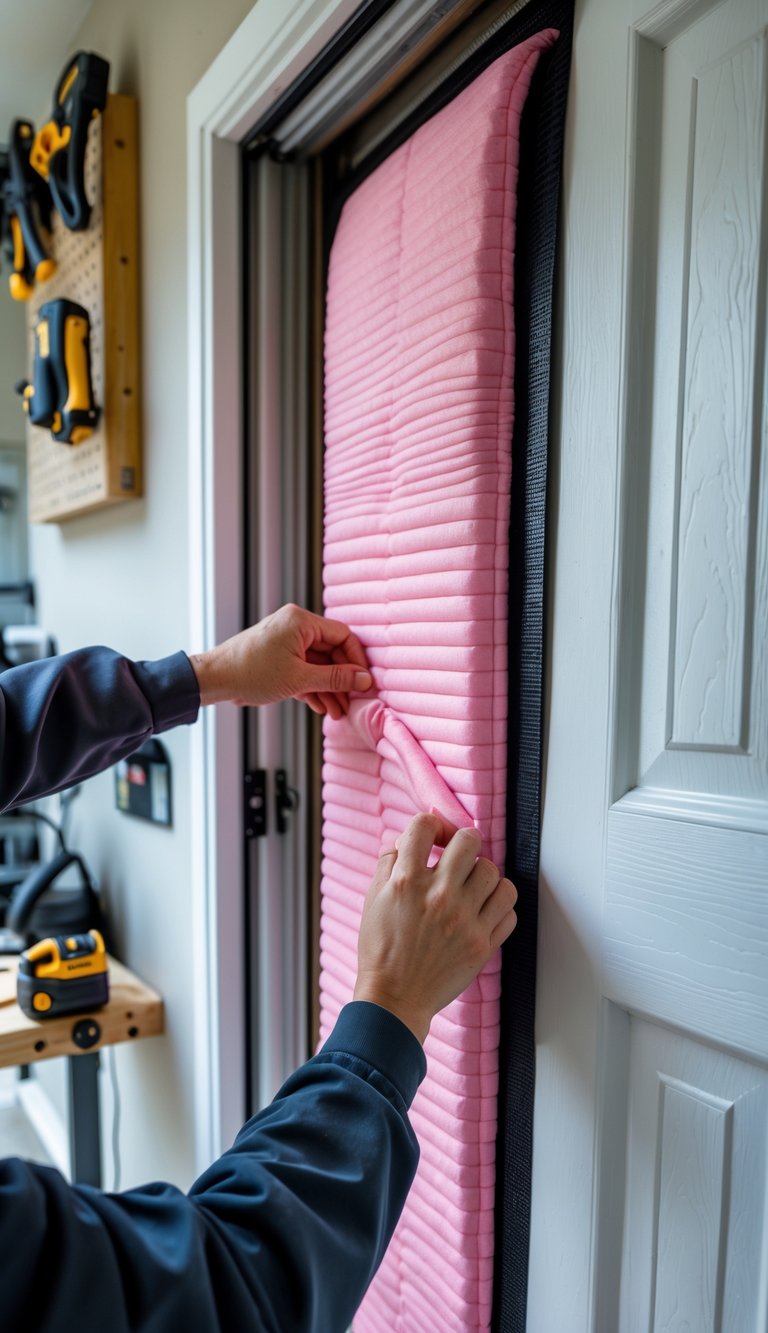
5) Add weatherstripping around the door edges for airtight sealing

Weatherstripping seals gaps around your garage door to keep cold air, moisture, and pests out. You can use rubber, vinyl, or foam strips that attach with adhesive or screws. Pick a material that matches your door type and local climate.
Clean the door edges before you install to help the seal stick and last longer. Measure carefully and cut the strips to fit so there are no gaps left. Check the seal by closing the door and looking for light or feeling drafts.
Replace worn or compressed weatherstripping each few years to keep it effective. A good seal improves comfort and can reduce heat loss from your home. Simple weatherstripping is one of the easiest ways to make your garage warmer in winter.
PRO TIP
Choose high-quality, weather-rated materials for the best results; cheap strips may crack or compress quickly in cold weather. If your garage sees a lot of rain or snow, use a durable rubber or silicone seal that resists moisture and stays flexible. For metal doors, consider adhesive-backed vinyl or a bulb-type rubber seal that compresses tightly without scraping paint. Install side and top seals as well as a bottom sweep to fully enclose the door frame. Test the fit on a cold, windy day by placing a thin piece of paper between the door and frame—if you can pull it out easily, tighten or replace the strip. Finally, clean and inspect seals each season and apply a silicone lubricant to rubber parts to prevent drying and cracking.
6) Use foam board insulation for a lightweight and effective barrier
Foam board panels give your garage door a thin, sturdy layer of insulation. They are light, so they won’t add strain to springs or tracks, and they fit neatly into most door sections.
You can cut foam board to match each panel, then secure it with adhesive or double-sided tape. The boards offer good R-value for their thickness, helping keep cold air out and heat in.
Foam board resists moisture better than fiberglass, so it reduces the risk of mold and sagging. It also works well with weatherstripping around the door edges for a tighter seal and better overall performance.
PRO TIP
When installing foam board, measure each door panel and mark cuts carefully to avoid gaps that let cold air through. Use a straightedge and utility knife for clean cuts, and test-fit each piece before gluing or taping. Choose XPS or polyiso for higher R-value, and add foil-faced boards if you want extra radiant heat reflection. If your door has windows or metal ribs, cut around them so insulation sits flush; use foam sealant for small gaps. Check the door balance after installing all panels. If the opener strains or the door feels heavy, adjust or consult a technician to protect springs and hardware.
7) Install foam pipe insulation on exposed garage pipes
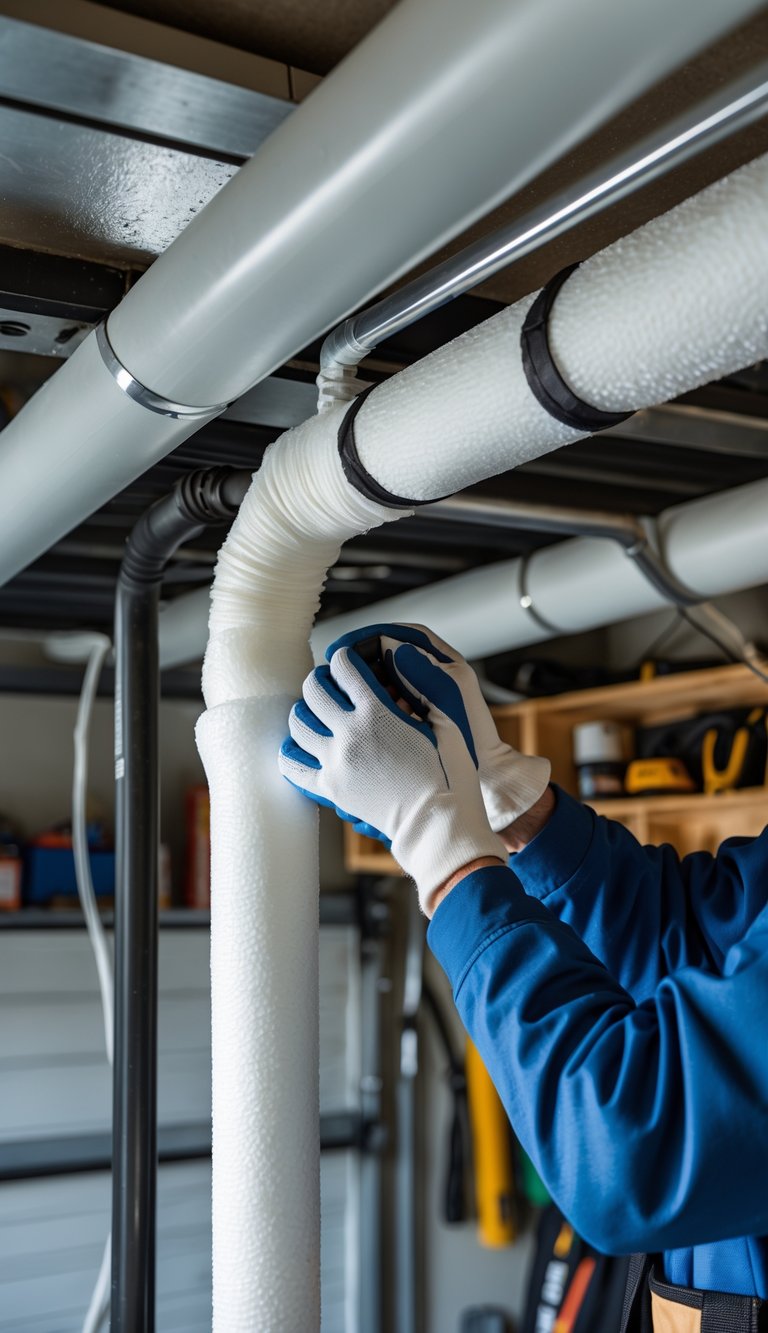
If your garage has exposed water or heating pipes, wrap them with foam pipe insulation to reduce heat loss and prevent freezing. Cut the foam to fit, then snap or tape it around the pipe; most foam sleeves come with a slit and adhesive strip for quick installation.
Insulating pipes is cheap and fast. You can cover joints and valves with small pieces of foam or pipe wrap to reduce cold spots.
PRO TIP
Use foam pipe insulation rated for the pipe diameter and the temperatures you expect in winter. Measure each run first and buy a little extra for elbows and valves. For outdoor-facing pipes, add a layer of foil tape over the seams to keep moisture out and improve durability. If pipes carry hot water, choose insulation with a higher temperature rating to avoid compression and gaps. Check insulation periodically for tears, and replace any damaged sections before a deep freeze. Simple steps now can prevent bursts and save you repair costs.
8) Attach thermal curtains inside the garage door for extra warmth
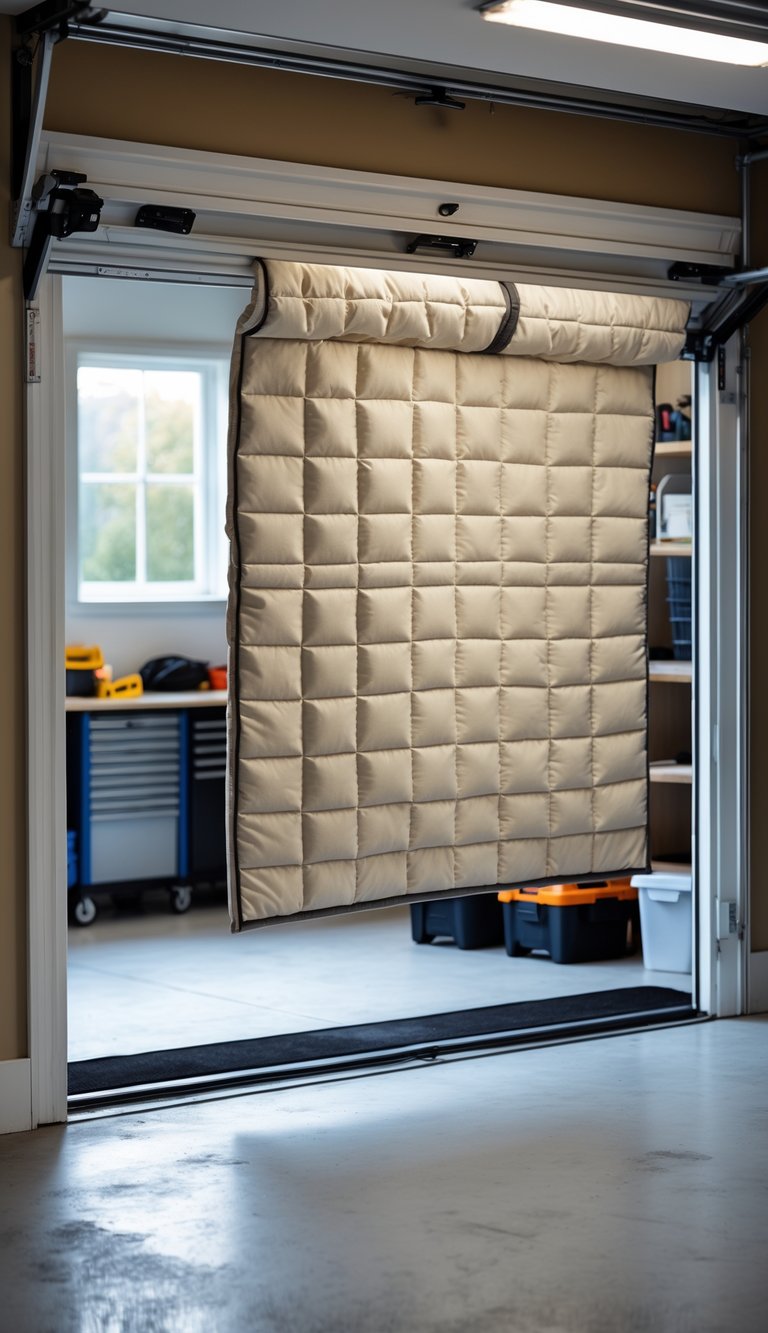
You can hang a thermal curtain on the inside of the garage door to block drafts and slow heat loss. These curtains use thick fabric and insulating layers to reduce cold air coming through panels and gaps.
Attach the curtain with magnets, Velcro, or snaps so you can remove it when you need the door. A weighted hem or clips at the bottom help keep the curtain in place during wind or when the door moves.
Make sure the curtain fits a little larger than the door opening for better coverage. Check that it won’t interfere with door tracks, sensors, or the opener before you install it.
PRO TIP
If you want the best results, choose a curtain made for garage doors that lists thermal or insulated layers. Measure the door width and height and add a few inches to each dimension so the curtain overlaps the frame; this overlap reduces drafts at the edges. Use magnetic strips or industrial Velcro if your door surface is metal, because those give a tight seal and are easy to remove for door use. For sectional doors, leave clearance for the panels to bend, or install the curtain on the interior face above the panels. Add a bottom-weighted strip or attach small weights to keep the lower edge sealed against cold gusts. If you have a door opener, confirm the curtain won’t catch on moving parts; mount higher or use quick-release fasteners so you can open the door quickly in an emergency.
9) Choose spray foam insulation for tight spots and hard-to-reach areas

Spray foam works well where batts or rigid panels can’t fit. It expands to fill gaps, cracks, and odd angles around your garage door frame and tracks.
You can use spray foam in corners, behind trim, and inside narrow cavities. It creates an airtight seal that helps reduce drafts and keeps cold air out.
For small DIY cans, apply carefully in short bursts to avoid overfill. For larger jobs or full perimeter sealing, hire a pro who can ensure even coverage and proper ventilation.
PRO TIP
Choose closed-cell spray foam when you need extra moisture resistance and higher R-value in a thin layer, and open-cell spray foam when you want better sound dampening and more flexibility for movement. When working with canned foam, wear gloves, eye protection, and a mask to avoid skin and lung irritation. Apply foam in mild temperatures and follow cure times before trimming or painting. If you plan to insulate the entire garage door system, consider combining foam with weatherstripping for the best airtight seal. For large or complex gaps, a professional installer can test for coverage and prevent over-application that can warp seals or hinges.
10) Velcro Mount Owens Corning Garage Door Kit panels for easy removal
If you want an easy way to remove insulation for warmer months, use heavy-duty Velcro to mount Owens Corning panels. Cut the Velcro strips to fit the panel edges and press the hook side to the metal door and the loop side to the vinyl-facing panels. This method keeps panels snug but lets you peel them off when needed.
Velcro reduces the need for clips or staples that can damage the door. It also speeds up installation and removal, so you can switch between insulated and uninsulated seasons in minutes.
PRO TIP
Choose industrial-strength, adhesive-backed Velcro designed for outdoor or garage use so it stays put through cold and moisture. Clean the door surface with rubbing alcohol before applying the hook strips to ensure a strong bond. Place Velcro at the panel corners and along the midpoints for even holding power, and test one panel first to check adhesion. If your door has deep channels or heavy texture, consider small screws or magnetic strips at the edges instead of relying only on adhesive. Store panels flat in a dry place when removed to keep them from bending or losing their vinyl facing.
11) Add a garage door bottom seal to block out moisture and cold
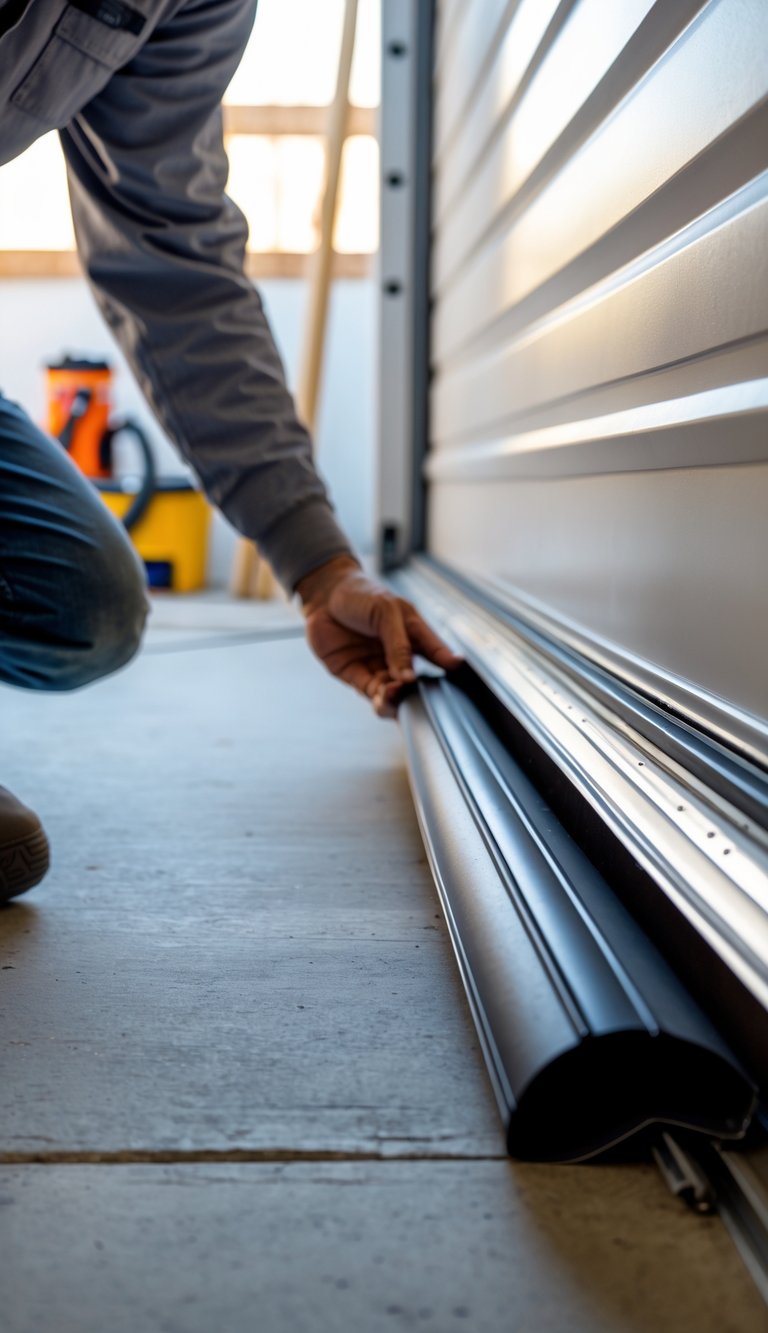
A garage door bottom seal fits along the bottom edge of your door to close the gap between the door and the floor. It keeps out cold air, rain, dirt, and small pests so your garage stays drier and warmer.
These seals come in rubber or vinyl and compress when the door closes to form a tight barrier. They are simple to install with screws or adhesive and you can cut them to size for a snug fit.
Check the seal each year for cracks, hardening, or gaps and replace it if it no longer compresses. A good bottom seal reduces drafts and helps your home heating work less hard.
PRO TIP
Choose a bottom seal that matches your garage door type and floor level for the best fit. Measure the door width and the gap height before buying so you get the right profile and length. If your floor is uneven, consider a flexible rubbersweep style that adapts to bumps and low spots. For heavy doors, pick a durable rubber with good weather resistance; for lighter doors, vinyl works well and costs less. Clean the mounting area and remove old adhesive before attaching the new seal. Tighten fasteners evenly so the seal sits flat and compresses evenly when closed. If water pooling is an issue, install a threshold strip on the floor first to lift the seal slightly and block runoff.
12) Paint garage door with insulating paint for added heat retention

You can boost heat retention by applying insulating paint to your garage door. This paint contains tiny ceramic or insulating particles that help reflect heat back inside and reduce heat loss through the door.
Start by cleaning the door and repairing any dents or rust for a smooth finish. Use a primer if the surface is bare metal or old paint, then apply the insulating paint in even coats.
Insulating paint works best as a complement to other measures like weatherstripping and foam panels. It won’t replace proper insulation, but it can help lower small heat losses and improve comfort in mild climates.
PRO TIP
When choosing insulating paint, check the product label for thermal performance data and follow manufacturer drying times between coats. Apply paint on a calm, dry day to ensure proper adhesion and avoid moisture trapping. For metal doors, use a rust-inhibiting primer first; for wooden doors, repair cracks and sand rough spots before priming. Use a brush for edges and a roller for large panels to get even coverage. Combine paint with sealing around the door perimeter and optional foam board on the inside for the best result. Keep realistic expectations—paint adds modest insulation, but it improves appearance and helps slightly with heat retention.
13) Use recycled denim insulation for eco-friendly soundproofing
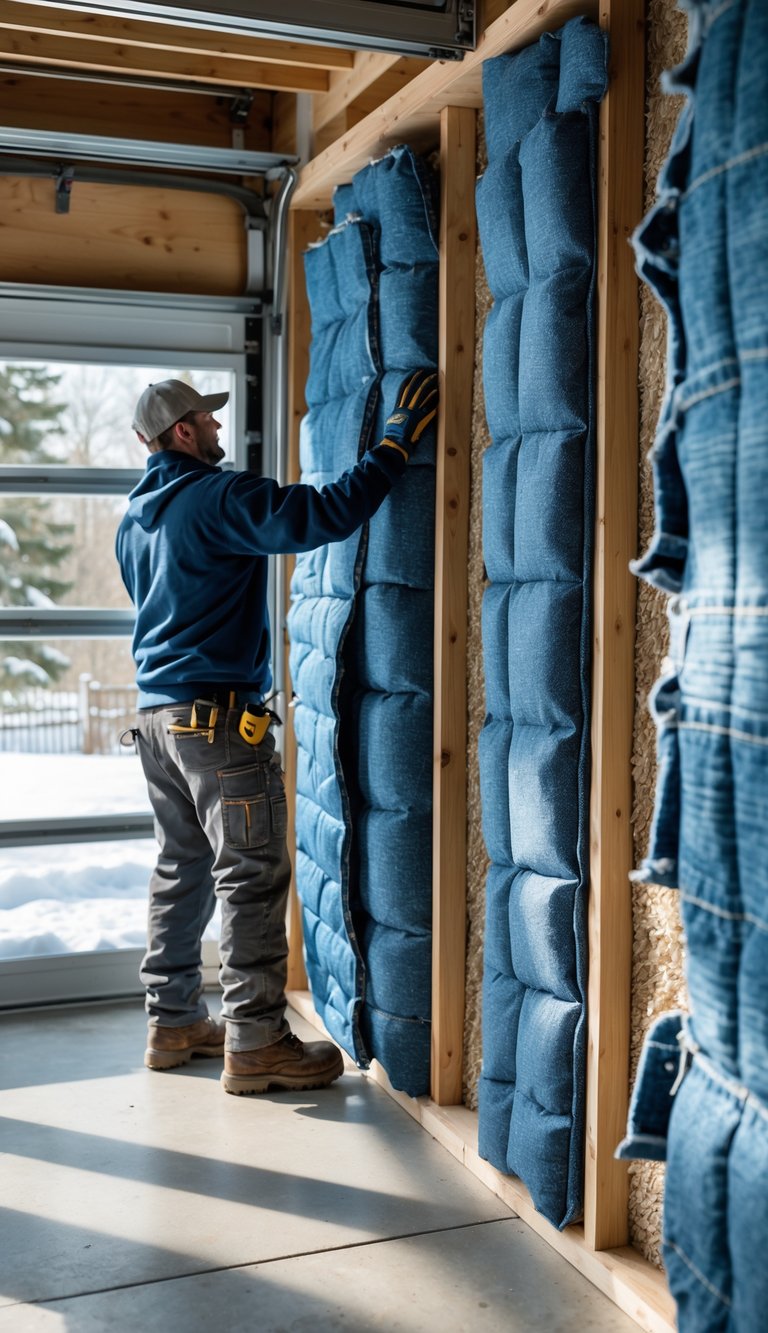
You can insulate your garage door with recycled denim batting to cut noise and improve winter comfort. This material comes from old jeans and cotton fibers, so it reduces landfill waste while adding thermal value.
Denim insulation is soft to the touch and safer to handle than fiberglass. It resists dust and itch, making installation easier if you do the work yourself.
It also performs well at absorbing sound in walls and doors. Adding denim panels behind the garage door skin reduces road and wind noise, making the space quieter for hobbies or storage.
PRO TIP
If you want the best results, measure the cavity depth in your garage door and buy denim batts that fit snugly. Use an adhesive or retention clips to hold the insulation in place and seal gaps around the edges with foam tape. Combine the denim with a thin interior skin, like plywood or MDF, to protect the insulation and improve sound mass. Also check the fire and moisture ratings of the product you choose and follow the manufacturer’s installation instructions for safety and warranty reasons.
14) Install a garage door threshold seal for floor-level insulation
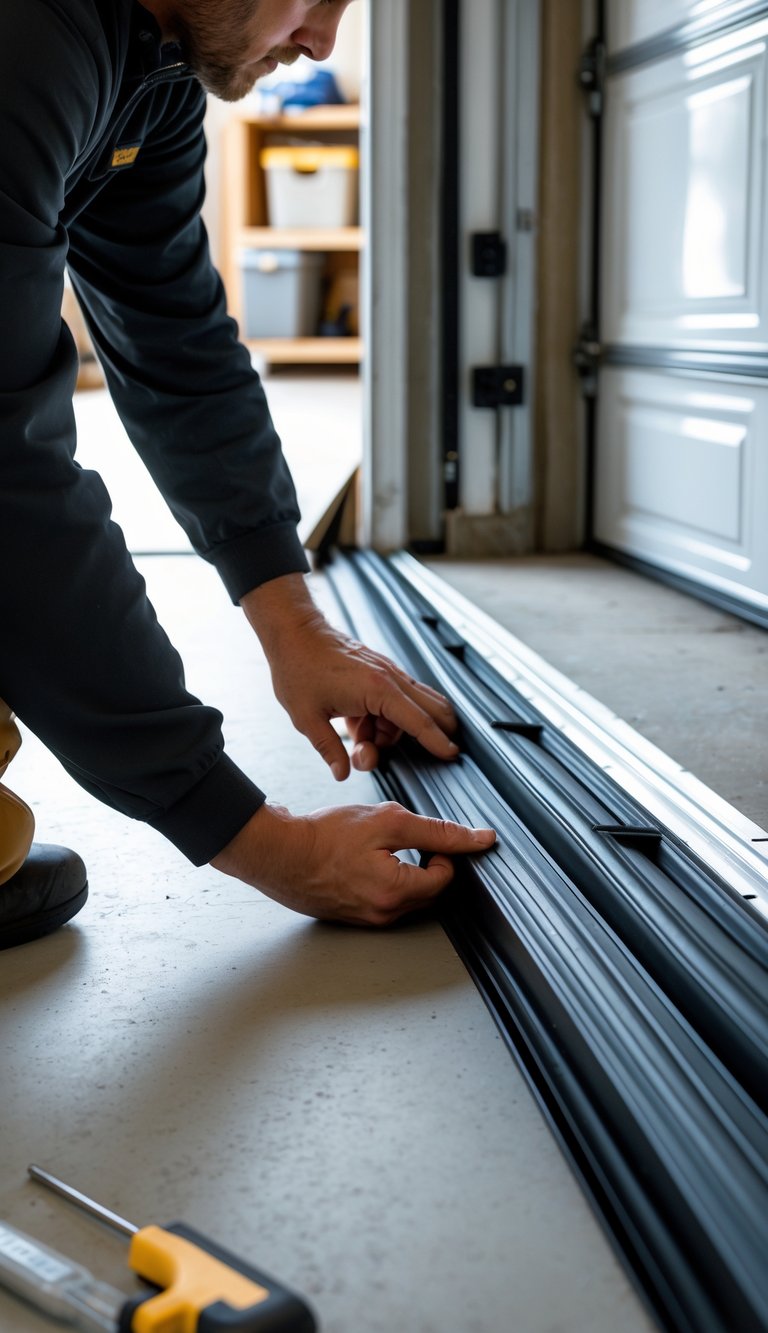
A threshold seal sits along the garage floor where the door closes. It blocks drafts, water, dirt, and small pests from coming under the door. This reduces cold air entering at ground level and helps your garage stay warmer.
Most threshold kits stick to concrete with adhesive or come with a peel-and-stick backing. You center the strip, trim it to fit, roughen the floor for better grip, and press it down firmly. Then lower the door onto the seal so the door makes a tight contact with the raised lip.
Threshold seals work with bottom door seals for better performance. They are inexpensive and simple to install, yet they can cut heat loss and keep a cleaner, drier space.
PRO TIP
When you install a threshold seal, pick a product rated for your climate and for garage traffic. Clean and dry the concrete first; use a wire brush or degreaser to remove oil and loose debris so the adhesive will stick well. Measure and mark the area with the door closed, then raise the door just enough to place the seal and avoid moving it before the adhesive cures. If your garage floor is uneven, use a thicker threshold or self-leveling caulk under the seal to fill low spots. For heavy water flow, consider adding a small drain channel in front of the threshold so water runs away from the seal rather than pooling against it. Regularly inspect the seal and replace it when it cracks or compresses to keep the barrier effective.
15) Layer bubble wrap on windows to reduce heat loss
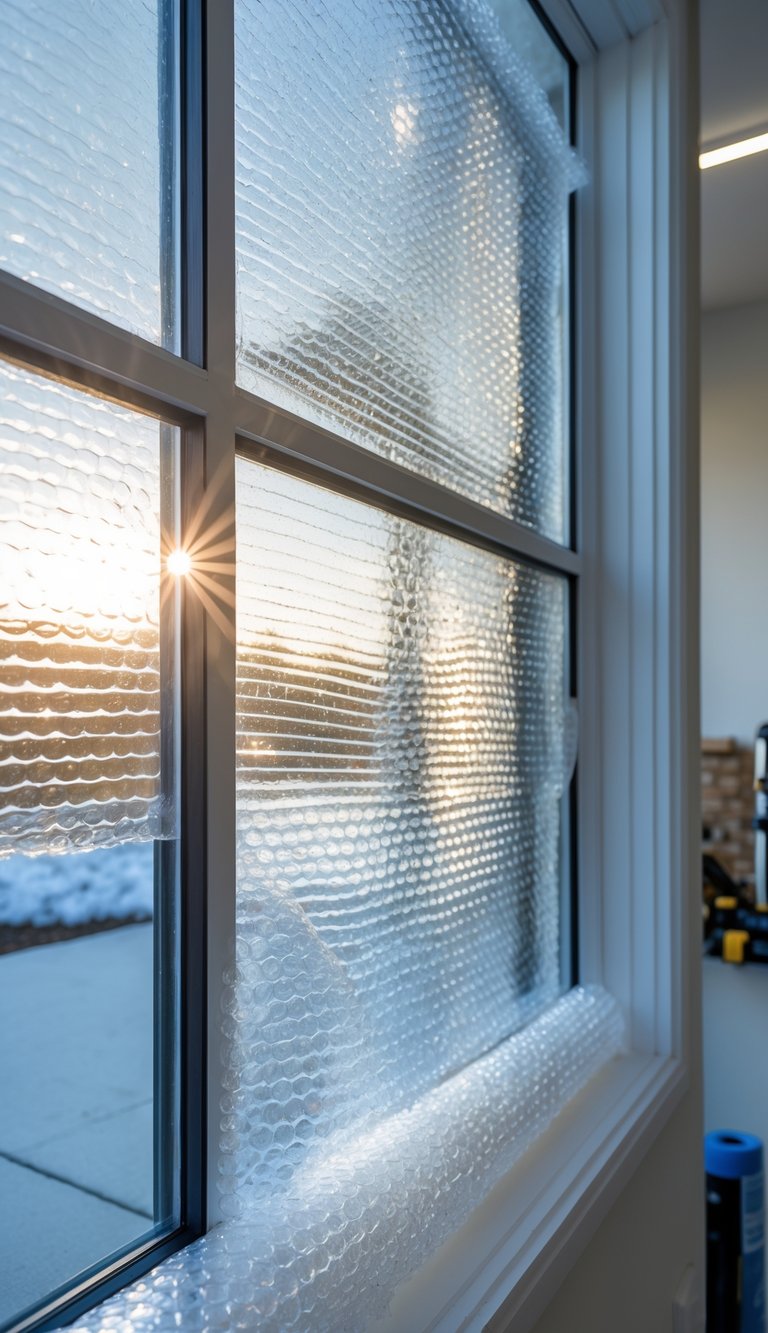
Bubble wrap makes a cheap, quick layer of insulation for garage windows. The trapped air in the bubbles slows heat transfer through glass, so your garage stays warmer without blocking all the light.
Cut the wrap to fit each pane and spray a little water on the glass to help it stick. You can also use low-tack tape around the frame for a firmer hold that won’t damage surfaces when removed.
This method works best for single-pane or older windows. It won’t stop drafts from gaps in the frame, so seal those first for the biggest benefit.
PRO TIP
When you apply bubble wrap, choose the larger-bubble kind for better insulation; it traps more air and gives a thicker barrier. Apply it on the inside of the window where it stays protected from wind and moisture. Measure each pane and cut the wrap slightly oversize so you can press edges into the frame for a snug fit. Use a spray bottle with plain water—no soap—to make the wrap cling without leaving residue. If you need light, place the bubbles facing the glass; that keeps the surface smoother and lets more daylight through. In cold, humid garages, check for condensation on the wrap and remove it briefly to dry if needed. When spring comes, peel the wrap off gently and store it flat for reuse next winter.
16) Add insulation tape to metal garage door joints
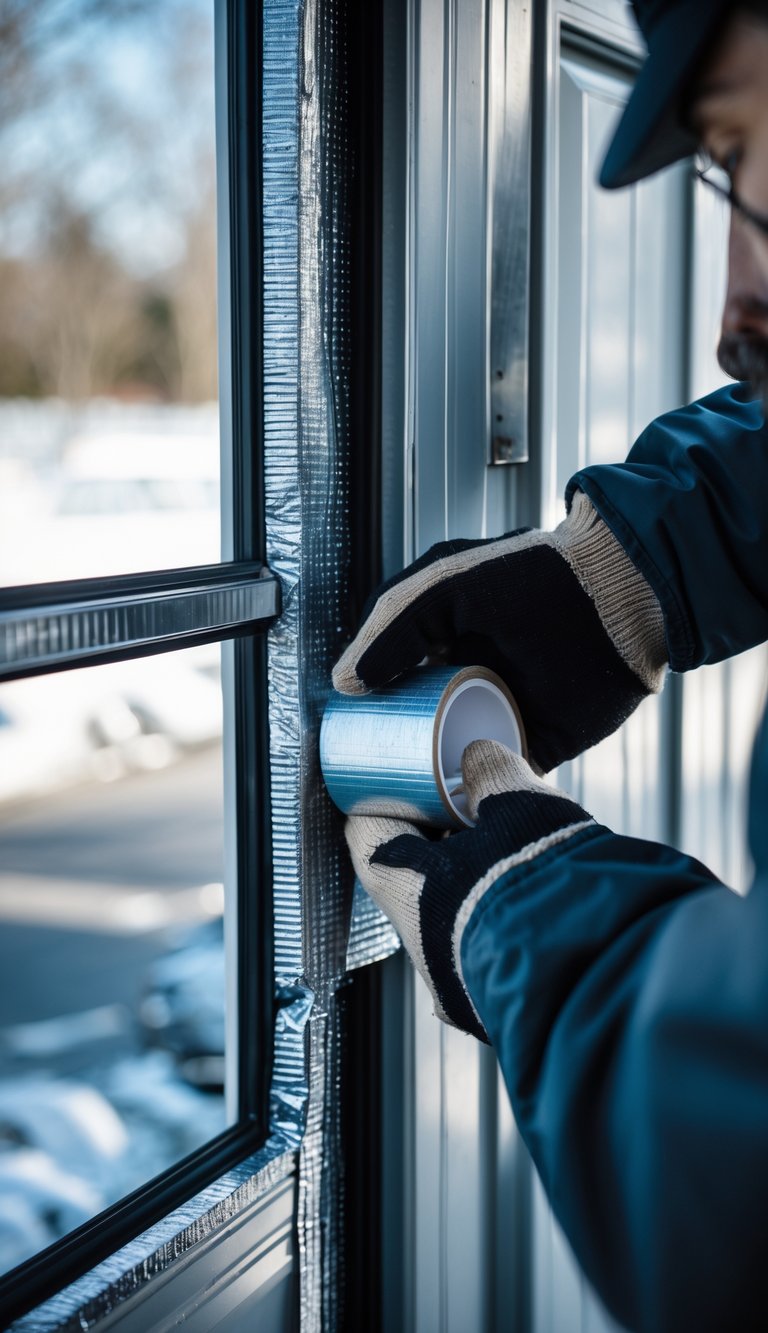
Adding insulation tape to the joints of a metal garage door helps stop drafts where panels meet. You peel and stick the tape along the seams to block air flow and reduce thermal bypass. That keeps your garage warmer in winter and reduces how hard your heater or furnace works.
The tape works well with other insulation like foam boards or reflective panels. It creates an air seal that those materials alone might miss. Use tape designed for weather sealing so it stays flexible when temperatures change.
PRO TIP
When you apply insulation tape, start with clean, dry metal. Wipe the seams with rubbing alcohol and let them dry fully. Measure each joint before you cut tape to avoid gaps and overlap. Press firmly along the entire length to ensure a tight bond, especially at the corners and hinge areas. Choose a tape rated for outdoor use and for the temperature swings in your area so it won’t crack or peel. If your door opens and closes frequently, check the tape every few months and replace any worn sections to keep the seal effective.


