Last Updated on April 18, 2026
You can turn an ordinary enclosed trailer into a versatile base for camping, storage, or weekend projects. This article will show practical ideas that help you make better use of your trailer’s space, power, and gear so your next trip or job goes smoother.
You’ll learn straightforward options to sleep, cook, store, and work from a single trailer setup that fits your needs and budget.
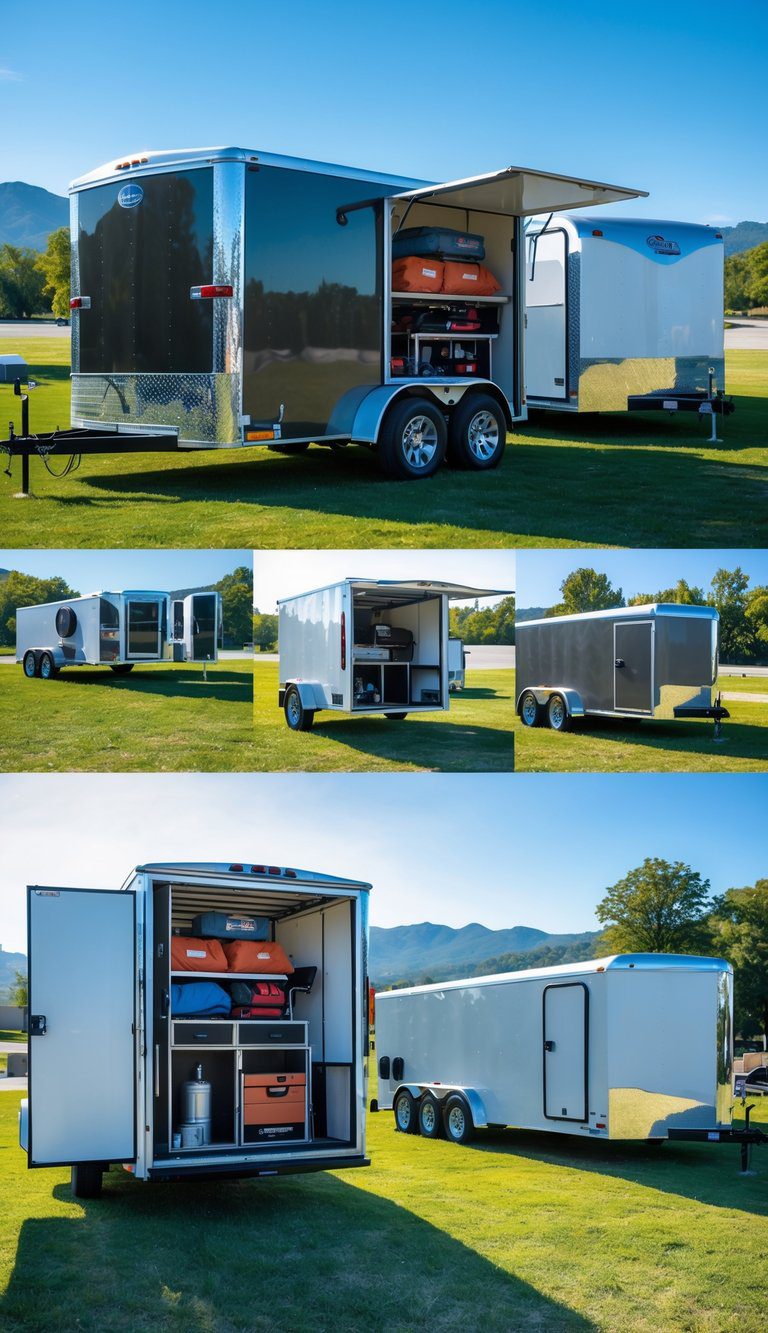
Explore solutions that balance comfort, utility, and easy installation so you can choose upgrades that match how you use the trailer. Each idea keeps real-world needs in mind, from power and weather protection to tools and transport, so you can plan a build that actually works for you.
1) Fold‑out Murphy bed with underframe storage
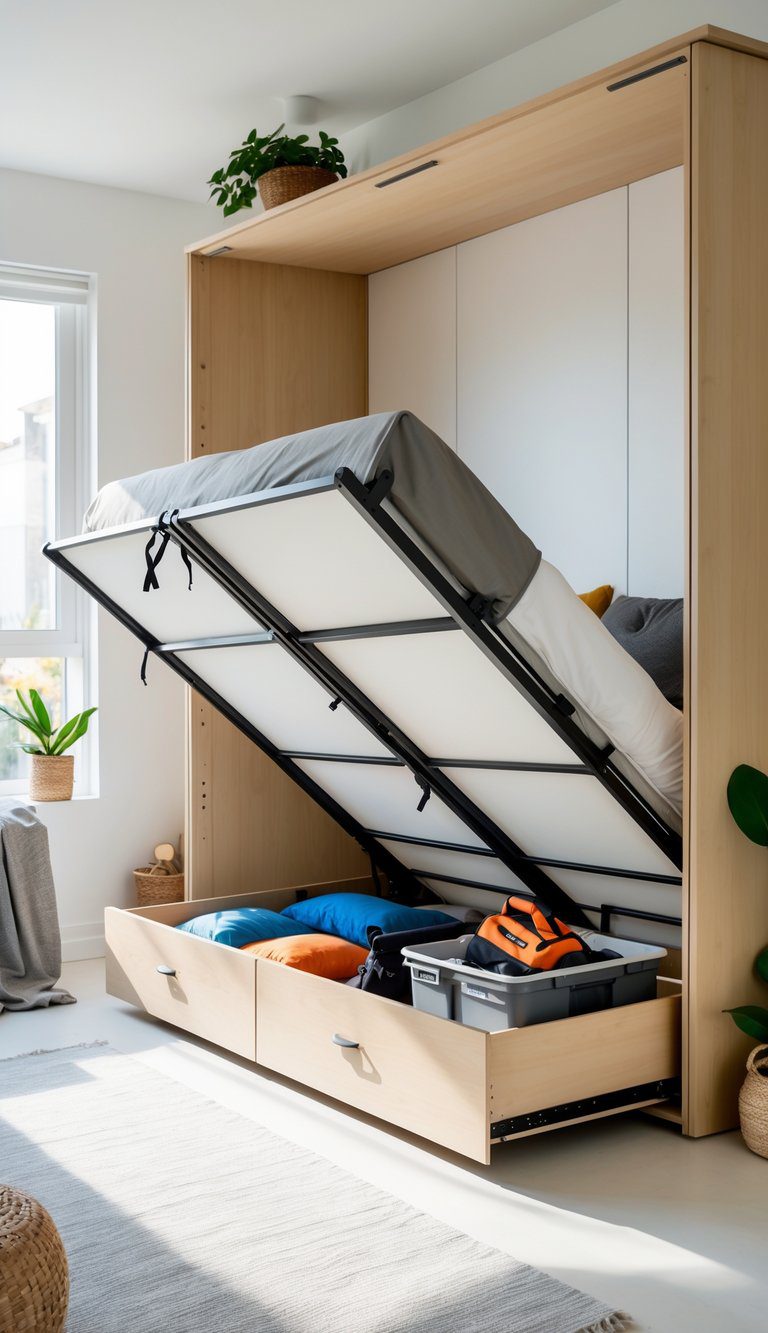
A fold‑out Murphy bed makes your trailer a comfy camper or a guest space in minutes. You pull the bed down at night and fold it up during the day to free floor space for projects or gear.
Build the bed on a raised underframe to create roomy storage below. Use drawers, bins, or a sliding platform so you can reach tools, coolers, or camping supplies without unpacking everything.
Keep the mechanism simple and sturdy; gas struts or heavy‑duty hinges make operation smooth. Choose a mattress thin enough to fold cleanly but supportive enough for good sleep.
PRO TIP
Anchor the underframe to the trailer floor and add vented panels to prevent moisture buildup in stored gear.
2) Removable modular shelving racks (steel)
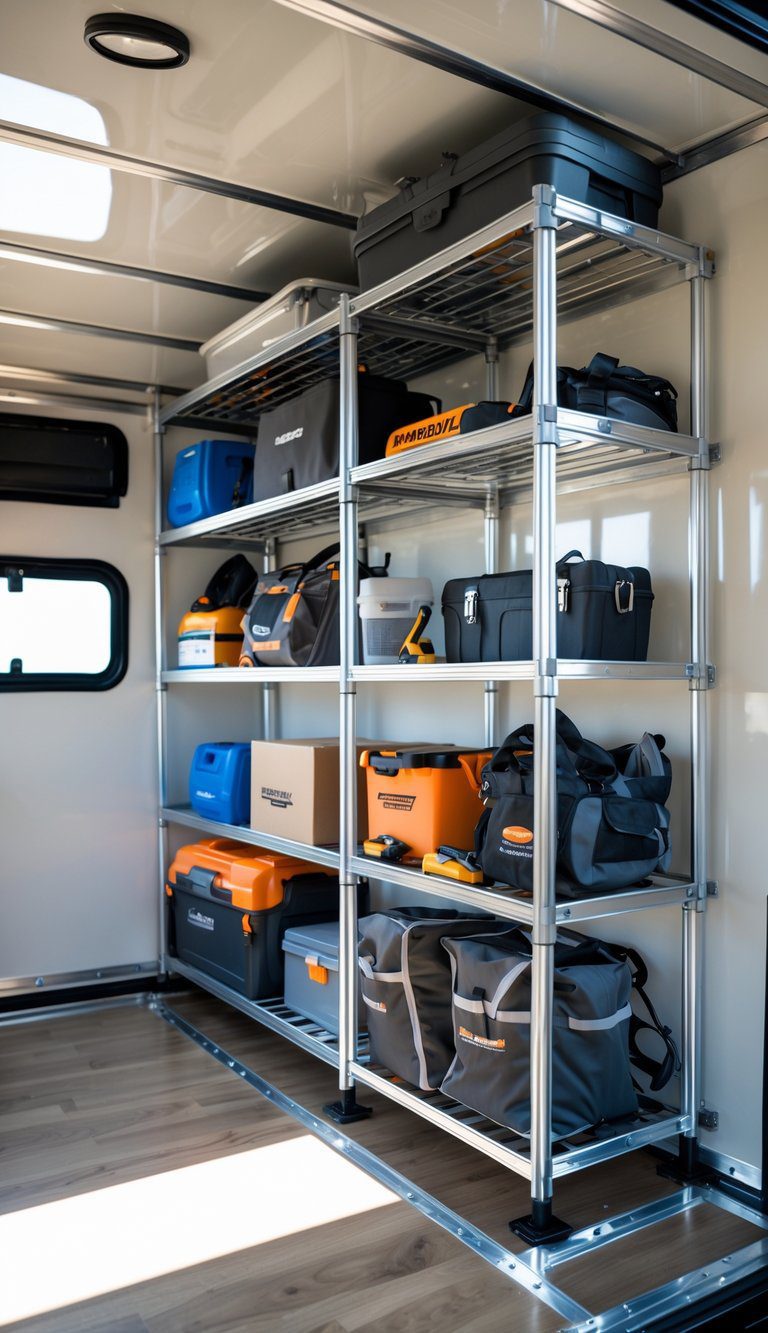
Removable modular steel racks let you change your trailer layout fast. You can slide shelves in or take them out to fit bikes, coolers, or lumber.
Steel racks hold heavy gear and stand up to road bumps. Many systems use bolts or pipe-and-joint fittings so you can reconfigure without cutting or welding.
Use divider liners and removable supports to keep small parts from shifting. This makes the racks useful for camping gear, tools, or weekend project supplies.
PRO TIP
Label shelves and keep a small toolkit on one shelf so you can adjust or repair the rack on the road.
3) Rooftop solar panel array with MPPT charge controller
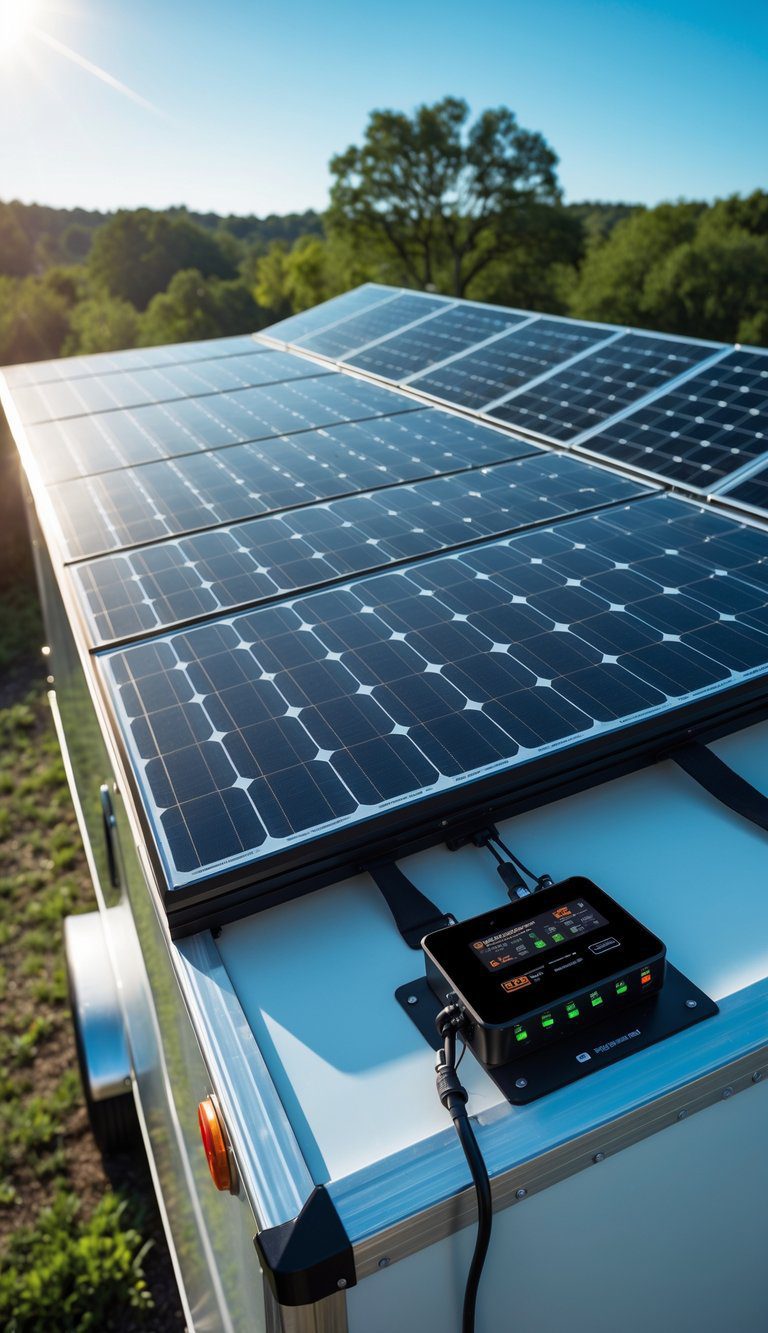
Mount solar panels on your trailer roof to keep batteries charged while camping or working remotely. A rooftop array gives steady DC power for lights, fridges, and tools without running the engine.
Use an MPPT charge controller to get the most energy from your panels. MPPT units adjust voltage and current to match your battery, improving charge efficiency especially in low light.
Keep panels flat or slightly tilted for best output, and leave space for vents and roof access. Wire through a combiner or fuse block and put the controller near the battery bank to reduce voltage drop.
PRO TIP
Choose a quality controller with Bluetooth or display so you can monitor production and battery state from your phone.
4) Slide‑out kitchenette module with sink and propane stove
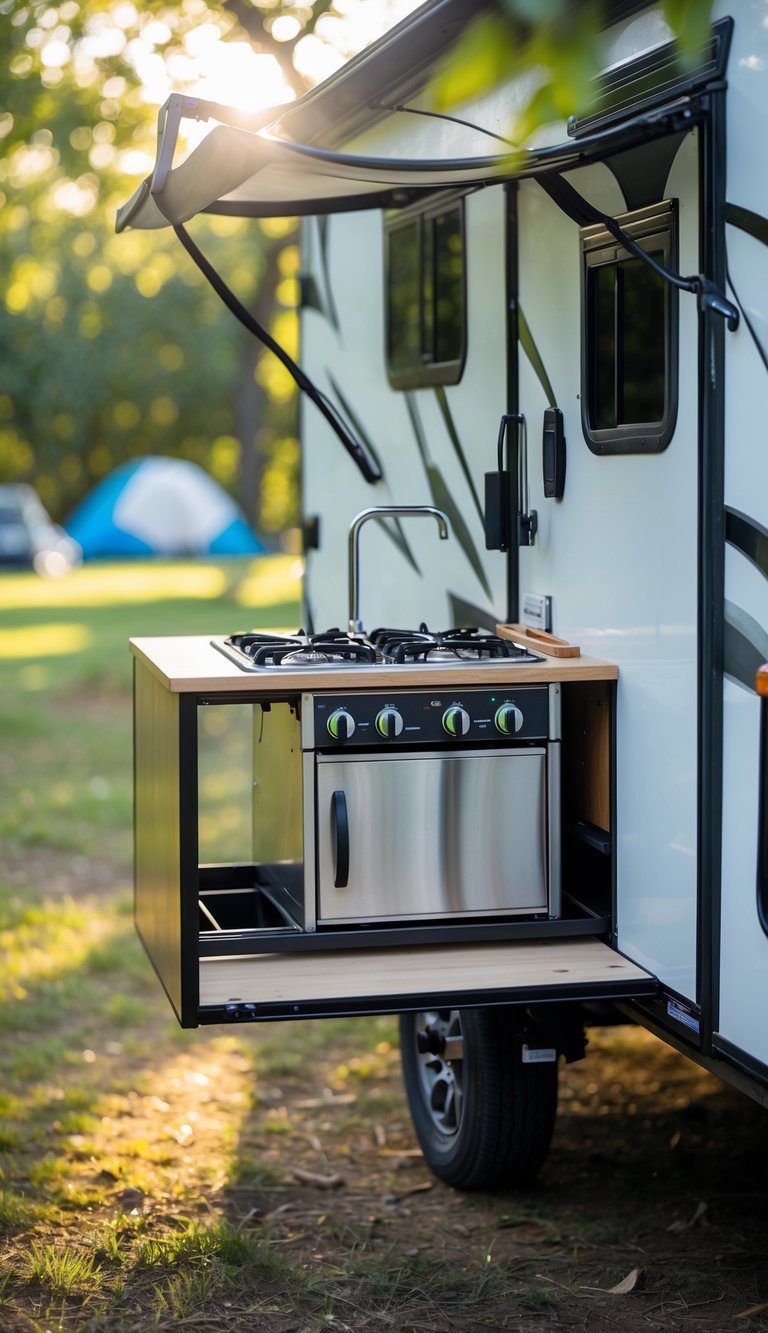
A slide-out kitchenette gives you a full working kitchen that tucks away when you drive. You can cook on a two-burner propane stove, wash up in a small sink, and store cookware in drawers or shelves.
These modules often mount on heavy-duty slides and lock in place for use. They save space inside the trailer and make meal prep faster at camp.
Pick durable materials like stainless steel or reinforced panels for wet and rough use. Keep plumbing and propane lines simple and serviceable so you can fix problems at the campsite.
PRO TIP
Bolt down quick-disconnect fittings for water and propane. That makes setup fast and keeps connections safer when you move.
5) Detachable awning and screen room combo
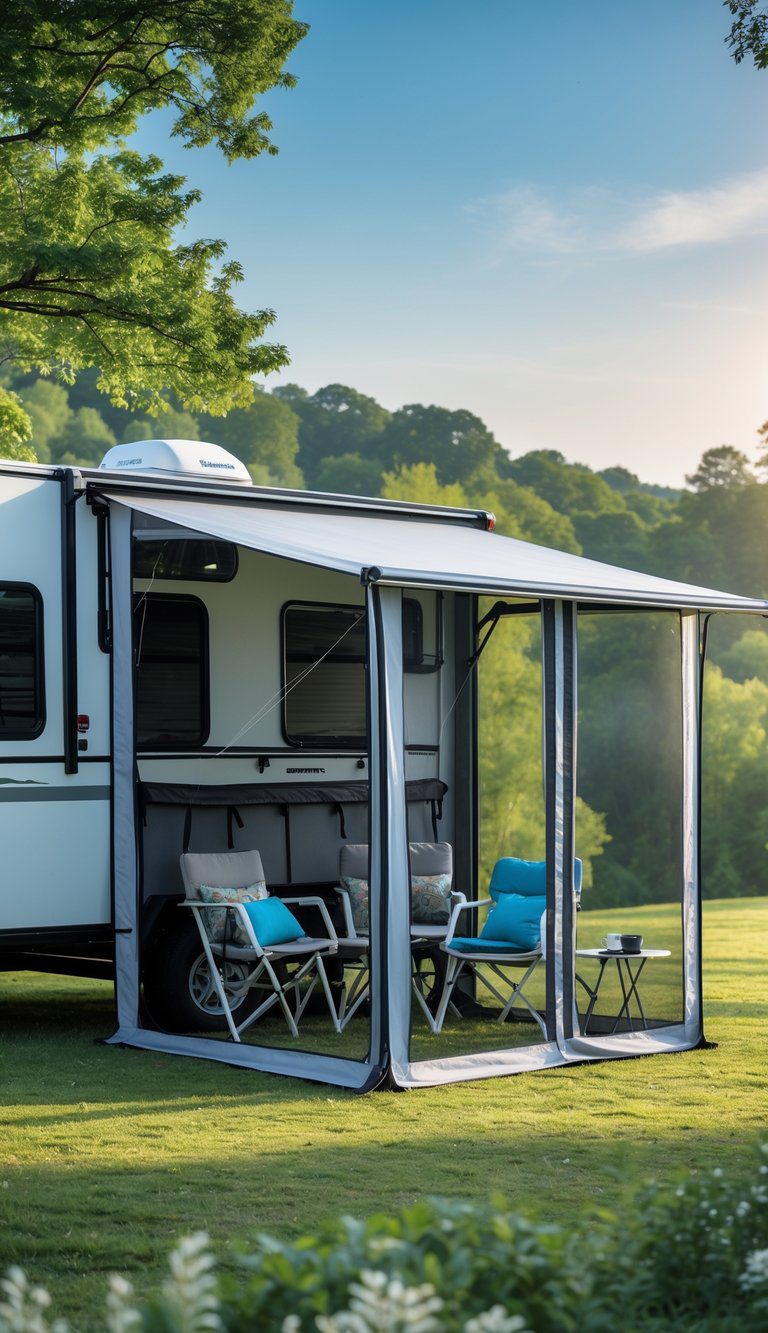
You can add a detachable awning and screen room to your trailer to make a quick outdoor living area. These kits mount to your awning and give you a bug-free, shaded space for cooking, eating, or gear storage.
Most screen rooms use mesh panels for airflow and lighter weight, while some offer vinyl panels for more weather protection. They usually come with mounting hardware and a storage bag so you can pack them away when you move.
Set up takes minutes and they fit many power and manual awnings in common sizes. This makes them a flexible choice for weekend trips, longer camping stays, or extra shelter during projects.
PRO TIP
Choose a room size slightly smaller than your awning to allow proper overlap and to keep the awning canopy from overhanging the fabric edges.
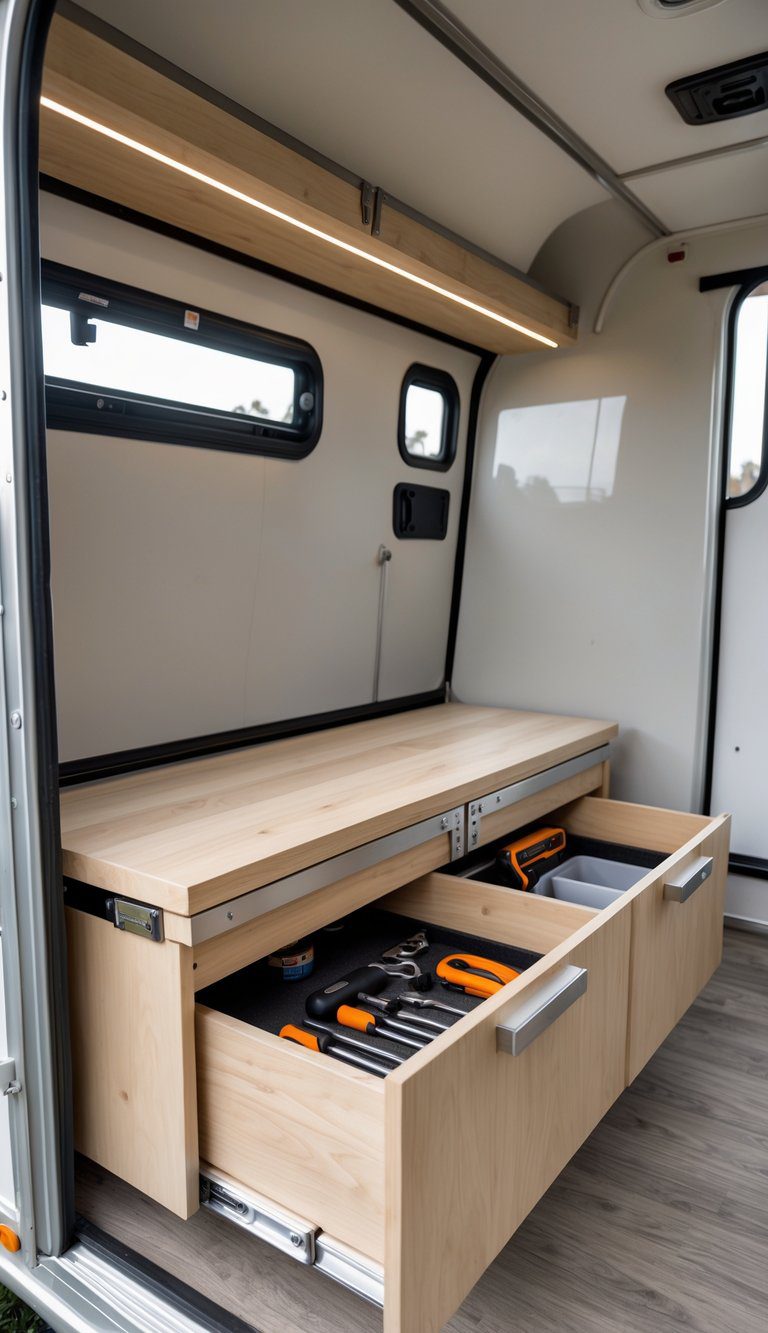
6) Foldaway workbench with integrated vice
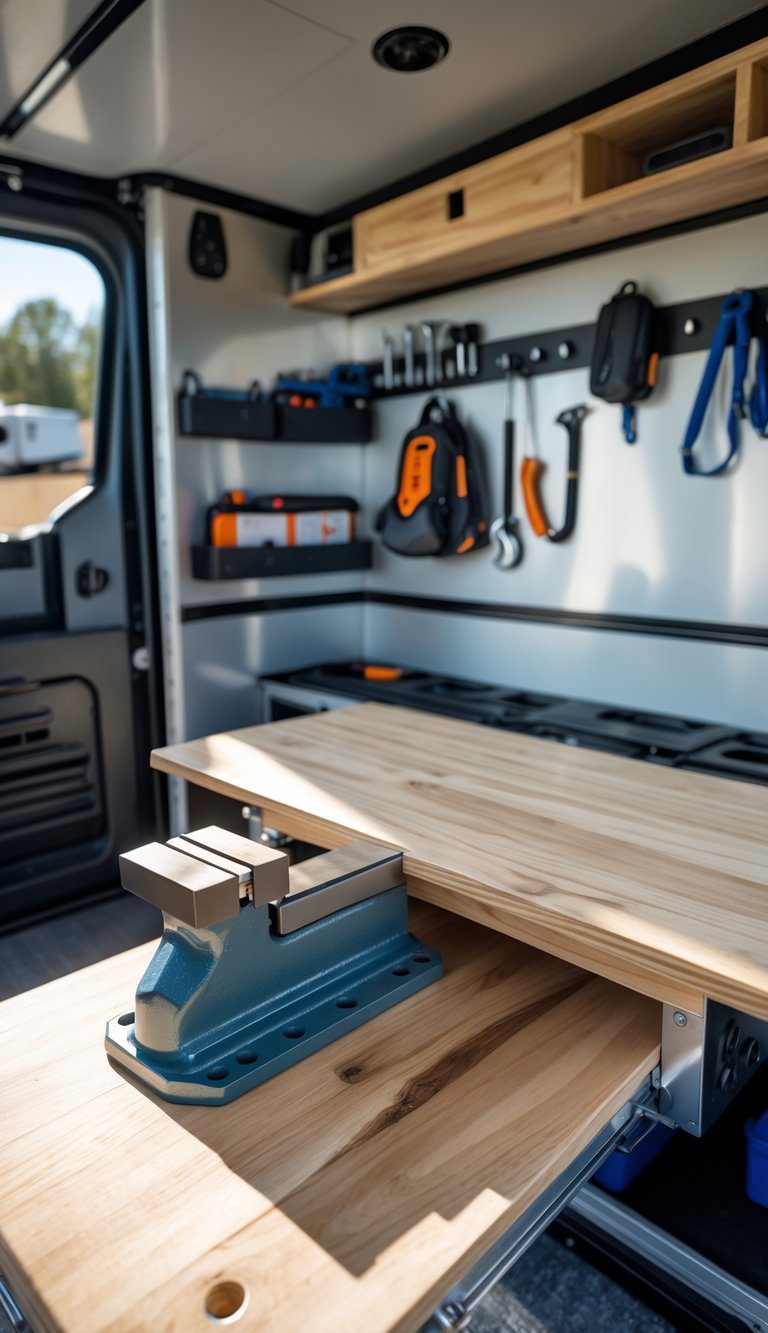
A foldaway workbench gives you a strong, compact workspace that tucks away when you need the aisle clear. You can mount it to a sidewall or to E-track rails so it folds up and locks, saving floor space for gear or passengers.
Choose a bench with an integrated vice to keep parts steady while you saw, file, or assemble. A built-in vice cuts setup time and reduces the need for extra clamps that take up room.
Keep legs telescoping or use folding brackets for added stability when the bench is down. Use plywood or aluminum for the top to balance weight and strength based on what you carry.
PRO TIP
Bolt the vice to a removable mounting plate so you can take it off for maintenance or use it elsewhere.
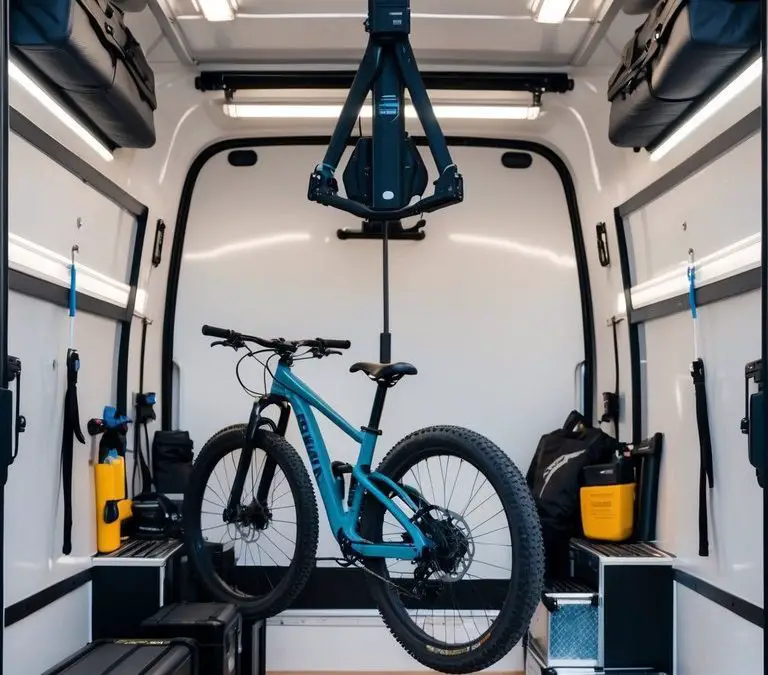
7) Overhead bike hoist system (electric)
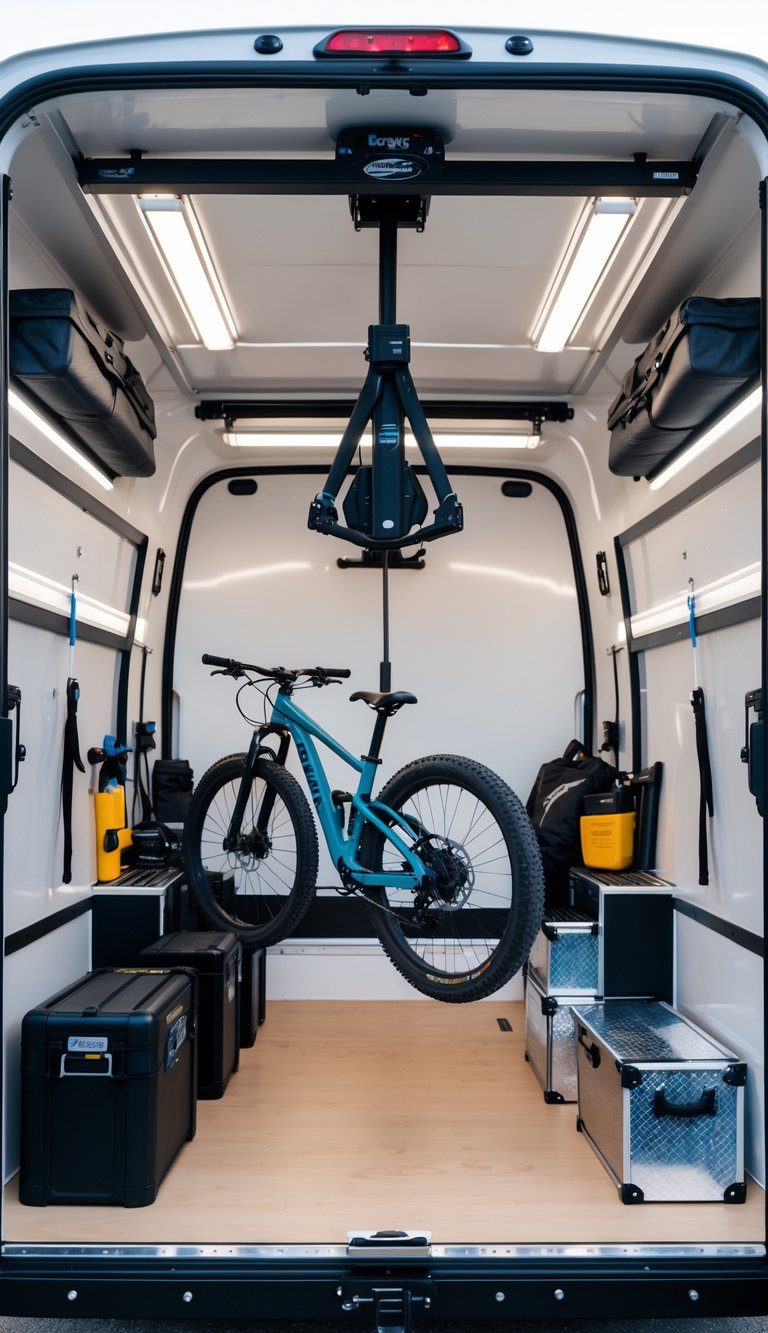
An electric hoist lifts bikes to the ceiling with the push of a button. You save floor space and keep bikes out of the way for gear, tools, or a vehicle.
These systems attach to ceiling joists or a track and hold one or more bikes securely. They are easier to use than manual pulleys, especially if you store heavy e-bikes or multiple bikes.
Install near the trailer door or along a side wall to avoid blocking movement. Make sure your ceiling structure can handle the load and follow the manufacturer’s weight limits.
PRO TIP
Choose a unit with a remote or wall switch and a soft-start motor. That makes lifting smoother and reduces wear on straps and hooks.
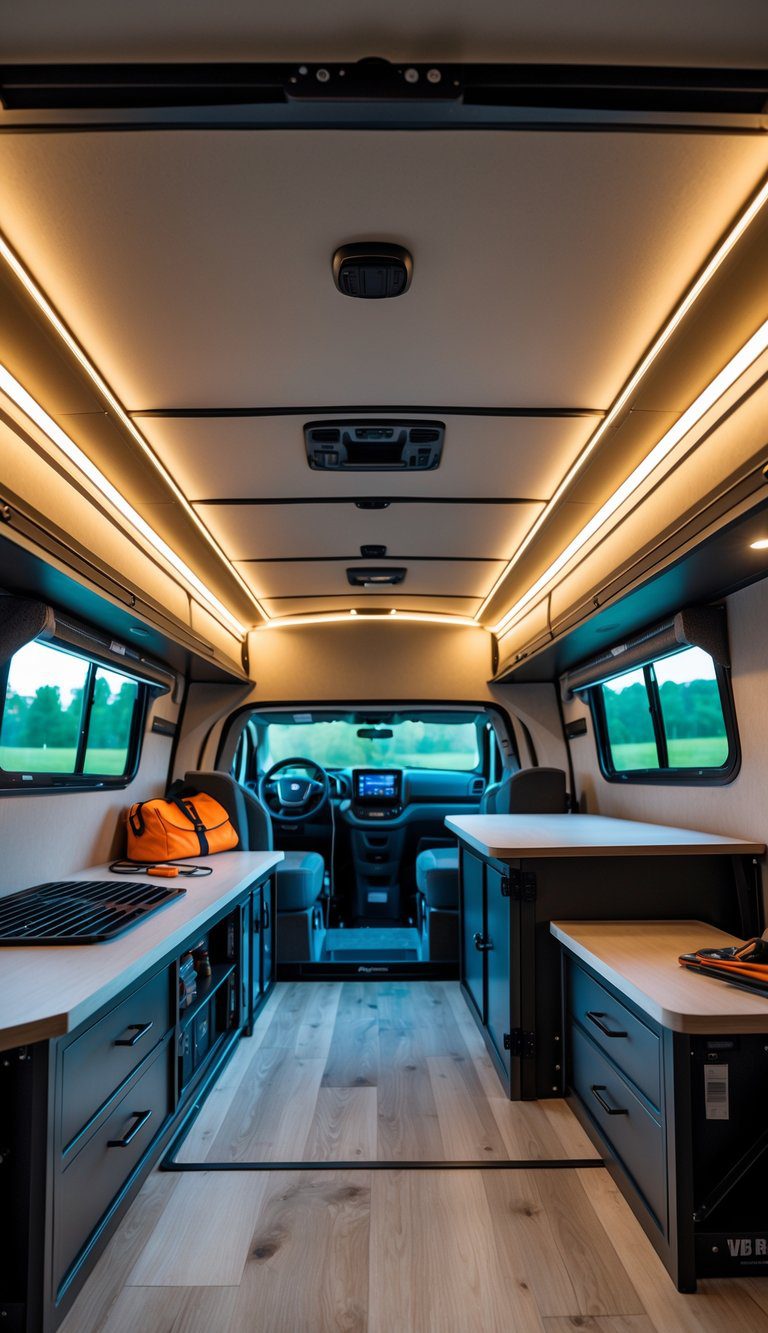
8) Insulated cedar‑clad tiny‑home interior conversion
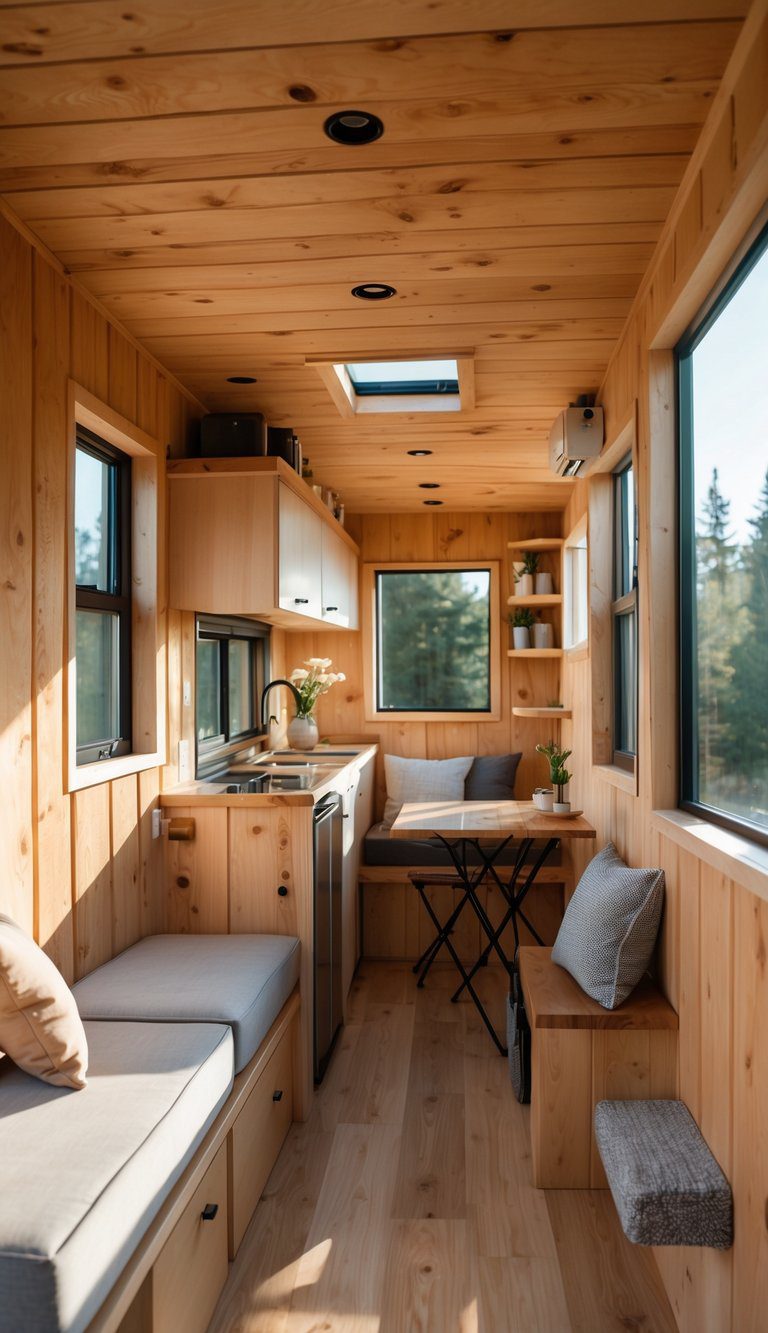
You can turn an enclosed trailer into a cozy tiny home by adding insulation and cedar cladding for warmth and style. Start by framing the walls and floor, then install rigid foam or spray foam insulation to control temperature and reduce noise.
Cedar boards add a clean, natural look and resist moisture when properly sealed. Use thin furring strips to create a ventilation gap behind the cladding so the wood can dry and last longer.
Plan a compact layout with a small bed, foldaway table, and built-in storage to maximize space. Keep wiring and plumbing inside framed cavities to stay tidy and make future repairs easier.
PRO TIP
Choose tongue‑and‑groove cedar for faster installation, and seal cut ends with exterior wood sealer to prevent rot.
9) Heavy‑duty E‑track cargo anchoring system
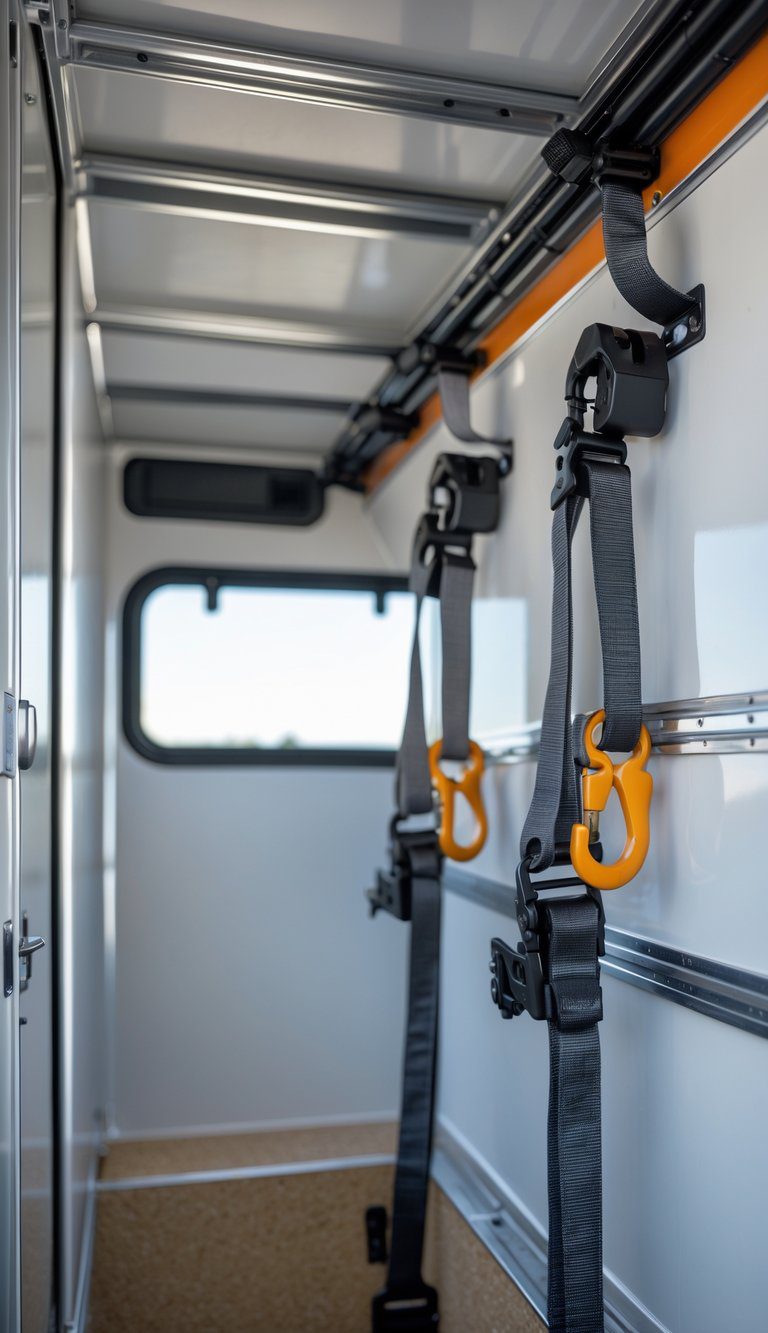
A heavy‑duty E‑track gives your trailer strong, flexible anchor points for gear. You can mount horizontal or vertical rails on the walls or floor to match how you load and haul gear.
Use straps, hooks, and fittings that lock into the slots to keep bikes, coolers, and tools from shifting. The system is adjustable, so you can move anchors where you need them and fit different cargo sizes.
Choose steel rails rated for vehicle use and fasten them into studs or reinforced plates. Proper installation prevents pull‑out and keeps straps working as intended.
PRO TIP
Plan your rail layout before drilling. Mock up positions with tape to test reach and clearance for doors and shelving.
10) Portable composting toilet cabinet
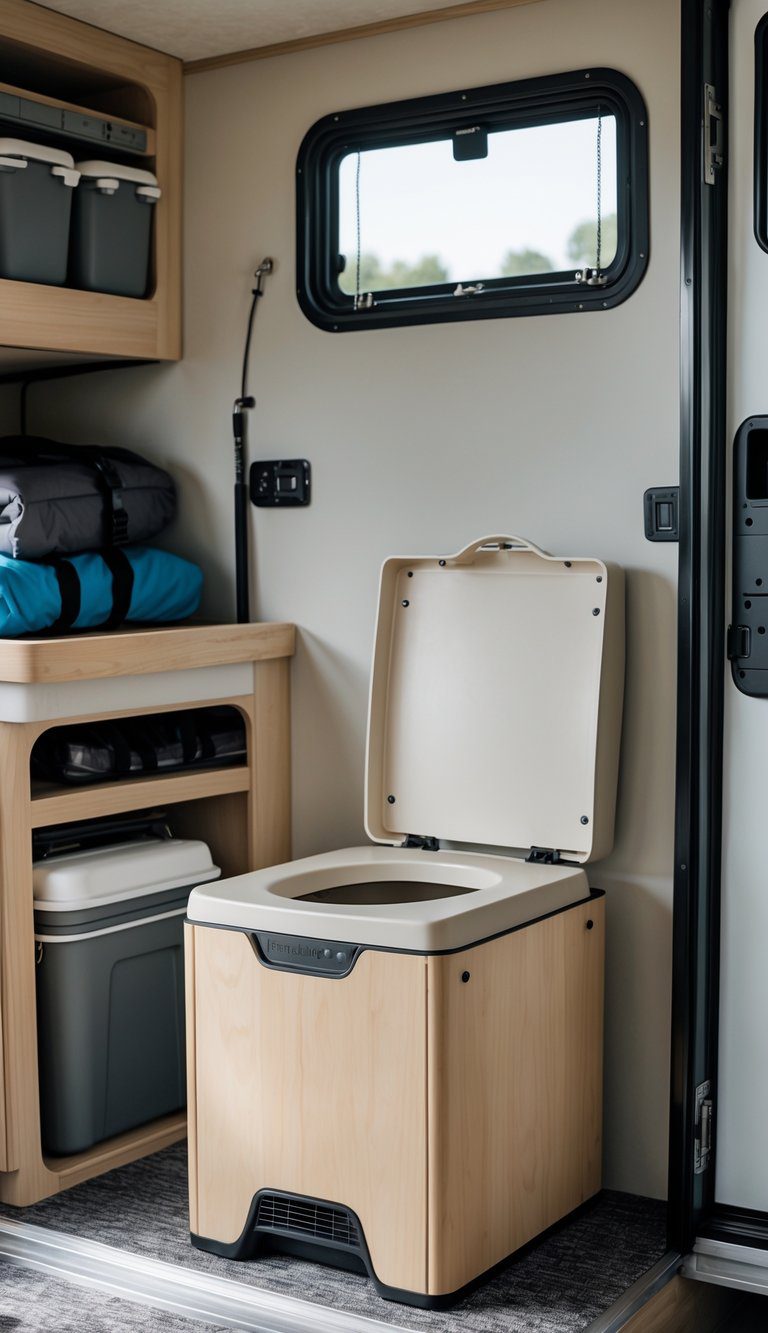
A portable composting toilet cabinet keeps your toilet out of sight and saves floor space. You can build a simple box with a hinged lid and a slide-out shelf for the toilet unit, or buy a ready-made cabinet that fits most compact composting models.
Ventilation matters. Install a small vent fan or a screened vent to reduce smells and speed drying. Use water-resistant plywood and seal all edges to protect the cabinet from moisture.
Make access easy for cleaning and emptying. A removable top or front panel and a stable latch help you service the toilet without moving the whole cabinet.
PRO TIP
Measure your composting toilet before you build. Leave extra space for hoses, filters, and a small bin for cover material like sawdust.
11) Roof‑mounted kayak/surfboard carrier
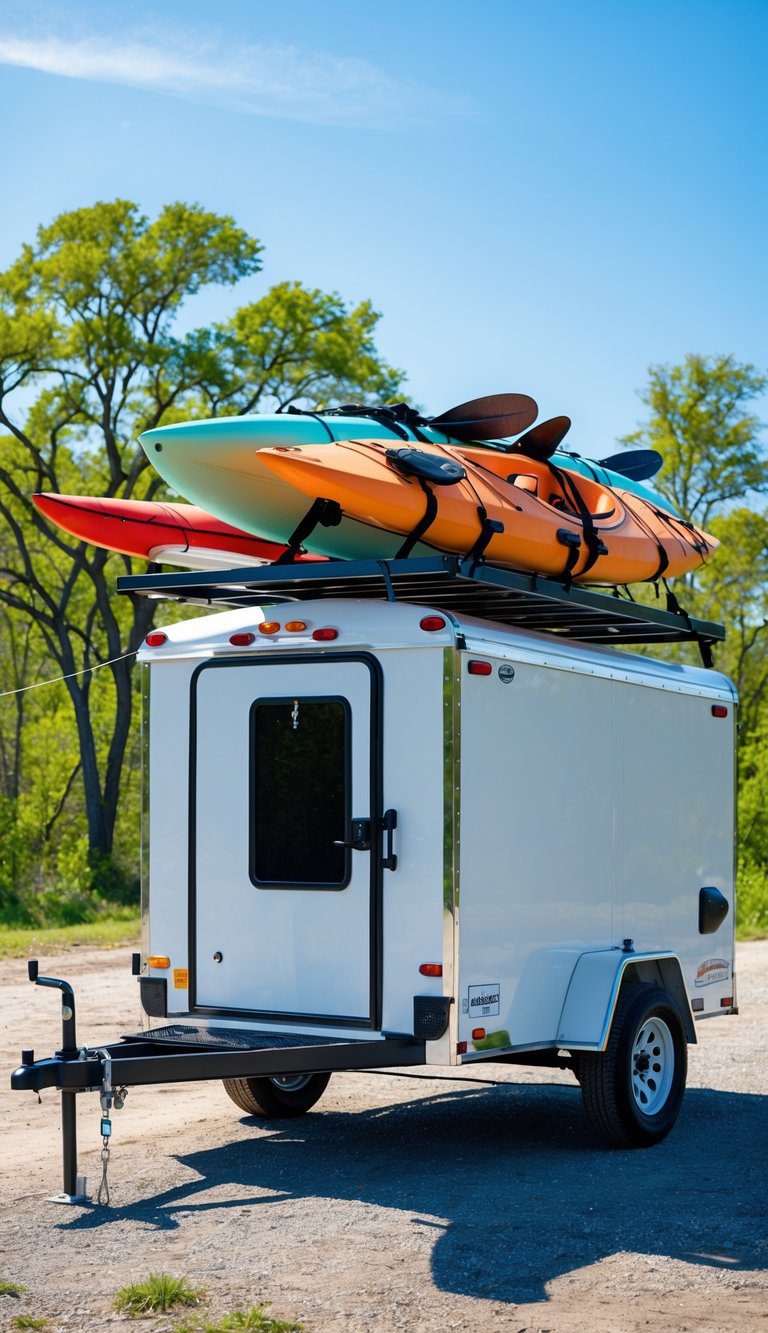
A roof‑mounted carrier frees up floor space inside your trailer and keeps long gear out of the way. You can mount crossbars or a dedicated rack to the trailer roof to carry kayaks, surfboards, or SUPs safely.
Choose a carrier that matches your gear and roof type. J‑racks hold kayaks on their side and save space, while stacker bars let you layer multiple boards. Look for padded cradles or foam blocks to protect hulls and decks.
Secure each item with cam straps and bow/stern lines so nothing shifts in transit. If you tow at highway speeds, check mounts and straps before every trip.
PRO TIP
Label straps and keep a small toolkit on hand for quick retightening or rack adjustments at the trailhead.
12) LED puck lighting with dimmer strip
LED puck lights give you bright, even light without taking up much space. You can mount them under shelves, along walls, or over a workbench to light specific areas.
Pair the pucks with a dimmer strip so you control brightness for tasks or mood. The dimmer saves battery when you need soft light and boosts output when you need full visibility.
Install on a 12V system tied to your trailer battery or wire into existing lighting circuits. Most kits include adhesive or screws and simple wiring; you’ll only need basic tools and a fuse for safety.
PRO TIP
Place pucks where shadows from people or gear won’t block the light. Use warm white for cozy camping and cool white for detailed work.
13) Foldable bench seating with hidden tool drawers
A foldable bench gives you seating without stealing floor space. When folded up, it clears the aisle; when down, it makes a comfy spot to sit or work.
Hidden drawers under the seat keep tools and small gear organized and out of sight. You can pull a drawer to access wrenches, straps, or camping utensils in seconds.
Choose durable hinges and a locking latch so the bench stays secure while driving. Use plywood or aluminum for a strong, light frame and add foam and vinyl for comfort that resists dirt.
PRO TIP
Label drawer fronts and add foam liners to protect tools and stop rattles.
14) Front V‑nose aerodynamic storage box
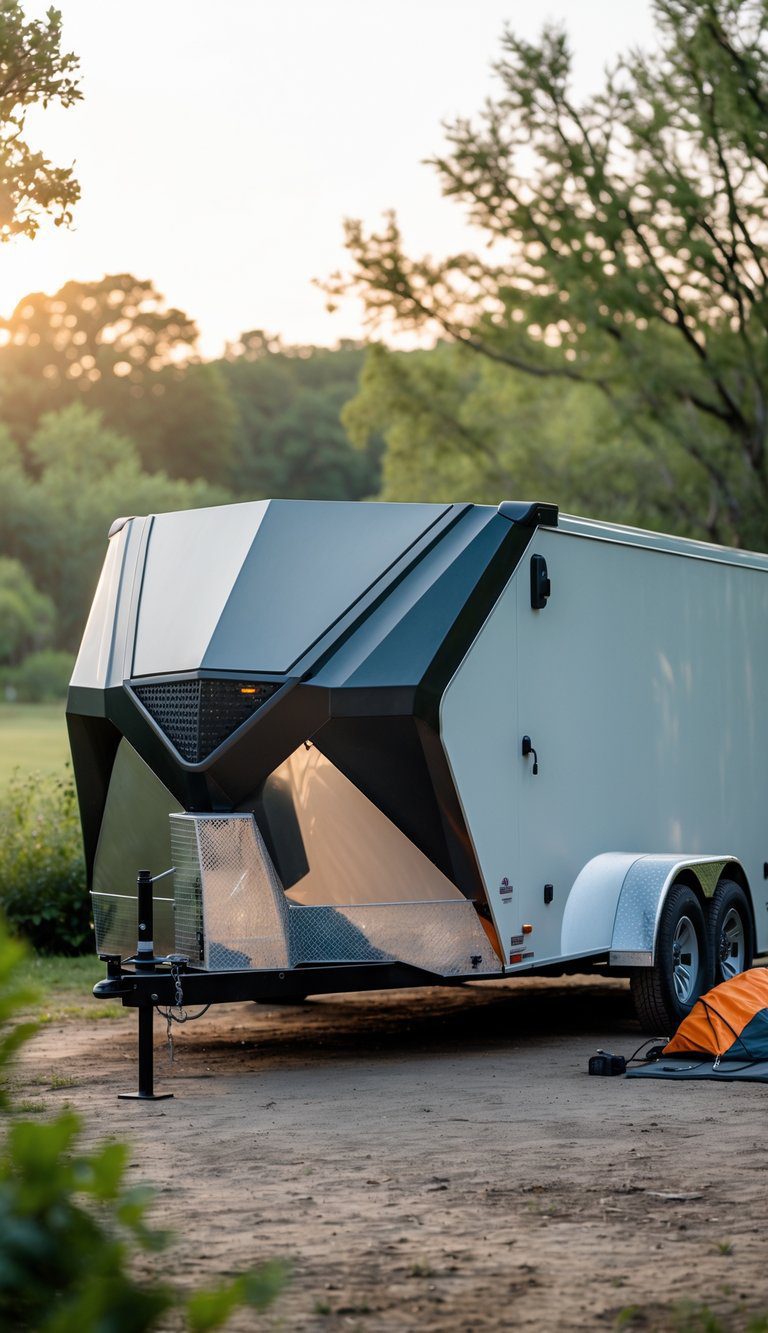
A front V‑nose aerodynamic storage box adds secure, low-profile storage to your trailer’s nose. You get weather‑resistant space for tools, tie‑downs, or camping gear without eating into the main cargo area.
These boxes mount across the V and follow the trailer’s shape to keep wind drag down. Many come in aluminum and lockable models so your gear stays dry and safe on the road.
Install it so the weight stays over the trailer tongue for better towing balance. If you carry heavy items, spread the load between the box and interior shelves to avoid tongue‑weight issues.
PRO TIP
Measure the V‑nose interior and choose a box that fits snugly front to back. Use marine‑grade sealant around mounts to prevent leaks and inspect locks before each trip.


")