Last Updated on June 22, 2026
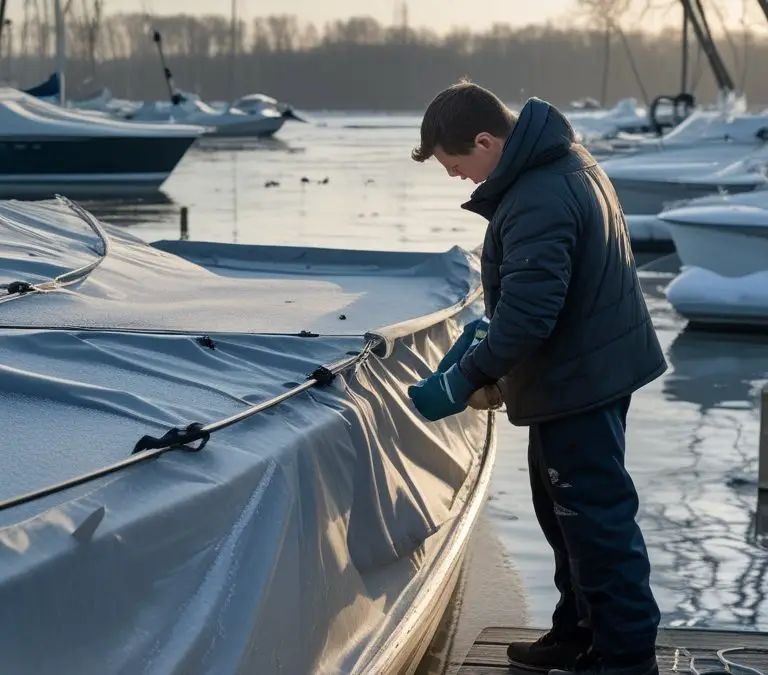
You know how one cold night can ruin a season of boating if systems freeze or mold sets in. This article helps you protect your boat with 16 practical winterization ideas that cover engines, fuel, plumbing, electricals, and interiors so you avoid costly repairs and enjoy a smooth spring launch.
Follow these steps and your boat will stay safe, dry, and ready when warm weather returns.
1) Inspect and repair gelcoat chips and fiberglass cracks
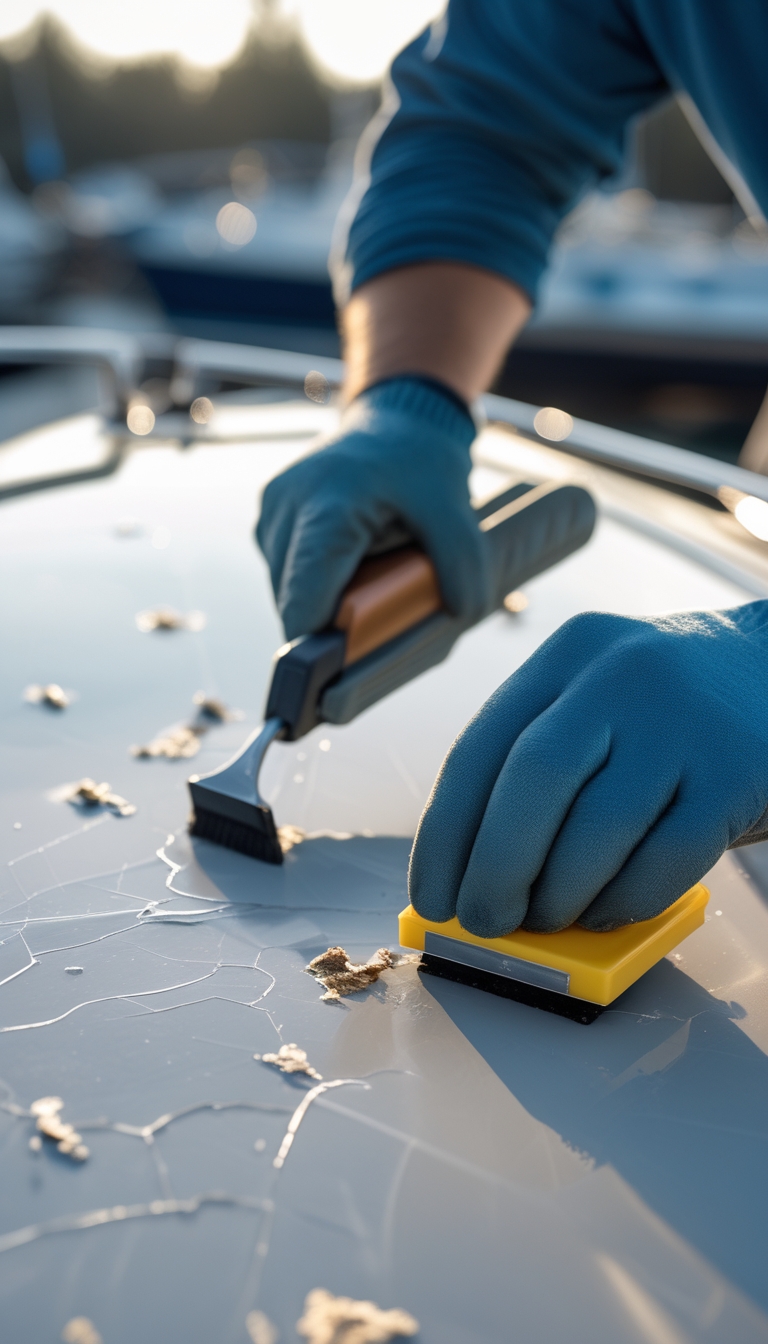
Walk the boat and look closely for chips, hairline cracks, and soft spots in the gelcoat. Small damage can let water into the fiberglass and grow worse over winter.
Clean the area with mild soap and a soft brush, then dry it well before any repair. Remove loose bits and rough edges so patches bond properly.
Use a gelcoat repair kit for chips and small cracks, or epoxy and fiberglass cloth for deeper structural damage. Follow product directions and work in a well-ventilated space.
Keep repairs smooth and color-matched when possible to protect the hull and make future inspections easier. Let everything cure fully before launching next season.
PRO TIP
Tape a small card with the repair date and materials used near each fix so you track warranty windows and future maintenance.
2) Change engine oil and replace oil filter (follow owner’s manual intervals)
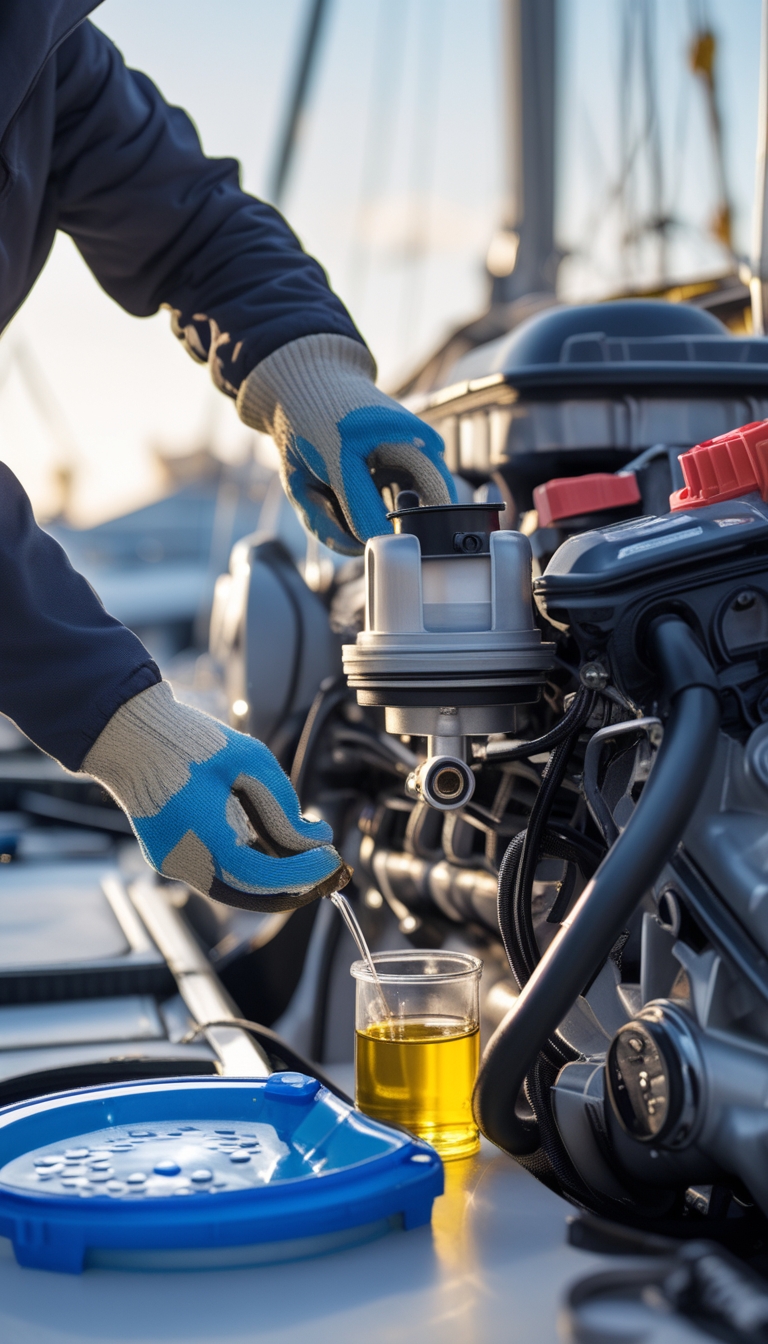
Changing your engine oil before storage prevents corrosion and removes contaminants that can harm the engine over winter. Check your owner’s manual for the exact interval, but most guides suggest changing oil at season end or every 50–100 hours. Use marine-grade oil that matches your engine’s specs.
Always replace the oil filter when you change the oil. A fresh filter catches debris and keeps oil cleaner during storage and first start-up in spring. Drain the oil while the engine is warm for better flow, and dispose of used oil responsibly.
PRO TIP
Label the oil change date and hours in your maintenance log. This makes it easier to follow intervals and spot trends next season.
3) Fog the engine with Marvel Mystery Oil or Sea Foam before storage
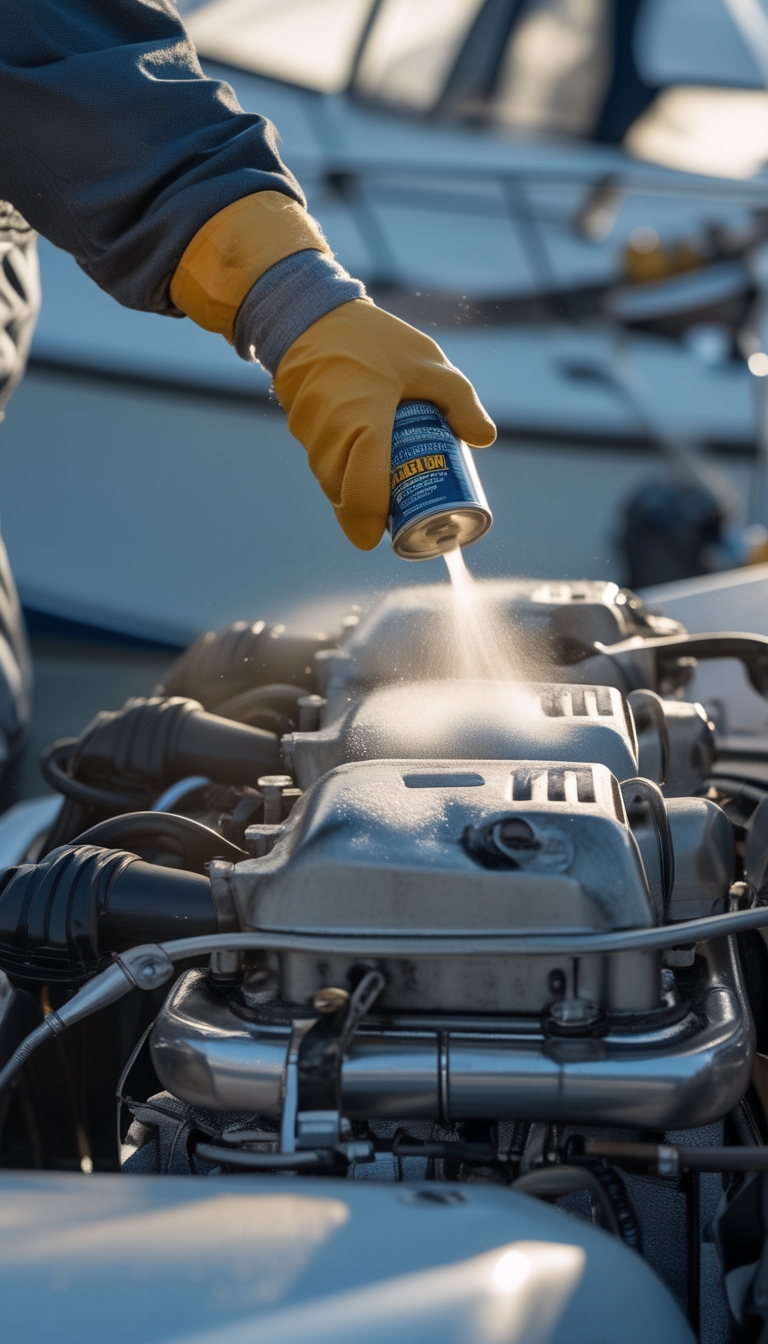
Fogging coats internal parts with a light oil to stop rust and corrosion while the boat sits. You spray a fogging oil or a product like Marvel Mystery Oil or Sea Foam into the intake while the engine runs at low speed, which leaves a protective film on cylinders and valves.
Only fog gasoline engines that won’t use a catalytic converter. Do not fog diesel engines; that can cause serious problems. Follow the product directions and wear gloves and eye protection when spraying.
After fogging, change the oil and filter before you run the engine again in spring. That removes the oily residue and any trapped moisture so your engine runs clean.
PRO TIP
Turn the engine by hand a few times after fogging to spread the oil evenly, and label the service so you remember what you did.
4) Stabilize fuel with STA-BIL Marine Fuel Stabilizer and top off tank
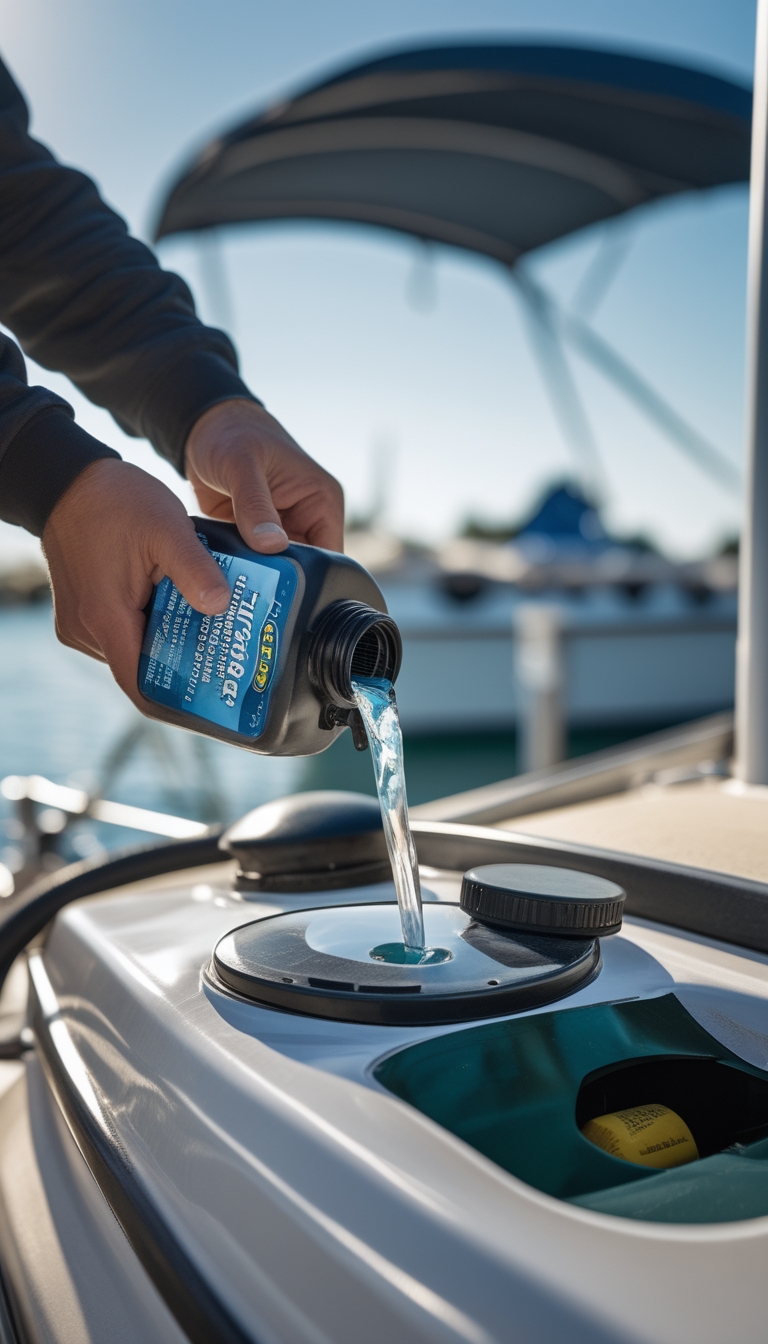
Add STA-BIL Marine Fuel Stabilizer to fresh fuel before storage. It helps stop fuel from breaking down and can reduce deposits in your fuel system.
Fill the tank after adding stabilizer. Topping off limits air space and slows oxidation and moisture buildup.
Run the engine a few minutes so stabilized fuel reaches the carburetor or injectors. That simple step helps protect the whole fuel system, not just the tank.
Store the boat with a full tank if possible. Less vapor space means less condensation and a lower chance of corrosion.
PRO TIP
Label the date you treated the fuel and the product used. That makes next-season prep faster and helps you track how long the fuel should remain fresh.
5) Replace in-line fuel filter and inspect fuel lines for cracks
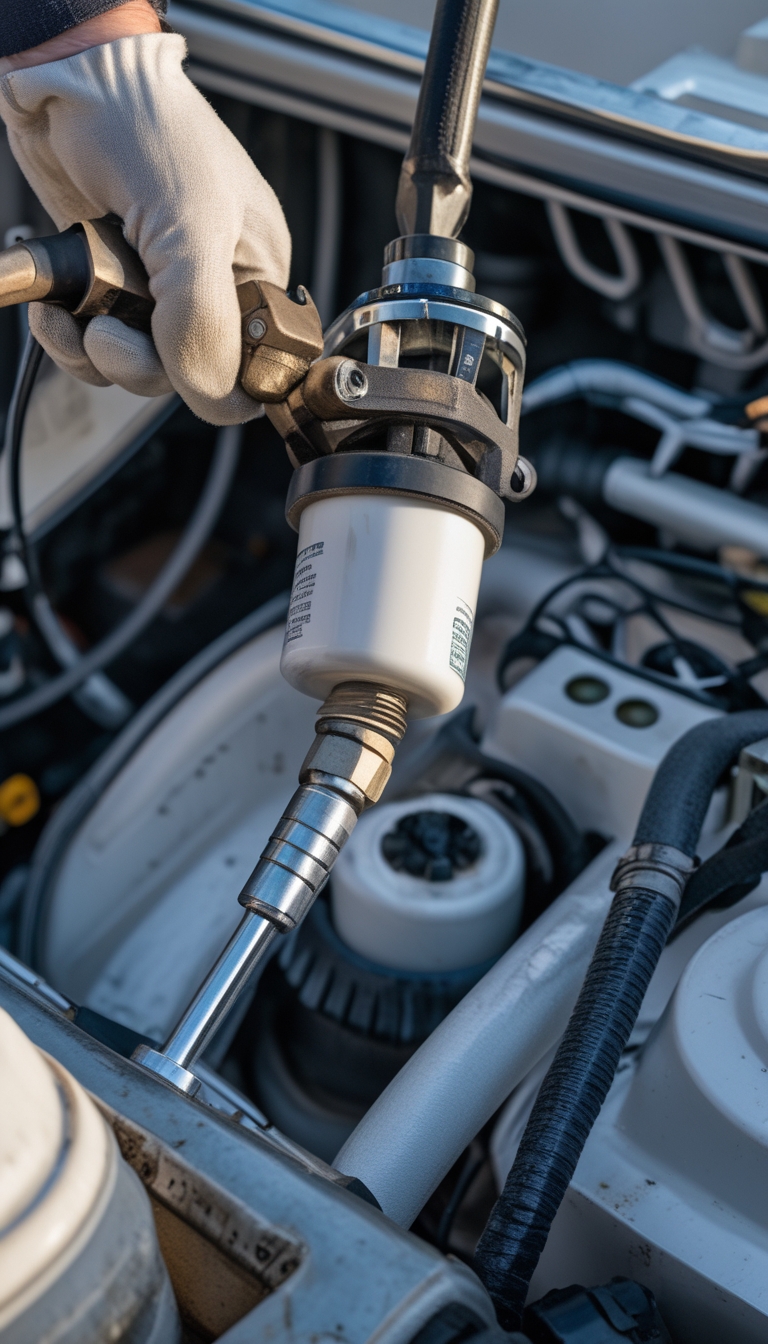
Change your in-line fuel filter before winter so stale fuel and debris don’t sit in the system. A fresh filter takes about 30 minutes and costs little, but it protects costly engine parts.
Check all fuel hoses for cracks, soft spots, or hardening. Squeeze along the hose and look for discoloration or brittleness near clamps and bends.
Replace any hose that shows wear with marine-rated fuel line and new clamps. Use correct fittings and secure connections to prevent leaks and fire hazards.
PRO TIP
Run the engine briefly after replacing the filter and hoses to watch for leaks and ensure proper fuel flow.
6) Flush and winterize freshwater and livewell systems with RV/marine antifreeze
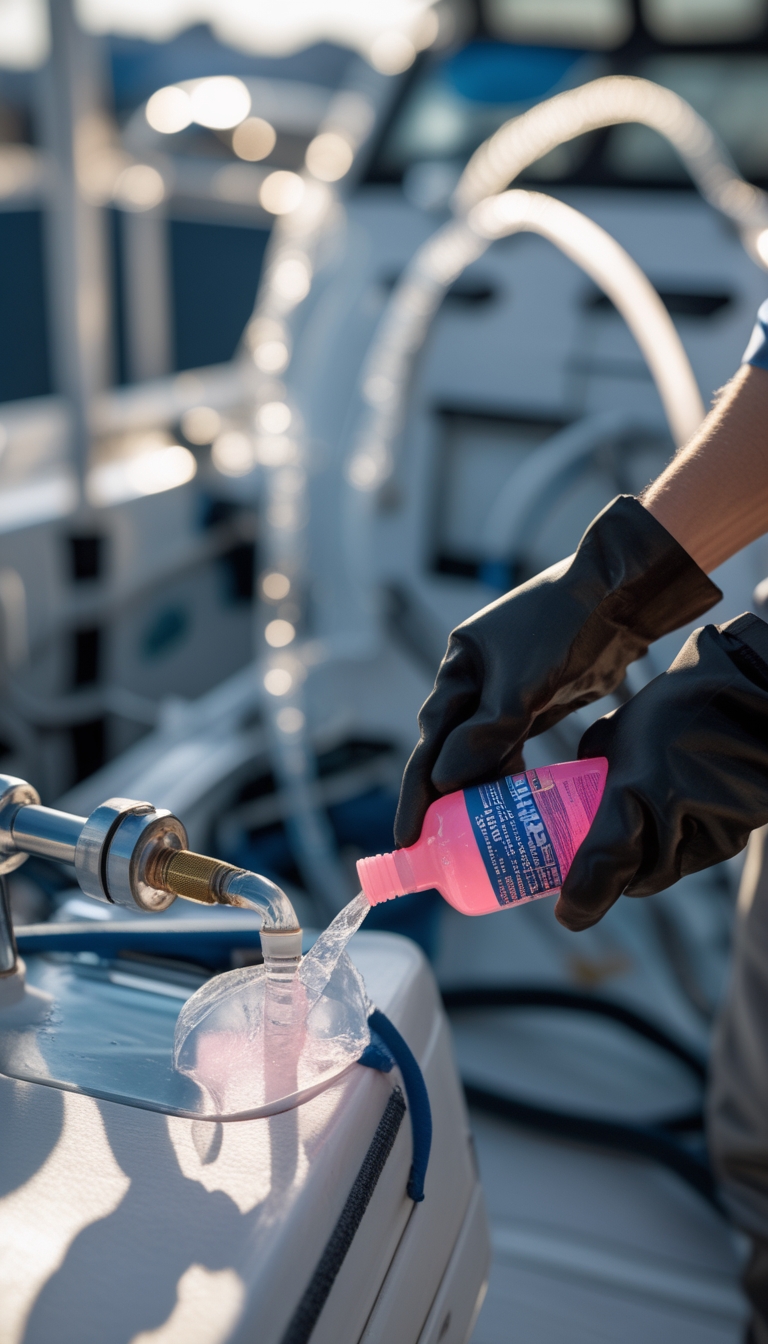
You should drain fresh water and livewell lines, then flush them with clean water until clear. This removes debris and reduces the chance of trapped water freezing.
Use non-toxic RV antifreeze for freshwater systems and livewells. Pump it through faucets, shower, toilets, and livewell pumps until pink fluid appears, then shut valves and cap outlets.
For raw-water pumps and engine-related parts, choose marine-grade antifreeze if the manufacturer advises. Protect strainers, pumps, and hoses by following hose-by-hose flushing so every section gets treated.
PRO TIP
Label service points and note how much antifreeze you use. That makes spring de-winterizing faster and helps avoid waste.
7) Drain and winterize raw-water cooling system; pump antifreeze through manifolds
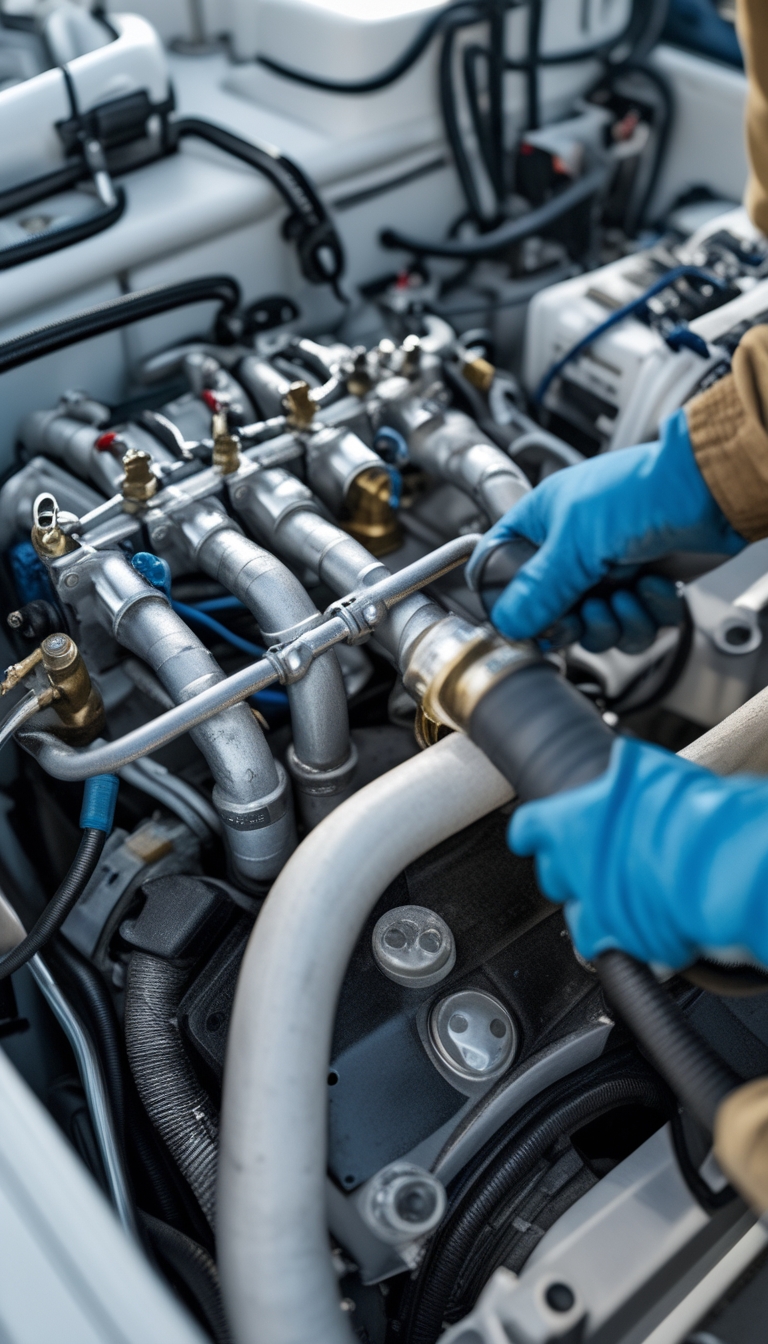
Shut off seawater intake and remove strainer baskets. You want to clear every pocket where water can hide before the cold hits.
Open all drain plugs on the motor, manifolds, and lower unit. Let the system gravity-drain until no more water comes out.
Run fresh water through the raw-water side to flush salt and debris. Then pump propylene-glycol antifreeze through the raw-water passages until it appears at every outlet.
Reinstall drain plugs and seal fittings. Leave strainers and through-hulls accessible so you can check them in spring.
PRO TIP
Run the bilge pump briefly while flushing to move trapped fluid. Mark the date and type of antifreeze used for next season.
8) Remove, clean, and store battery; charge with NOCO Genius maintainer
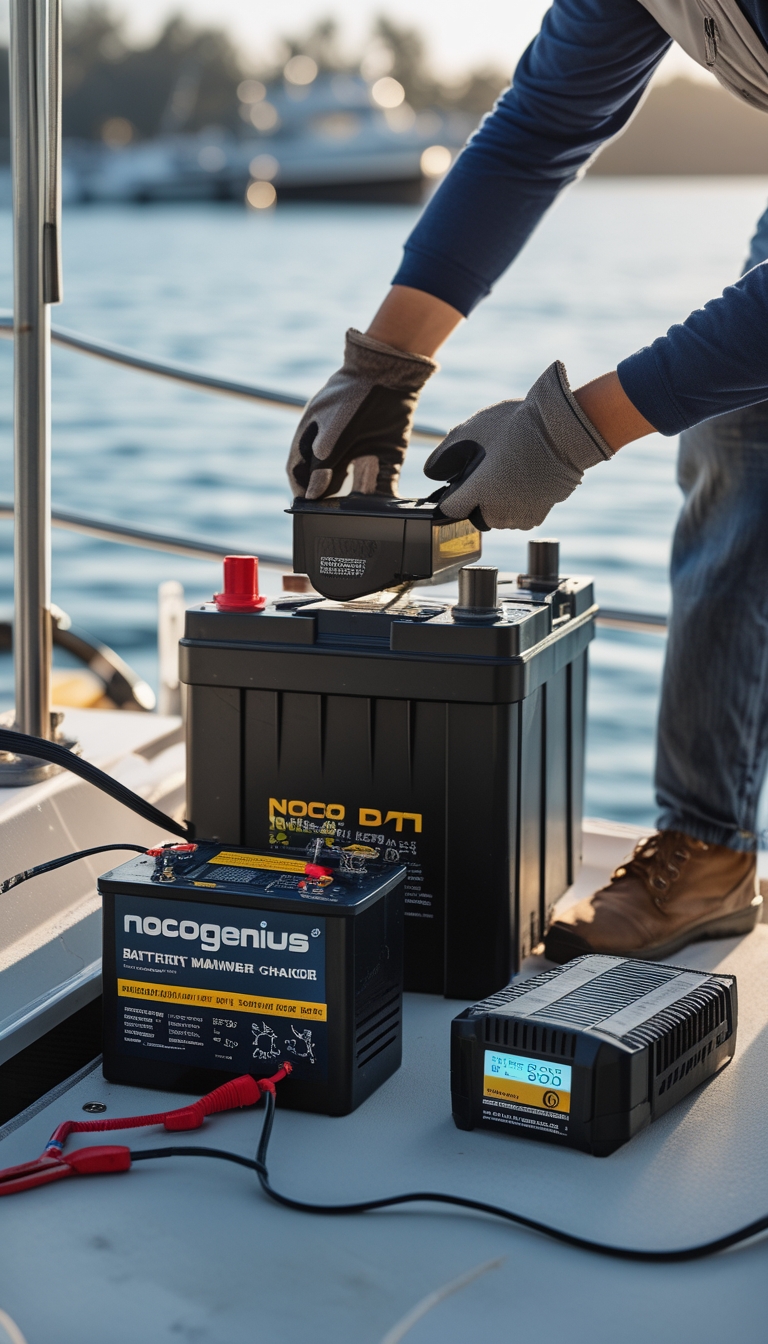
Remove the battery and disconnect negative first, then positive. This prevents sparks and protects your boat’s electrical system.
Clean the terminals with a baking soda paste or a terminal cleaner and a wire brush. Dry the battery completely before storage to prevent corrosion.
Store the battery in a cool, dry place off the floor and away from direct sunlight. Keep it upright and on a non-conductive surface.
Use a NOCO Genius maintainer to keep the battery topped up during winter. The maintainer prevents overcharging and can revive weak batteries safely.
PRO TIP
Label the battery with the date you removed it. That way you track age and know when to test or replace it next season.
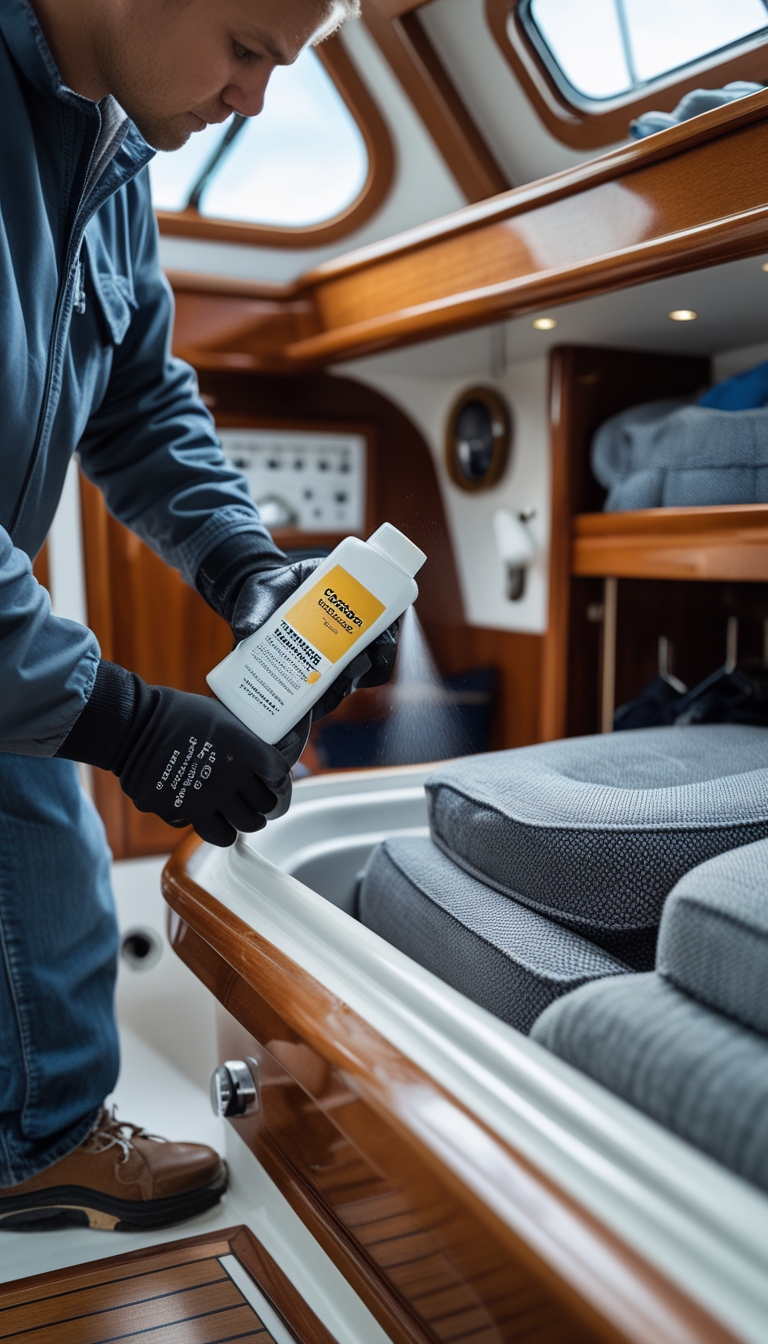
9) Apply corrosion inhibitor (Star brite Corrosion Block) to electrical connections
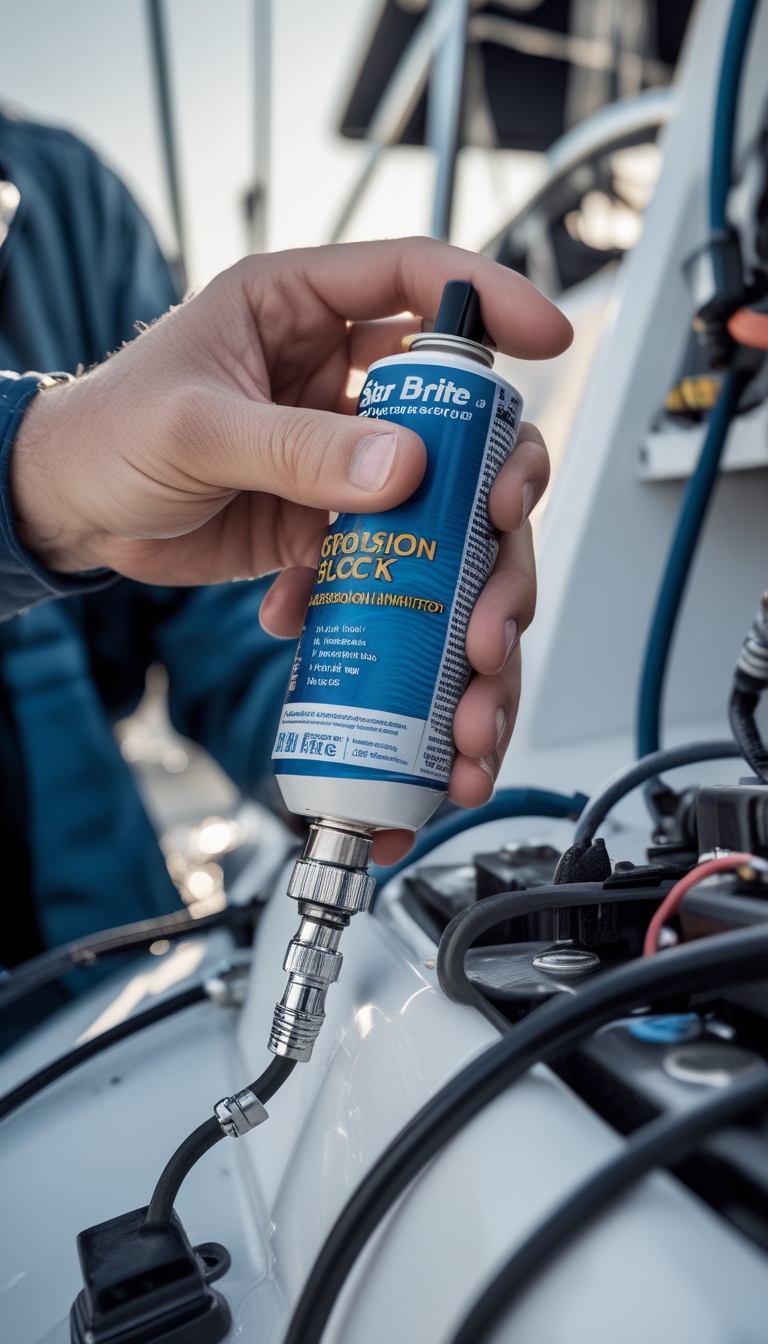
You should spray a non-conductive corrosion inhibitor on battery terminals, wiring joints, and exposed connectors. This creates a thin, tack-free barrier that helps keep moisture and salt from causing corrosion.
Clean connections first with a wire brush or contact cleaner so the inhibitor bonds well. A clean surface gives longer protection and better electrical contact.
Spray lightly and wipe any excess; avoid pooling on switches or sensors. The product is safe for painted surfaces and wiring when used as directed.
PRO TIP
Mask nearby painted areas if you’re spray-heavy and recheck terminals after a few days to ensure good contact and no buildup.
10) Treat and fog outboard lower unit; change lower unit gear oil
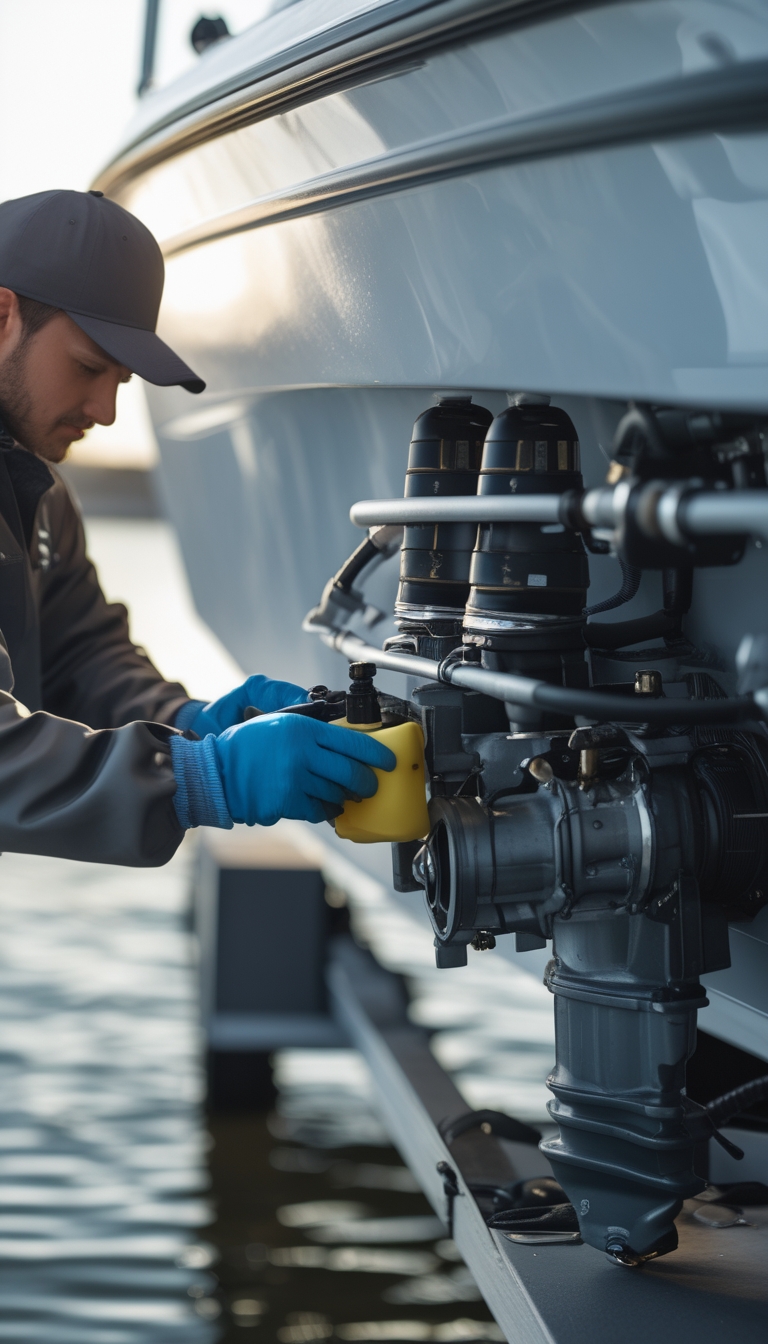
Before storage, fog the lower unit’s internal parts with fogging oil to stop corrosion. Spray through the carb or fogging port until you see a light film on the prop shaft area. This helps protect gears and bearings over cold, damp months.
Drain the lower unit gear oil and check it for water, metal shavings, or milky color. Replace with the gear oil your engine maker recommends and fill to the proper level. Fresh lube prevents rust and keeps gears working smoothly when you start the boat again.
Seal the drain and fill plugs tightly and inspect the prop shaft seal. Replace worn seals and tighten clamps to keep water out during winter storage.
PRO TIP
Catch the old oil in a clear container so you can spot contamination easily.
11) Shrink-wrap boat with Marine-Tex or use a SeaDek cockpit cover for UV protection
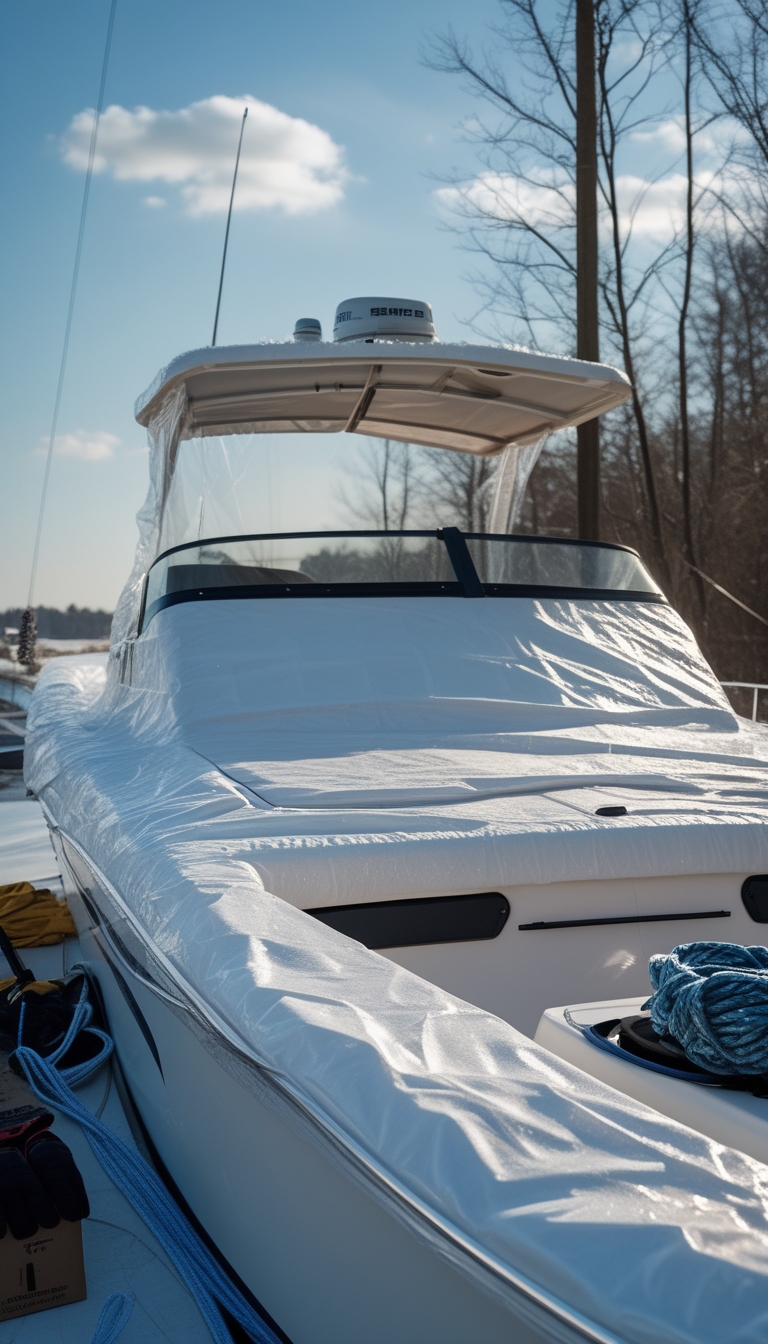
Shrink-wrapping seals your boat against rain, snow, and sun. Use a quality marine shrink film like Marine-Tex for a tight, weatherproof barrier that keeps moisture and UV rays off hull and gear.
A SeaDek cockpit cover protects high-wear areas without trapping moisture. Its foam surface blocks UV and stops fading on seats and consoles while letting vents and drainage work.
Pick shrink-wrap for full-season storage or transport. Choose a SeaDek cover if you need quick UV protection with easy access to the cockpit.
PRO TIP
Leave vents and moisture paths open when shrink-wrapping. That cuts mold risk and keeps your interior dry.
12) Remove sails, canvas, and cushions; store in breathable bags with silica gel
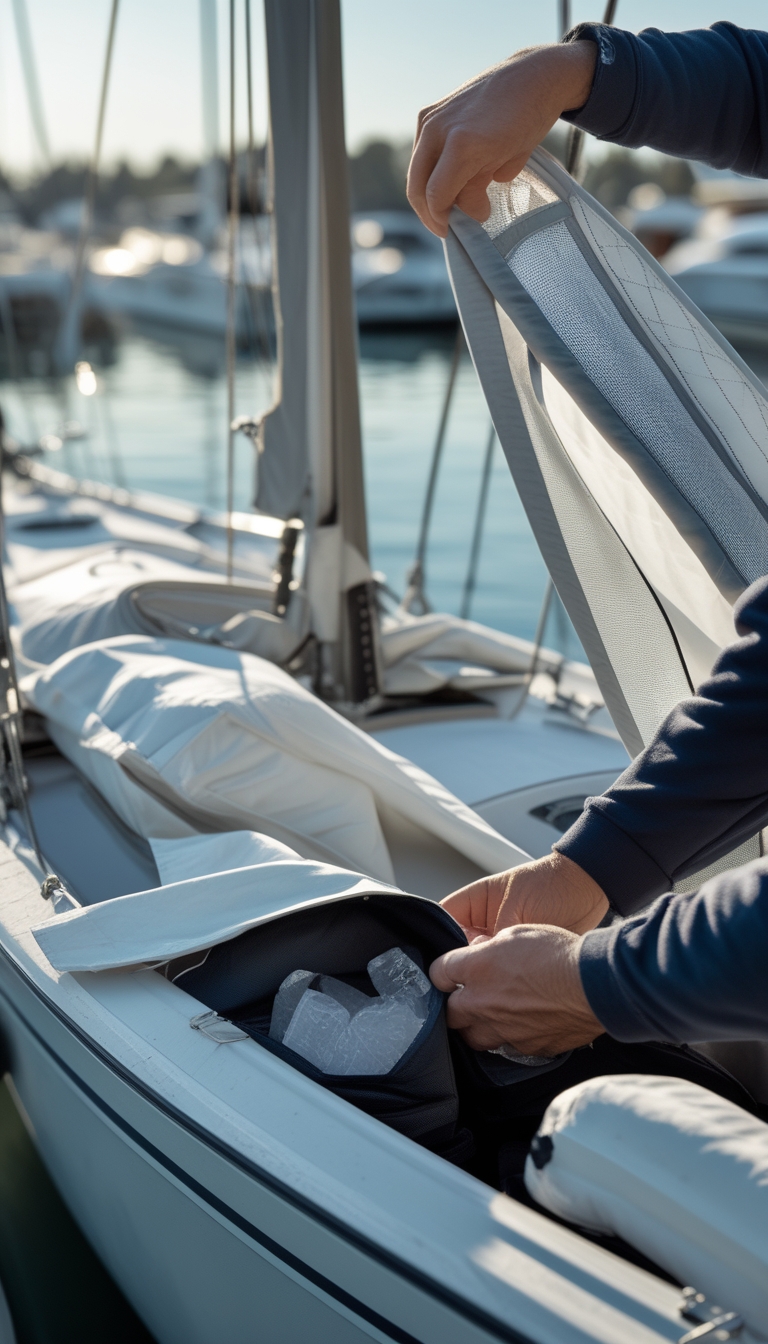
Take sails, canvas covers, and cushions off the boat before winter sets in. Clean and dry each piece thoroughly to stop mold and mildew from forming.
Fold items loosely to avoid sharp creases and place them in breathable storage bags. Avoid plastic that traps moisture; use cotton or mesh bags that let air move.
Add silica gel packets or other desiccants to each bag to keep humidity low. Check the packets periodically and replace them if they feel damp.
Store items in a cool, dry spot away from direct sunlight and pests. Label bags so you can find what you need quickly in spring.
PRO TIP
Lay sails out flat or roll them around a tube when possible to prevent fabric stress and extend their life.
13) Inspect and grease steering cables and control linkages with Lubriplate or CRC Marine Lube
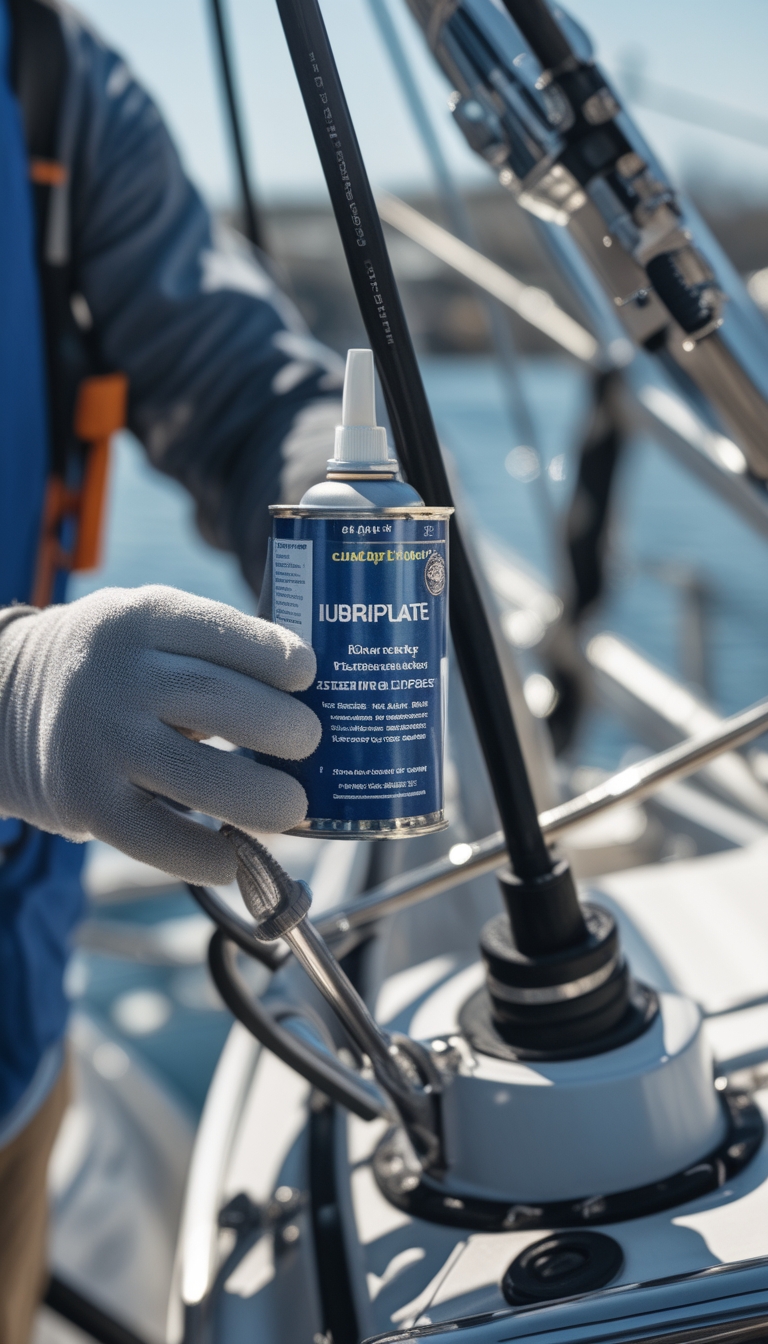
Check your steering cables and linkages for wear, rust, or fraying. Look at both ends and along the sheath where water can hide and cause corrosion.
Wipe off old grime and salt before you lube. Use a marine-grade grease like Lubriplate or CRC Marine Lube; they resist water and keep moving parts smooth.
Apply lubricant to the cable ends, fittings, and any exposed linkages. Move the wheel and controls to work the lube into the assembly for even coverage.
If your cable has a sealed factory lubrication, don’t over-lube it. Replace cables that show deep corrosion, kinks, or damaged inner wires.
PRO TIP
Work in dry weather and run the steering through full travel several times after lubing to push lubricant into tight spots.
14) Clean bilge, test automatic bilge pump, and install a bilge pump float switch
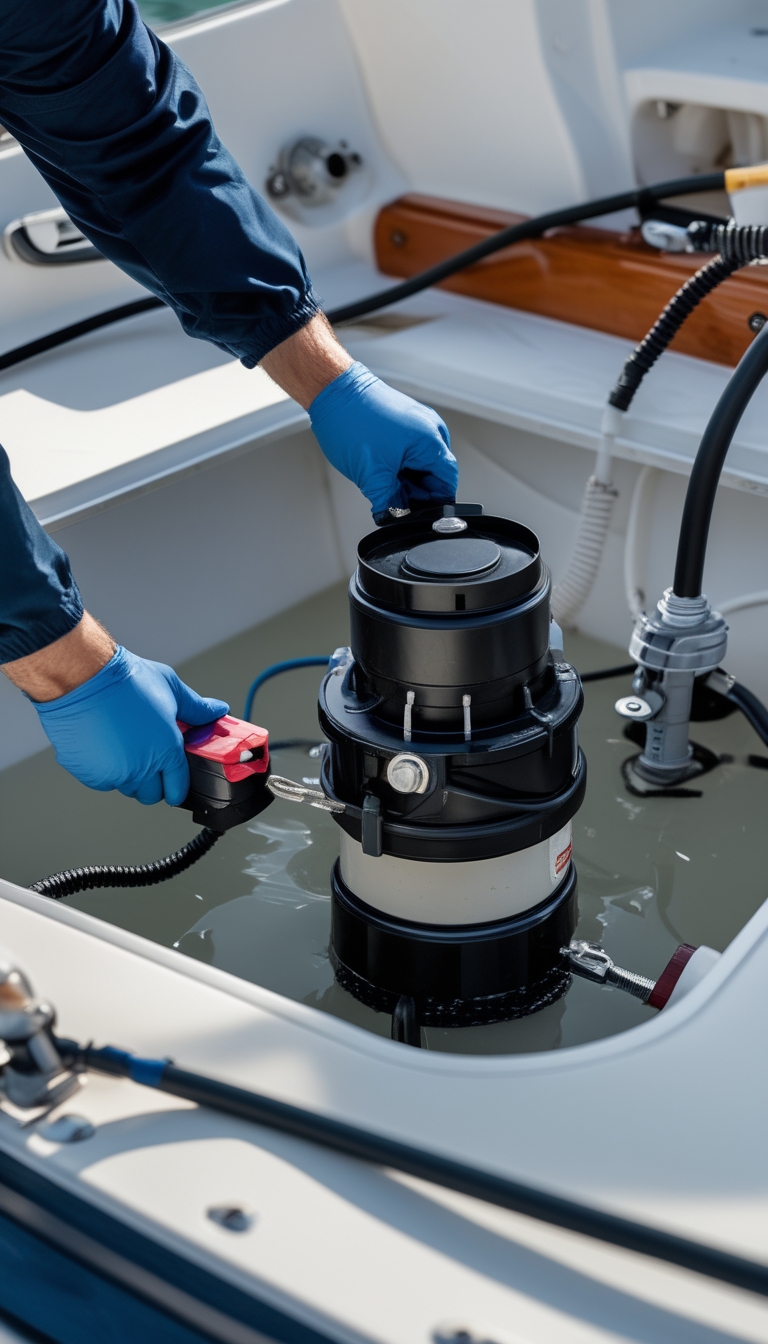
You should remove debris, oil, and sludge from the bilge before winter. A clean bilge helps pumps work and makes leaks easier to spot.
Test the automatic bilge pump in both manual and auto modes. Run the pump under load and lift the float to confirm it starts and stops reliably.
If your pump lacks a proper float switch, install one or replace a worn switch. Wire the pump directly to the battery with an inline fuse so it still works if the main switch is off.
PRO TIP
Check hose fittings and clamps for cracks or corrosion while the bilge is clean. Small fixes now prevent big problems later.
15) Protect wood trim with Cetol or Interlux varnish before winter storage
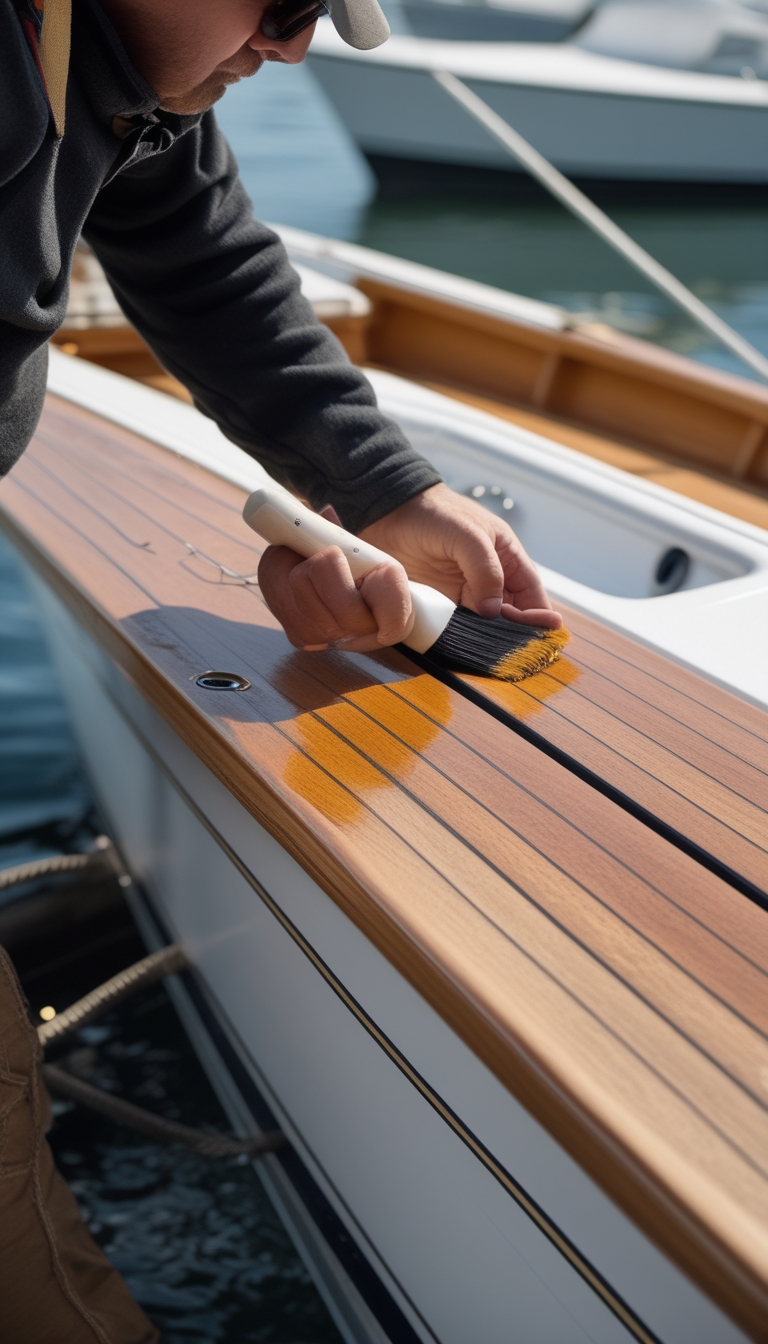
Treat your wood trim before you store the boat to stop moisture and UV damage. Clean the wood, sand smooth, and remove old coatings so the new finish bonds well.
Use a marine-grade product like Cetol or Interlux Cetol Marine for a translucent, breathable finish. These finishes protect grain and resist UV without needing the heavy build of traditional varnish.
If you want a gloss look, some Cetol systems offer a gloss topcoat made to go over their translucent base. Follow the maker’s prep and drying guidelines, and keep wood moisture under 18% before coating.
PRO TIP
Apply maintenance coats on a mild dry day and store the boat covered in a well-ventilated space.
16) Apply mold and mildew inhibitor (Concrobium Mold Control) to bilge and cabin fabrics
Treating the bilge and cabin fabrics with a mold inhibitor helps stop musty smells and slow mold growth while your boat sits. Spray a thin, even coat on carpets, cushions, canvas, and hard surfaces, then let it dry fully before closing hatches.
Concrobium Mold Control works as a cleaner and a protective layer, so you can use it during winter prep and again after cleaning. It is EPA-registered and safe for many materials, but always test a small hidden spot first to check for color change.
Wear gloves and a mask when you spray, and ventilate the area if possible. Store the product where it won’t freeze, and label the container so you remember its purpose.
PRO TIP
Apply the product after you vacuum and wipe surfaces. That lets the inhibitor reach fabric fibers and crevices for better protection.


