Last Updated on March 21, 2026
You spend a lot of time in a small space, so your homework setup should work as hard as you do. This article shows simple, smart ways to turn tight corners, benches, and walls into calm, clutter-free study spots that keep learning on track while you travel.
You’ll get ideas for space-saving desks, lighting, storage, comfort, and quiet zones that fit an RV lifestyle. Flip through the tips to find quick fixes and easy upgrades that make schoolwork smoother without sacrificing living space.
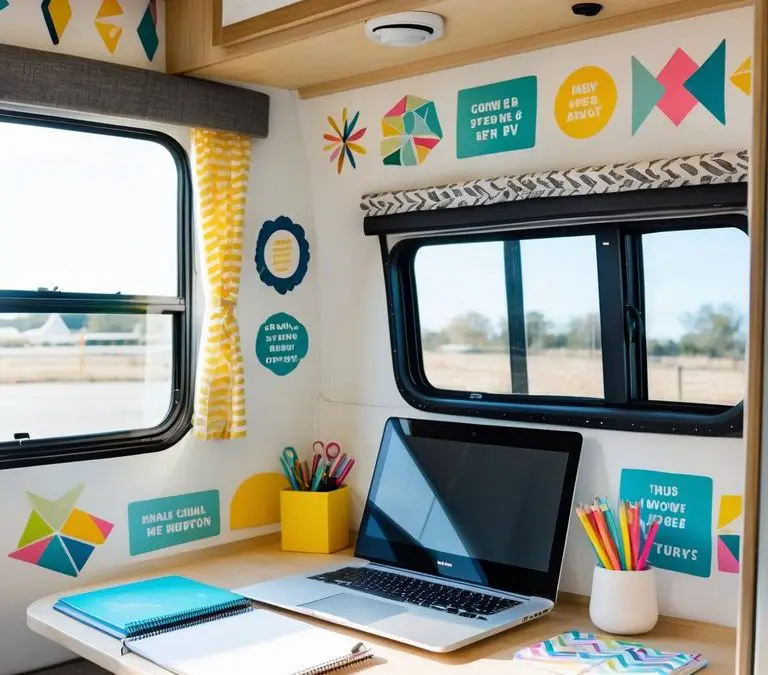
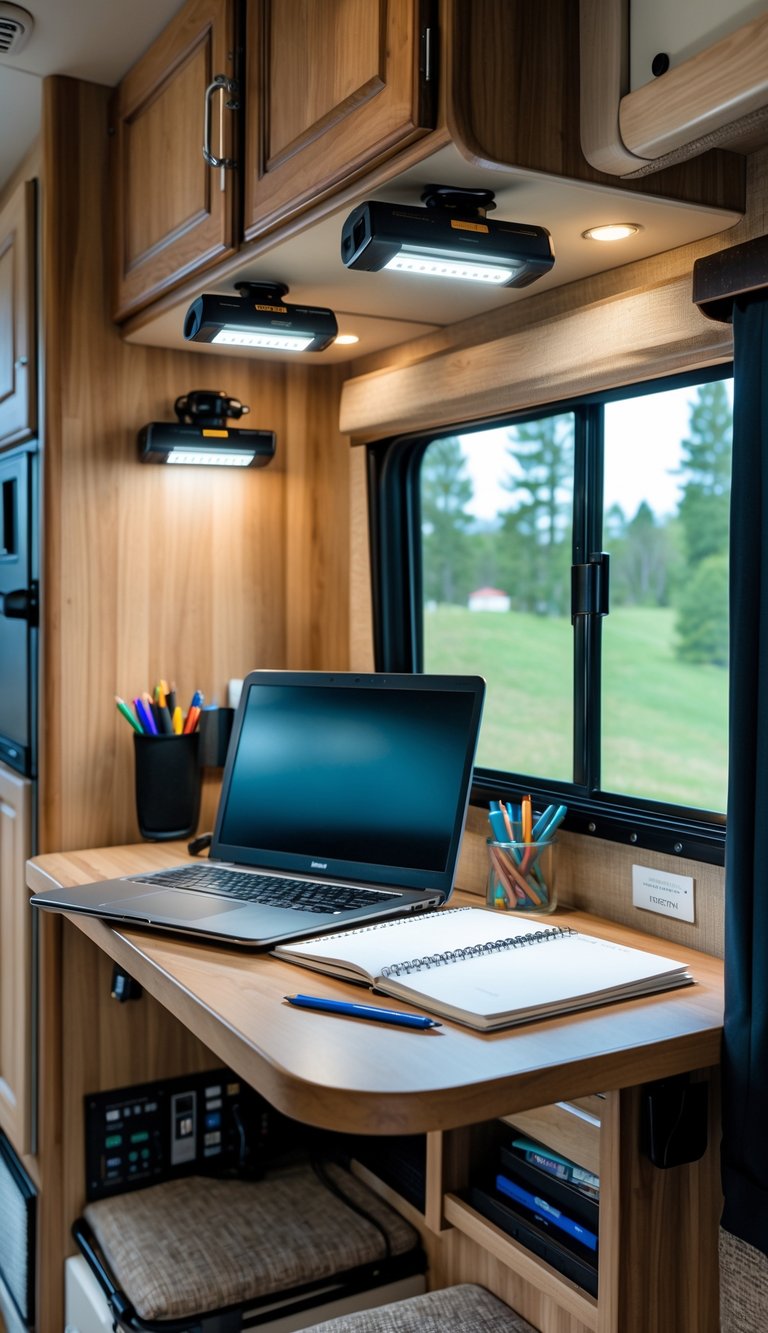
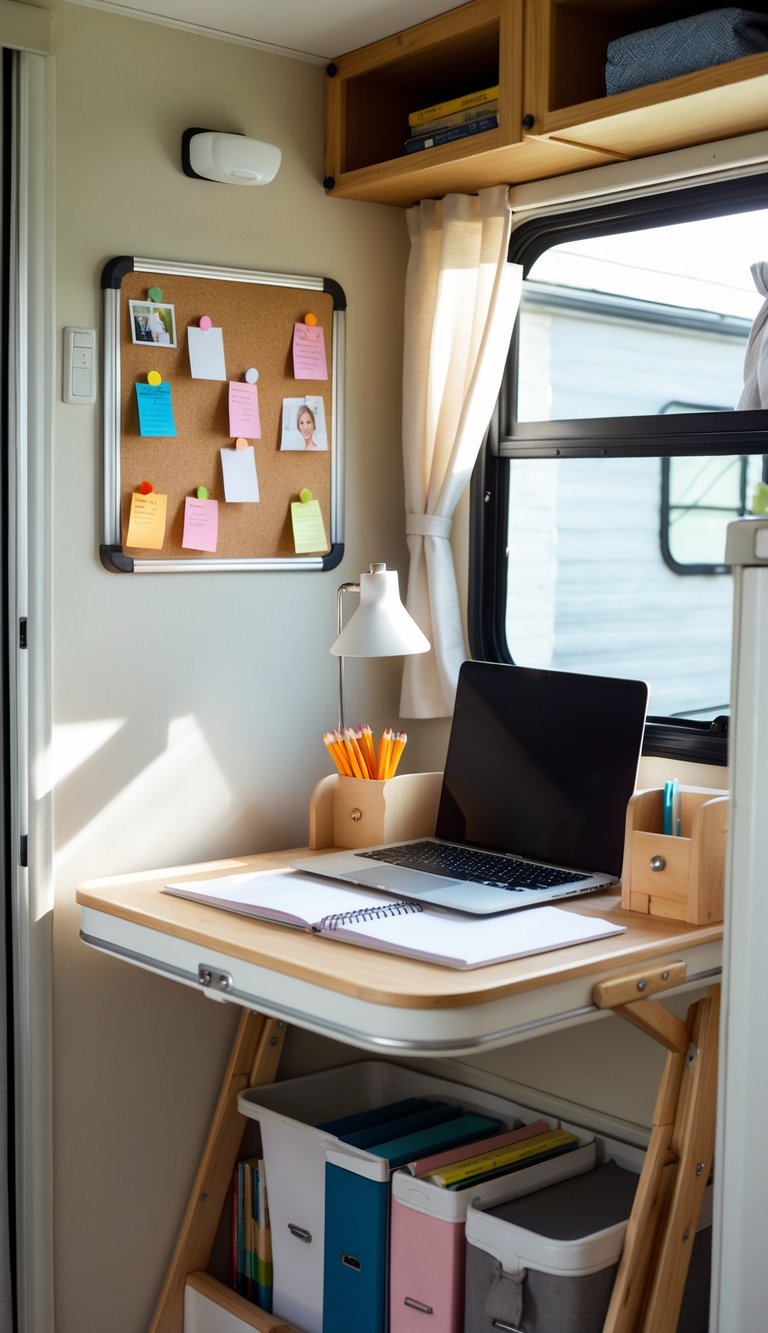
1) Use fold-down wall desks to save space
Fold-down wall desks give you a real workspace without stealing room. You fold them up when not in use, so you keep floor space for living or sleeping.
Many models mount to studs and lock flat against the wall. That keeps the desk steady and lets you use the same surface for a laptop, books, or a quick craft project.
You can choose simple DIY designs or buy prebuilt units that match your RV decor. Add small shelves or a paper organizer above the desk to keep supplies handy and tidy.
PRO TIP
Mount the desk near an outlet and use a strip of hook-and-loop tape to secure cords. This keeps power handy and prevents cables from dangling while you drive.
2) Install magnetic whiteboards for notes
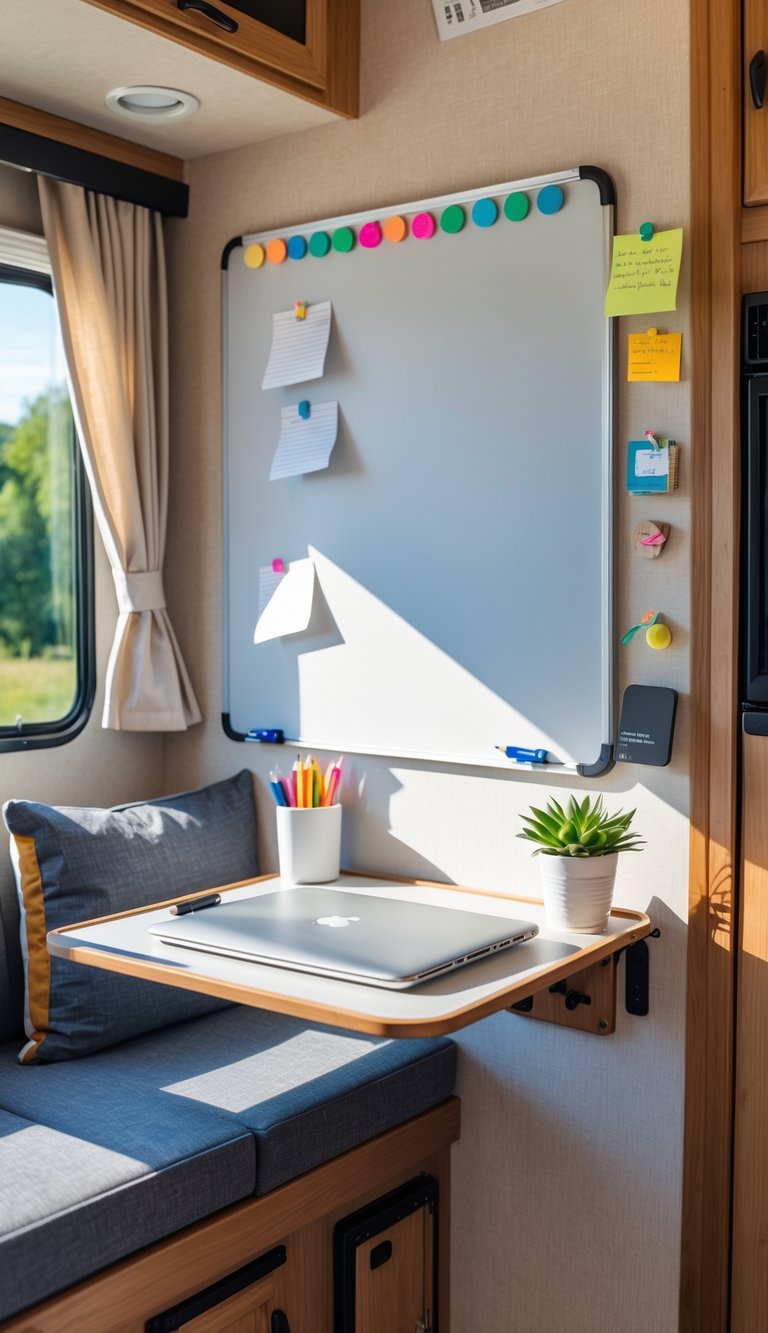
A magnetic whiteboard gives your RV a compact, reusable place to write quick notes and reminders. You can mount one on a cabinet door, over a desk, or along a narrow wall to save floor space.
Use small magnets to hold homework sheets, permission slips, or a weekly schedule. That keeps papers visible and off counters where they might get lost.
Choose a lightweight magnetic board or magnetic paint if you need a low-profile option. Peel-and-stick magnetic sheets work well for renters and are easy to remove.
PRO TIP
Keep a small pouch of dry-erase markers and an eraser nearby. That makes it simple for everyone to jot notes and keep the station tidy.
3) Add clip-on LED lights for focused lighting
Clip-on LED lights give you bright, direct light right where you need it. They clamp to shelves, tables, or the edge of your RV desk without taking up precious counter space.
Choose a light with adjustable color temperature so you can switch from cool morning light to a warmer evening glow. Dimming helps prevent eye strain during long homework or reading sessions.
Many clip-ons run on rechargeable batteries or USB power, which fits RV electrical limits. You can move them easily between bunks, the dinette, or a closet nook.
PRO TIP
Mount one on a flexible arm so you can steer the beam exactly where you want it.
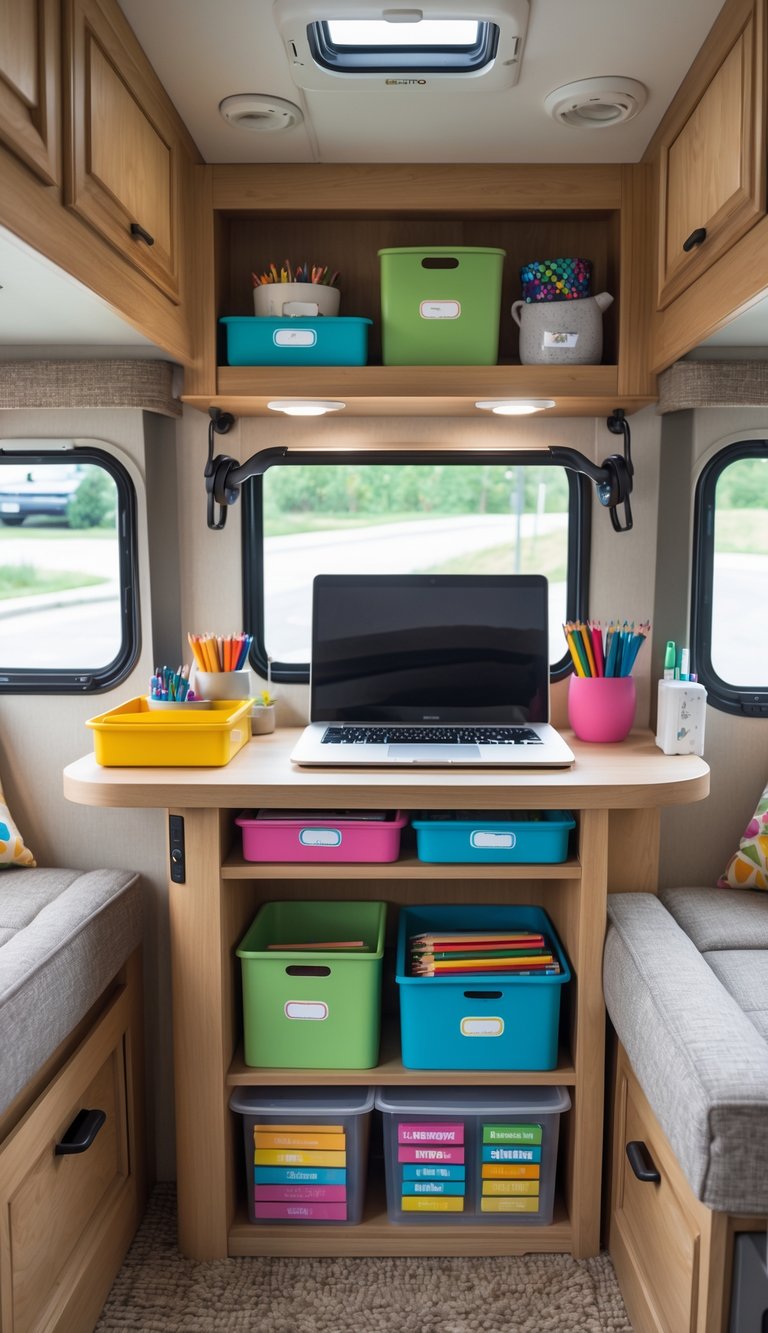
4) Use clear storage bins for supplies
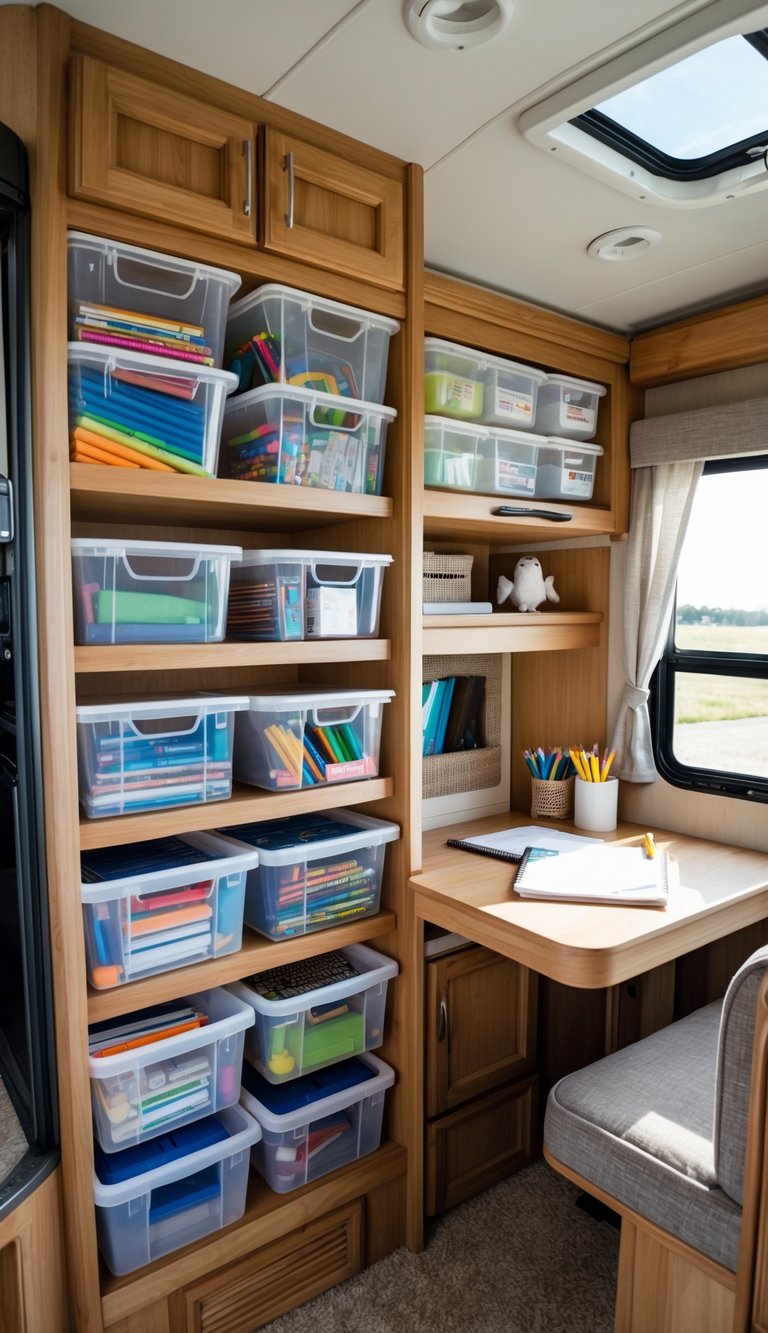
Clear bins let you see what’s inside at a glance. That saves time when your child needs a pencil, glue, or a worksheet during a short stop.
Use small clear containers for markers, erasers, and clips. Stackable bins work well in tight RV cabinets and keep tiny items from rolling around while you drive.
Label each bin with a simple word or picture so kids can find things themselves. You can also use removable labels if your supplies change by season.
Keep one clear bin for current work and another for finished papers. This helps you avoid a pileup on the table and makes cleanup faster between stops.
PRO TIP
Choose bins with secure lids and rounded corners to prevent spills and keep hands safe.
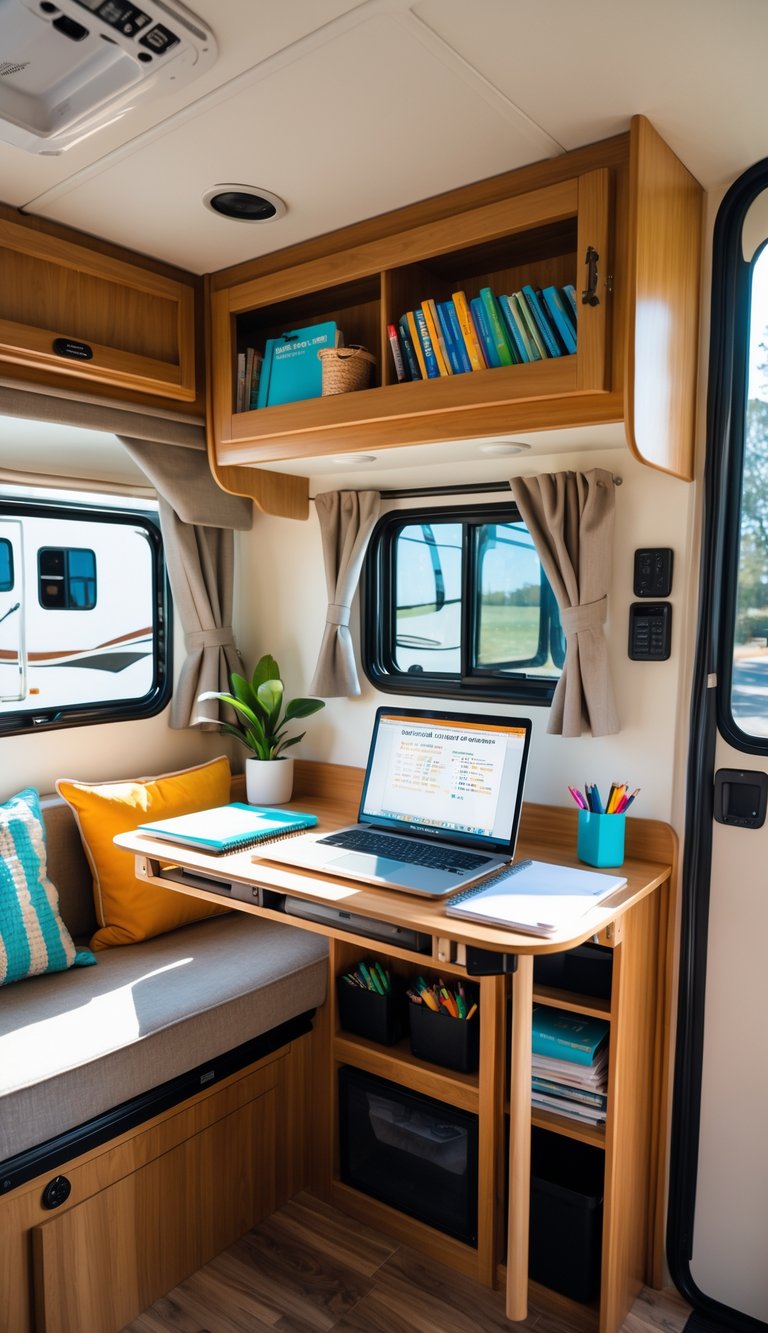
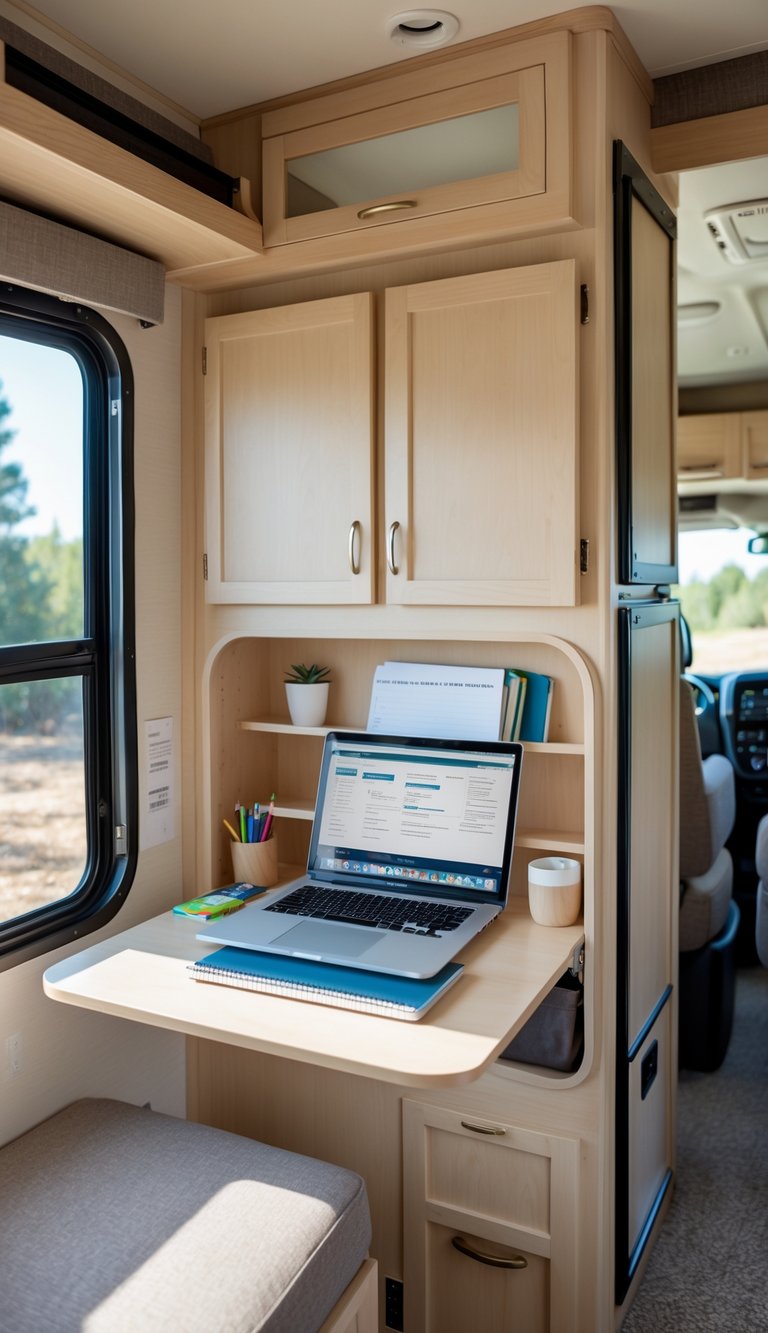
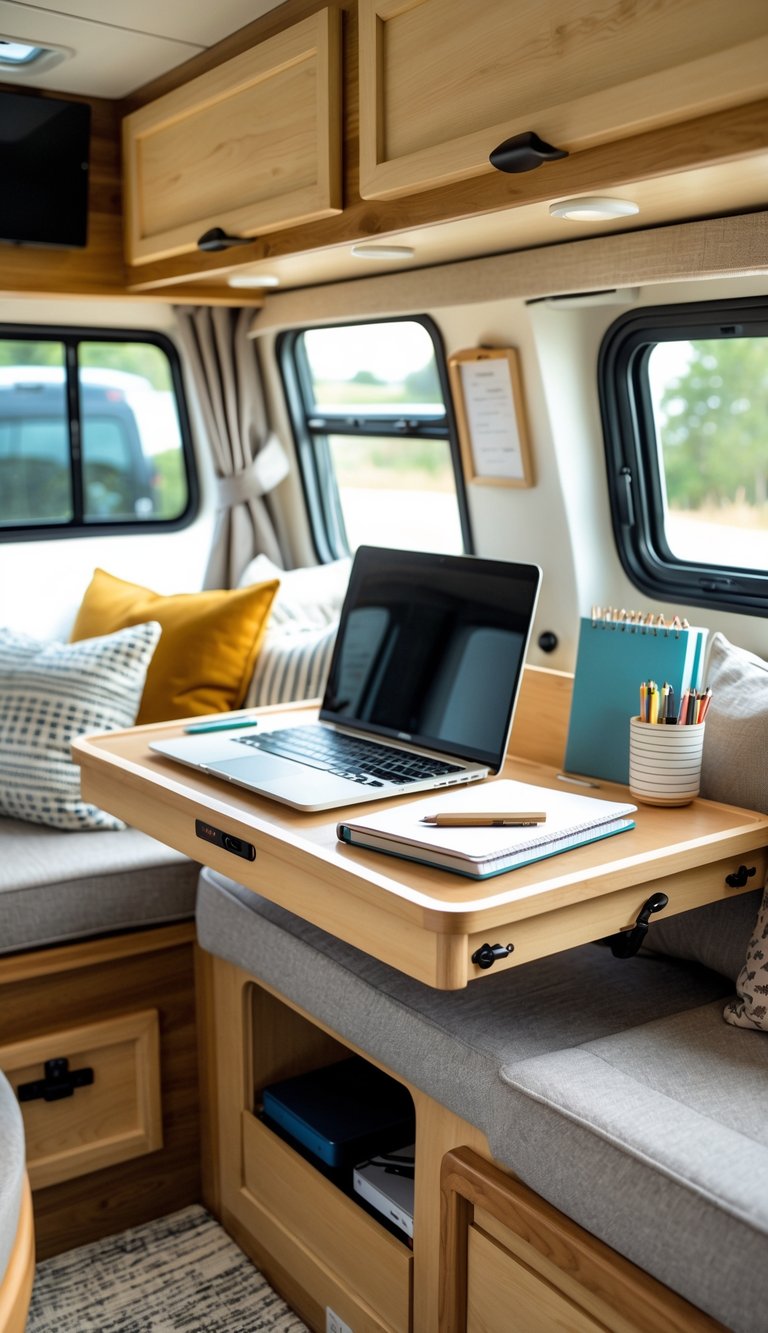
5) Create a designated laptop nook
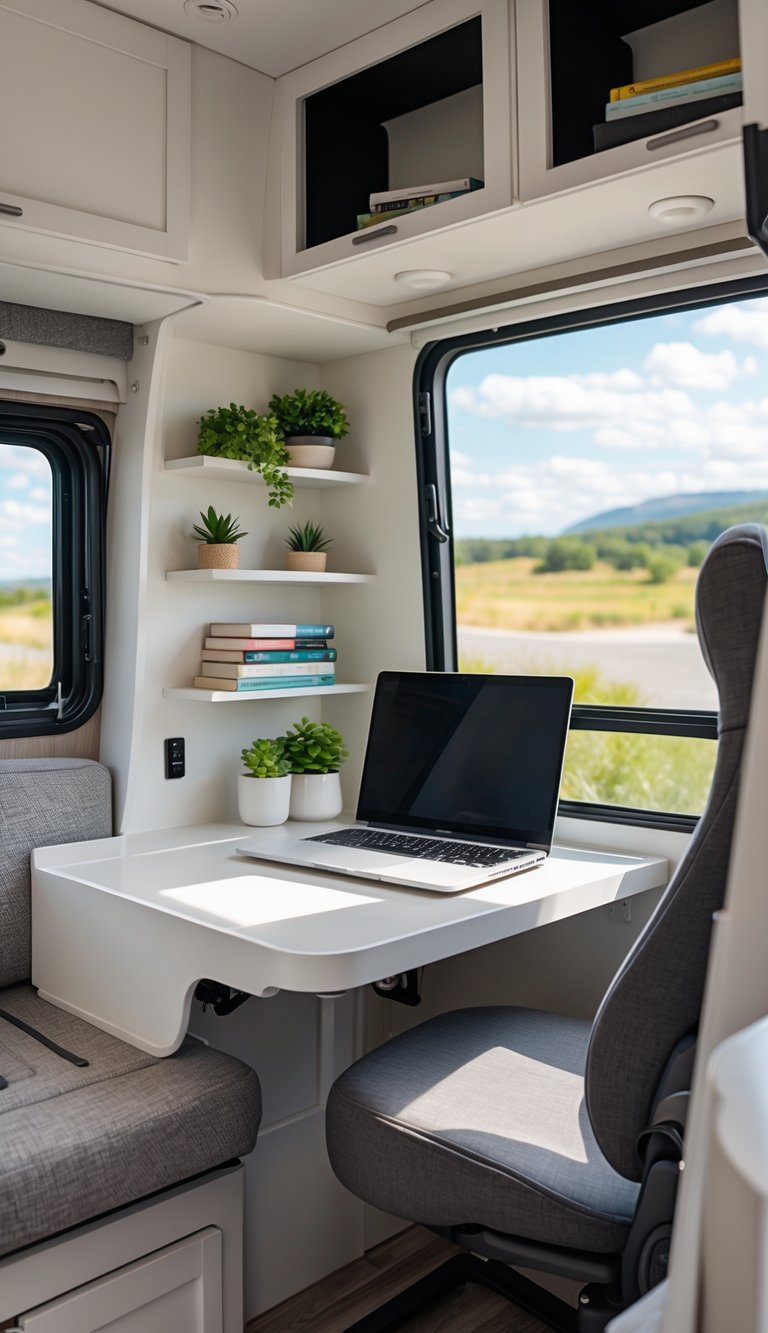
Give your laptop a consistent spot so you and your kids know where work happens. Pick a small counter, a pull-out table, or a corner of a dinette and keep it set up for study time.
Add a comfortable chair or a cushion and a simple lap desk if you move around. Good lighting matters; a clip-on lamp or under-cabinet light keeps screens easy to read without glare.
Keep cords tidy with a small power strip and cable clips. Store chargers, a mouse, and headphones in a nearby bin so everything stays within reach.
PRO TIP
Mount a slim shelf above the nook for notebooks and a few supplies. That small habit saves time and helps keep your RV clutter-free.
6) Incorporate pegboards for hanging tools
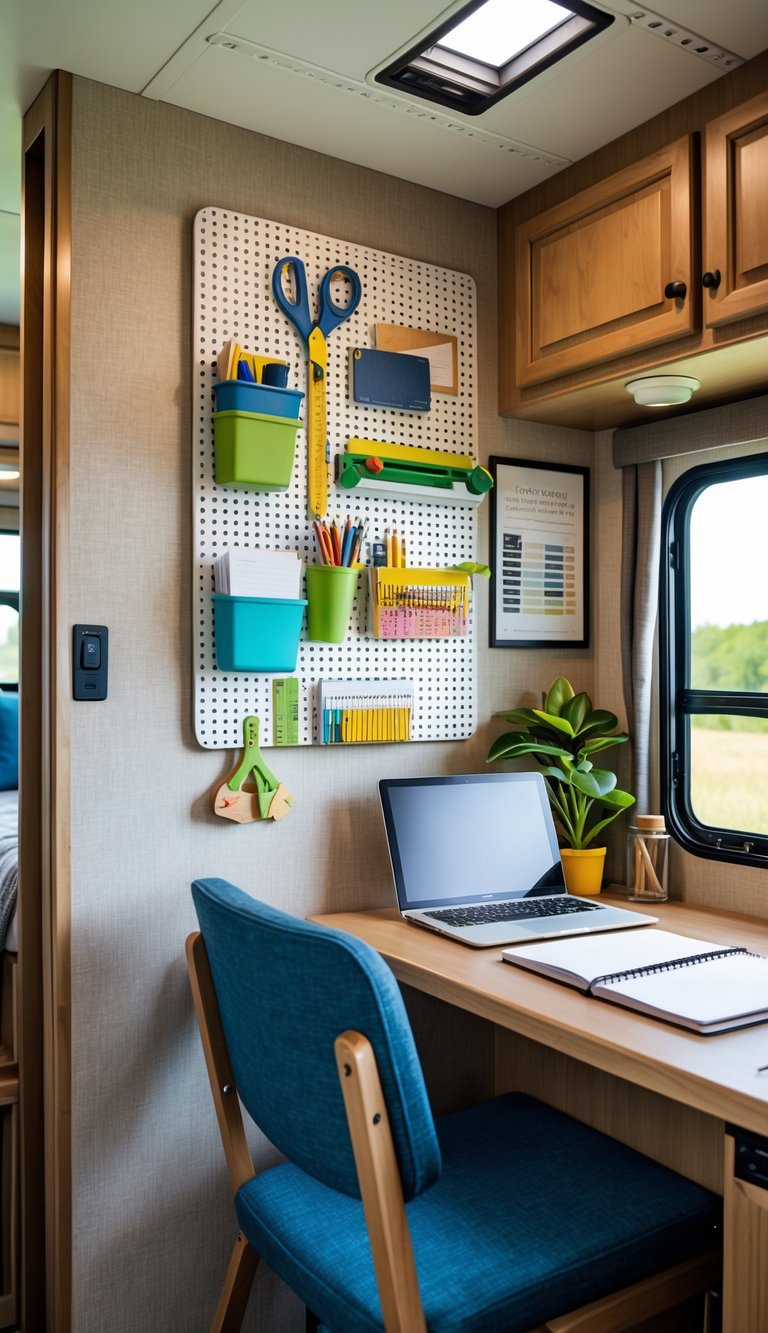
Pegboards make great use of vertical space in an RV. You can hang small tools, school supplies, and charging cords so your work surface stays clear.
Choose a metal or wood pegboard based on weight needs and style. Metal holds heavier items; wood is easy to cut to size and paint to match your RV.
Use hooks, baskets, and shelves to store pens, scissors, rulers, and headphones. Arrange items by task so everything you need for homework is within arm’s reach.
Install the pegboard near your desk or fold-down table for quick access. Secure it to studs or use strong anchors to keep it stable on the road.
PRO TIP
Outline each tool’s spot with a marker or paint. This helps kids return items to the right place and keeps your station tidy.
7) Install a small corkboard for reminders
A small corkboard gives you a simple place to pin class schedules, permission slips, and grocery lists. Mount it near your desk or dinette where you work so you see reminders often.
Choose a thin, lightweight board to save space and weight in the RV. You can cut a cork sheet to fit an odd wall space or inside a cabinet door.
Use color-coded pins or sticky notes to separate tasks, supplies, and deadlines. This makes it easy to scan what’s urgent at a glance.
PRO TIP
Stick a small pouch or magnetic clip under the corkboard to hold spare pens, extra pins, and a mini notepad.
8) Use stackable trays for organizing papers
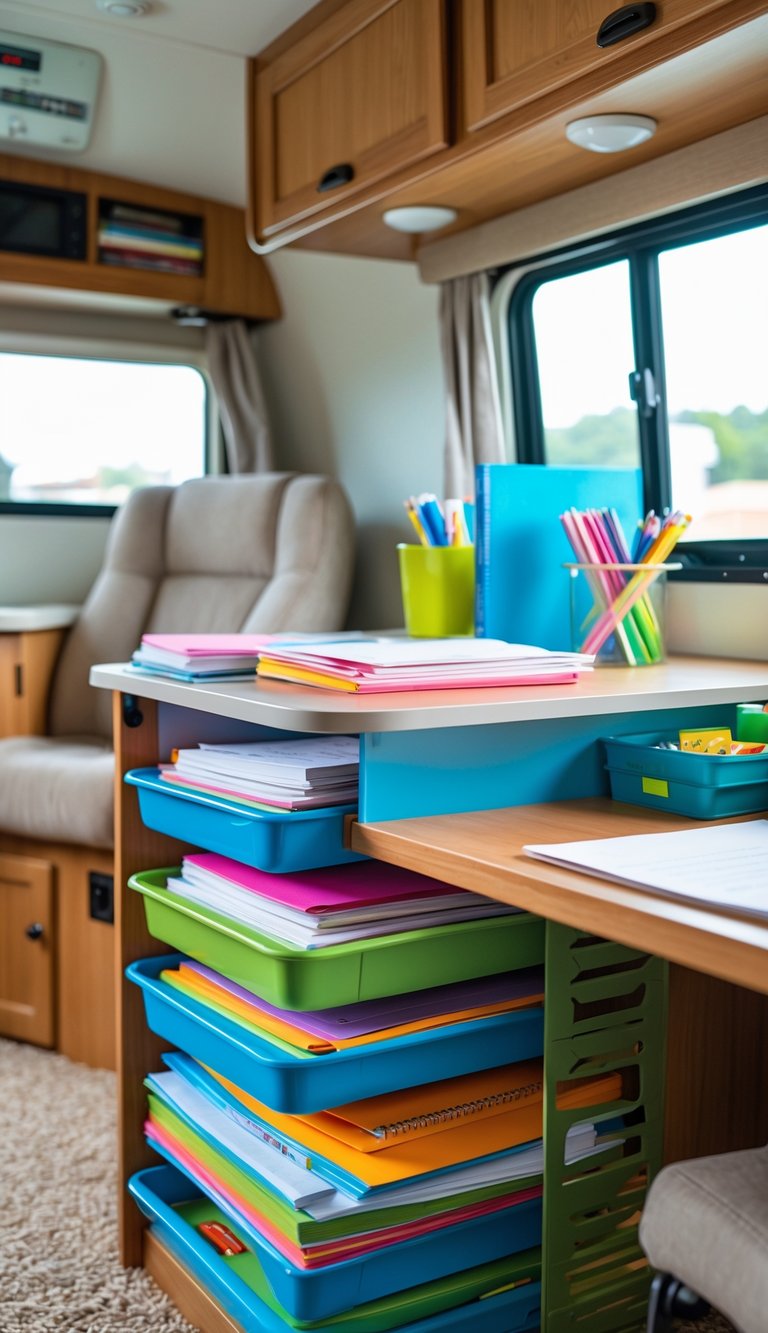
Stackable trays save space in tight RV desks and counters. You can sort homework by child, subject, or urgency so papers stay easy to find.
Choose trays that fit letter-size papers or smaller, depending on your kids’ worksheets and folders. Lightweight plastic or metal mesh trays work well and won’t add much weight to your RV.
Keep one tray for incoming work and one for finished or to-be-graded items. This simple flow helps you avoid piles and keeps each child responsible for their own stack.
Place the trays near a writing surface or wall-mounted shelf. That keeps papers handy during study time and out of the way when you need counter space.
PRO TIP
Label each tray with a child’s name or subject using sticky labels. It makes cleanup faster and helps kids put things back themselves.
9) Add colorful cushions for comfort
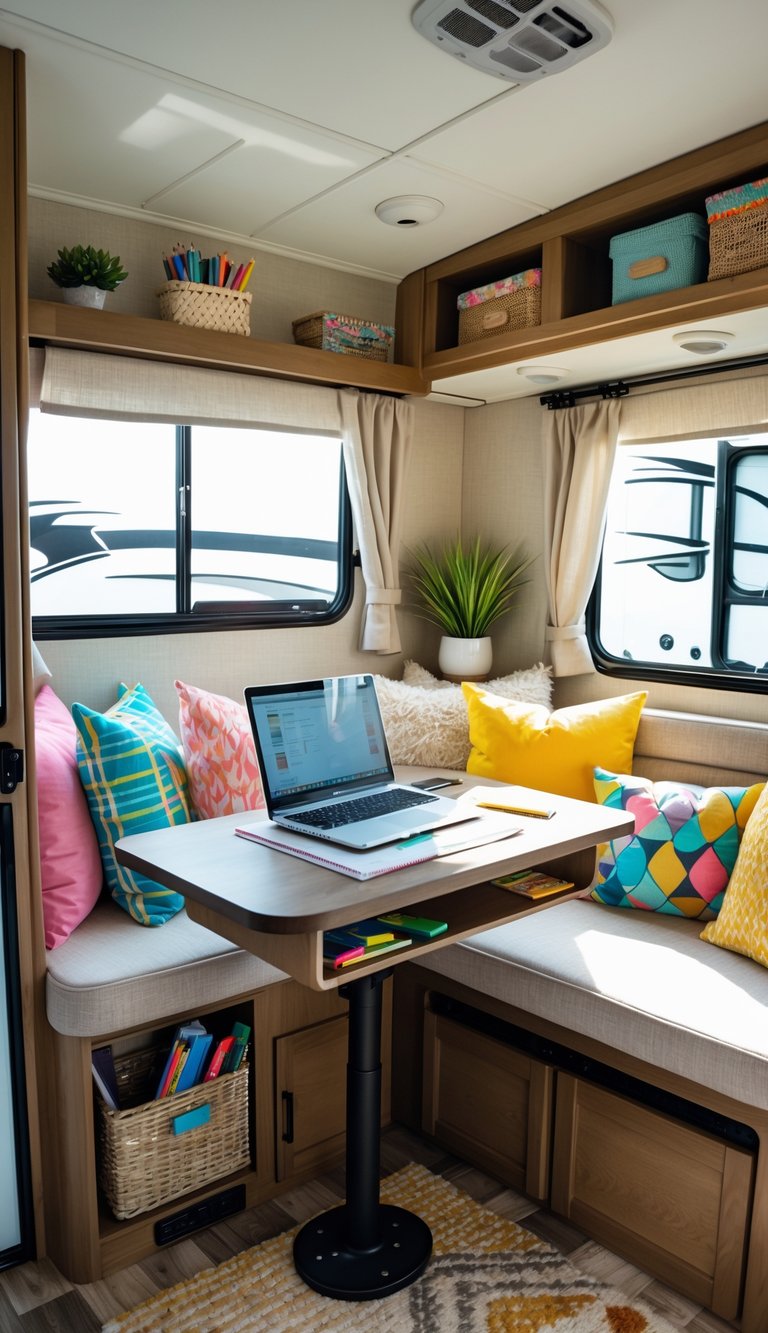
Cushions make a small RV homework nook feel inviting and help your child sit more comfortably. Soft cushions support good posture and reduce fidgeting during longer tasks.
Pick bright colors or fun patterns to make the space feel cheerful. Color can lift mood and make studying seem less like a chore.
Choose cushions that are easy to clean and store. Removable covers or waterproof fabrics work well in tight RV spaces.
Mix seat cushions with a few lumbar pillows for extra back support. Stack or tuck them when not in use to save space.
PRO TIP
Use cushions with ties or non-slip backing so they stay put on bench seats while the RV is moving.
10) Use multi-use furniture with hidden storage
Pick furniture that does two jobs at once. A bench that opens, a sofa with under-seat drawers, or a table with shelves gives you study space and storage without extra pieces.
Hidden storage keeps school supplies out of sight. You can store books, chargers, and notebooks where kids can reach them but visitors won’t see the clutter.
Look for pieces that fit your RV layout. Measure first so the furniture doesn’t block walkways or doors.
PRO TIP
Use organizers inside the hidden compartments to keep items tidy. Small bins or dividers make it easy to grab what you need and put things away quickly.
11) Create a portable supply caddy
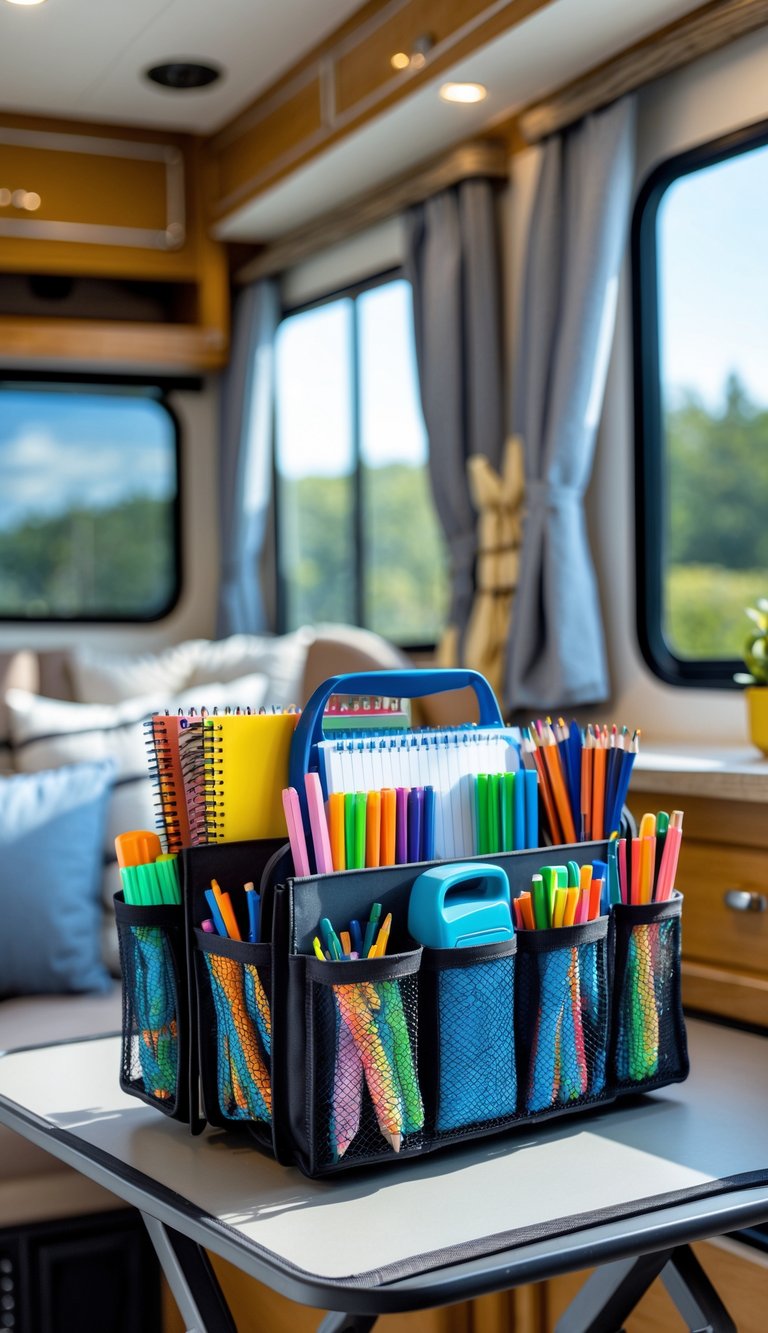
A small caddy keeps pens, pencils, markers, scissors, and glue in one place. You can move it from the dinette to a bedside table in seconds, so kids always have what they need.
Choose a tote with compartments or add small jars to hold supplies upright. Keep a pencil sharpener, sticky notes, and a ruler nearby for quick fixes.
Make it lightweight and durable so it won’t tip over while the RV’s moving. Label sections for each child to cut down on fights and speed cleanup.
PRO TIP
Use a small handle or strap so you can hang the caddy on a hook when not in use.
12) Add a small bookshelf with straps
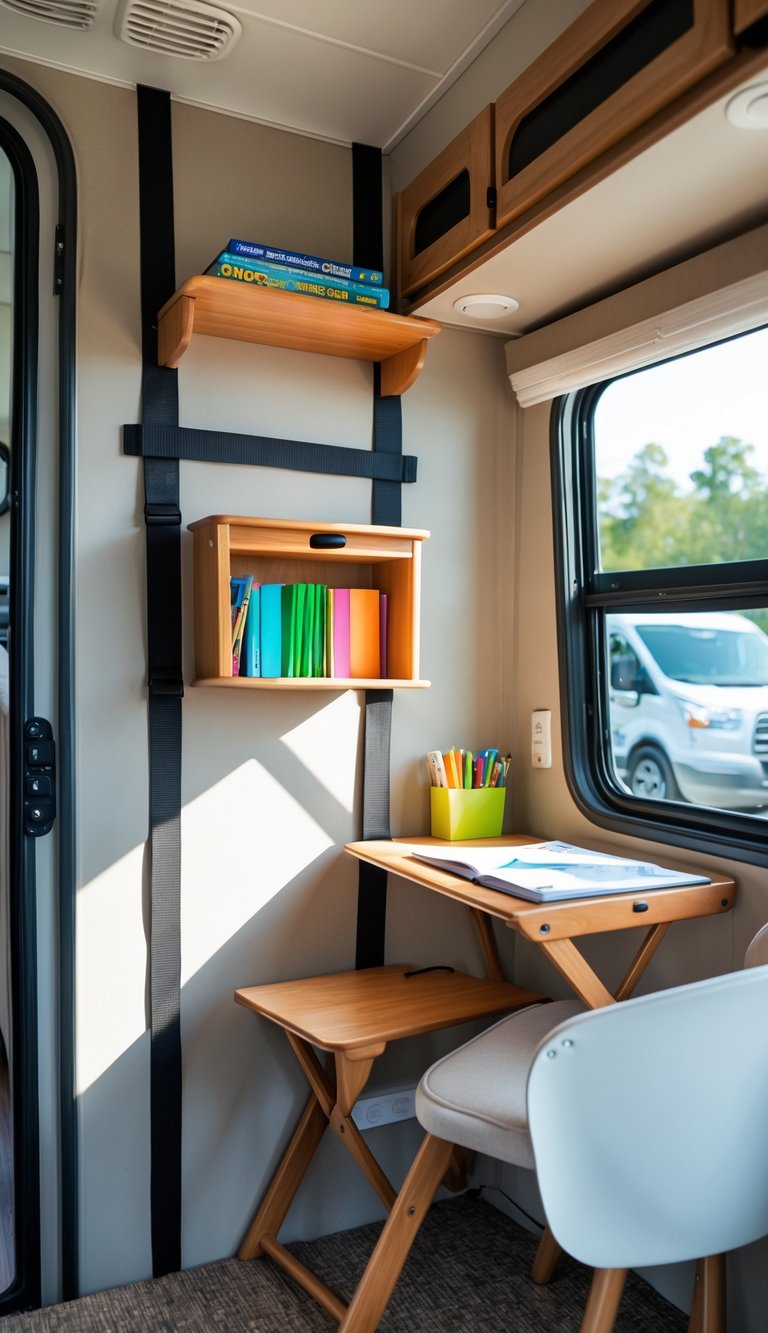
A narrow bookshelf gives your RV a tidy place for textbooks, notebooks, and a few favorite reads. Pick a shallow unit that fits beside a dinette or over a countertop to save floor space.
Secure the shelf with straps or marine-grade bungee cords so books stay put while you drive. Fasten straps to cabinet anchors or threaded inserts to keep everything stable on bumpy roads.
Use elastic book straps or simple luggage straps that tighten easily. Label shelves by subject or child to make homework time faster and reduce clutter.
PRO TIP
Mount the bookshelf low enough for kids to reach and add a rubber lip or non-slip shelf liner to stop pages from sliding out.
13) Use removable wall decals for decoration
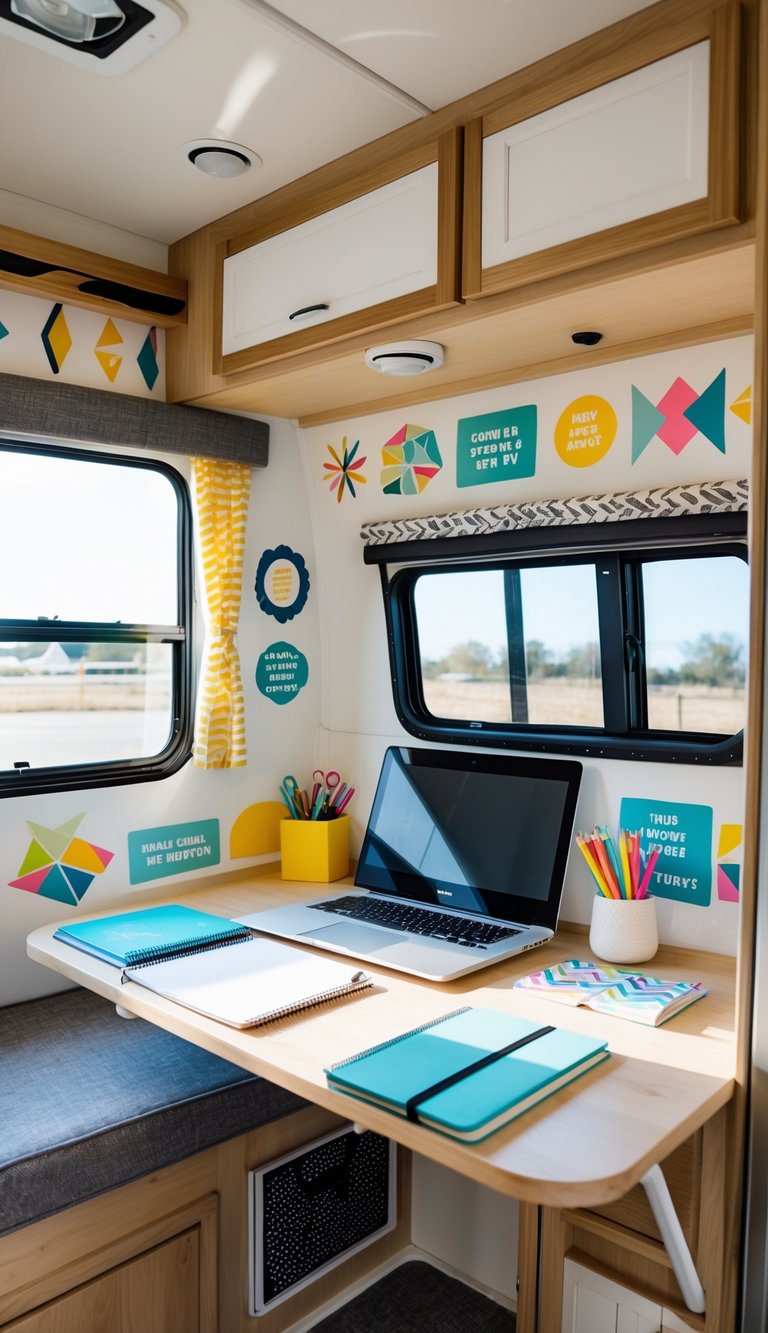
You can add color and personality to your RV homework area without paint or tools. Removable wall decals stick on smooth surfaces and peel off cleanly, so they suit rented or small spaces.
Pick decals that match your child’s interests, like maps, numbers, or nature scenes. They create a fun backdrop that helps focus and makes the spot feel special.
Decals also work as learning aids. Use alphabet letters, a simple math chart, or a world map near the desk to make study time more visual and hands-on.
PRO TIP
Choose high-quality, repositionable decals and test a small corner first. That keeps walls safe and lets you change the look as your needs or tastes change.
14) Incorporate a foldable chair with back support

A foldable chair with back support saves space and gives your child a steady place to sit. Pick one that folds flat so you can stash it under a bed or in a cabinet when not in use.
Choose a chair with a padded back or lumbar support to keep posture healthy during longer work sessions. Lightweight metal or sturdy plastic models work well in an RV because they balance comfort and portability.
Look for a chair with a locking mechanism so it feels stable while in use. If you worry about floors, add a small rug or non-slip pads to protect the RV surface.
PRO TIP
Buy a chair with a washable cover or removable cushion. That makes cleanup easy after snacks, markers, or travel dirt.
15) Install wall-mounted pencil holders
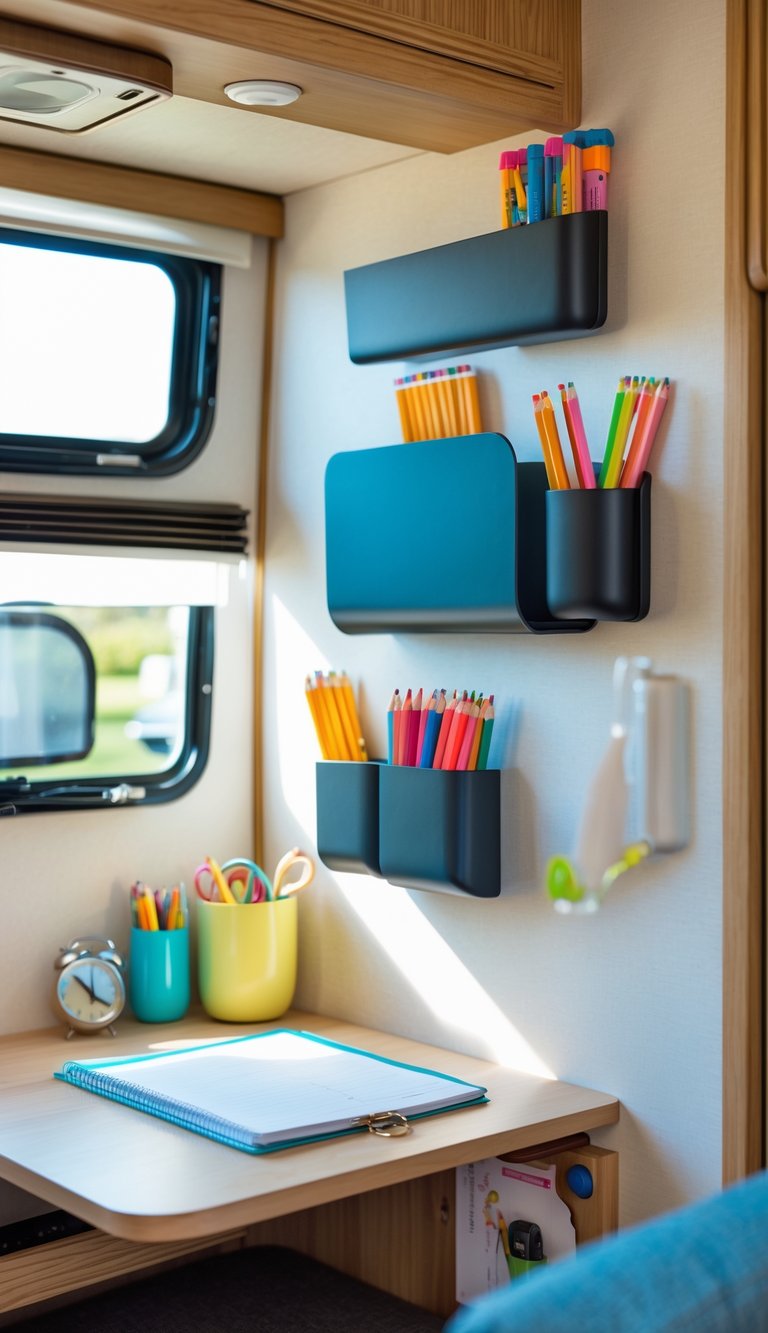
Wall-mounted pencil holders save counter space and keep supplies where you need them. You can mount a few near the desk or along the RV wall to keep pens, pencils, markers, and scissors organized.
Choose lightweight containers like small cups, mason jars with lids, or pocket organizers that screw or stick to the wall. In an RV, use strong adhesive strips or screw anchors made for thin walls to avoid damage.
Group items by type so kids can grab what they need fast. Label each holder with simple tags for pencils, markers, and tools to cut down on clutter and lost supplies.
PRO TIP
Mount holders at the child’s eye level so they reach everything without climbing.
16) Use lightweight clip-on fans for airflow
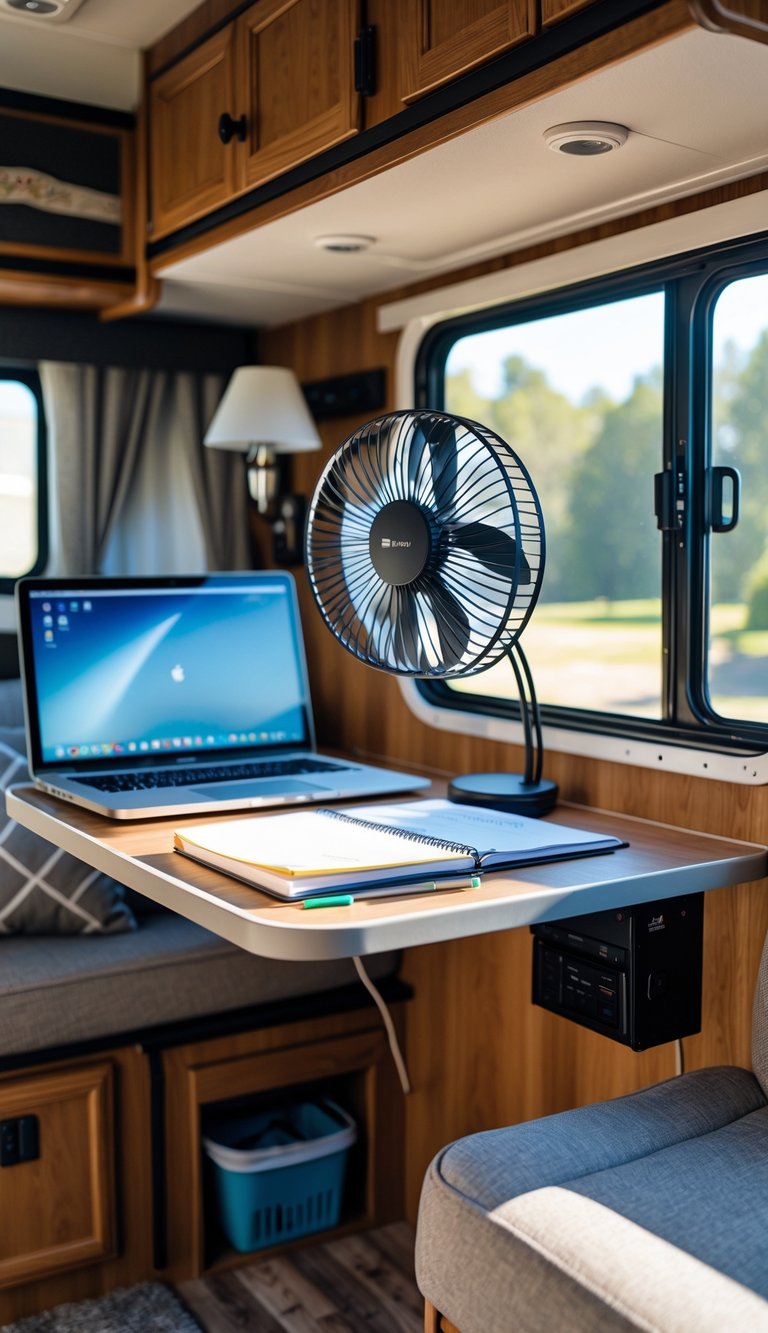
In an RV, airflow matters for comfort and focus. Clip-on fans are small, light, and easy to move to your homework area.
You can clip a fan to a shelf, table edge, or bunk rail to cool your workspace without taking up desk space. They use little power and often run on 12V or USB, which fits RV setups.
Place the fan to push fresh air toward your face, or angle it to pull warm air away. Quiet models help keep noise low while you study.
PRO TIP
Choose a fan with adjustable speed and a flexible neck so you can direct airflow exactly where you need it.
17) Add sticker labels for easy identification
Sticker labels make it faster to find supplies in a small RV. You can label bins, drawers, and folders so everything has a clear place.
Use simple words or icons so kids can read them at a glance. Bright colors help items stand out against wood or fabric surfaces.
Waterproof labels work best for an RV where moisture and spills happen. Removable stickers let you change labels as needs shift or supplies run out.
Keep a sheet of blank labels in the station for quick updates. That small habit keeps your homework area tidy and saves time during busy evenings.
PRO TIP
Print or write labels on both sides of a storage bin to see names from any angle.
18) Create a quiet zone with noise-cancelling headphones
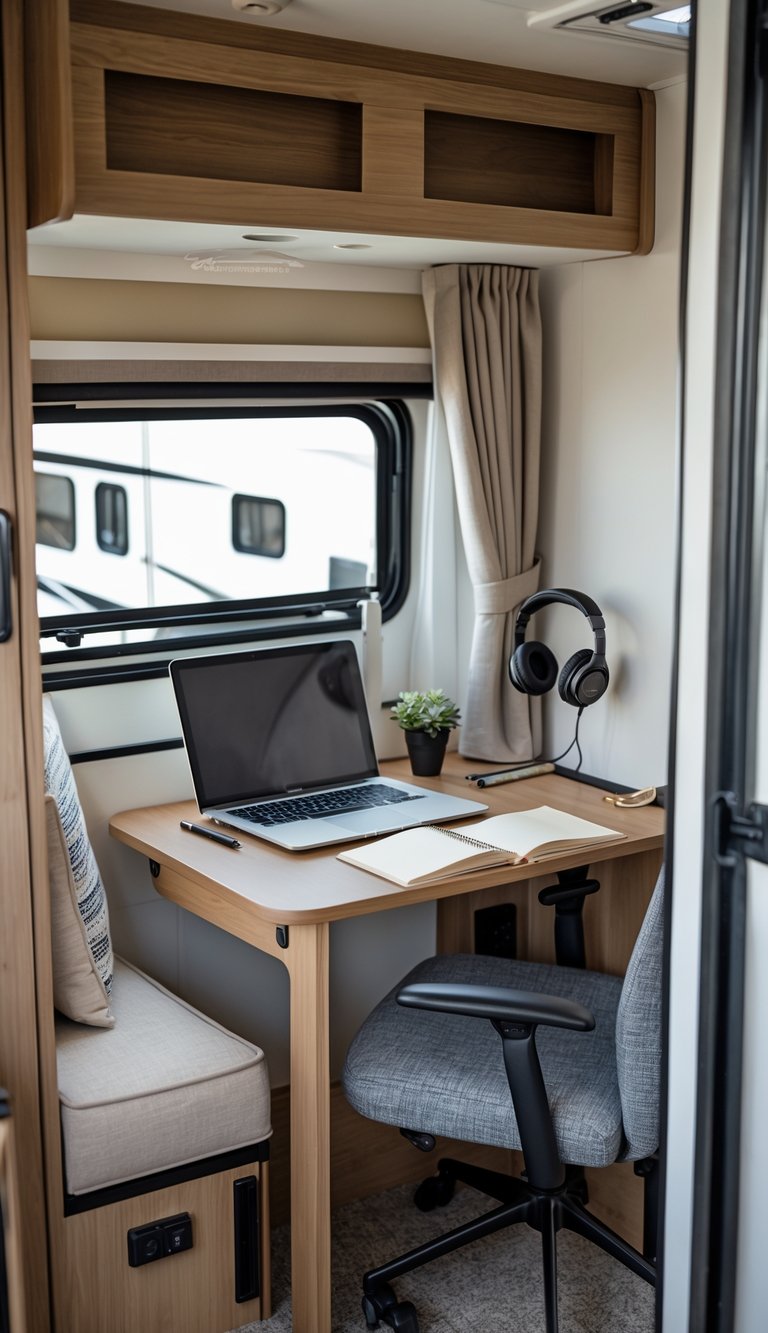
Noise can travel easily in an RV. Use noise-cancelling headphones to give your child a personal quiet space for homework or reading.
Pick comfortable, lightweight headphones that fit your child’s head. Over-ear models block more sound, while in-ear buds are compact and easy to store.
Let your child use white noise, instrumental music, or quiet study playlists to help focus. Keep volume safe and set a timer so breaks happen regularly.
Store headphones in a small bin or a hook near the homework station. This keeps them handy and helps you avoid lost cords.
PRO TIP
Choose rechargeable headphones with a simple on/off and a long battery life. They work well on the road and reduce the need for extra chargers.
19) Use pull-out drawers under benches
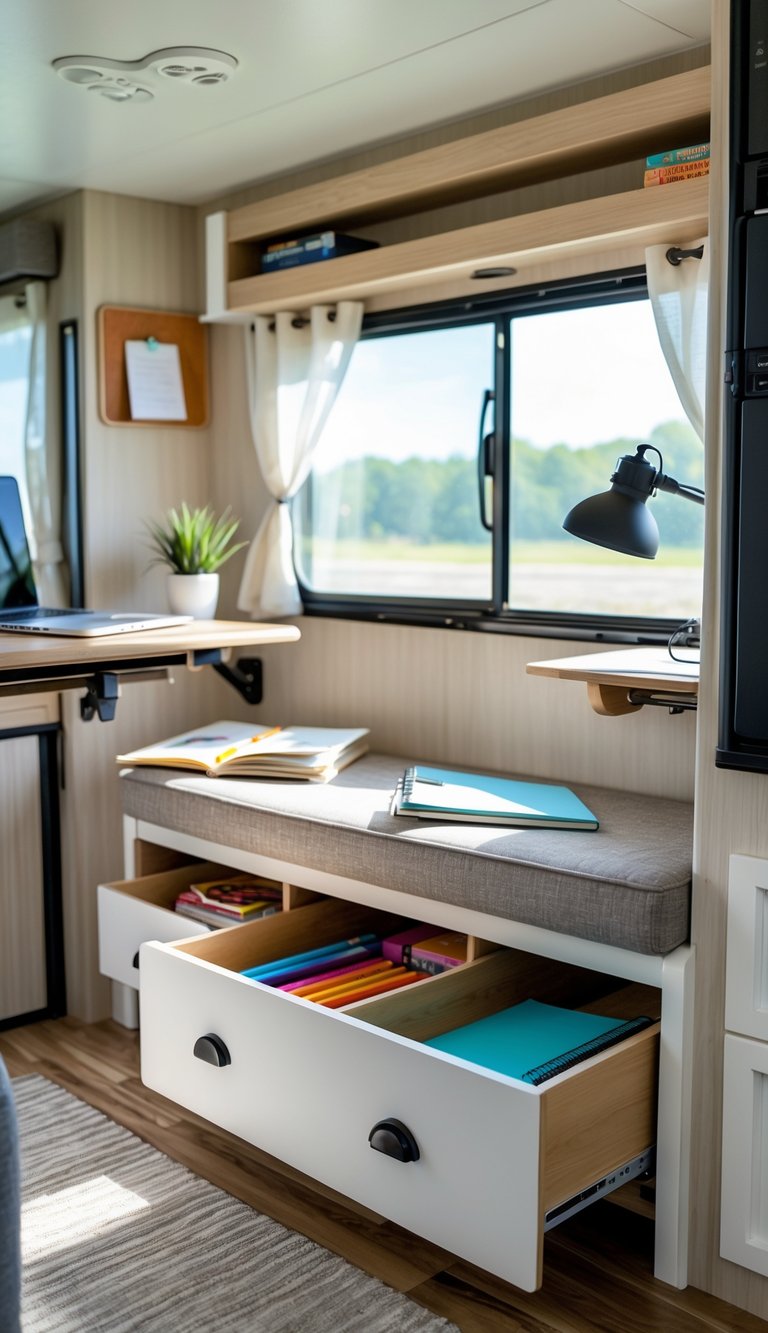
Pull-out drawers under benches make smart use of tight RV space. You can store books, supplies, and small devices out of sight but within easy reach.
Drawers keep your work area tidy and cut down on clutter that distracts kids. They also protect papers from shifting while you drive.
Choose shallow drawers for notebooks and pens, and deeper ones for binders or craft bins. Soft-close slides prevent banging and keep the cabin quiet.
PRO TIP
Label each drawer so everyone knows where things go. That small step saves time and keeps the homework station ready to use.


