Last Updated on May 12, 2026
You want your RV to feel warm, safe, and cozy as the days cool. This article shows 20 practical fall renovation projects that help you save heat, cut drafts, and make the space more comfortable without a full gut job.
You’ll get straightforward, easy-to-do upgrades that improve comfort, save energy, and keep your rig ready for colder trips.
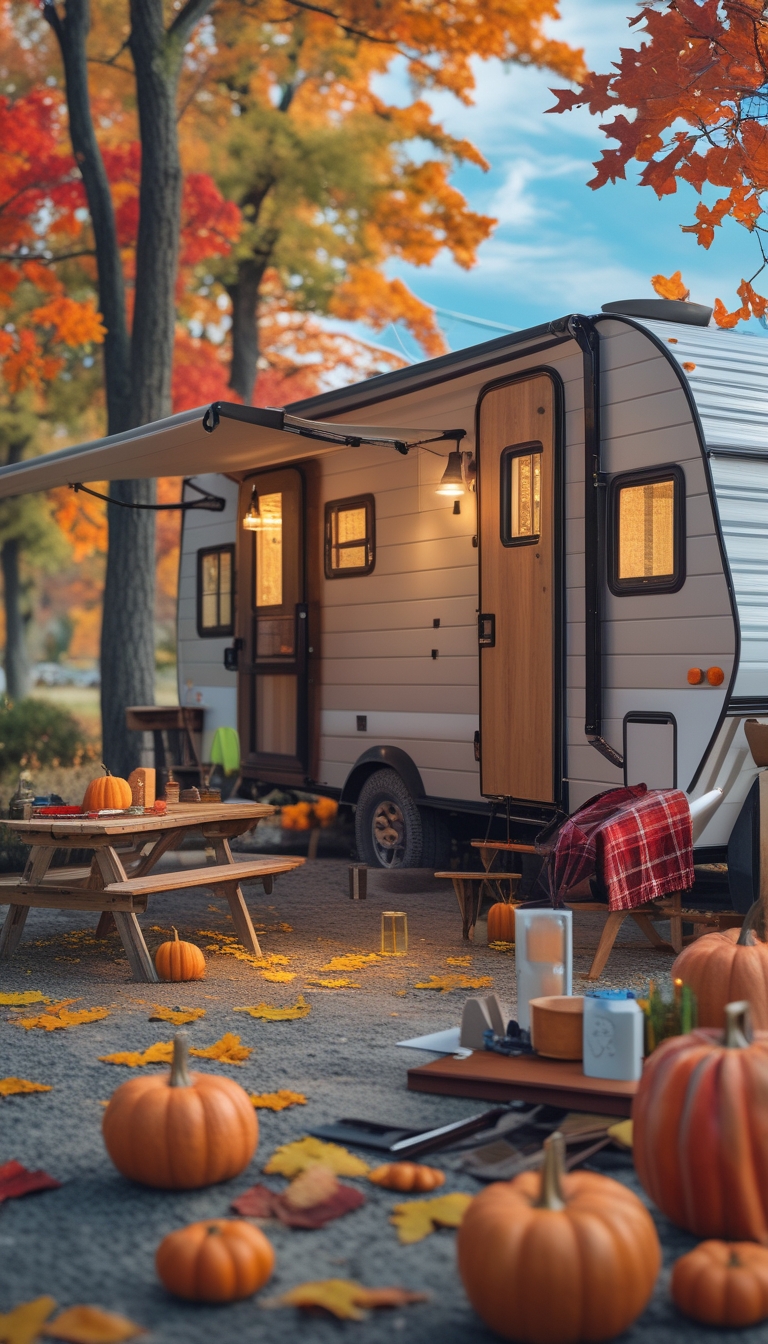
Expect a mix of quick fixes and small upgrades you can tackle over a weekend or a few evenings. These ideas cover insulation, heating, lighting, weatherproofing, and simple cosmetic touches that make your RV feel like home this fall.
PRO TIP
1) Replace summer curtains with insulated thermal RV curtains
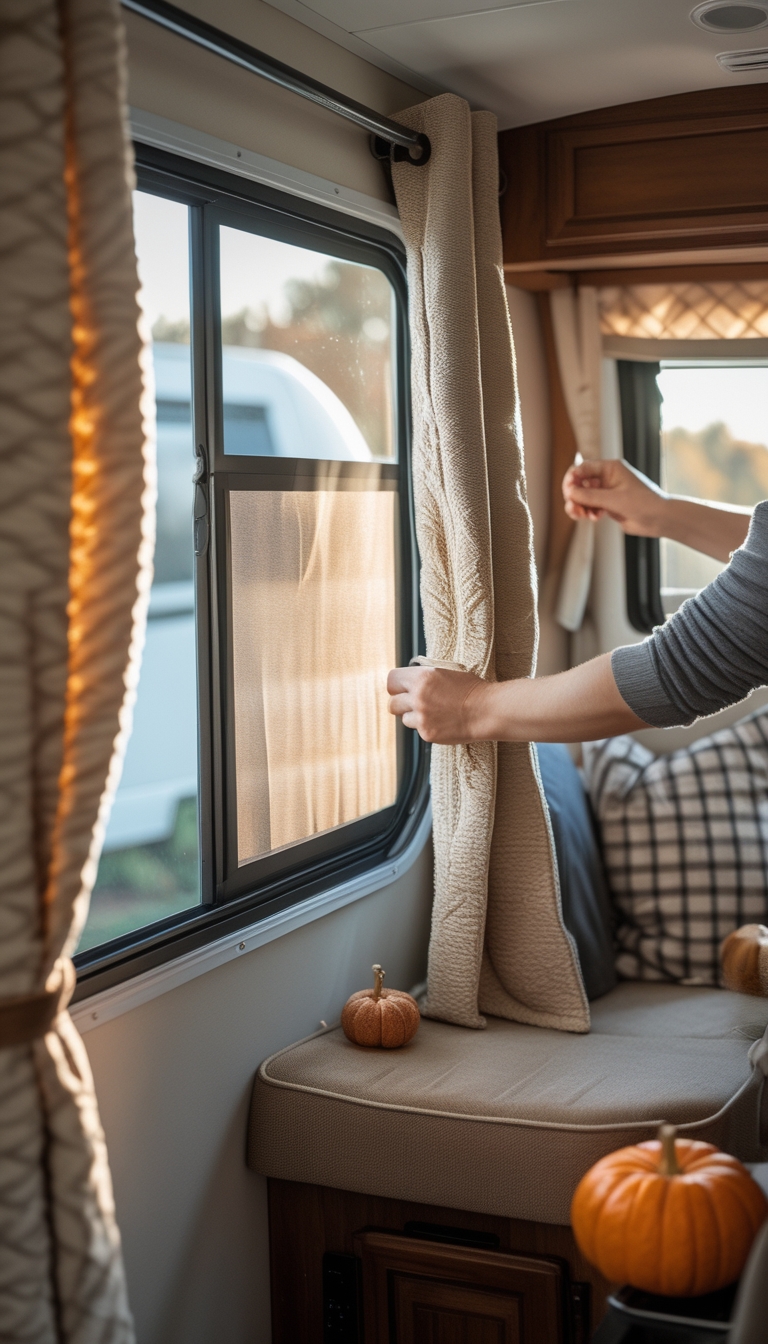
Swapping thin summer curtains for insulated thermal ones helps keep your RV warm on cool fall mornings. You’ll notice less draft and more stable cabin temperatures, so your heater runs less.
Thermal curtains have multiple layers that block heat loss and reduce heat gain from sunlight. They also add privacy and a cozier look for the season.
Install options include tension rods, Velcro, or magnetic strips for quick changes. Choose a size and fabric that fit your windows and match your style.
PRO TIP
Measure each window twice before buying. If you want extra insulation, add a reflective panel behind the curtain for better performance.
2) Install 12V LED warm-tone puck lights in kitchen and dinette
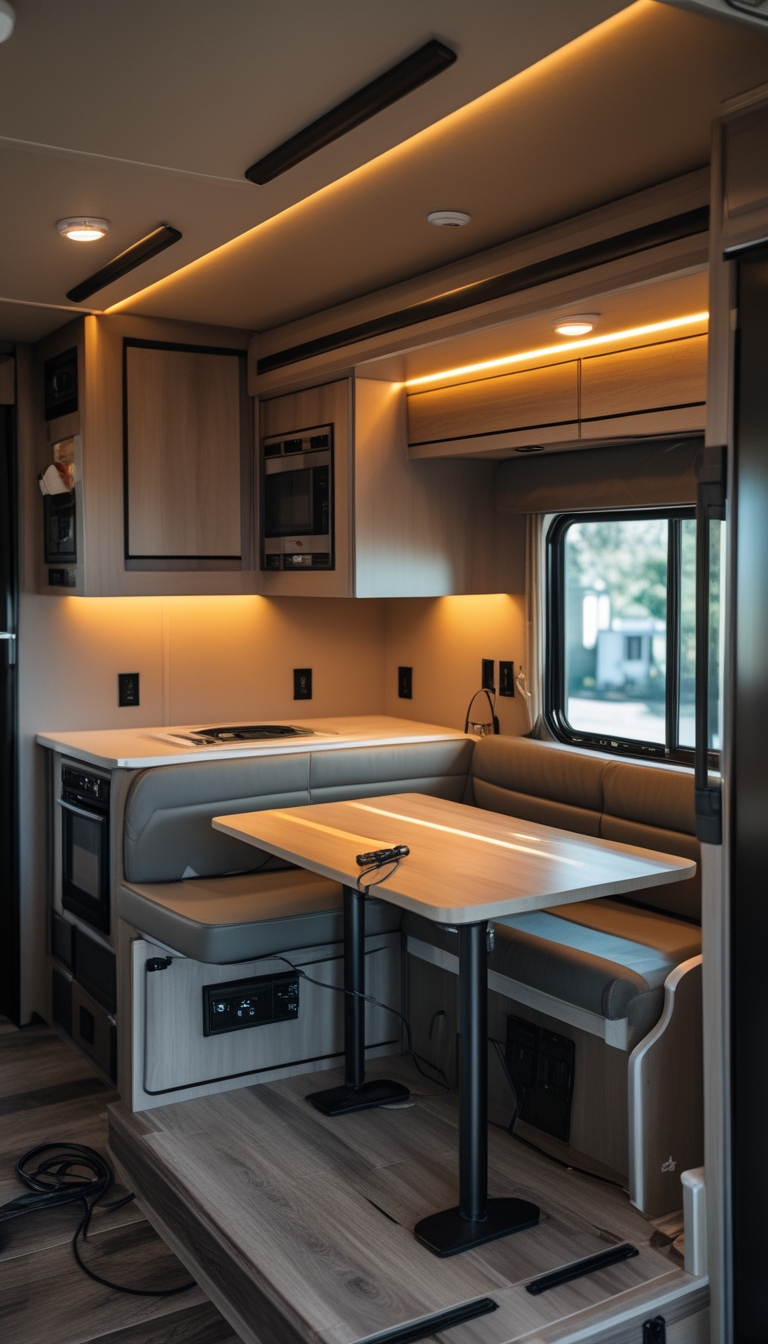
Adding 12V warm-tone puck lights brings soft, cozy light to your RV kitchen and dinette. They fit under cabinets or inside shelves and use little power, which helps your batteries last longer on overnight stays.
You can choose hardwired or plug-in setups. Hardwired gives a cleaner look, while plug-in options are faster to install and change later.
Place pucks evenly to avoid bright spots or shadows. Aim for spacing that lights the whole counter without glare, and keep runs short to reduce voltage drop.
PRO TIP
Test layout with stick-on lights before cutting or drilling. That way you can tweak placement without extra holes.
3) Refinish cabinet faces with chalk paint and new brass pulls
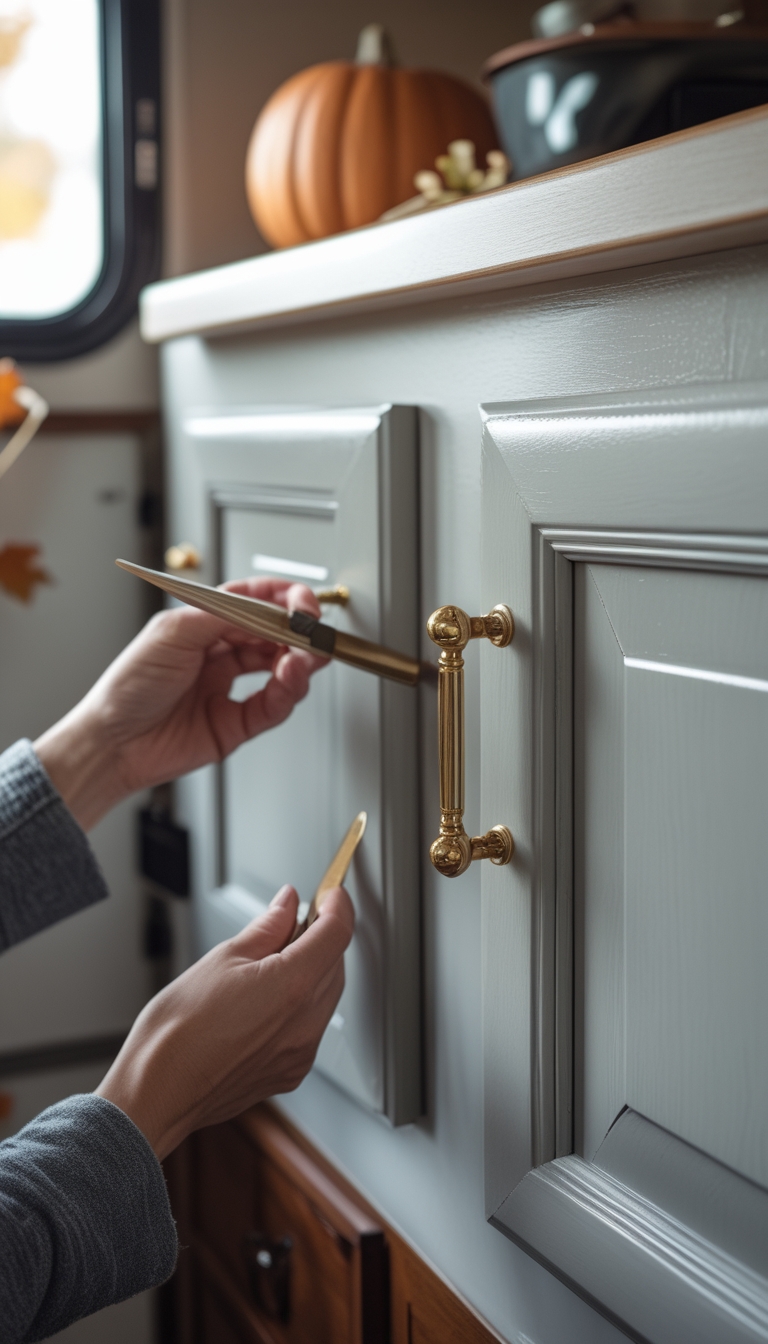
Refinishing cabinet faces with chalk paint gives your RV a soft, updated look without heavy work. You can skip heavy sanding if you lightly scuff the surface and use a good primer first.
Choose a chalk paint color that brightens your space. Apply thin coats and sand lightly between them for a smooth finish that resists chips.
Swap old hardware for warm brass pulls to lift the whole vibe. Brass hides fingerprints better than chrome and pairs well with most wood tones.
PRO TIP
Remove pulls before painting and label each door so reassembly is quick. Use a clear wax or polyurethane sealer to protect the chalk paint from daily wear.
4) Add a compact electric fireplace insert (e.g., Kidde or MagikFlame)
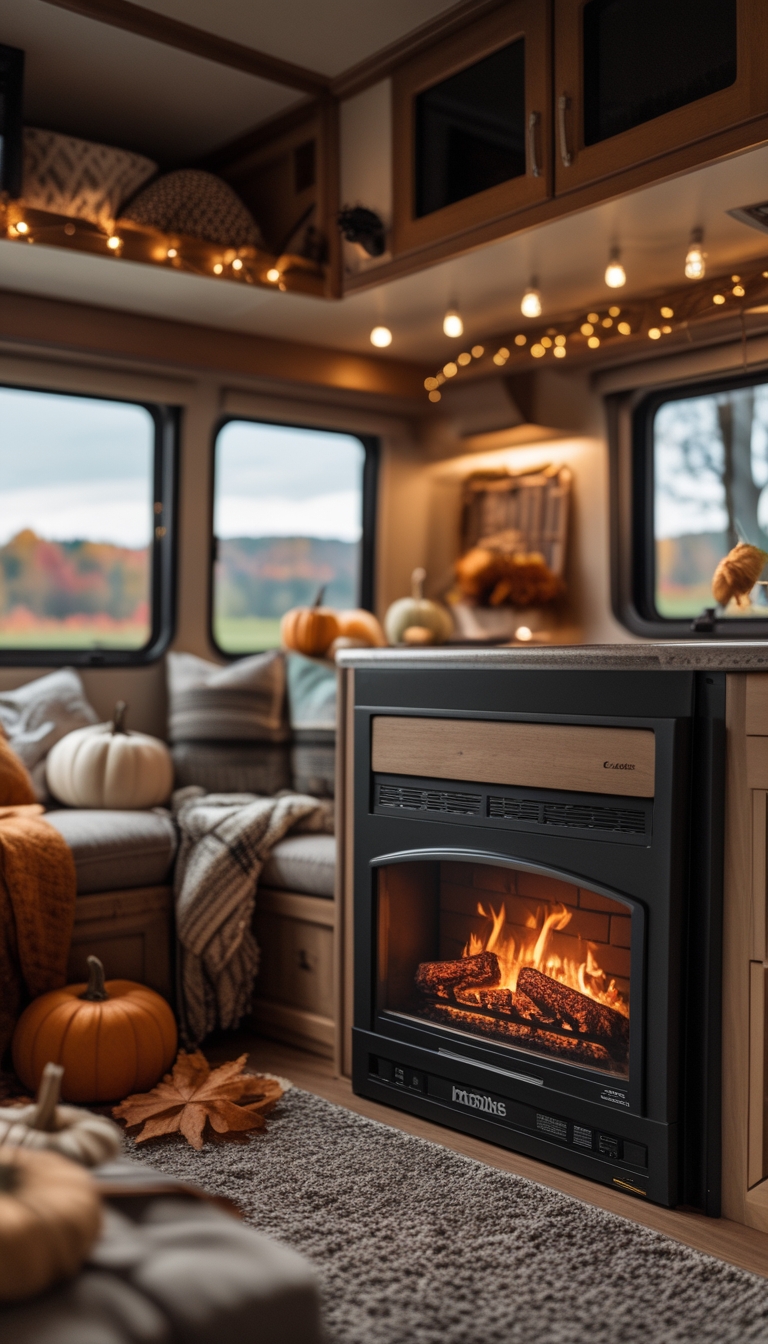
Adding a small electric fireplace insert brings warmth and cozy light to your RV without the fuss of a real chimney. You can pick units that fit into an existing cabinet or a built-in niche to save space.
Most inserts plug into a standard outlet or can be hard-wired by a pro if needed. They often include LED flames and a low-wattage heater for short bursts of heat on cool mornings.
Choose a model with safety features like automatic shutoff and cool-touch surfaces. Look for compact dimensions and lower amperage so you don’t overload your RV’s electrical system.
PRO TIP
Measure your opening twice and check the insert’s power needs before buying. A snug fit and the right circuit make installation simple and safe.
5) Upgrade furnace thermostat to a smart RV-compatible model
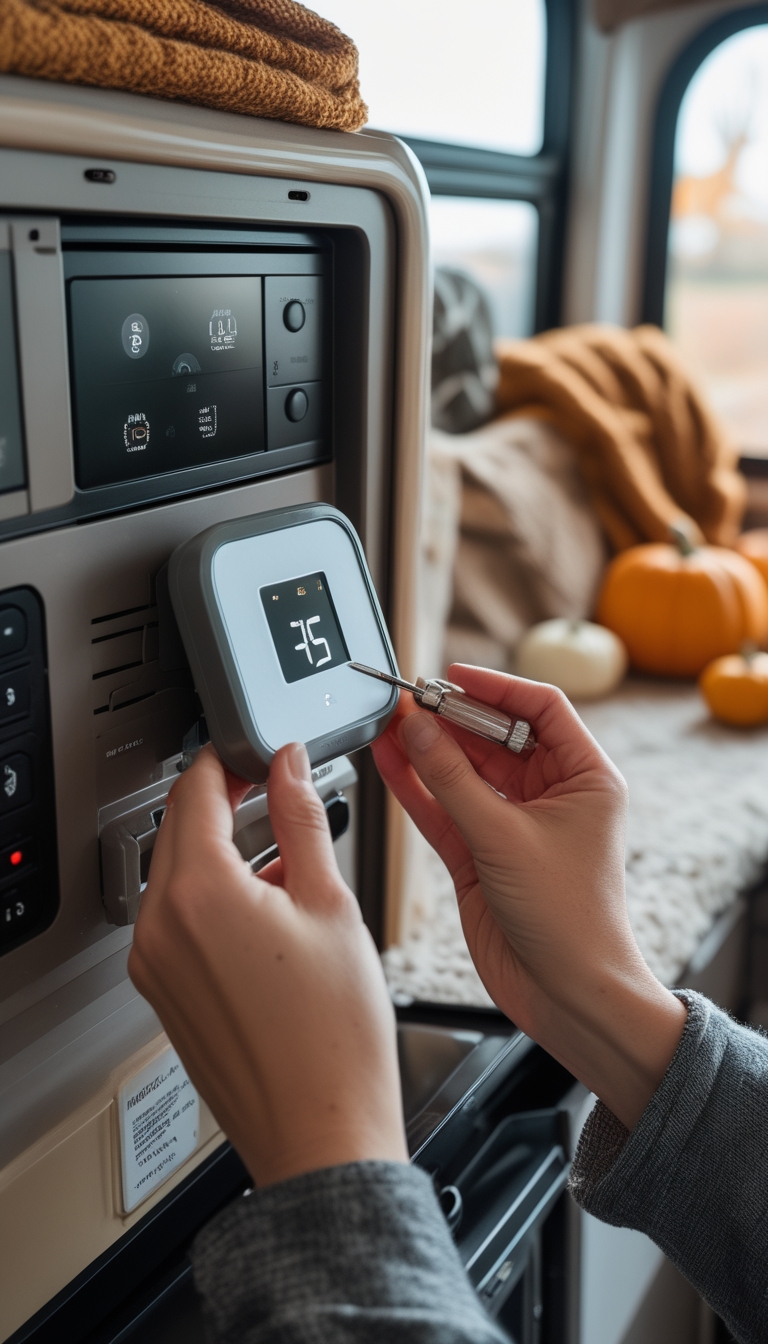
Swap your old thermostat for an RV-compatible smart model to get better temperature control and easier use. Smart units can run your furnace and, in many rigs, the air conditioner or heat pump too. You can set schedules, change temps remotely, and avoid waking up cold on a fall morning.
Installation is usually straightforward but check compatibility with your furnace and wiring before buying. Many smart RV thermostats work with 12V systems and common RV HVAC brands. If you boondock, smart control can help reduce generator or battery use by running systems only when needed.
PRO TIP
Pick a model made for RVs, not just a home thermostat. Look for Wi‑Fi, simple wiring diagrams, and a reliable brand with good support.
6) Lay peel-and-stick cork flooring in living area for warmth
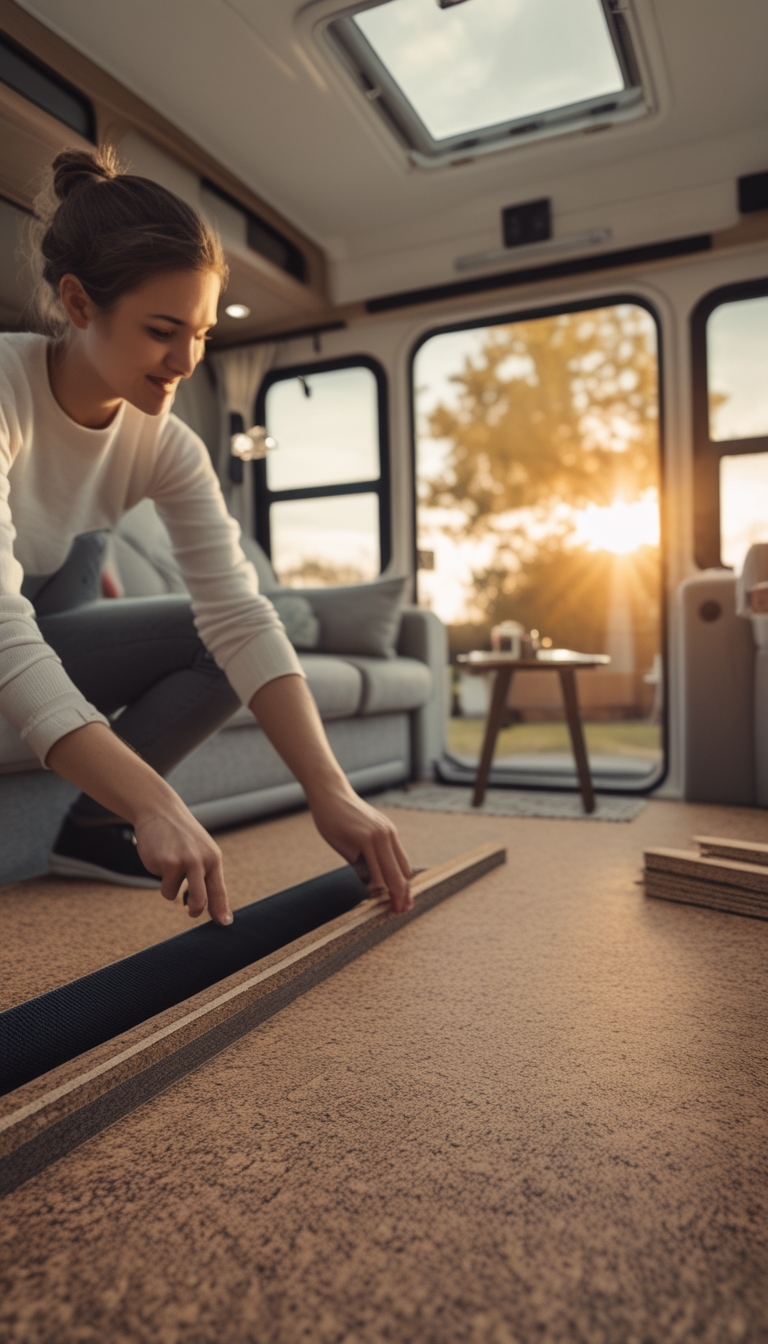
Peel-and-stick cork tiles add soft warmth underfoot and cut noise inside your RV. You’ll notice a cozy feel that’s great for cool fall mornings.
Installation is simple and fits weekend projects. Clean and level the floor first, then let the tiles acclimate to your RV for a few days to reduce gaps later.
Work from the center outward and press each tile firmly to avoid bubbles. Cork is forgiving, but keep humidity in mind; avoid installing during very damp conditions.
PRO TIP
Cut tiles with a sharp utility knife and use a roller to secure seams. That gives a smooth, long-lasting finish.
7) Seal roof seams and reseal around vents with Dicor lap sealant
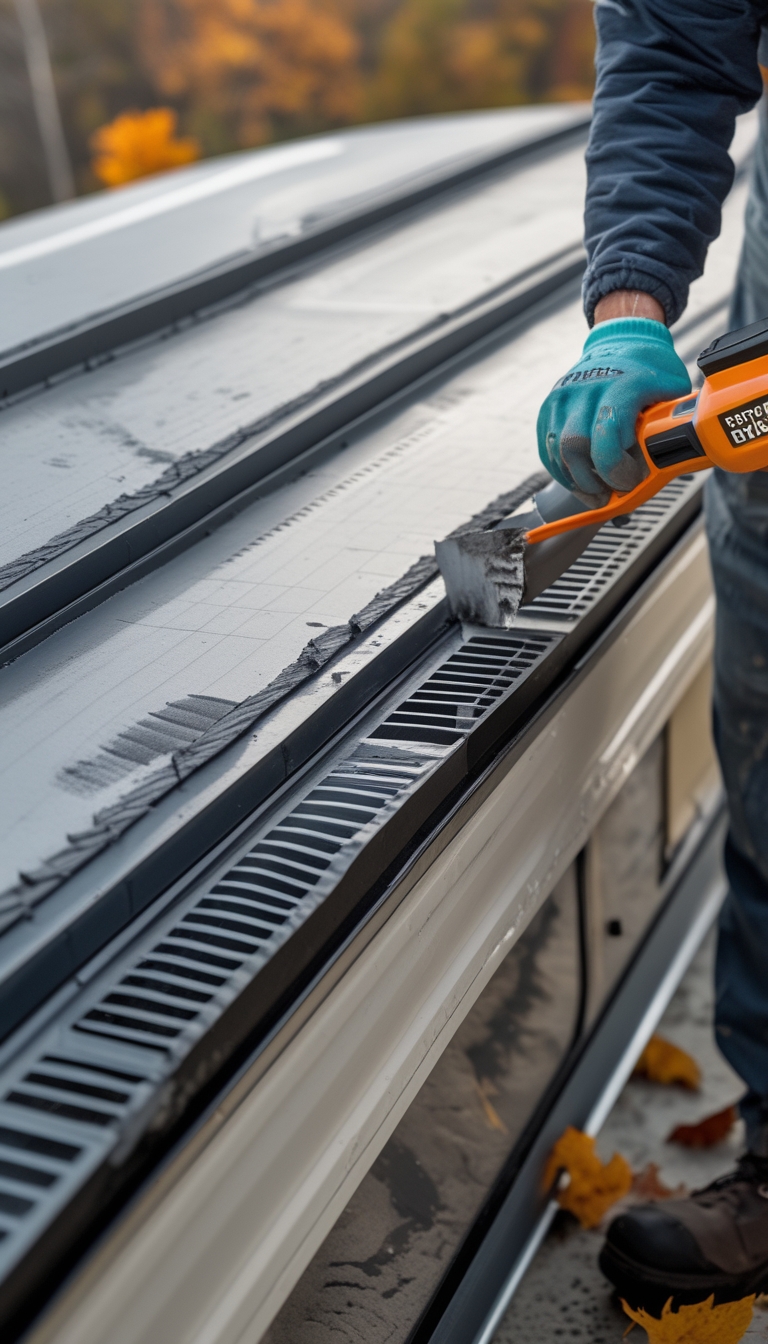
Check your RV roof for small gaps, old sealant, and cracked caulk. You want a clean, dry surface before you start so the new sealant bonds well.
Dicor self-leveling lap sealant works well on EPDM, TPO, fiberglass, and metal. Apply a smooth bead along seams, around vents, and over screw heads to stop leaks and keep water out.
Work in cool, dry weather and use a good caulk gun for even beads. Smooth the sealant lightly if needed, and let it cure fully before driving or camping.
PRO TIP
Wear gloves and clean old sealant with a compatible cleaner. Reseal annually or after any roof work to keep your roof watertight.
8) Insulate underbelly and heated tanks with foam board panels
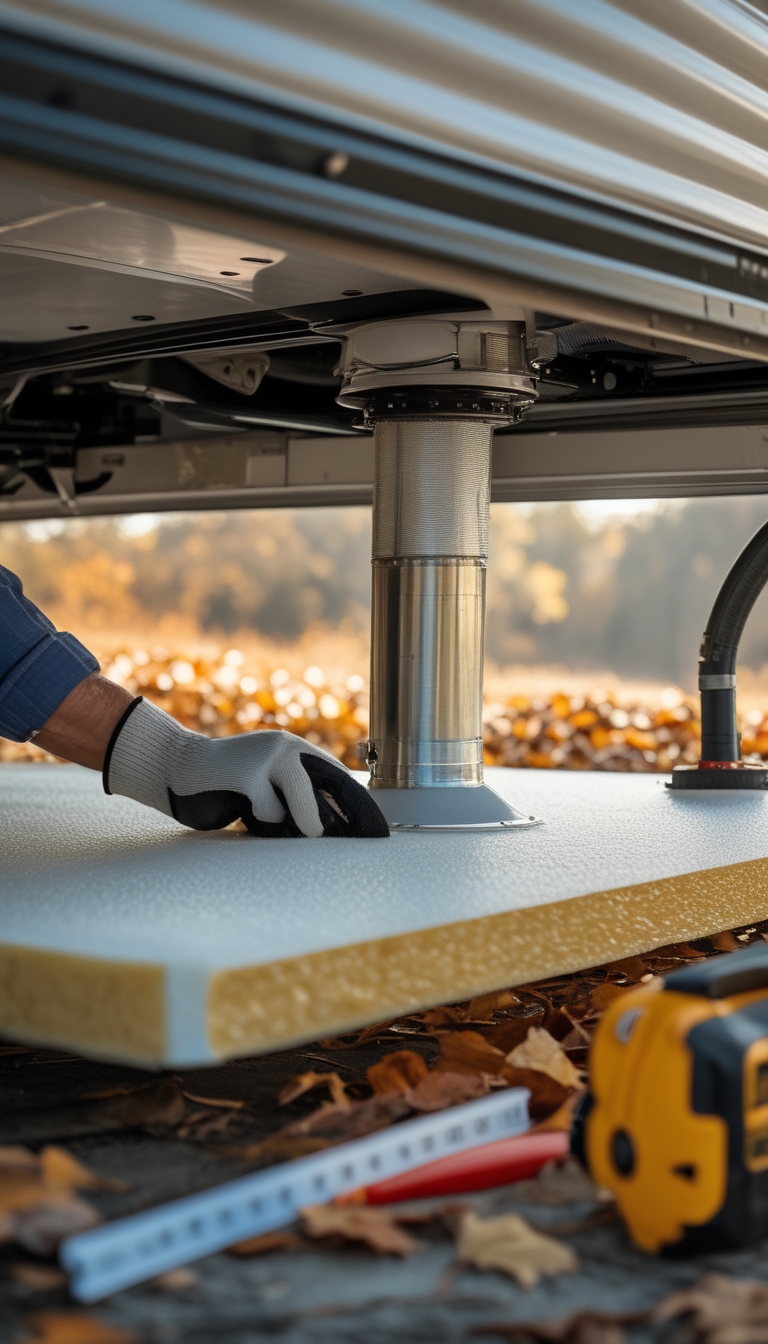
Adding rigid foam board under your RV helps keep pipes and tanks from freezing. Cut panels to fit between beams and around tanks, then secure with adhesive and tape to seal gaps.
foam panels add R-value without bulk, and they resist moisture better than fiberglass. You can leave access points for wiring and valves so future repairs stay easy.
Wrap or box each holding tank with foam panels and add small ducted heat or tank heaters where needed. That keeps waste lines flowing and prevents costly damage in cold weather.
PRO TIP
Label panels and take photos before removal so you can reinstall them correctly. Work in mild weather and wear gloves and eye protection.
9) Swap thin RV bedding for a 7-inch memory foam mattress topper
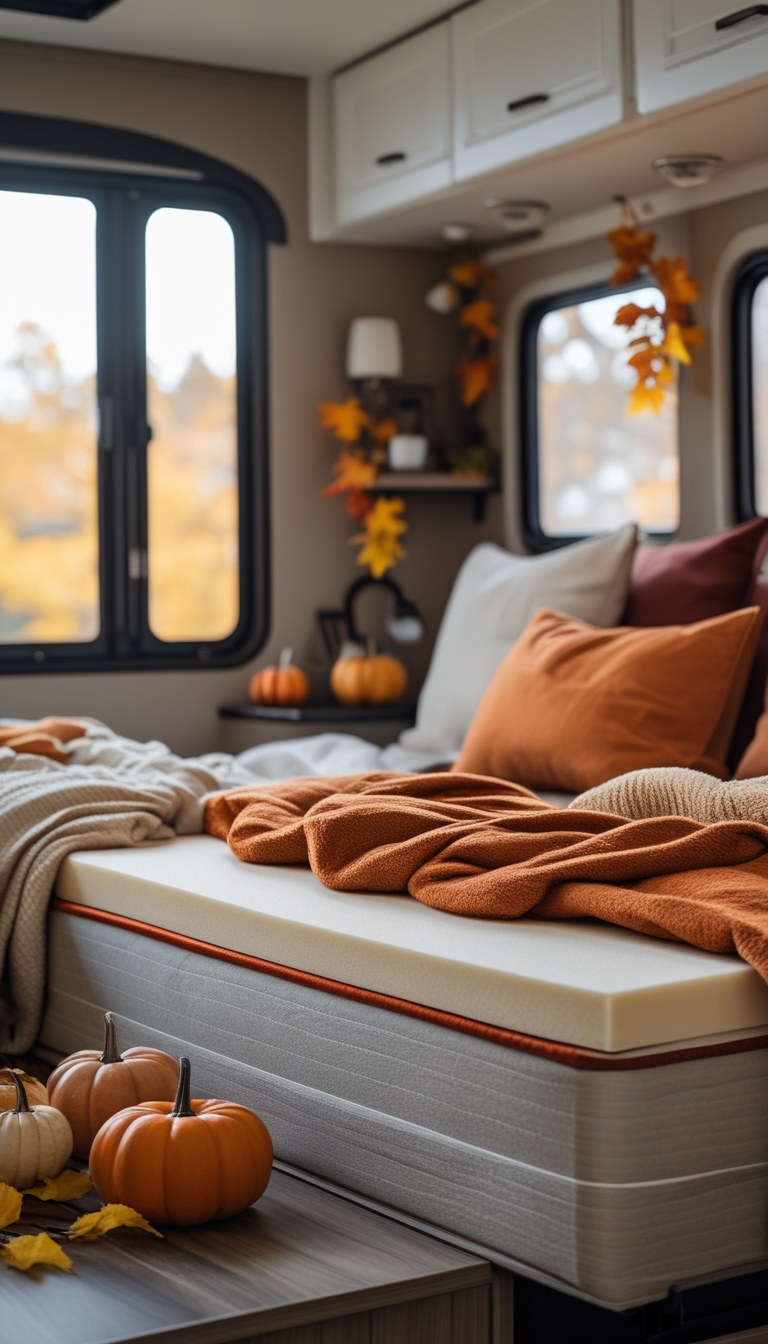
A 7-inch memory foam topper gives your RV bed more cushion without a full mattress swap. You get better pressure relief for hips and shoulders, so you wake up with less stiffness.
Memory foam trims easily to fit odd RV shapes and sizes. That makes it a smart, low-cost change that still improves sleep a lot.
Look for gel or ventilated foam if you sleep hot. Also pick a topper with straps or a fitted cover to keep it from sliding on your existing mattress.
PRO TIP
Measure your bed and cut the topper outside. Use a long utility knife and straight edge for clean cuts and test fit before covering.
10) Install a window awning to block wind and rain at doorways

An awning over your RV door keeps rain from blowing in when you step outside. It also slows gusts that push cold air into the entry, making your RV feel warmer.
Choose a compact, low-profile awning that fits your roofline and won’t add too much weight. You can buy a ready-made model or make a simple DIY frame from aluminum and waterproof fabric.
Mount it so the slope sheds water away from the door and tie it down for windy days. Seams and fastenings should be sealed to avoid leaks.
PRO TIP
Pick fabric with UV and mildew resistance. Use stainless screws and marine sealant to prevent rust and water damage.
11) Build removable storm shutters for large front windows
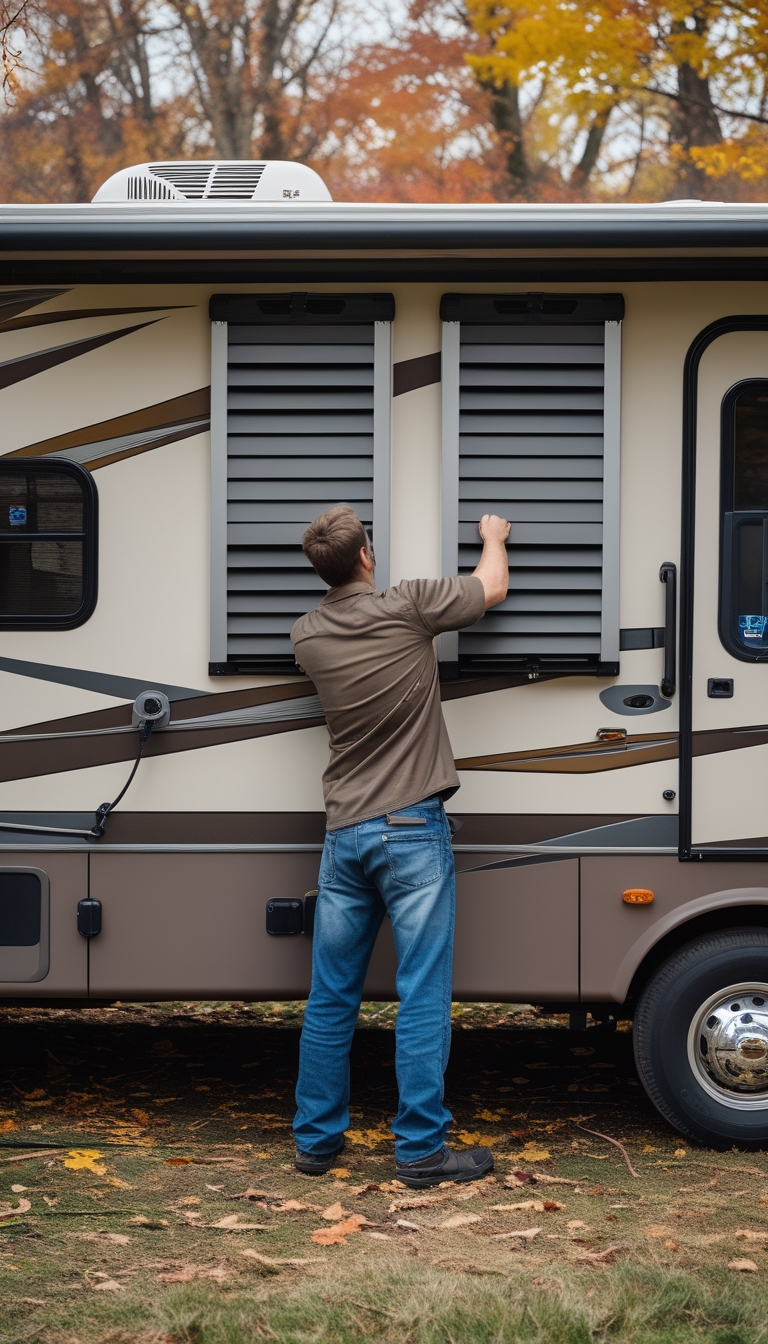
You can make strong, removable storm shutters to protect your big front windows. Use plywood, corrugated metal, or polycarbonate panels cut to fit each opening. Measure carefully so panels sit flush and bolt holes line up.
Build simple frames or add battens for stiffness. Add threaded inserts or hook brackets on the window trim for quick attachment. Store panels vertically on a wall or in a labeled rack to save space.
Install and remove them yourself before storm season. Practice once so you know how long it takes and what tools you need.
PRO TIP
Label each panel and its mounting points. That speeds up installation and avoids frustrating guessing during a storm.
12) Install a tankless propane water heater bypass for winterizing
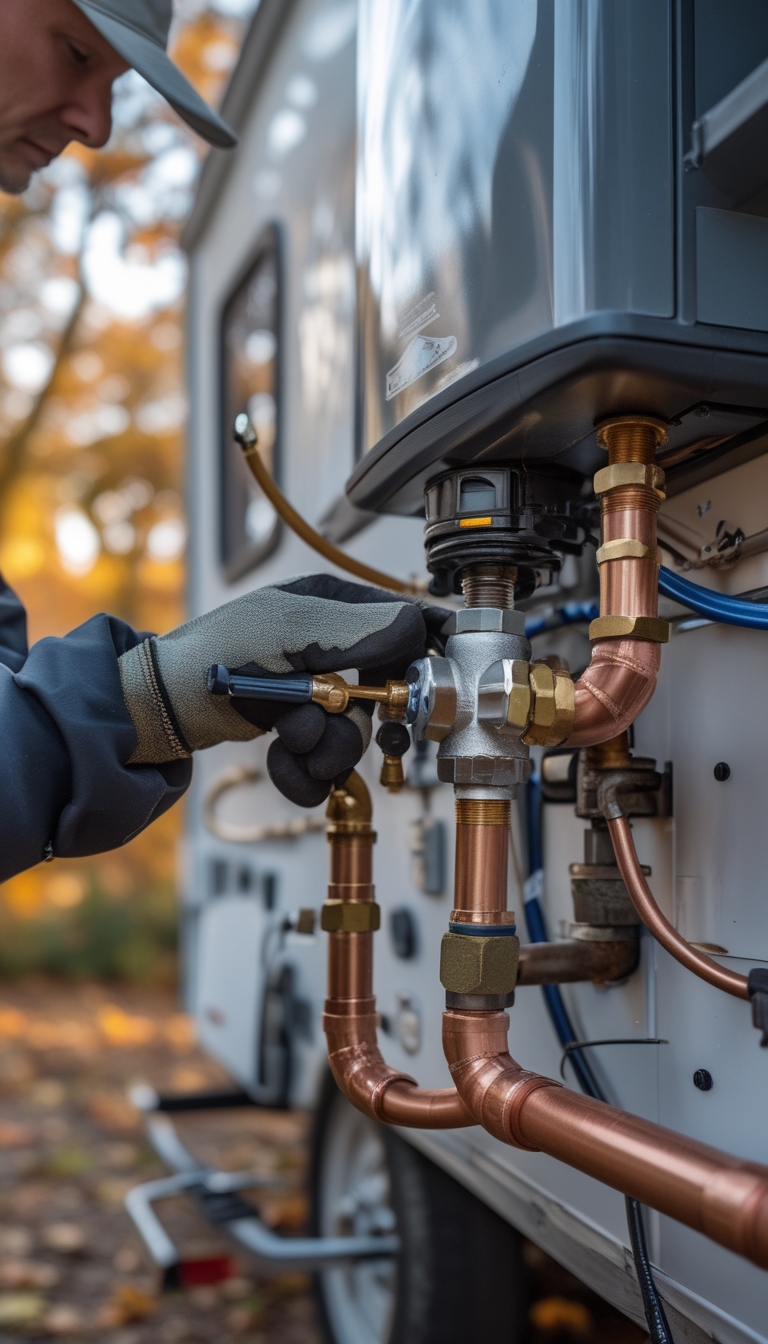
A bypass lets you keep RV antifreeze out of the tankless heater while still protecting your pipes. You shut valves so antifreeze flows around the unit and not through the heat exchanger. This saves antifreeze and avoids clogging or corroding the heater.
Many tankless systems don’t have a built-in bypass. You can add a simple valve kit or plumb a manual bypass with three valves. Turn off water and power before you reroute lines, then test for leaks.
PRO TIP
Label the bypass valves with tags so you don’t forget the winter mode. That makes spring startup easier and helps prevent accidental damage to the heater.
13) Swap vinyl countertop for butcher block laminate overlay
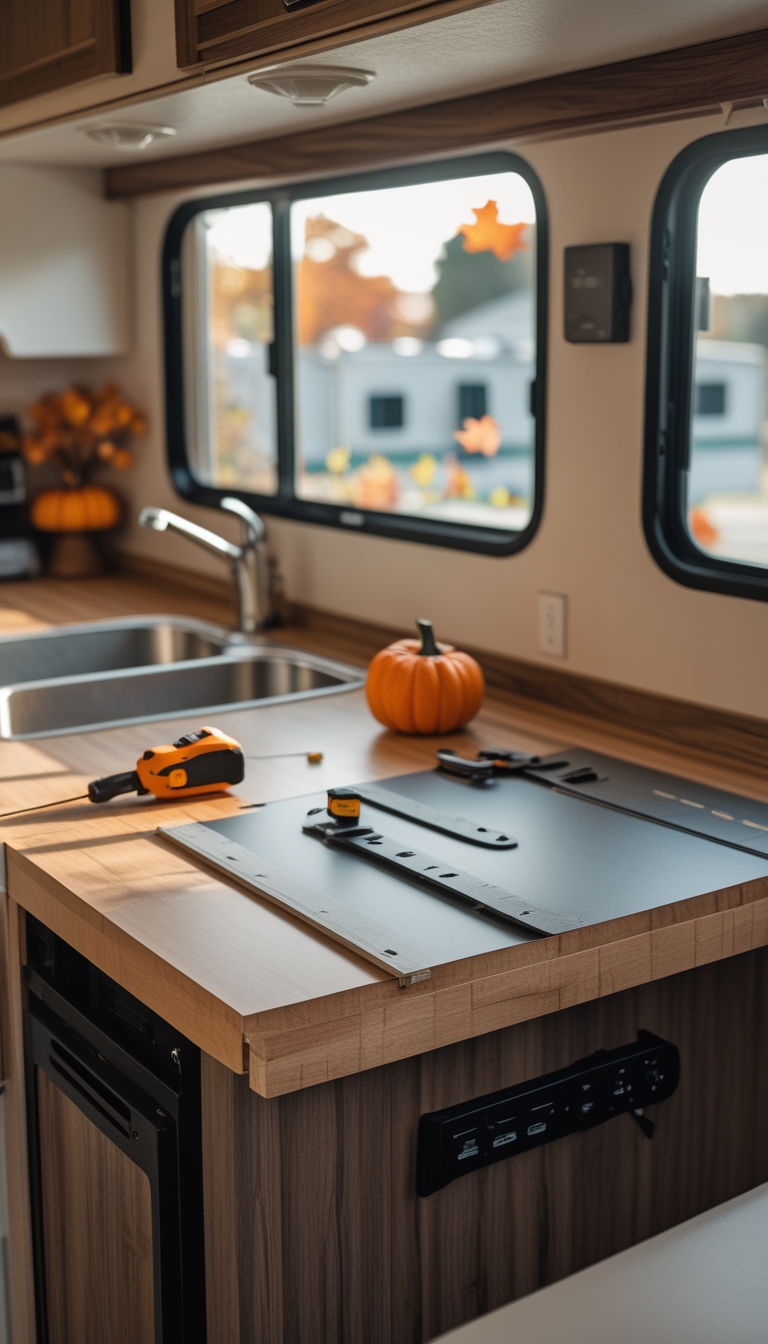
Replacing vinyl with a butcher block laminate overlay gives your RV kitchen a warmer, more modern look without heavy work. You can cut the overlay to size, glue it down, and seal the edges to keep moisture out.
This option is lighter and cheaper than full solid wood, so it won’t add much weight to your rig. It also resists warping better than real wood if you use a quality laminate and a good sealant.
Take accurate measurements and test-fit before gluing. Clamp or weight the overlay while the adhesive cures to avoid gaps and ensure a smooth surface.
PRO TIP
Choose a food-safe sealer for areas where you’ll prep food. Match edge trim to cabinets for a built-in look.
14) Add magnetic blackout shades for better heat retention
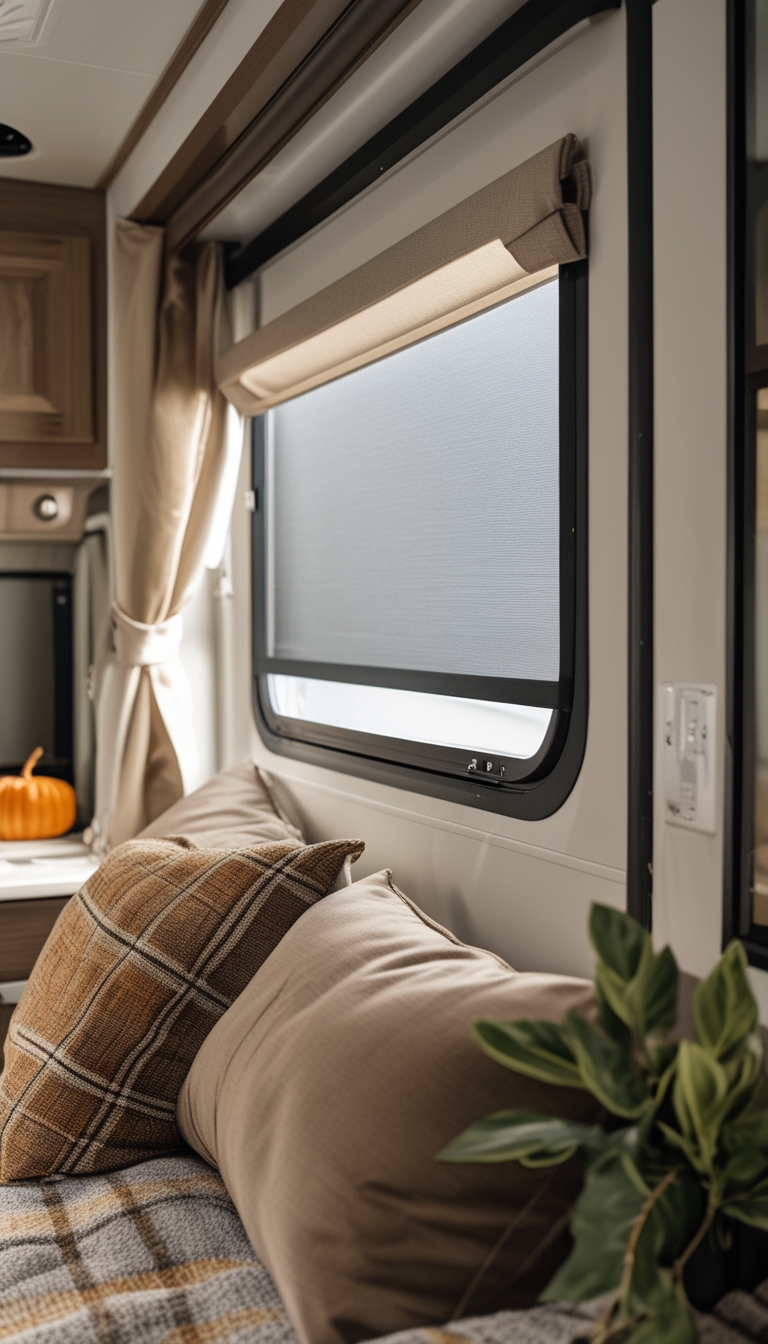
Magnetic blackout shades stick to metal window frames so you can install them fast. They block light and cut drafts, which helps keep warm air inside on chilly fall nights.
You can use them on doors and windows, and they come in sizes you can trim or buy to fit. The reflective backing on some models also reduces heat loss and protects fabrics from sun fade.
Installation takes minutes and does not damage surfaces, so they work well for renters and seasonal setups. Remove them in warmer months or when you want more daylight.
PRO TIP
Measure your windows before buying and watch installation videos for tips. Choose shades with good magnetic strength and a thermal or reflective layer for the best results.
15) Create a cozy fall vignette with faux wheat and battery candles
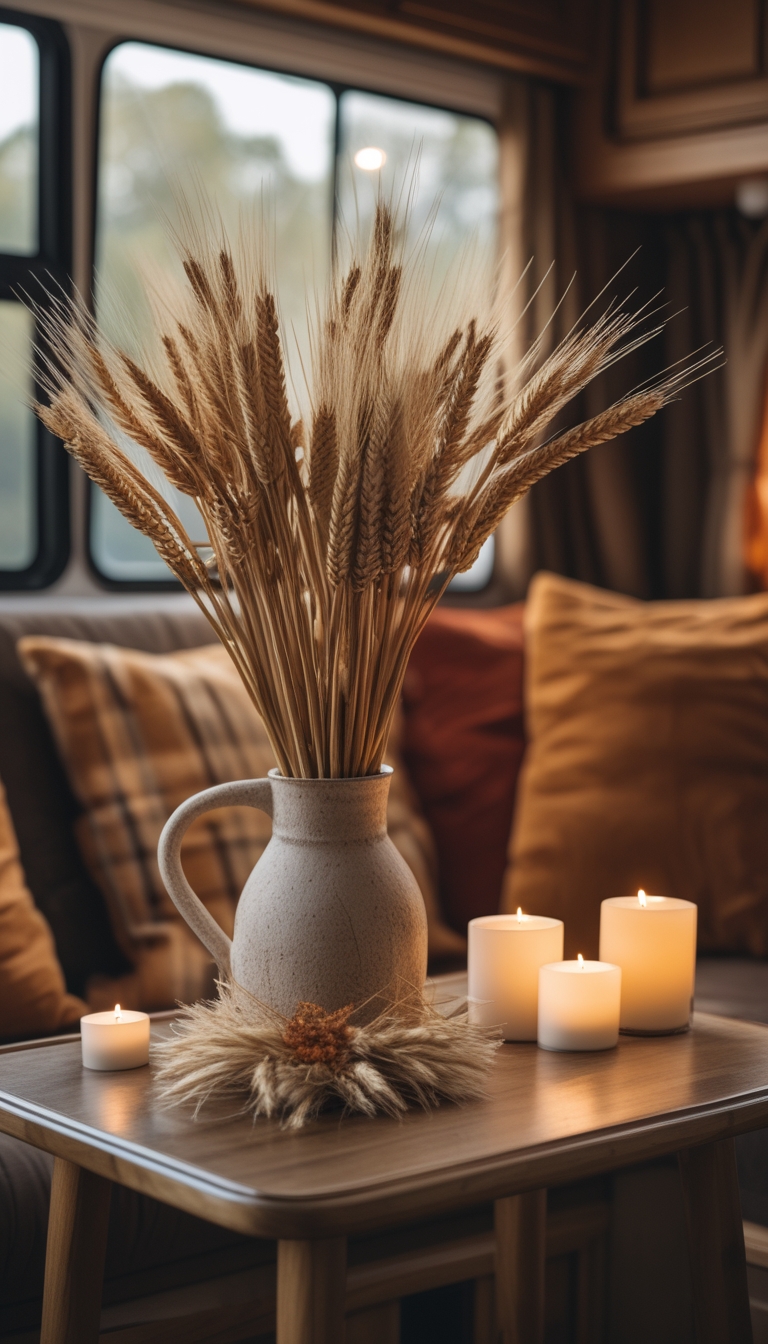
A small vignette can change the whole feel of your RV living area. Use a bundle of faux wheat in a simple vase to add warmth without the mess of real plants.
Place a few battery candles of different heights nearby for soft, safe light. Battery candles give the glow of real flames without worrying about sparks or wind while you travel.
Add a couple of small pumpkins or pinecones from a craft store to build texture. Keep the colors neutral so the vignette fits any decor and won’t overwhelm your limited space.
Mix in a folded plaid throw or a stack of mini books to make the scene feel lived-in. Arrange items on a tray to keep them secure while you drive.
PRO TIP
Choose flameless candles with timers so they turn on and off automatically.
16) Replace shower head with a low-flow high-pressure model
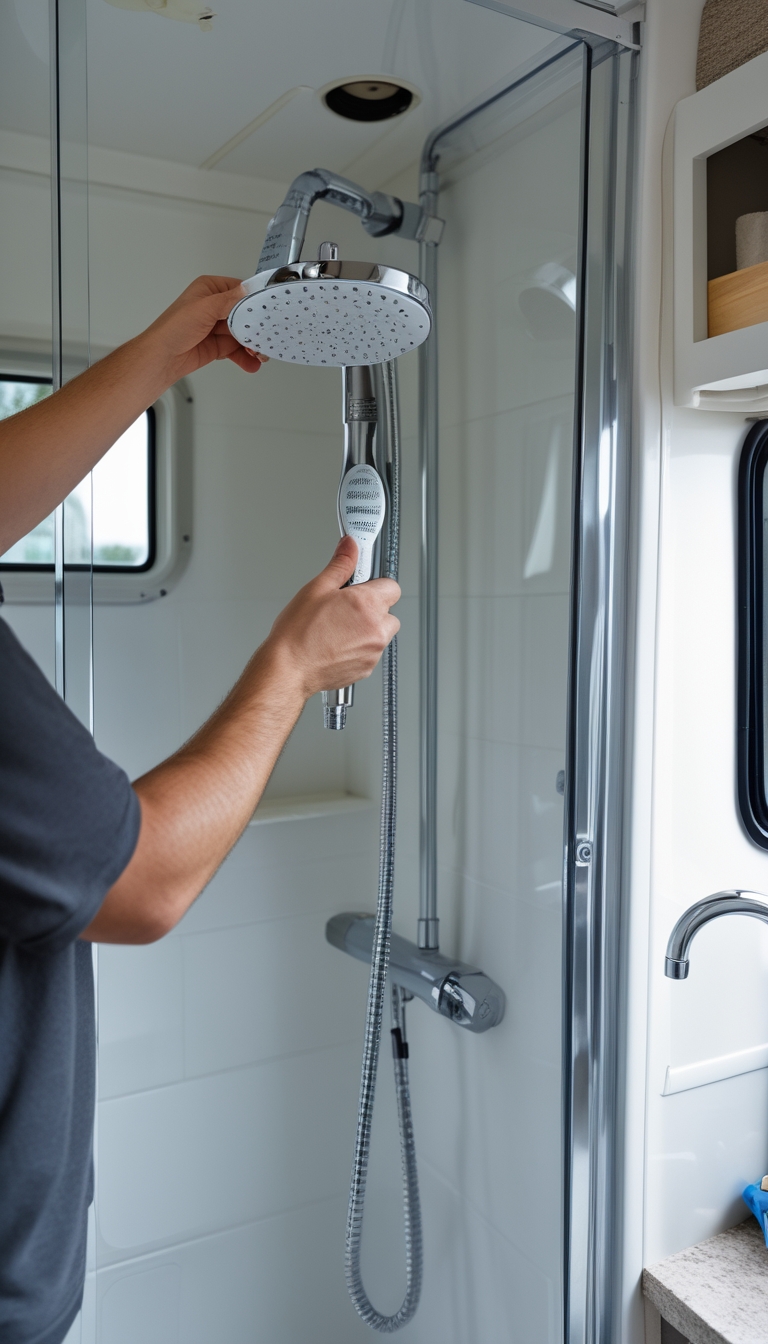
Swapping your RV shower head for a low-flow, high-pressure model saves water while keeping a good spray. You cut water use for long trips and lower the chance of running out of hot water.
Pick a model that mixes air with water or has narrow nozzles to keep pressure strong. Most screw-on shower heads fit without tools, so installation is quick and simple.
Check for a flow restrictor or debris at the hose connection first; removing build-up can help too. If you travel in new or recently repaired RVs, watch for construction debris like plastic shavings that can block flow.
PRO TIP
Carry a small pack of replacement washers and a wrench. That makes field fixes fast and avoids leaks during trips.
17) Install a dual-bank battery monitor and upgrade to AGM batteries

A dual-bank battery monitor lets you watch both house and starter batteries at once. You can see charge, drain, and state of charge so you stop guessing how much power you have left.
Upgrading to AGM batteries gives you better vibration resistance and lower maintenance than old flooded cells. They hold charge well for camping and cold fall trips, and they work with many modern chargers.
Install the monitor with a proper shunt on the negative side for accurate readings. Mount the display where you can read it from the cab or living area, and run Bluetooth models for easy phone access.
PRO TIP
Label all battery cables and take photos of your wiring before you start. That makes future troubleshooting and upgrades much easier.
18) Add rubber door sill guards to block drafts at entry
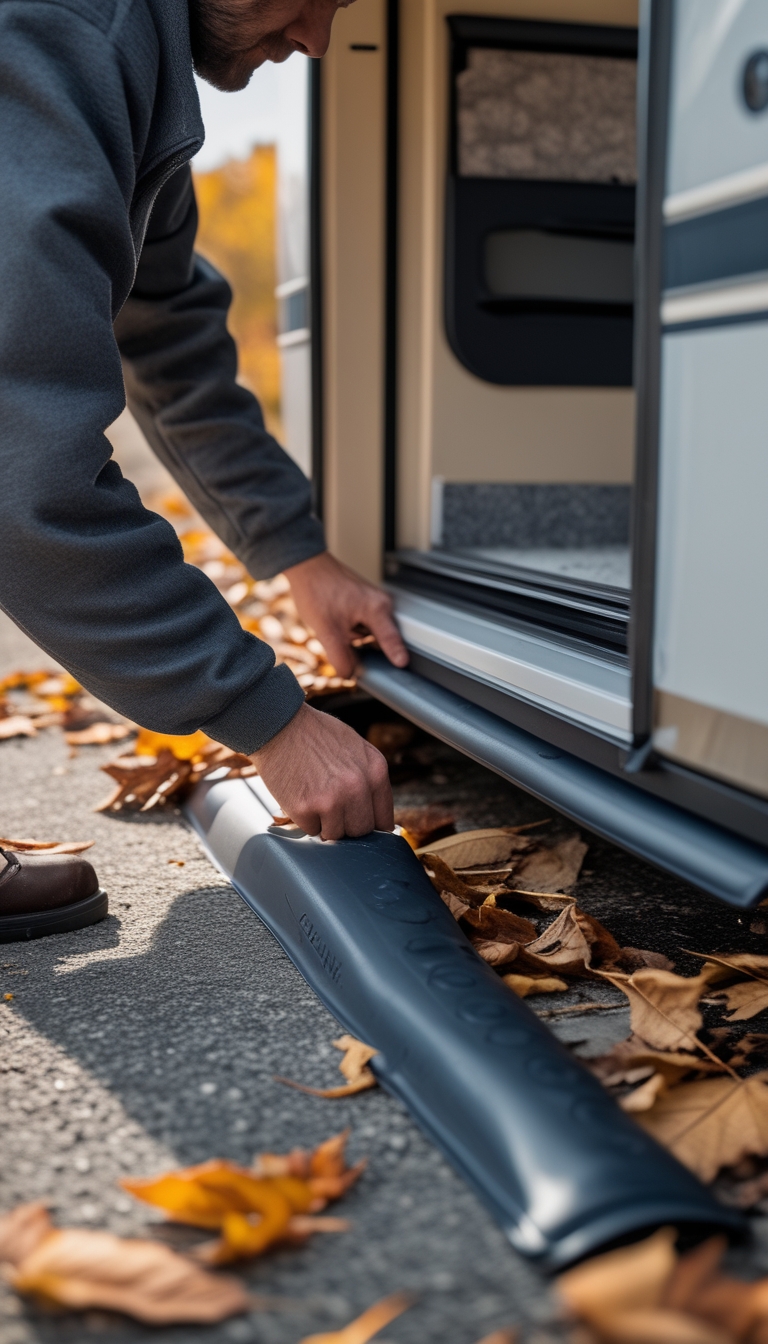
You can cut heat loss and keep cold air out by adding rubber door sill guards at your RV entry. These fit under the door and press against the threshold to stop drafts, dust, and small pests from sneaking in.
Rubber guards last longer than fabric draft stoppers and handle moisture better. They come in simple strips or brushes and attach with screws or adhesive for a tight seal.
Installing them is quick and lets you keep your interior warmer without turning up the heater. Choose a model that matches your door width and check the seal after a season or two.
PRO TIP
Measure the gap precisely and test different profiles so the guard doesn’t drag or leave gaps when the door closes.
19) Refinish exterior trim with marine-grade varnish
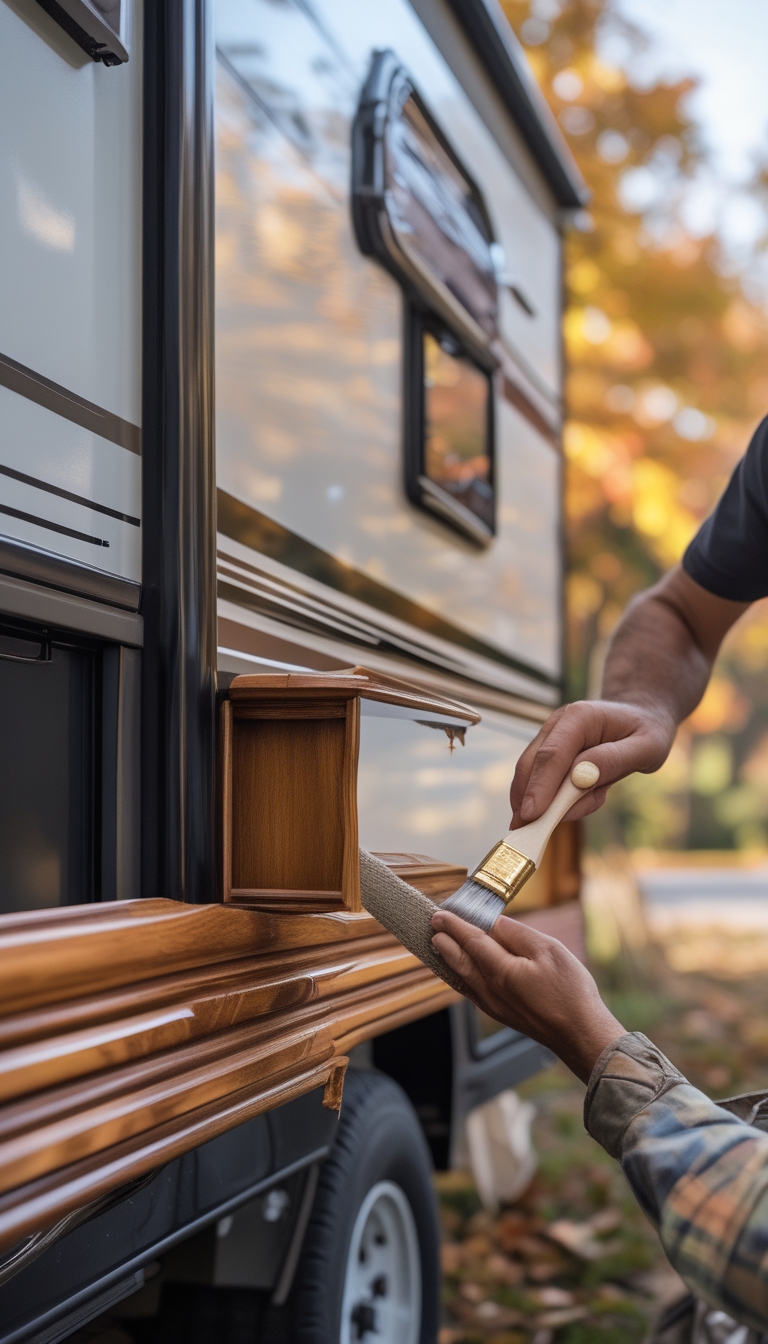
Refinishing trim with marine-grade varnish protects wood from sun, rain, and salt. You’ll restore the natural grain and add a hard, water-resistant coat that lasts longer than typical house varnishes.
Start by sanding away old finish and rough spots until the surface feels smooth. Clean the dust, then apply a thin sealer coat to lock in moisture resistance before topping with several varnish layers.
Choose a spar or marine-grade product with UV blockers and flexibility so the wood can expand without cracking. Apply thin, even coats and sand lightly between layers for a smooth, durable finish.
PRO TIP
Work on cool, dry days and avoid direct sun while varnishing. Test the product on a small trim piece first to confirm adhesion and sheen.
20) Install a small propane or electric space heater with tip-over protection
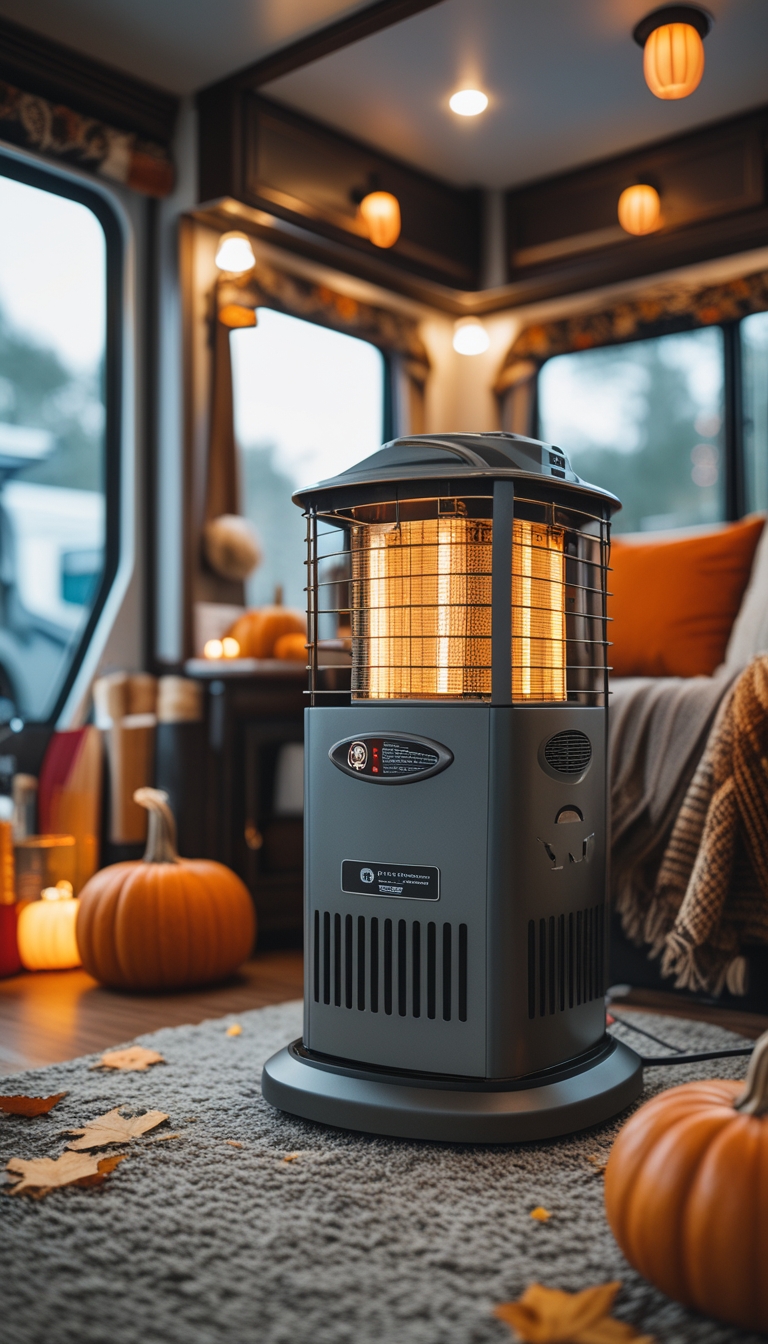
A compact heater can keep your RV cozy on chilly fall nights. Choose a model with tip-over and overheat protection so it shuts off if it falls or gets too hot.
Propane heaters work well off-grid, but you must ensure good ventilation and a working carbon monoxide detector. Electric heaters are simpler if you have shore power or a good battery/inverter setup.
Place the heater on a flat surface away from curtains, bedding, and anything flammable. Secure it so it won’t move when you drive or when pets and kids are onboard.
PRO TIP
Test the heater and safety features before your trip. Carry a small fire extinguisher and check the owner’s manual for safe placement and clearance rules.


