Last Updated on February 17, 2026
You can remake your RV bathroom without spending a lot. This article shows simple, budget-friendly ideas that boost function and style so your tiny space feels fresher and more useful.
You’ll find practical upgrades that save space, cut costs, and look great — all doable with easy tools and common parts.
PRO TIP
Think small and smart: tiny changes like better lighting, peel-and-stick surfaces, and clever storage add the biggest payoff for the least money.
1) Use light green paint to brighten the space
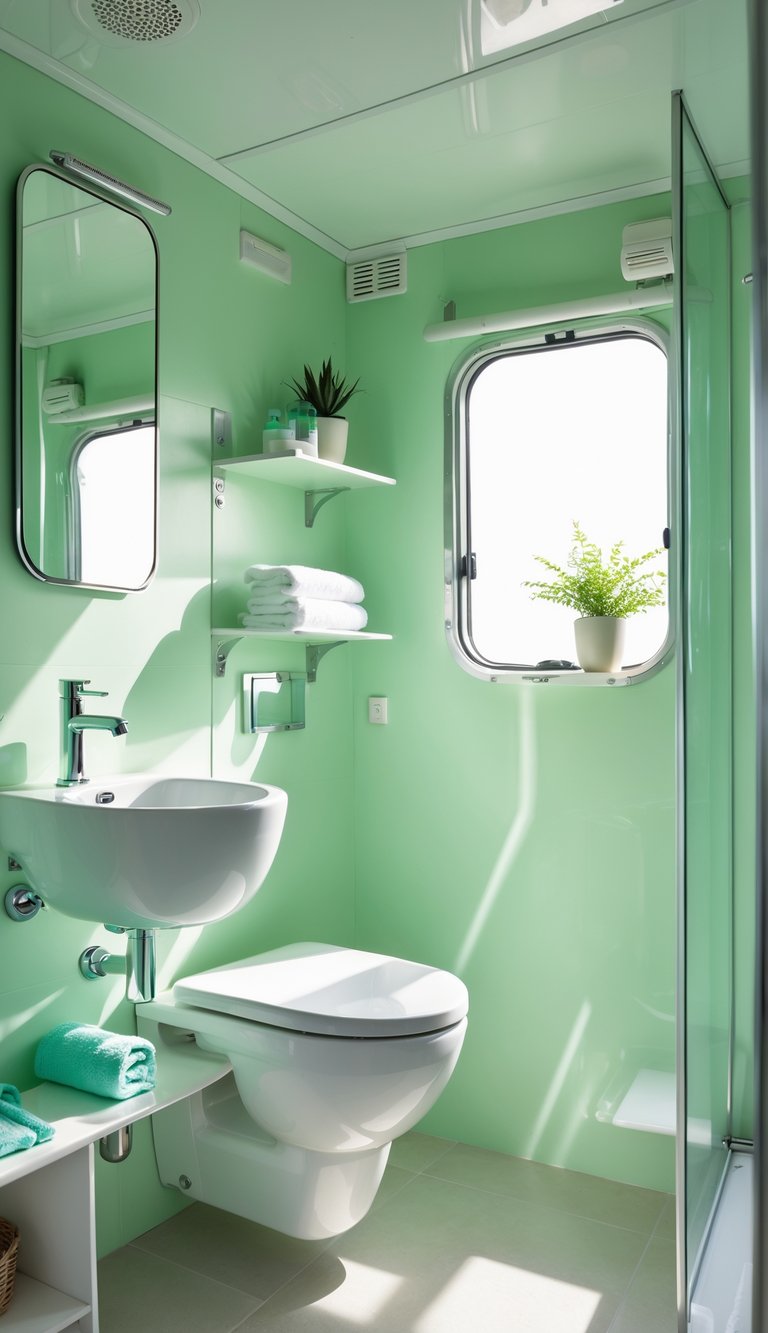
Light green makes small RV bathrooms feel fresher and less cramped. It reflects light better than darker shades, so your space will look brighter without extra lighting.
Choose a soft sage or mint for walls and trim. These tones pair well with white fixtures and natural wood accents, creating a calm, modern look that still feels warm.
Painting is cheap and fast compared with major swaps. You can roll walls in a day and use a satin or semi-gloss finish for easier cleaning around sinks and showers.
PRO TIP
Test a small patch first and view it in morning and evening light. Colors shift with lighting, so check before you paint the whole room.
2) Install subway tile backsplash
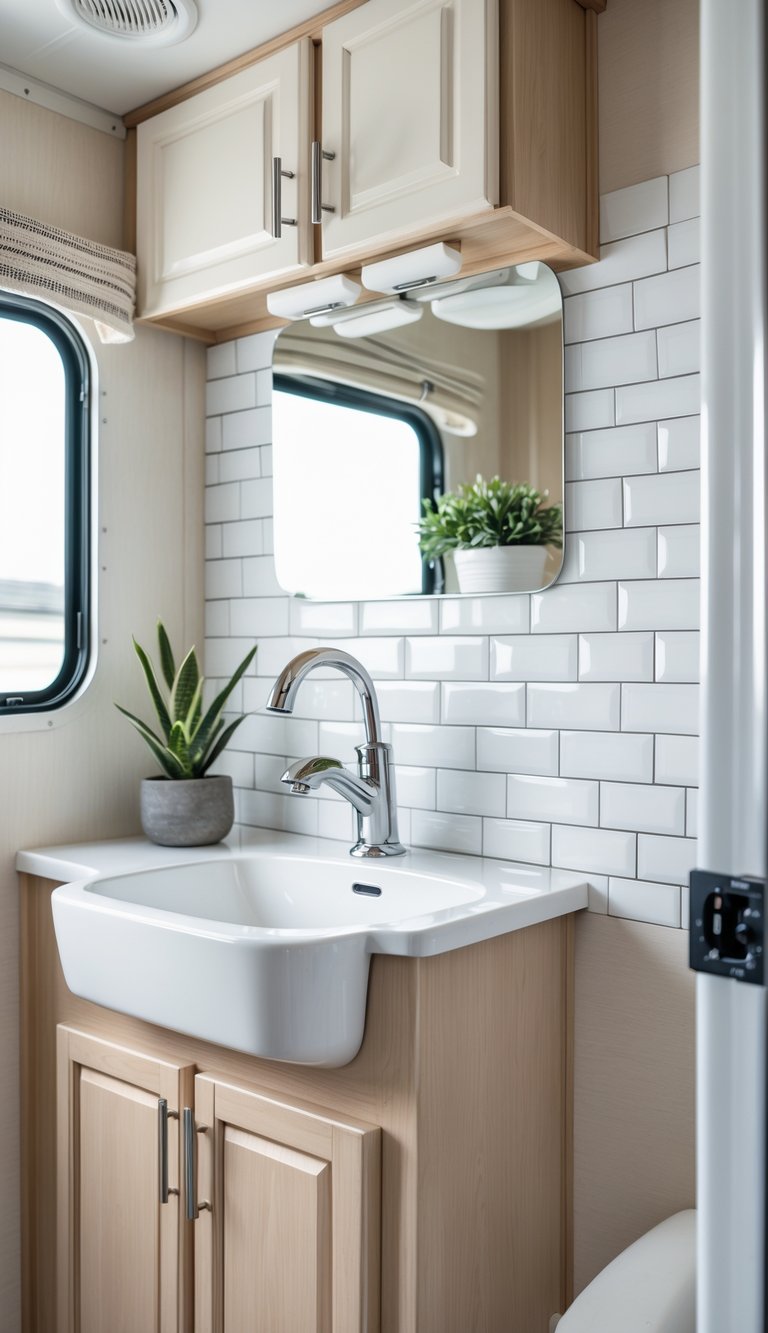
A subway tile backsplash gives your RV bathroom a clean, timeless look without a big cost. You can use peel-and-stick tiles to avoid grout and messy cutting, which makes the job faster and easier.
Choose white or light gray for a bright, roomy feel, or pick a bold color for a small pop. Measure carefully and dry-fit tiles first so you know how corners and fixtures will line up.
Peel-and-stick tiles hold up well in RVs when applied to a smooth, clean surface. Press firmly and smooth out bubbles; trim edges with a utility knife for a neat finish.
PRO TIP
If you expect moisture, add a thin bead of waterproof sealant along the top edge where tile meets wall. This keeps water out and helps the backsplash last longer.
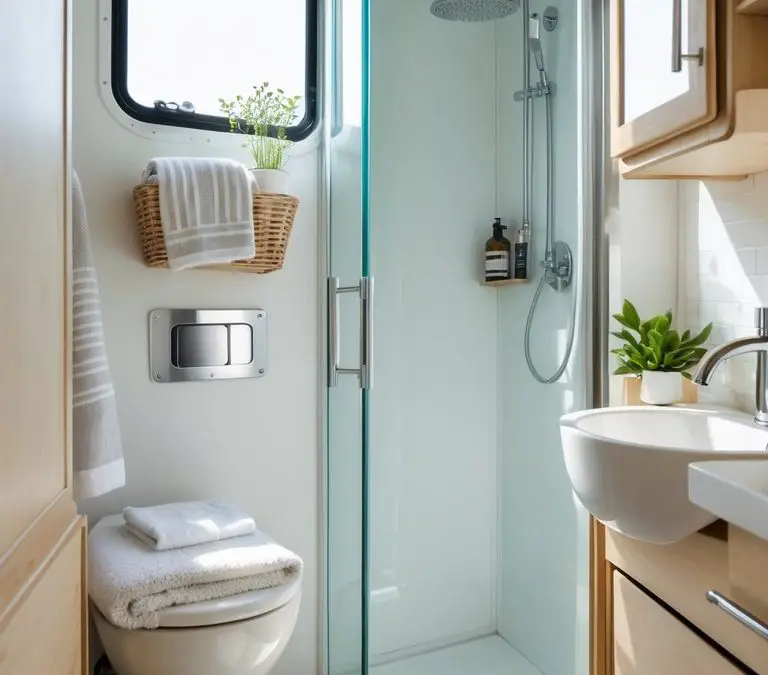
3) Add wood accents for warmth
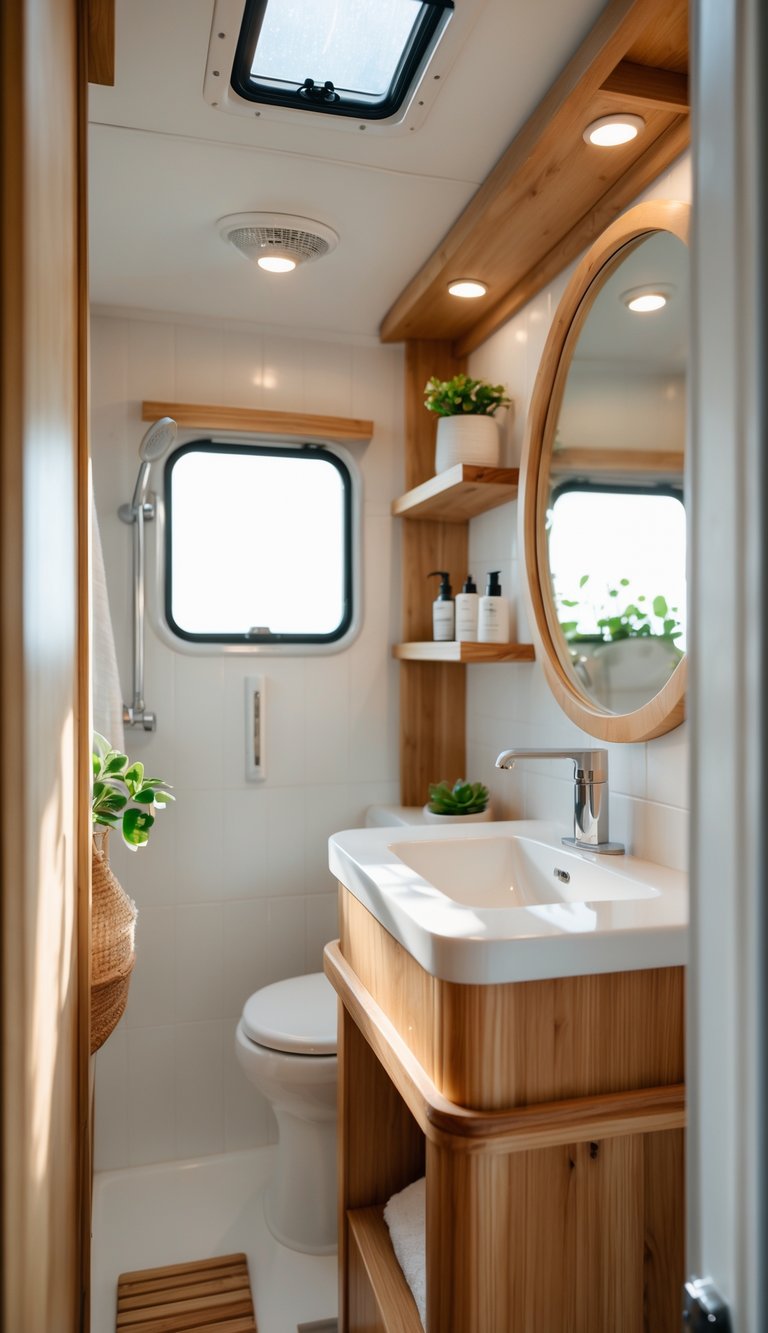
Wood accents bring warmth and a cozy feel to a small RV bathroom without a big budget. You can add a wooden shelf, a small vanity top, or a framed mirror to soften hard surfaces and make the space feel more inviting.
Choose lightweight, thin boards or reclaimed wood to keep weight low. Seal wood with a water-resistant finish so it holds up to moisture and cleaning.
Use wood in small doses: a towel rack, soap dish, or floating shelf adds character without crowding the space. Mix wood tones with white or light walls to keep the room bright and open.
PRO TIP
Buy unfinished wood and finish it yourself to save money. Stain or paint to match your RV’s style and install with simple brackets for an easy, durable update.
4) Replace old mirror with a framed one
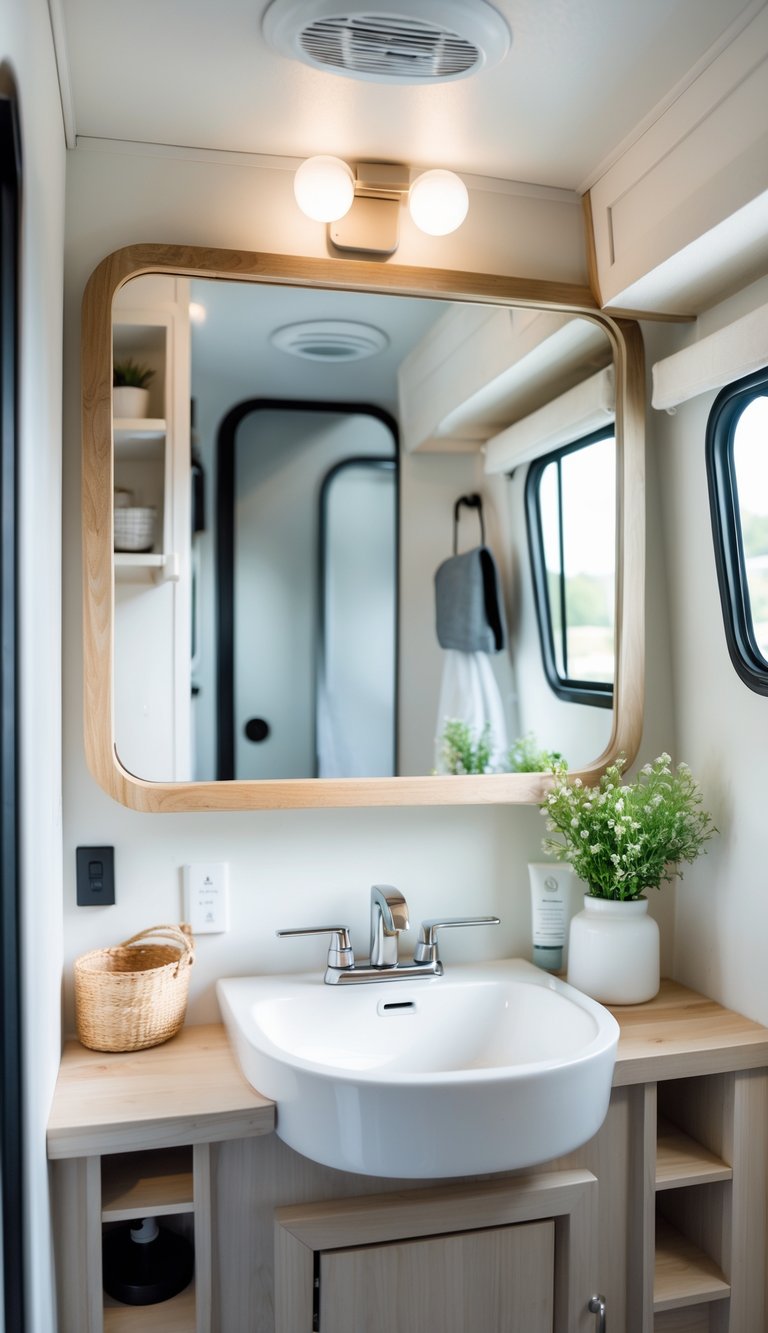
Swapping a plain RV mirror for a framed one makes the bathroom feel more like home. You get style and a quick visual upgrade without ripping anything out.
Choose a lightweight frame made for RVs or use a DIY frame kit to keep weight down. Metal, plastic, or thin wood all work and many attach with simple clips or adhesive.
A framed mirror can hide rough edges and gaps from the original mirror. It also gives you a chance to match the frame to hardware, wood tones, or your wallpaper.
PRO TIP
Measure carefully and dry-fit the frame before gluing or screwing it in. Use removable adhesives if you want a changeable look later.
5) Use peel-and-stick wallpaper
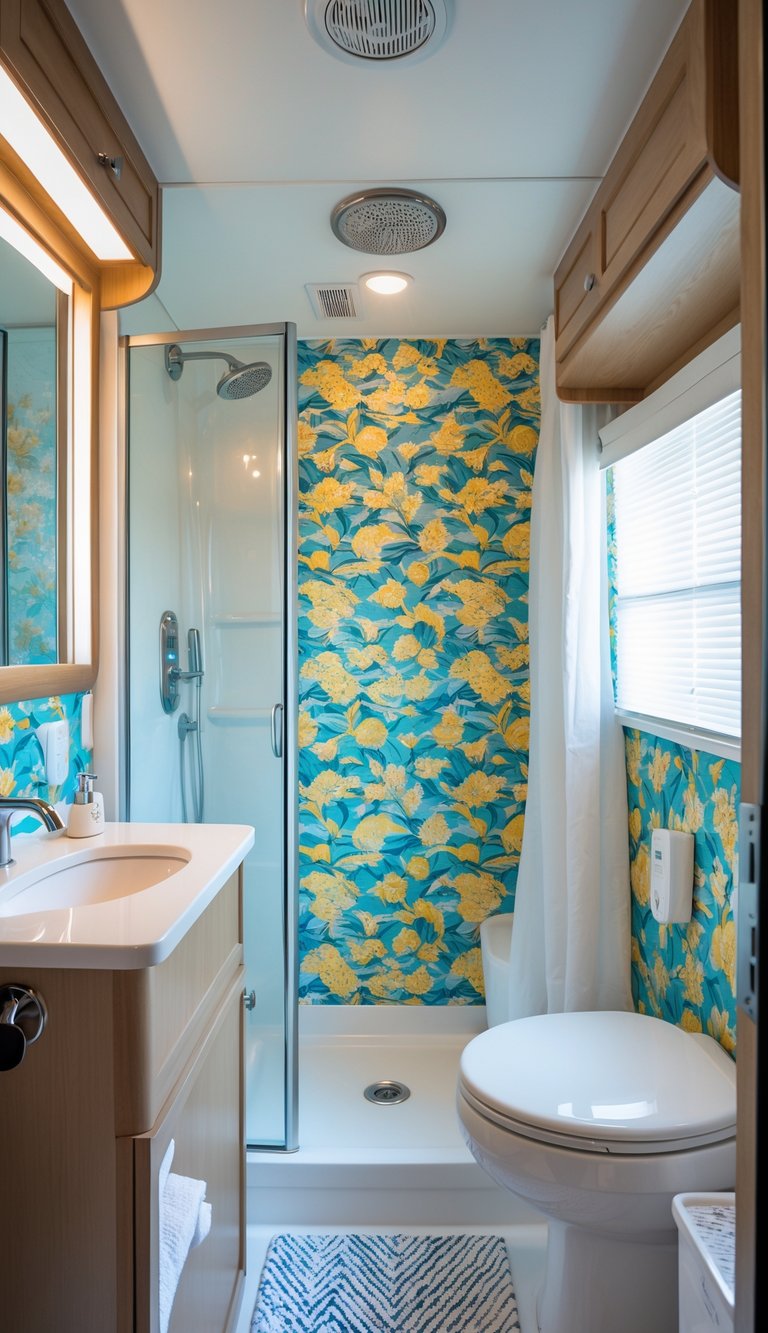
Peel-and-stick wallpaper gives your RV bathroom a big style lift without a big budget. You can add color, pattern, or texture in minutes and remove it later if you change your mind.
It works best on clean, smooth surfaces. Clean walls with a mild cleaner, let them dry, and sand any high spots lightly so the adhesive grips well.
Pick vinyl-backed, waterproof options for bathrooms to resist moisture. Apply slowly, smoothing seams with a plastic card to avoid bubbles.
H3 PRO TIP
Trim panels slightly larger than the area and fine-cut the edges after installation. That keeps seams tight and gives a cleaner, more professional look.
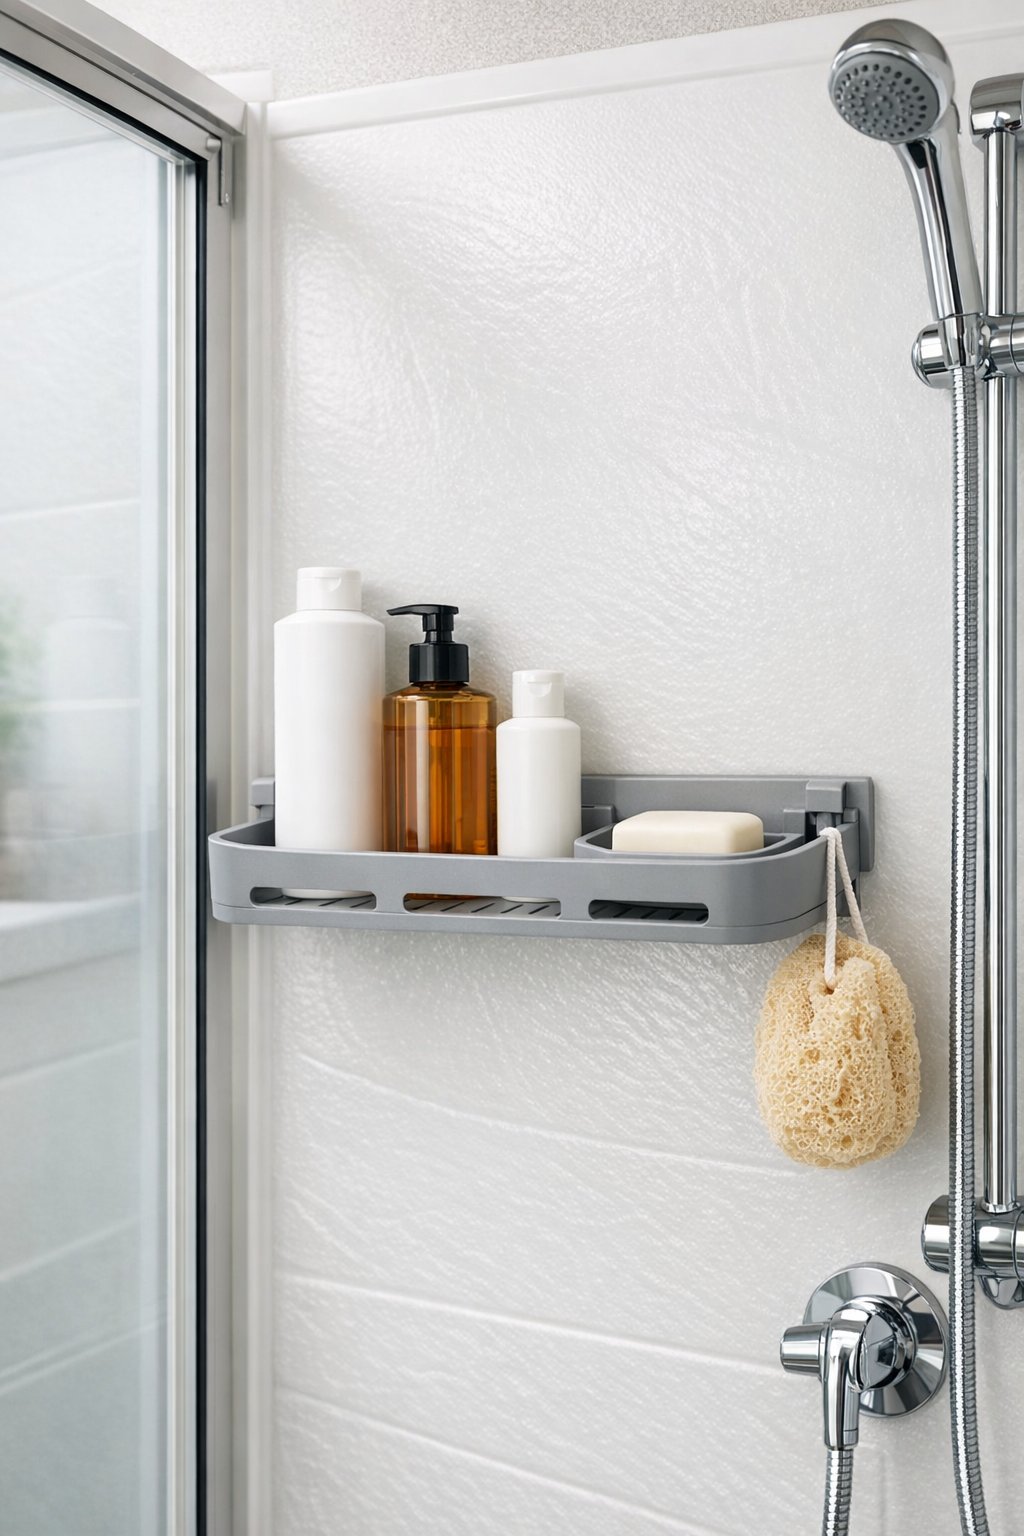
6) Install a corner shower caddy

A corner shower caddy saves space and keeps your items off wet surfaces. You can fit shampoo, soap, and a razor in one tidy spot without drilling into fragile RV walls.
Choose a rustproof, tension-pole or adhesive caddy to avoid heavy hardware. Those options hold well and remove cleanly if you move or change layouts.
Place the caddy where it won’t block the door or your elbow room. Keep heavier bottles on the lower shelf to prevent tipping.
PRO TIP
Measure the corner height before buying so the top shelf clears any shower head or light.
7) Add magnetic soap holders

Magnetic soap holders free up counter and shower space by lifting bars of soap off surfaces. You attach a small metal disc to the soap and a magnet mount to the wall or shower tile, so the soap stays dry and lasts longer.
These holders work well in tiny RV bathrooms where every inch counts. They cut down on drips and messy soap dishes, and they’re light and easy to install with adhesive pads or screws.
You can buy sets cheaply or make one from a strong magnet and stainless steel disc. Choose rust-resistant materials and stick the magnet where it won’t hit you when you move around.
PRO TIP
Press the adhesive for at least 30 seconds and let it cure before use. Replace the metal disc when it shows wear to keep the bond strong.
8) Use suction cup shelves
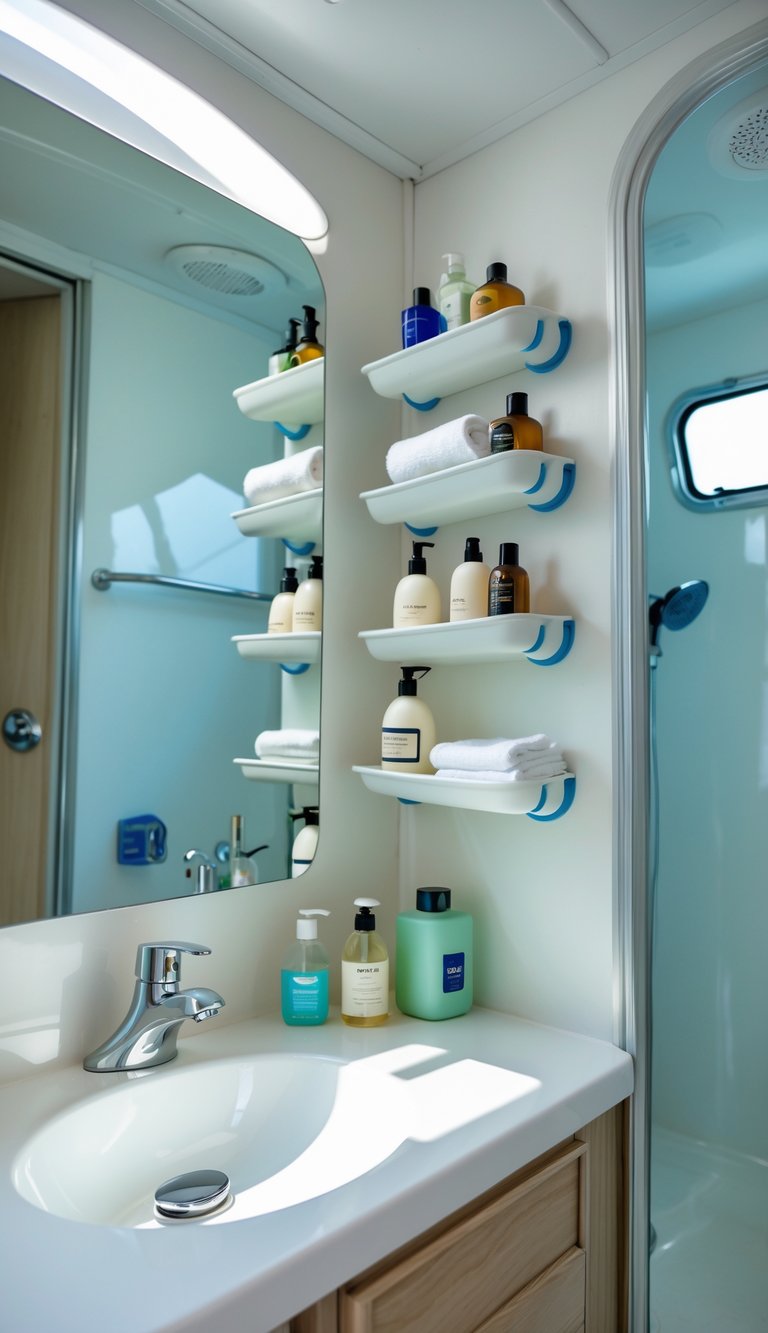
Suction cup shelves save space without screws or tools. You can mount them on shower walls, tile, or smooth cabinet faces to keep soaps and shampoos off the floor.
They install fast and move easily when you want to rearrange. Pick units with strong suction, good drainage, and rubber seals to avoid slips and leaks.
Clean the surface and the cup before installing for the best hold. Press firmly and let them sit for a few hours before loading heavier items.
PRO TIP
Check suction cups daily at first and re-secure them after long drives. Keep heavier items on lower shelves or in a cabinet to prevent falls.
9) Replace faucet with a water-saving model
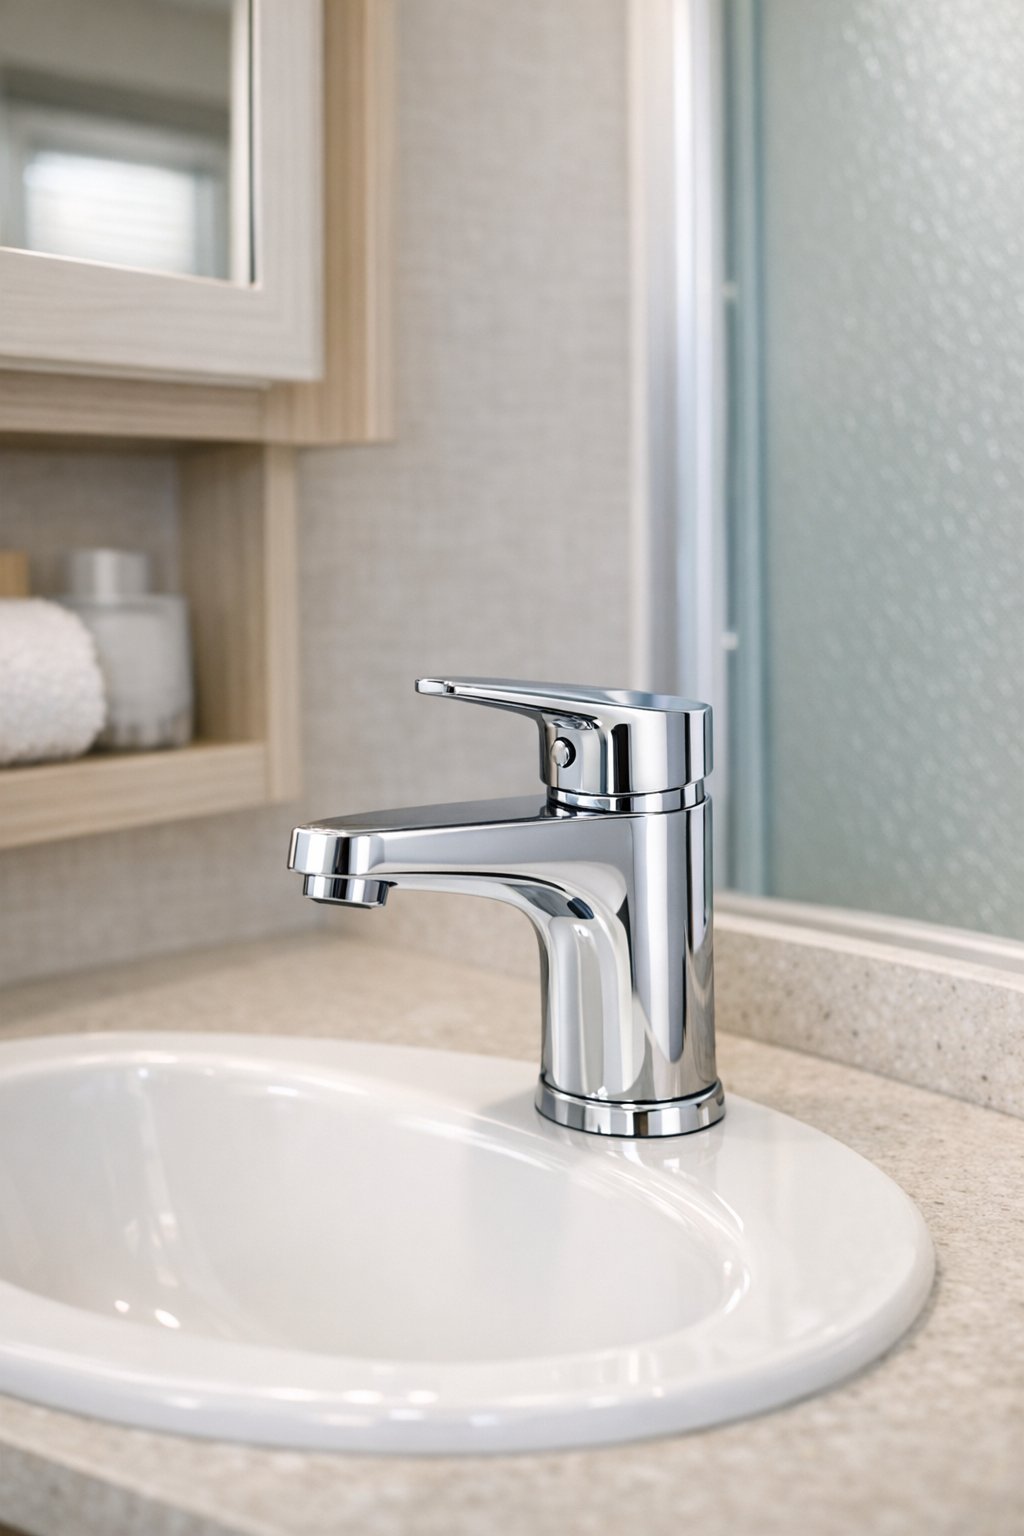
Swapping your RV bathroom faucet for a water-saving model cuts water use and can lower your gray tank fill rate. Look for faucets with aerators or low-flow ratings (around 1.5 gpm or less) to keep good pressure while using less water.
Choose a compact model made for RVs or one that fits your sink hole and supply lines. Many replacements install in under an hour with simple tools, and some models come with flexible connectors to match your pipes.
Think about a single-handle faucet for easier temperature control and fewer leak points. A newer faucet can also refresh the look of your bathroom without a big cost.
PRO TIP
Bring the old faucet or photos to the store to match thread size and mounting style.
10) Install LED strip lighting under cabinets
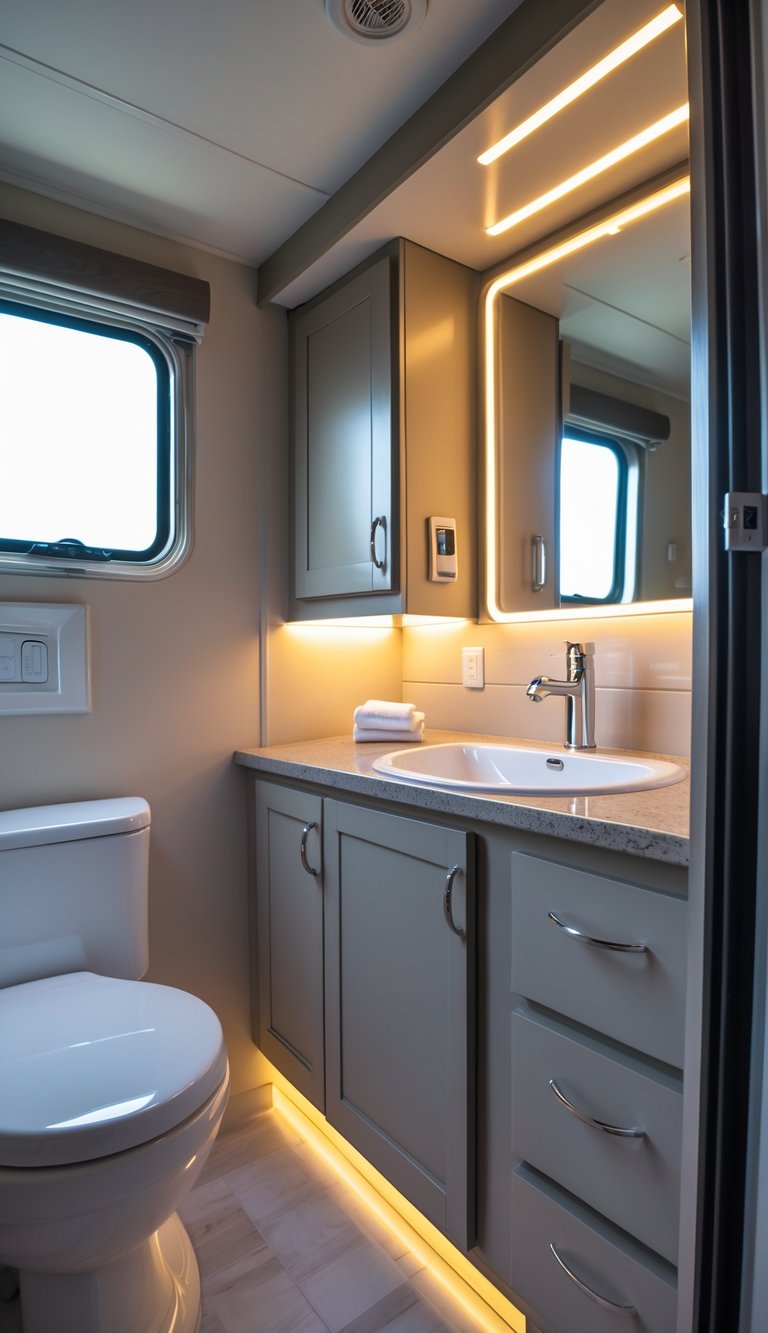
Adding LED strips under cabinets gives your RV bathroom softer, more useful light without using much power. You can brighten the sink area for shaving or makeup and keep a low, gentle glow for late-night trips to the toilet.
Measure first and buy strips rated for damp spaces. Peel-and-stick strips or tracks make mounting quick, and many come with dimmers or warm/cool settings so you control brightness and color.
Hide wires along cabinet edges or inside chase channels for a clean look. Use a 12V power supply that matches your RV system to avoid electrical issues.
PRO TIP
Choose warm white LEDs around 2700–3000K to make skin tones look natural and the space feel cozy.
11) Add a low-profile towel rack

A slim towel rack saves space and keeps your towels within reach. Choose a low-profile bar or multi-tier rack that sits close to the wall so it won’t stick into your walking space.
Mount it near the sink or shower for fast access after washing. A compact design helps towels dry faster and reduces clutter on counters or hooks.
Pick rust-resistant materials like stainless steel or coated aluminum for long life in a damp RV bathroom. You can also use adhesive or no-drill options if you rent your rig or want easier removal.
PRO TIP
Install the rack at a comfortable height for everyone who uses the RV. Measure before you drill to avoid blocking cabinet doors or vents.
12) Use a fold-down sink to save space
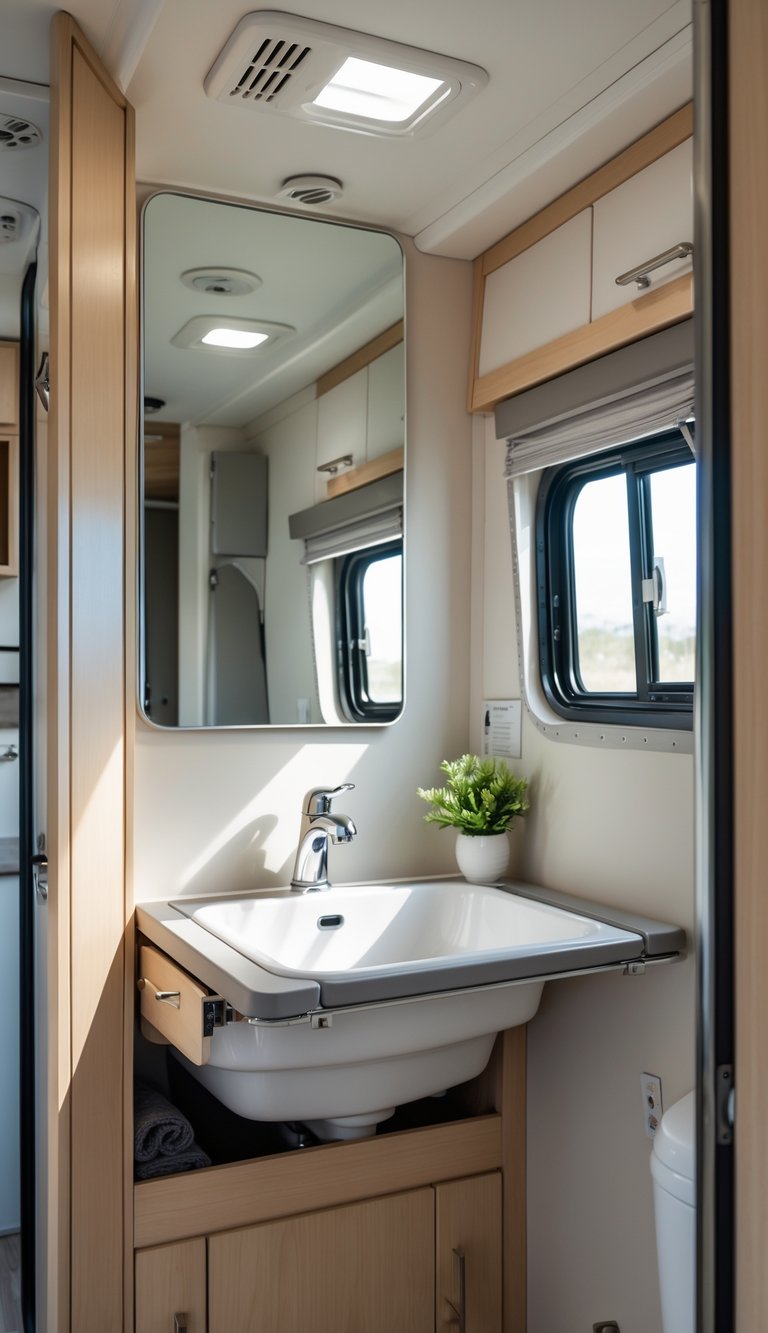
A fold-down sink gives you a real basin when you need it and clears the area when you don’t. You get counter space for shaving or packing, and the sink tucks away to make the room feel larger.
Many models mount to a wall or cabinet and fold down on a hinge. Pick one with a simple latch and a shallow basin so it won’t hit the toilet or shower door when open.
You can install a folding sink yourself with basic tools and plumbing skills. Look for lightweight materials and corrosion-resistant fittings to handle road vibration and moisture.
PRO TIP
Choose a sink with quick-connect plumbing or a swivel faucet to make hookups easier and reduce leak risk.
13) Install a vent fan for moisture control
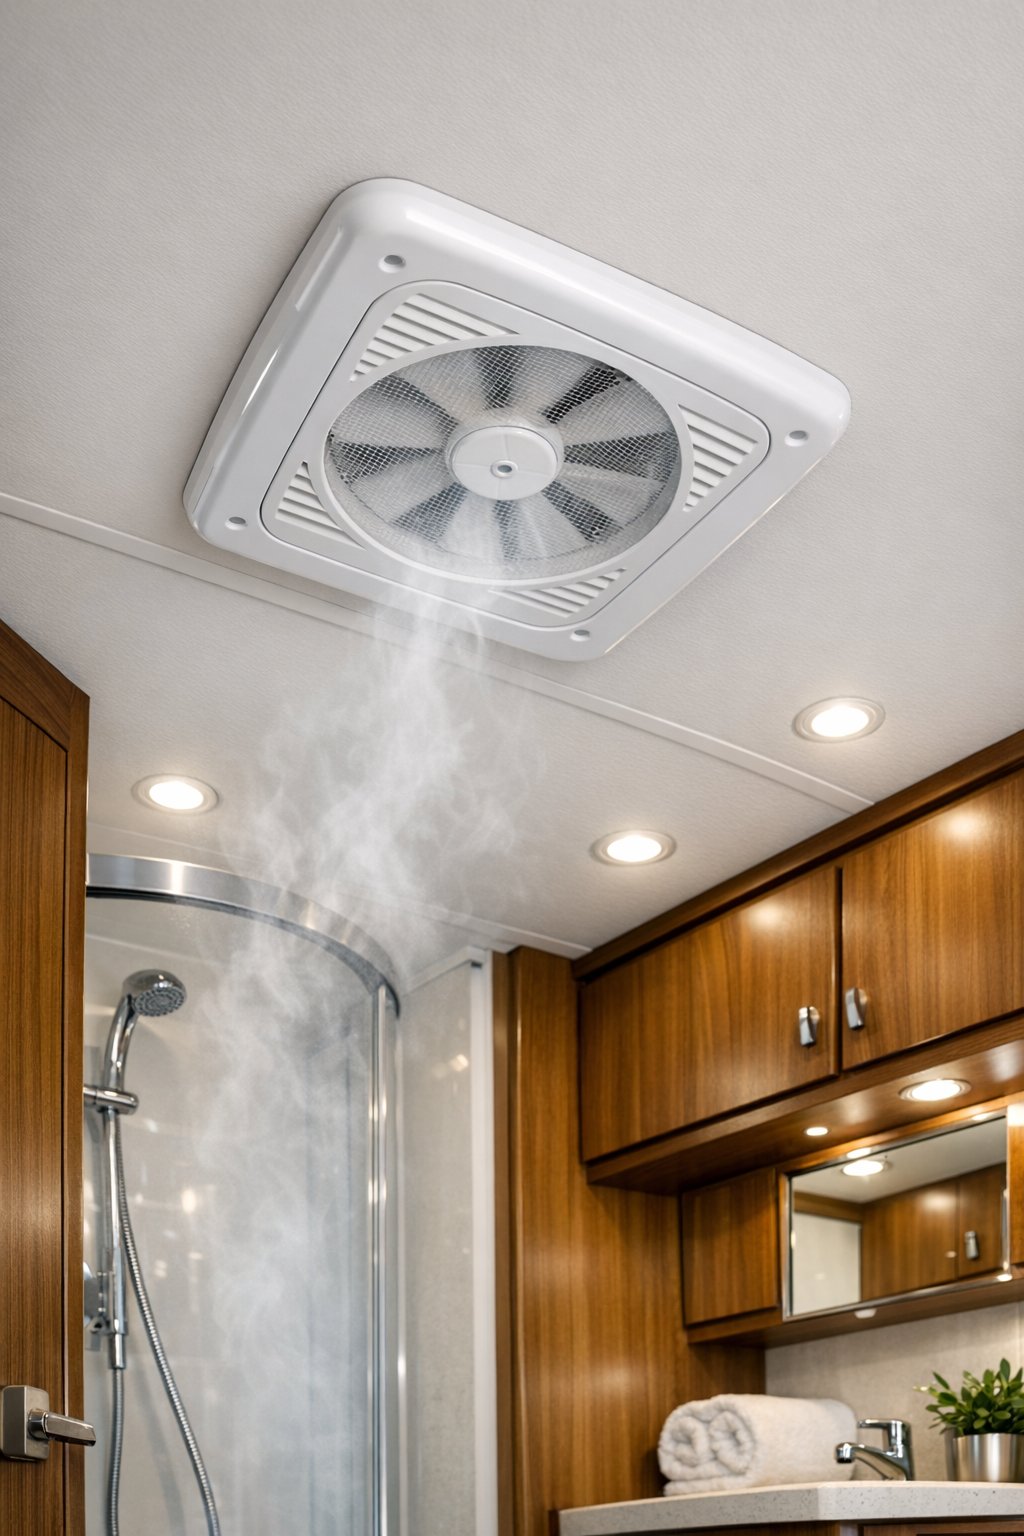
A vent fan helps stop steam and keeps your RV bathroom fresh. You cut down mold risk and protect cabinets and trim from water damage.
Pick a low-power, RV-rated fan that fits your existing roof opening. Many models are simple swaps and use the same screw pattern, so you can replace the old unit without major roof work.
Install carefully: remove interior trim, unhook wiring, lift the old fan from the roof, clean the sealing area, then set and seal the new fan with butyl tape and lap sealant. Test the electrical connections and run the fan to confirm airflow.
PRO TIP
Choose a fan with a built-in thermostat or humidity sensor so it runs only when needed. This saves power and keeps your space dry.
14) Use a removable shower head
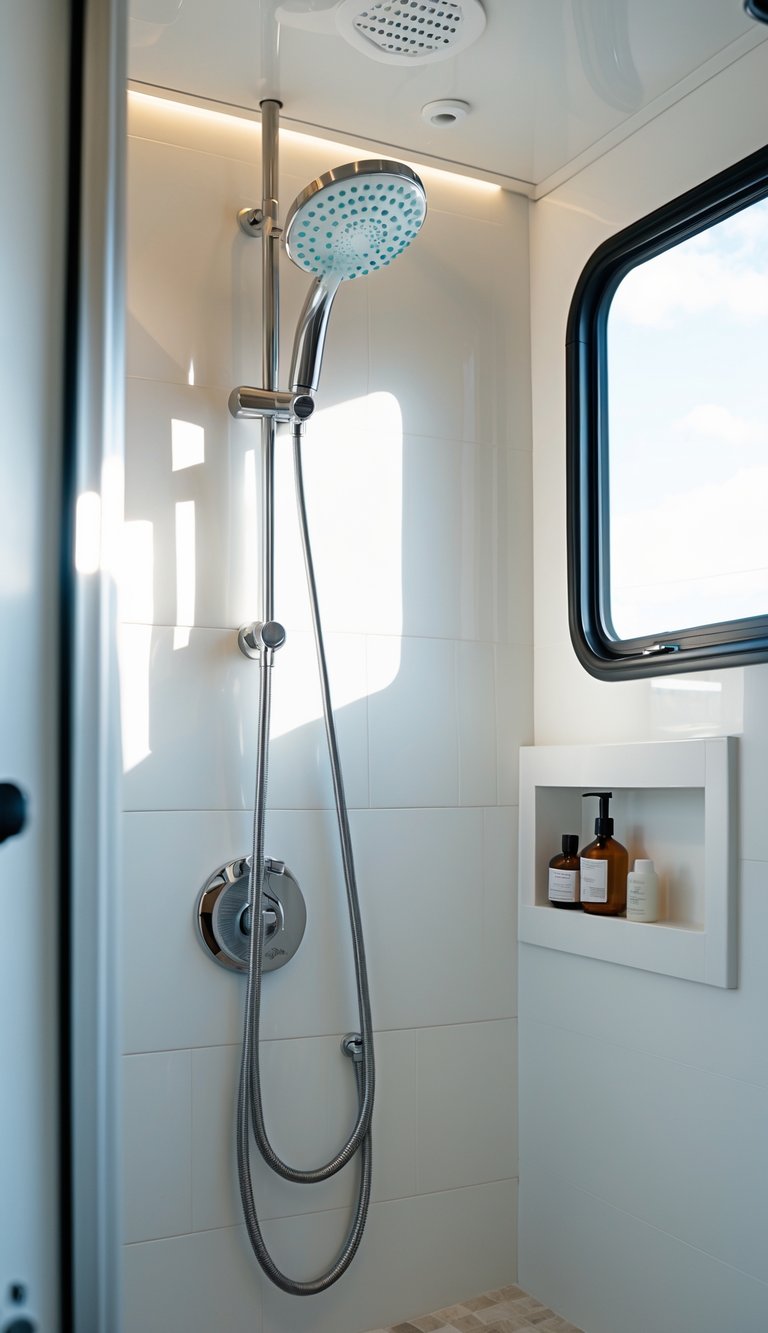
A removable shower head makes your RV shower more useful and saves water. You can direct the spray where you need it, rinse soap quickly, and clean the stall without extra tools.
Many models are low-flow and keep good pressure, so you cut water use without losing comfort. Handheld heads also help when bathing pets or rinsing muddy gear after a day outdoors.
Installation is usually simple and needs only a wrench and plumber’s tape. Choose a model with a long, kink-resistant hose and a bracket that fits your shower wall or curtain rod.
PRO TIP
Pick a detachable head with multiple spray settings and a pause button to control flow during lathering.
15) Add a slimline trash bin
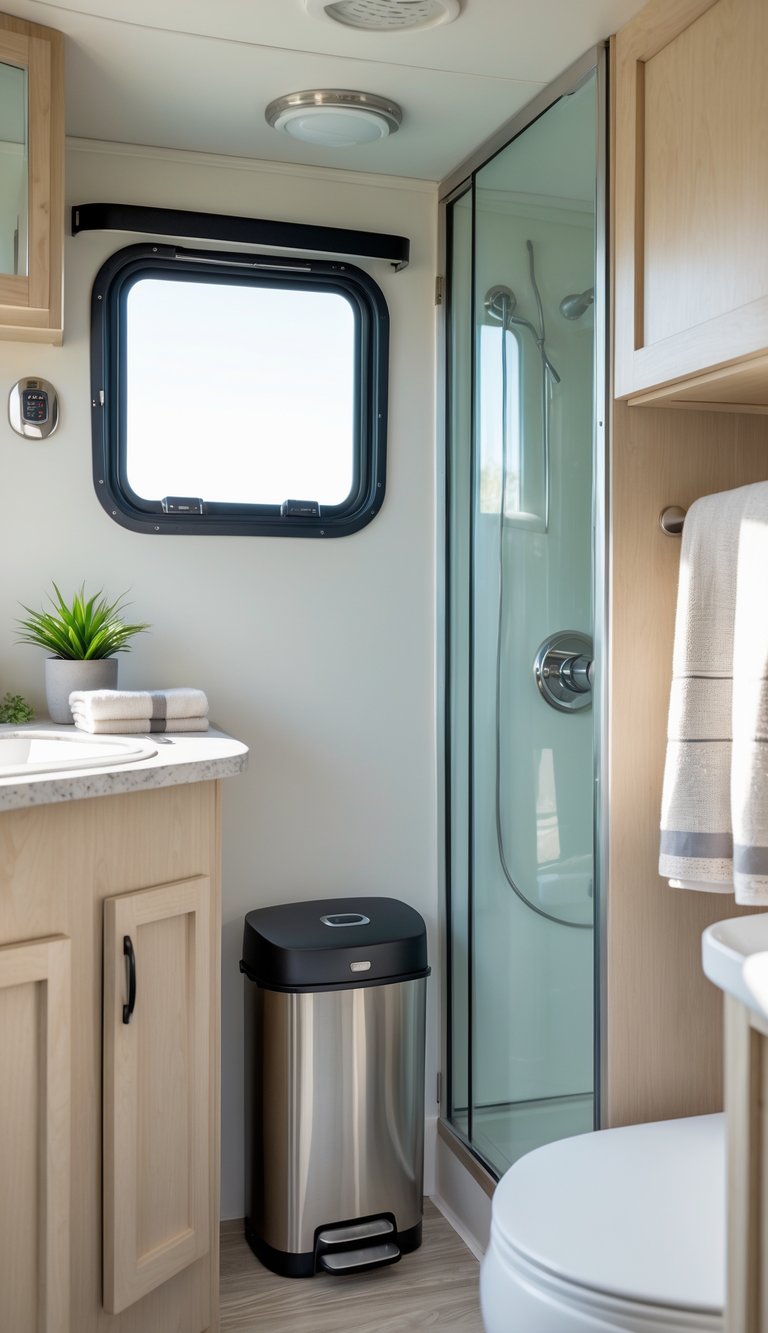
A slimline trash bin saves space in a tiny RV bathroom. You can tuck it beside the toilet, under a small sink, or mount it on the wall to free floor space.
Choose a model with a lid to keep odors contained and a removable inner bucket for easy dumping. Look for plastic or stainless steel that resists rust and is lightweight.
Some bins have a hands-free pedal or swing lid that helps when your hands are full. If you want extra savings, repurpose a narrow container or buy a slim bin designed for RVs.
PRO TIP
Line the bin with small compostable bags to reduce smells and make removal simpler.
16) Use adhesive hooks for hanging towels
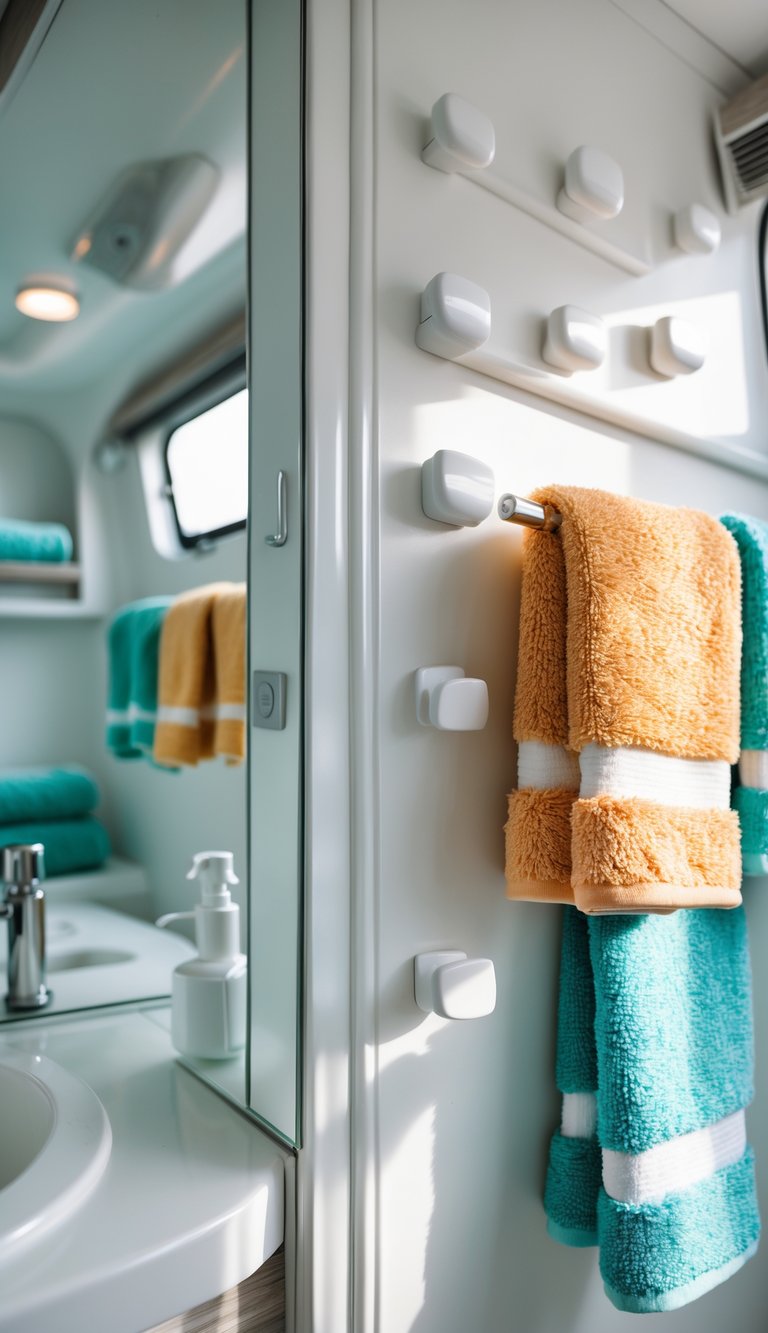
Adhesive hooks save space and avoid drilling into thin RV walls. You can place them near the shower, sink, or on the inside of a cabinet door to keep towels handy.
Choose hooks rated for the weight you expect and follow the surface prep steps on the package. Clean the area, let it dry, and press the hook firmly for the recommended time.
Mix sizes: small hooks for hand towels, larger or double hooks for bath towels. Remove and replace adhesive strips before long trips to keep hooks secure.
PRO TIP
Stick command-style strips to painted or smooth surfaces only, and test one hook overnight before adding more.
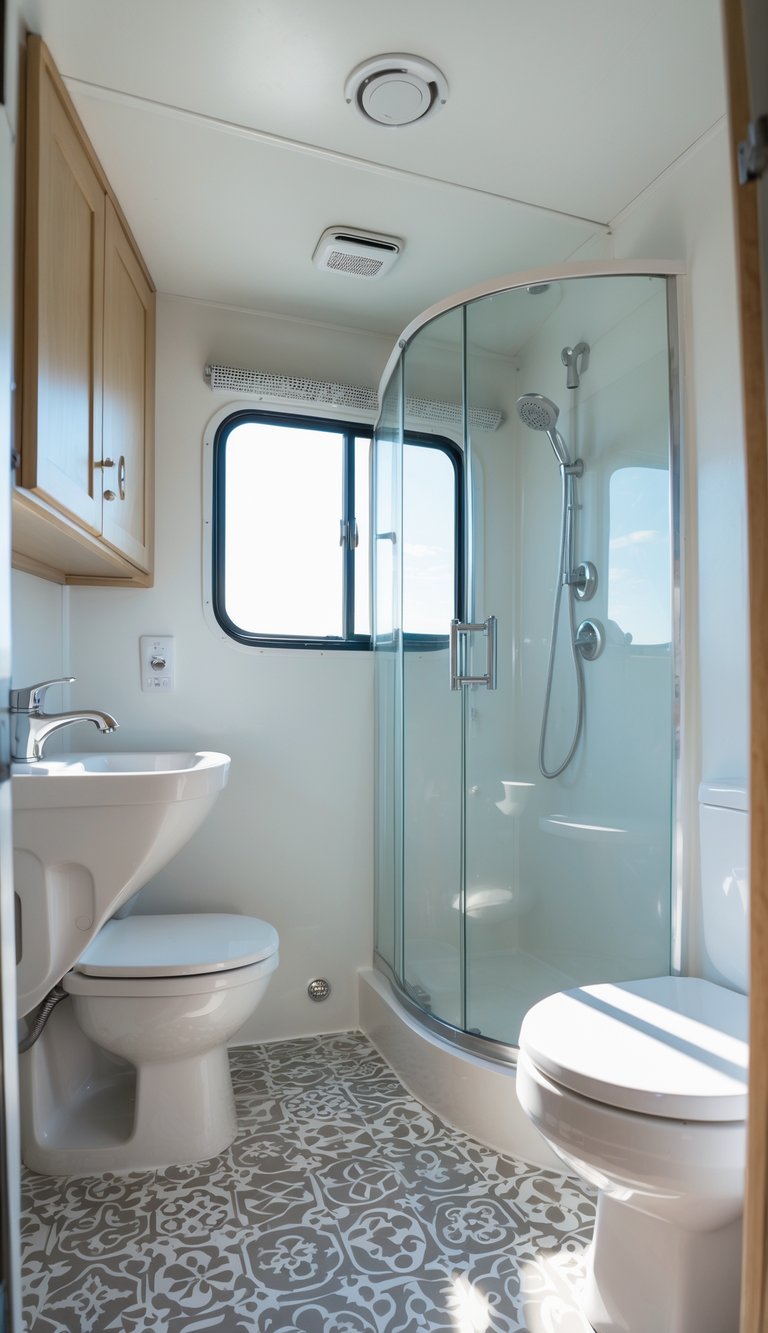
17) Install a sliding shower door
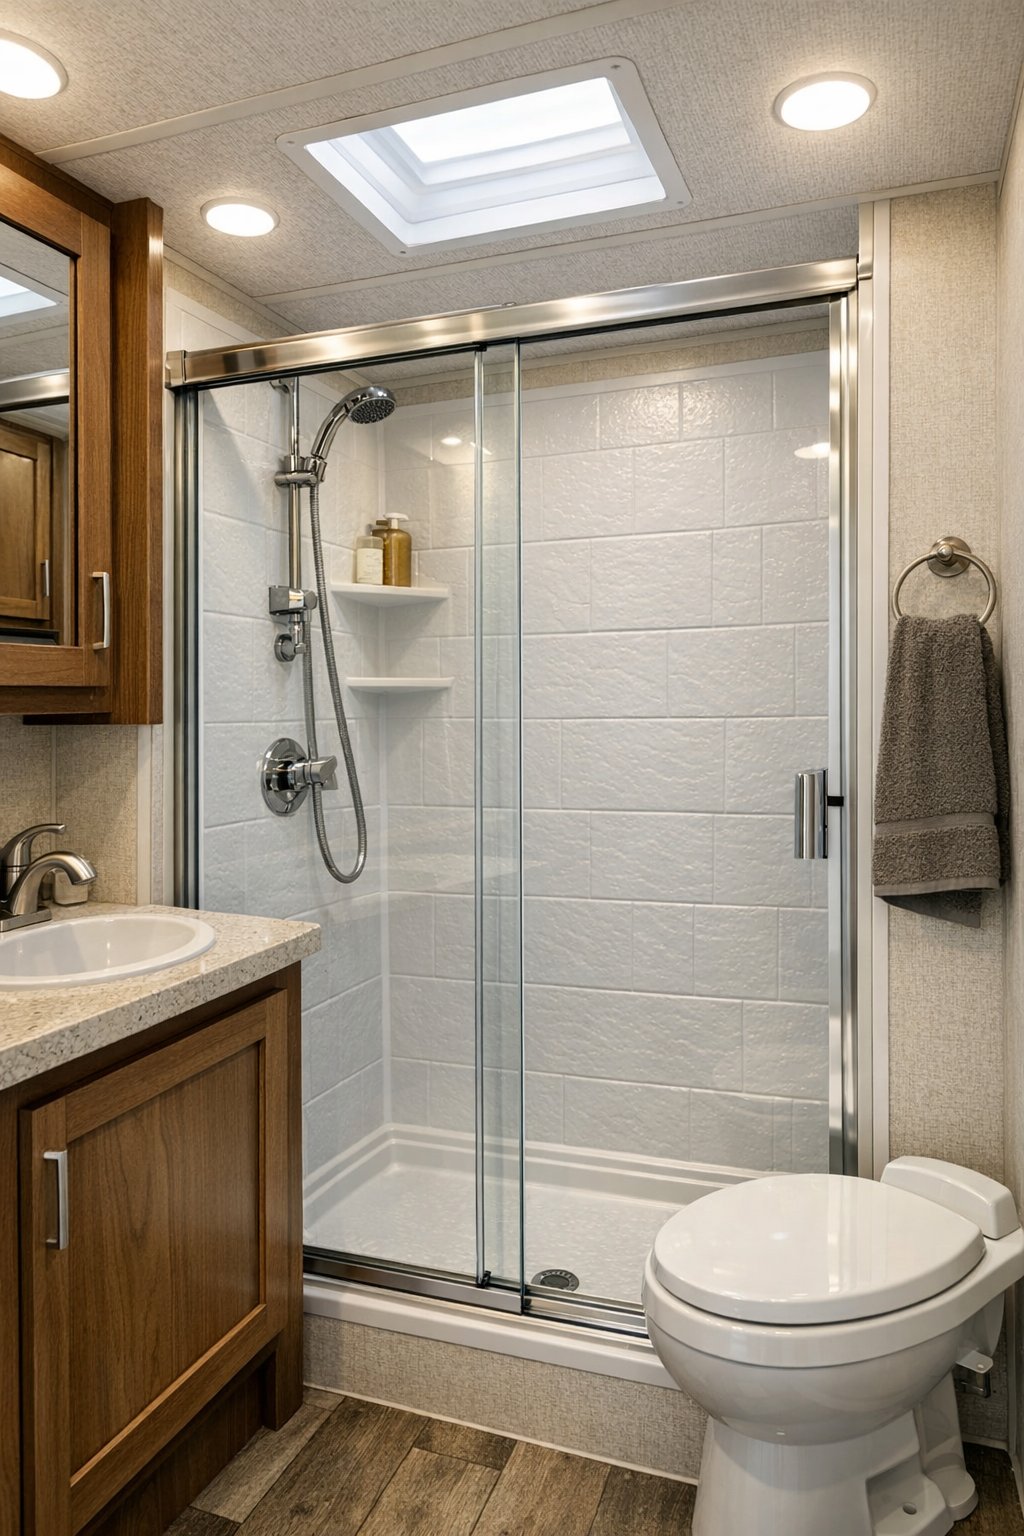
A sliding shower door saves space and keeps water inside the shower better than a curtain. You can choose lightweight, retractable, or framed glass doors to fit your budget and style.
Measure carefully before you buy so the door fits the opening and tracks line up. Many RV owners swap heavy glass for lighter options to reduce weight and make installation easier.
Most sliding doors mount to a top and bottom track and use simple screws and sealant. If your RV has curved or narrow openings, look for doors made for small spaces or adjustable tracks.
PRO TIP
Bring a helper when lifting and aligning the door. Use marine-grade silicone to seal edges and prevent leaks.
18) Add a small potted plant
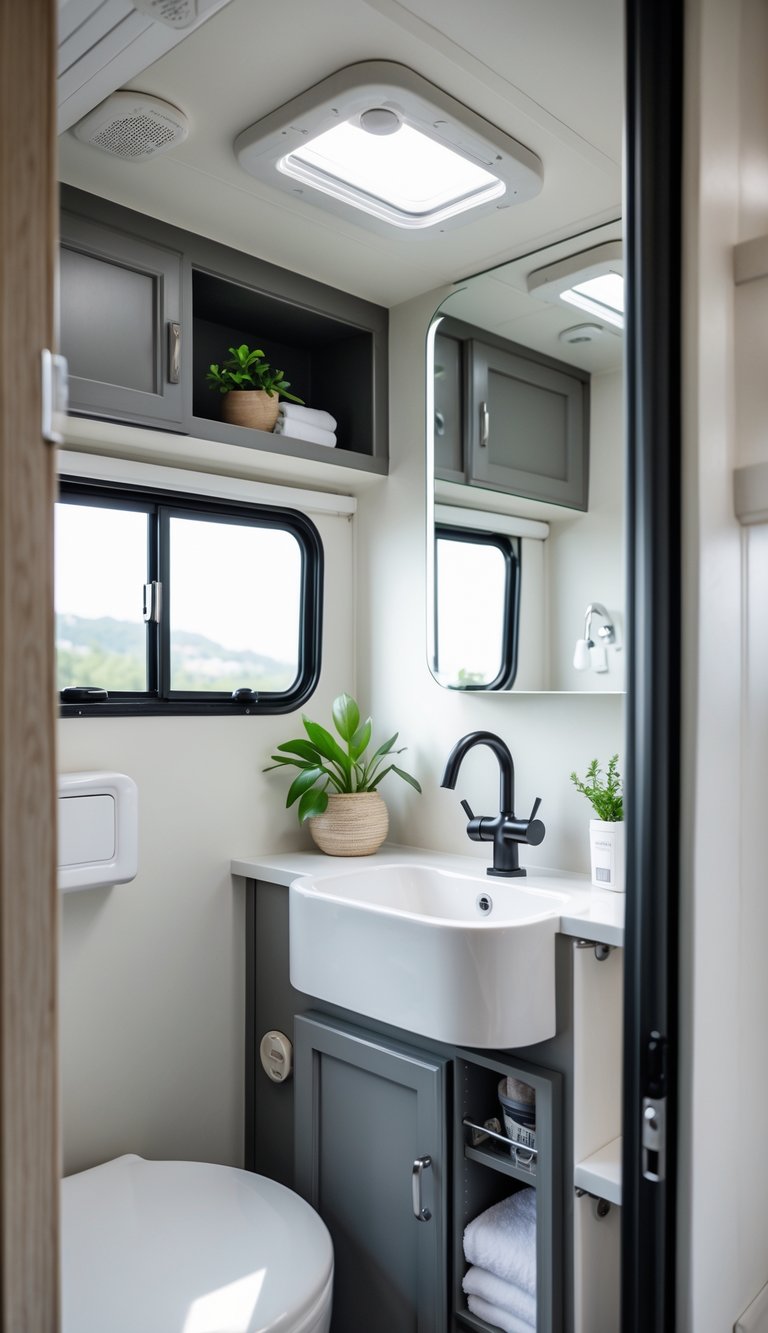
A small potted plant adds color and life to your RV bathroom without taking up much space. You can pick a low-light plant like a snake plant or a pothos that tolerates humidity and needs little care.
Place the pot on a narrow shelf, the vanity corner, or a wall-mounted planter to keep counters clear. Choose lightweight pots to avoid extra weight while you travel.
An artificial plant also works if you want zero maintenance. Either way, a touch of green makes the space feel fresher and more inviting.
PRO TIP
Use a shallow dish under the pot to catch drips and protect surfaces.
19) Use transparent storage bins

Transparent bins let you see what’s inside at a glance. That saves time when you’re on the road and keeps small spaces from turning into clutter.
Choose stackable clear bins to make use of vertical space in cabinets and under sinks. They fit neatly and keep toiletries, cleaning supplies, and spare toilet paper organized.
Label the bins with a sticky note or a small printed tag to make items even easier to find. Clear bins are also great for tracking supplies so you know when to restock before a trip.
H3: PRO TIP
Keep frequently used items in shallow clear trays so you can grab them quickly. For fragile items, add a foam liner or use small clear containers inside a larger bin to prevent shifting while driving.
20) Replace toilet seat with quick-release model
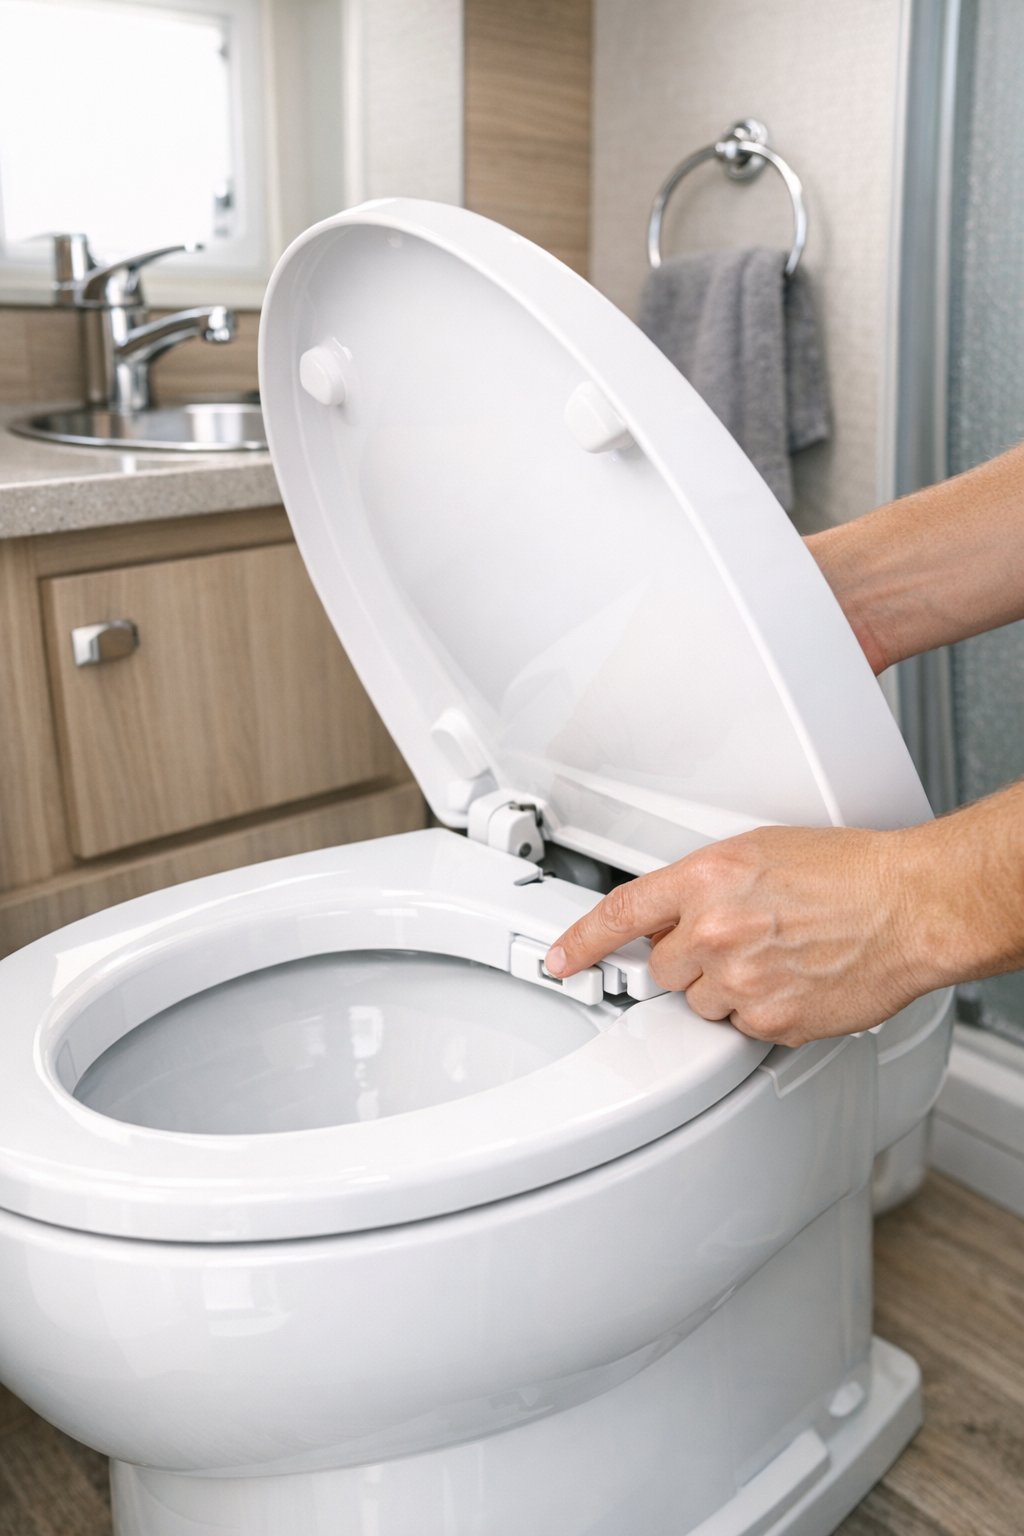
Swapping your RV toilet seat for a quick-release model makes cleaning faster and easier. These seats unclip with a button or latch so you can lift the whole seat off the bowl for a deep clean.
Quick-release seats often have soft-close hinges and thicker plastic for more comfort. You can find models that match RV bowl shapes, or use a standard seat if the size fits.
Installation usually needs just two bolts and takes minutes. Keep the old hardware until you confirm the new seat fits, and reuse parts if they match.
PRO TIP
Measure the bolt spread and bowl shape before buying. Bring a photo or the old seat to the store to avoid returns.
21) Paint cabinetry for updated look
Painting your RV cabinets gives a big visual change without a big cost. You can pick light colors to brighten tight spaces or deep tones to add contrast and style.
Start by cleaning and sanding the surfaces so paint sticks well. Use a primer made for slick surfaces if your cabinets are laminate or have glossy finish.
Choose durable, water-resistant paint made for cabinets or trim. Apply thin, even coats and sand lightly between coats for a smooth result.
You can swap old hardware for new knobs or pulls to complete the refresh. Small changes like this make your bathroom feel newer and more personal.
PRO TIP
Use a foam roller for flat areas and a small brush for corners to cut down on brush marks and speed up the job.
22) Add reusable silicone shower curtains
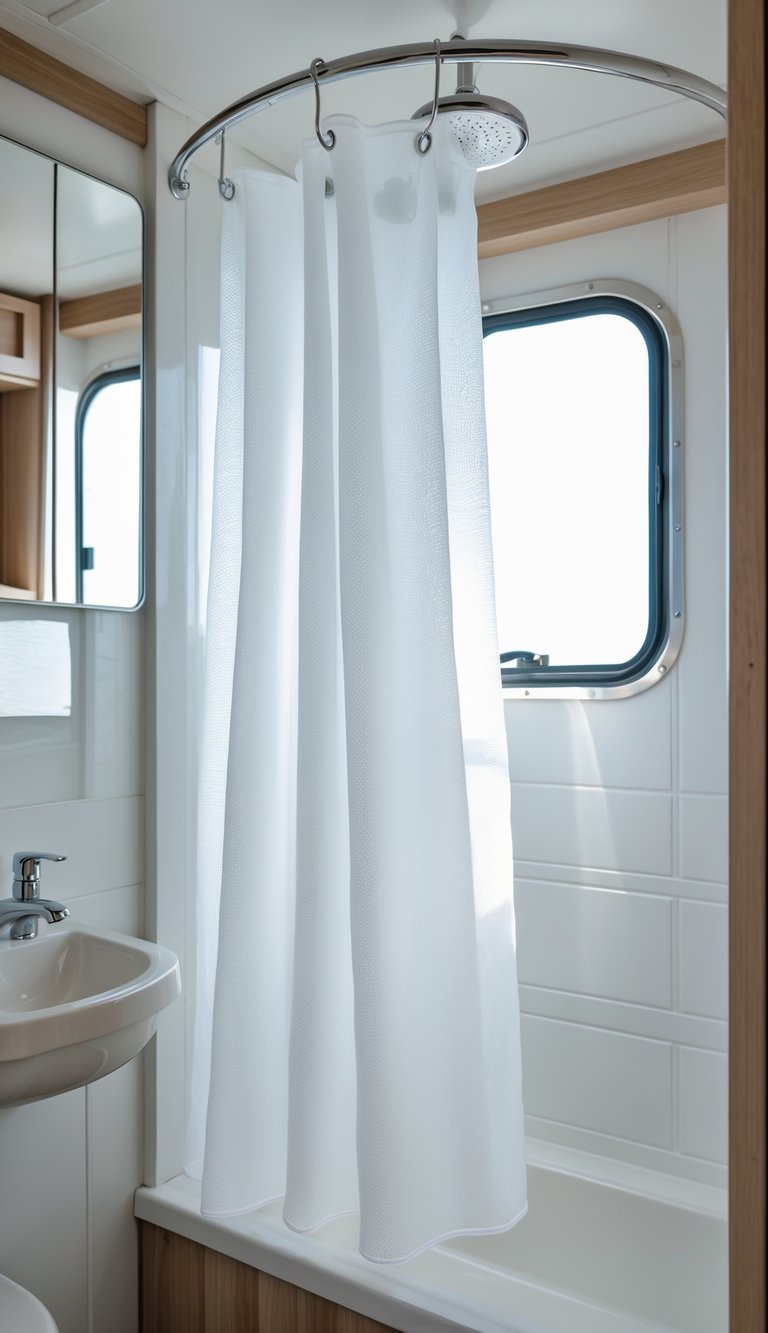
Silicone shower curtains fit small RV spaces well. They bend and fold so you can tuck them away when you need room, and they resist water and mildew better than fabric.
You save money over time because silicone lasts longer than disposable liners. Cleaning takes minutes — wipe with a damp cloth or vinegar solution to keep it fresh.
These curtains often stick to smooth surfaces, which helps keep water in the pan and off your floor. Pick a clear or frosted style to keep light in the bathroom while blocking direct views.
PRO TIP
Measure your shower opening before buying so the curtain fits without gaps. Use small, rust-proof magnets or suction hooks to keep the bottom sealed on windy nights.
23) Use a tension rod for extra hanging space
A tension rod adds hanging space without drilling or tools. You can place one across the shower to dry towels, swimsuits, or wet rags after use.
Install a rod inside a closet to create a lower bar for shirts or towels. Use S-hooks to hang cups, brushes, or small baskets for toiletries and keep counters clear.
Place a short rod under a cabinet shelf to store rolled towels or to hang cleaning spray bottles by their handles. Tension rods also work above the sink to hold a curtain for privacy or to hide clutter.
PRO TIP
Choose a rust-resistant rod and measure the span carefully for a snug fit. Use rubber end caps or adhesive pads to protect surfaces while driving.
24) Install a mirror with built-in storage

A mirror with built-in storage saves space and keeps your toiletries close at hand. You can choose a recessed medicine cabinet or a slim wall-mounted unit that won’t stick into narrow walkways.
These mirrors hide clutter and make small RV bathrooms feel cleaner. Many models include adjustable shelves and mirrored doors for extra function.
Pick a model that fits the wall cavity and matches your finish. Look for lightweight, rust-resistant materials designed for mobile use so it stays secure while you drive.
PRO TIP
Mount the cabinet with vibration-resistant anchors and use shelf lips or non-slip liners to keep items from shifting on the road.
25) Add peel-and-stick floor tiles
Peel-and-stick tiles give your RV bathroom a fresh look without heavy work. You can pick waterproof vinyl designs that mimic wood, stone, or tile and still keep weight low.
They cut to size with a utility knife, so you can fit around fixtures and corners. Installation is fast: clean the floor, lay tiles from the center, and press firmly to remove bubbles.
These tiles hold up well in small, low-traffic RV bathrooms but choose products rated for moisture and flex. If your subfloor is uneven, add a thin underlayment to improve adhesion and finish.
PRO TIP
Buy a few extra tiles for mistakes and future repairs. Test one tile in a hidden spot first to check adhesive and color under your RV lighting.
26) Use a compact electric water heater
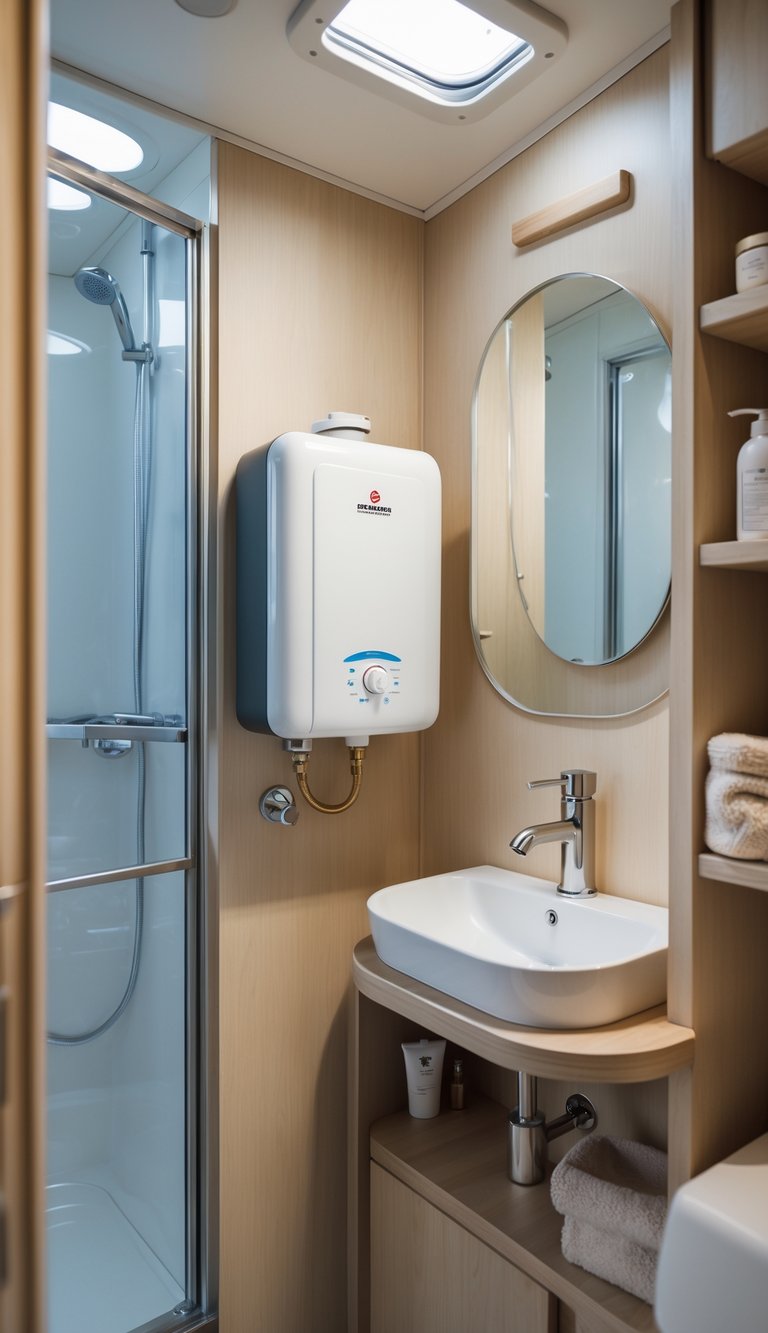
A compact electric water heater can give your RV steady hot water without the wait. These mini-tank units fit under sinks or in cabinets and deliver instant warmth for showers and handwashing.
They use less space than traditional tanks and often install with basic plumbing and a 120V outlet. You’ll save water too, since shorter waits mean less cold-water waste.
Look for a unit sized 2–4 gallons for most small rigs. Check the heater’s amperage so your RV electrical system can handle it without tripping breakers.
PRO TIP
Mount the heater close to the shower or sink to cut pipe length and heat loss. Add a simple shutoff valve for winter draining and easier maintenance.
27) Use a removable shower shelf
A removable shower shelf gives you extra storage without permanent changes. You can add one in minutes and take it down when you need more space or when you sell the RV.
Look for lightweight, rust-proof models that use suction cups, tension poles, or adhesive strips. These hold toiletries securely and avoid drilling into walls or damaging surfaces.
Removable shelves come in many sizes and styles. Pick narrow designs for small stalls or corner shelves to keep the center clear for showering.
PRO TIP
Clean mounting surfaces and follow weight limits to keep the shelf from falling. Store heavy bottles elsewhere and use refillable travel containers to save space.
28) Add a small wall clock
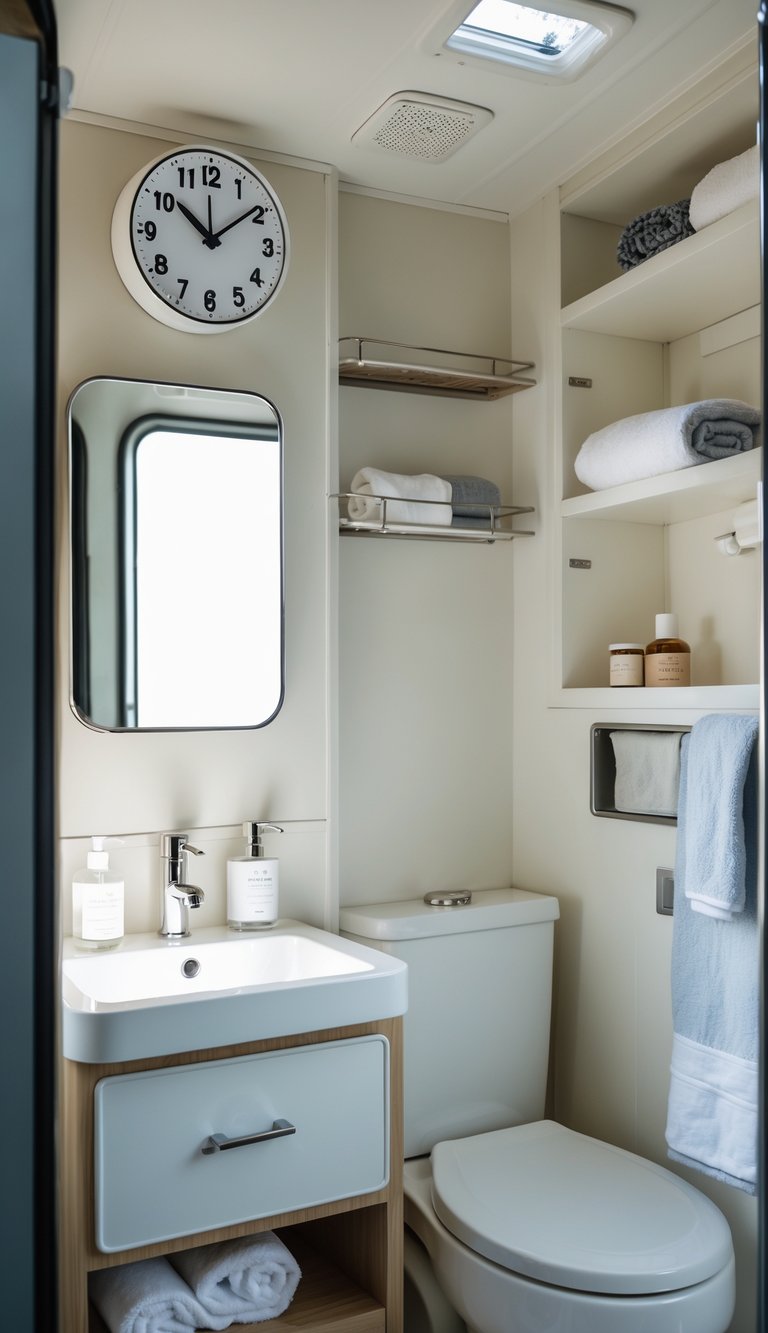
A small wall clock keeps you on schedule when you’re getting ready or trying to hit a campground checkout time. Pick a slim, battery-powered clock so it won’t need wiring and won’t take up much room.
Choose a simple design that matches your RV decor — neutral colors or a wood frame work well. Mount it at eye level near the mirror or door so you can glance at it without stretching.
An easy clock adds charm and function without costing much or adding weight. It’s a tiny upgrade that can make mornings smoother and help keep your whole trip on track.
PRO TIP
Opt for a clock with quiet movement to avoid ticking noise while you sleep.


