Last Updated on April 18, 2026
You can make a pop up camper feel modern and cozy without spending much. This article shows simple, practical updates that change how your space looks and works, using easy DIY projects and budget-friendly swaps you can finish in a weekend.
You’ll learn low-cost ways to boost comfort, style, and function so your camper feels more like a tiny home you actually want to use.
Turn small fixes into big improvements by focusing on smart materials, simple hardware swaps, and a few clever upgrades that save space and add durability. Use these ideas to plan a refresh that fits your budget and your travel plans.
1) Refinish plywood cabinets with white chalk paint and dark wax
You can refresh tired plywood cabinets with white chalk paint for a bright, clean look. Chalk paint sticks well to plywood and hides imperfections without heavy sanding.
Apply two thin coats of paint, letting each dry fully between coats. Thin coats reduce drips and give smoother coverage than one thick coat.
After the paint dries, rub on dark wax to add depth and an aged feel. Work the wax into corners and wipe back excess so the finish looks natural, not heavy.
Dark wax also helps protect the paint against light wear. Use a soft cloth and small amounts; you can always add more until you like the look.
PRO TIP
Lightly sand edges before waxing to let the natural wood grain show through for a subtle, worn effect.
2) Install peel-and-stick wood-look vinyl planks
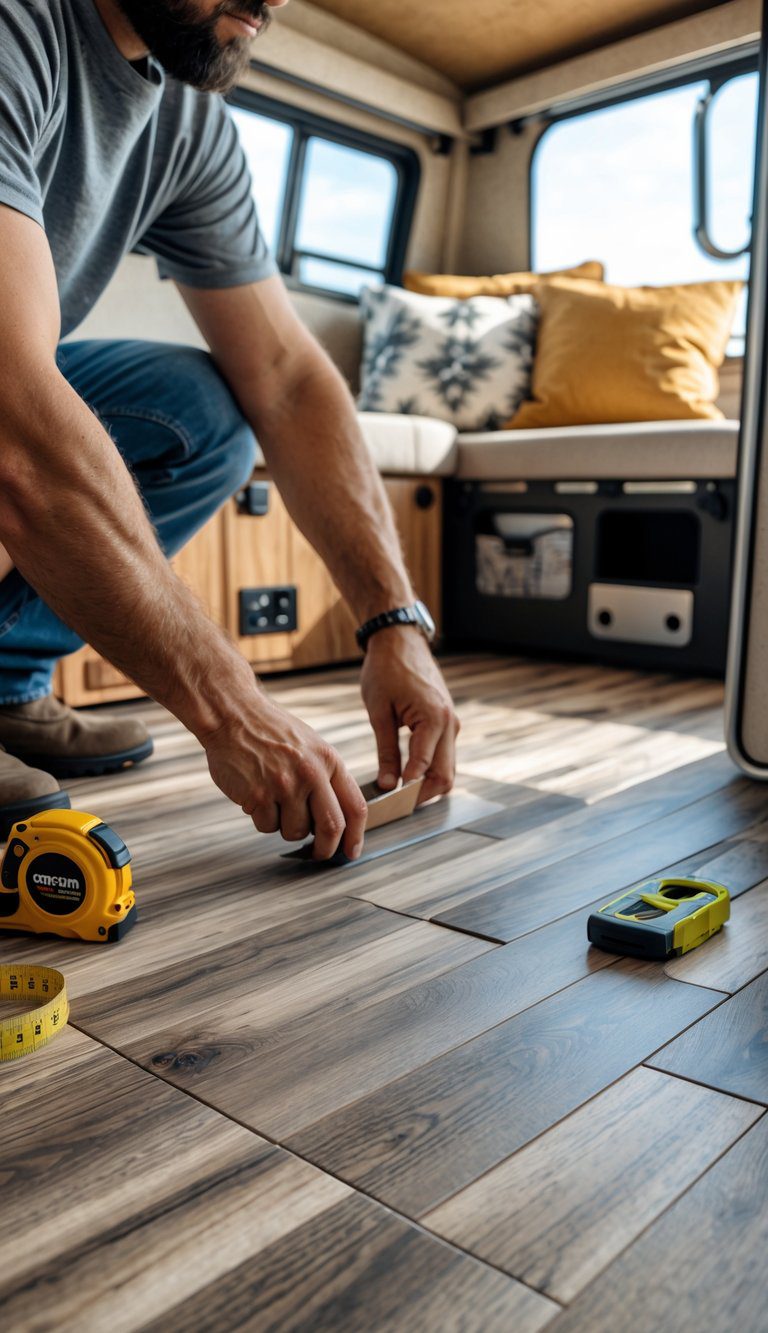
Peel-and-stick vinyl gives your camper a fresh, modern floor without a big budget. You can cut planks to fit odd angles and around fixtures, which makes them great for pop-up layouts.
These products resist water and handle foot traffic better than old linoleum. Adhesive backing speeds installation, so you can work in small sections and test fit before pressing down.
Pick a color that hides dirt and matches your trim. Use a straight edge and a sharp utility knife for clean cuts, and roll the floor with a flooring roller to ensure good adhesion.
PRO TIP
Start in the center and work outward to keep seams straight. Keep extra planks for future repairs or replacements.
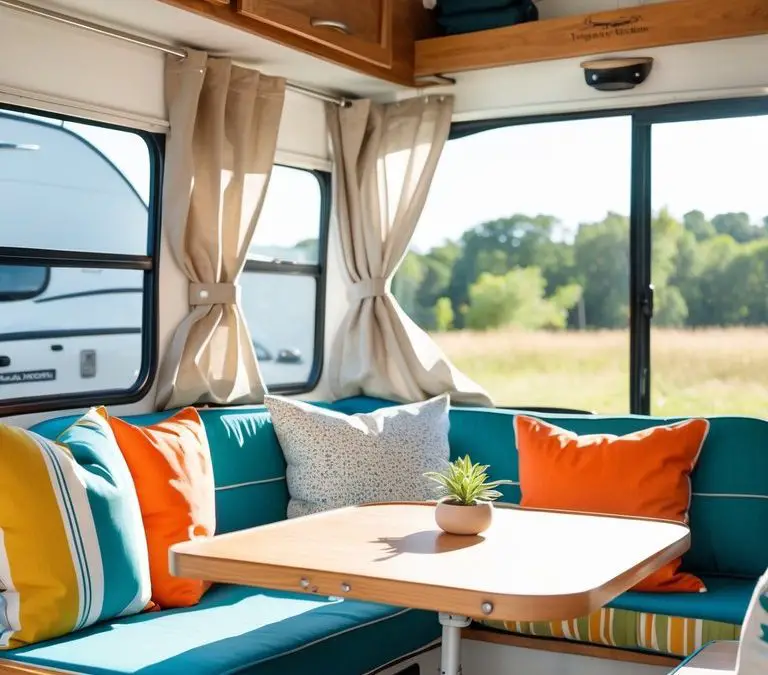
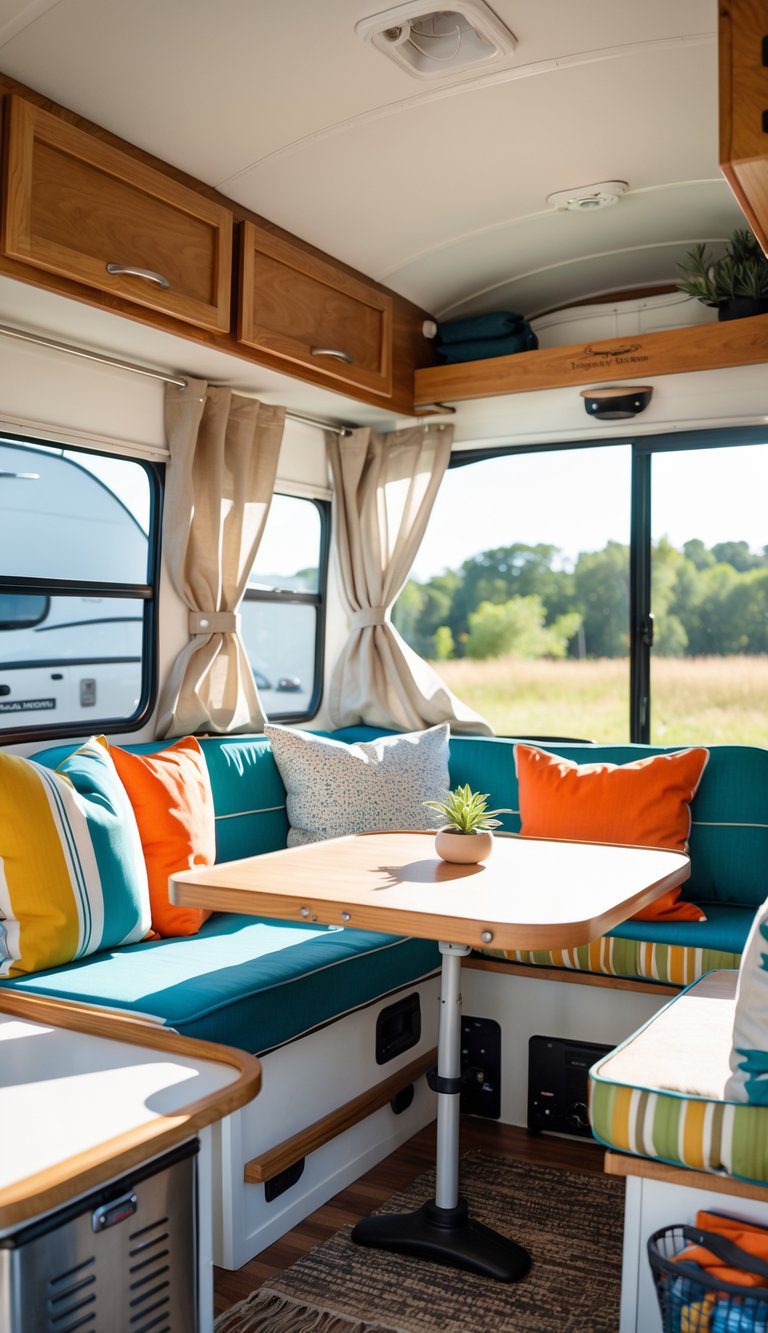
3) Replace curtains with linen Roman shades
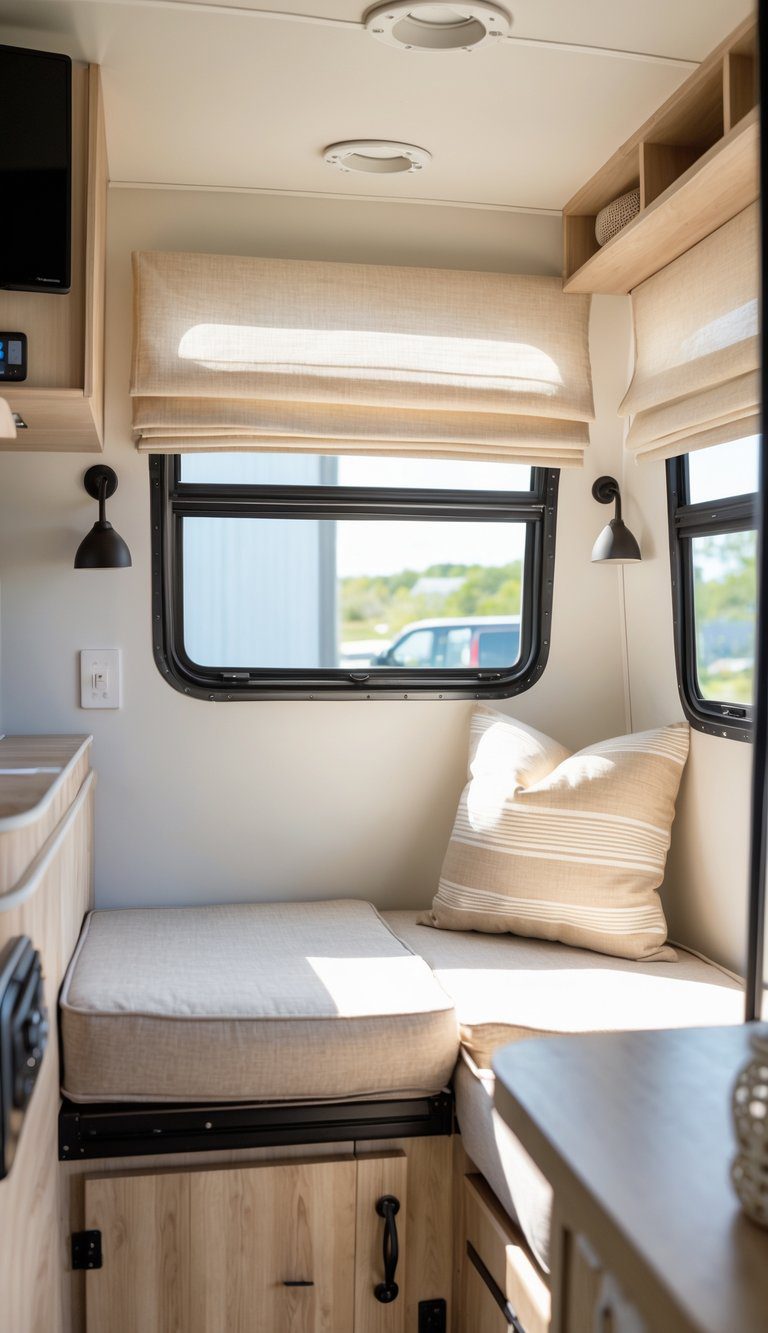
Swapping flimsy curtains for linen Roman shades gives your pop-up a cleaner, more modern look. Linen softens light and adds texture without weighing down small windows.
Roman shades fit flush to the frame, saving space and staying neat when you fold them up. They block drafts better than thin curtains, which helps keep the camper more comfortable.
You can sew simple shades or buy ready-made panels and modify the size. Pick light colors to brighten the interior, or choose a patterned linen to add personality.
PRO TIP
Install a tension rod or slim mounting board so shades sit tight against the window. This keeps privacy solid and makes the shades easier to raise and lower.
4) Add LED puck lights under cabinets
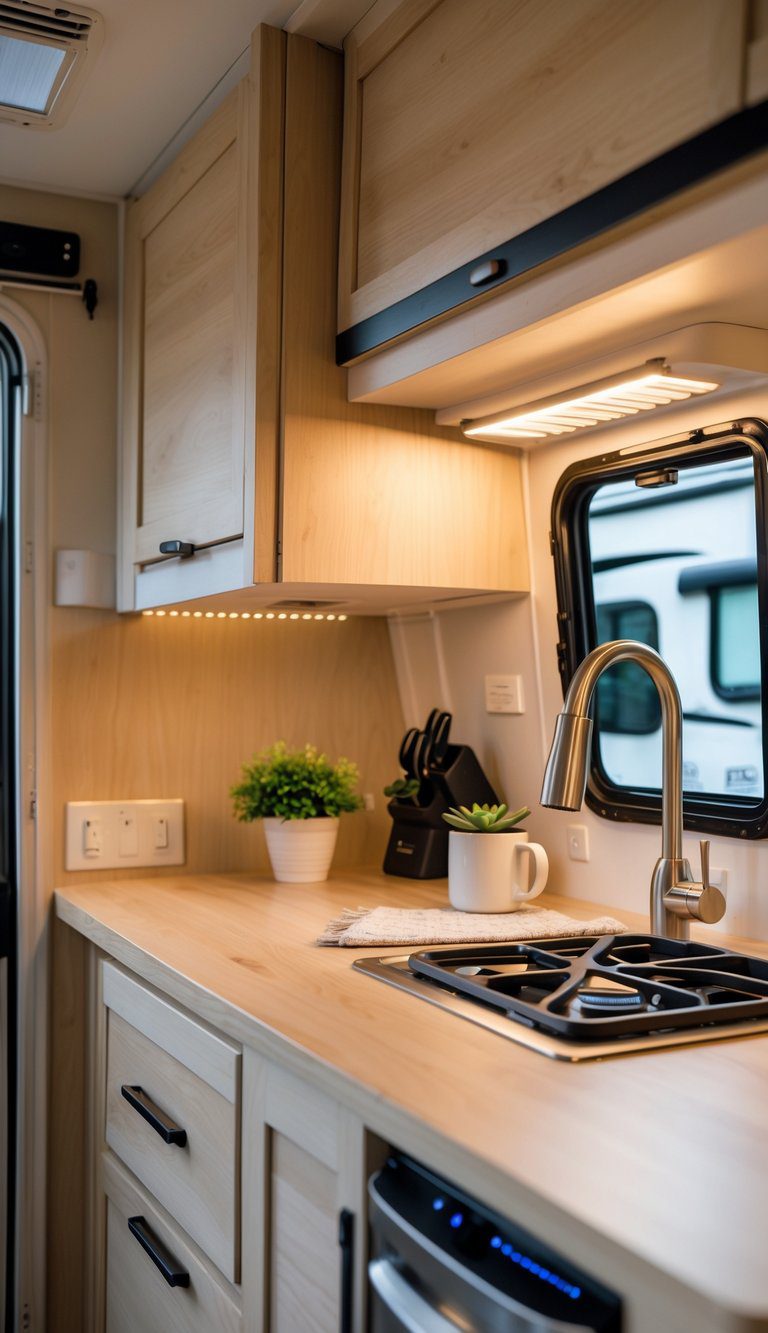
Puck lights give your camper bright, focused light without taking much space. You can choose battery, plug-in, or hardwired kits to match your skill level and budget.
Kasa and Aputure both make reliable LED puck lights with good color and low power draw. Kasa often offers easy smart controls, while Aputure focuses on clean color rendering and build quality.
Mount them under cabinets to light counters, the sink, or storage areas. Space pucks every 12–18 inches to avoid dark spots, and aim them slightly forward for better work-surface coverage.
PRO TIP
Run wiring behind cabinet backs where possible to hide cables. Use adhesive mounts for renters and screws for a long-term fix.
5) Use magnetic spice jars on a painted metal backsplash
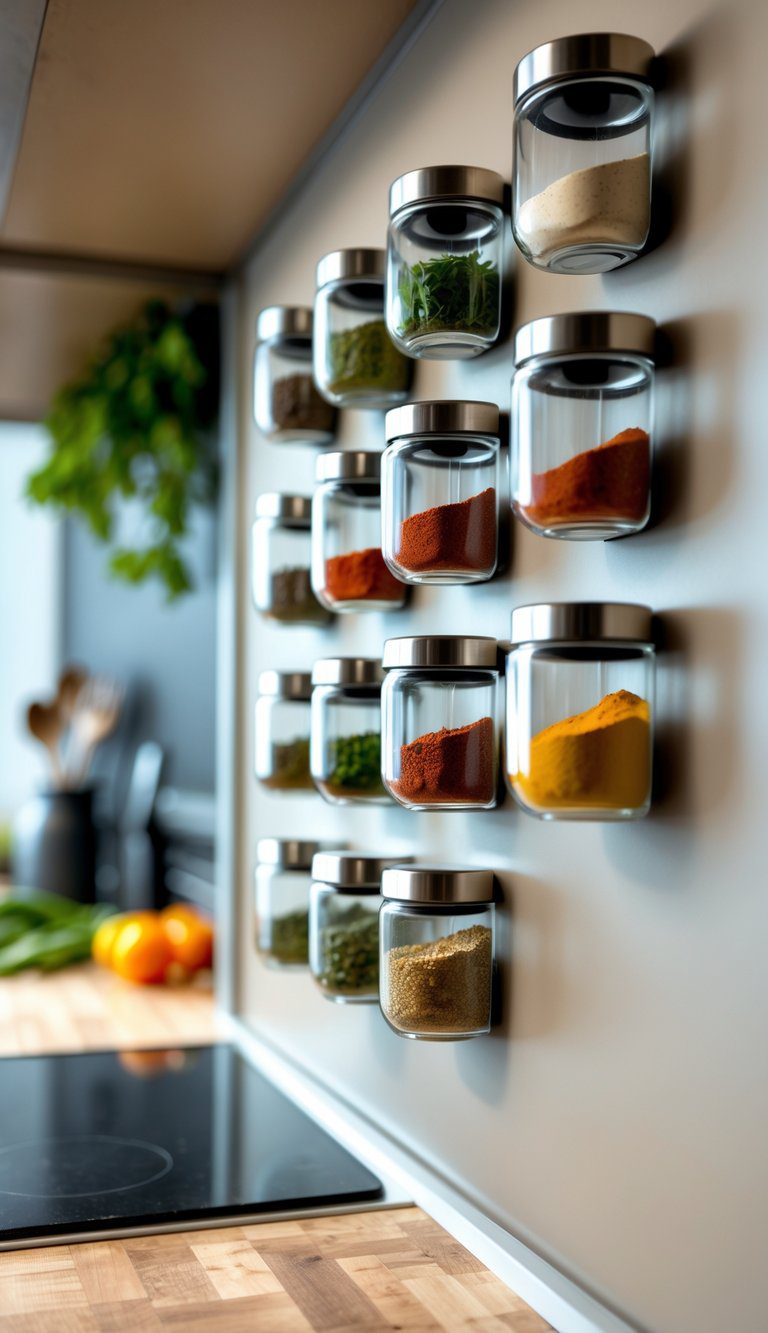
You can save counter and cabinet space by mounting magnetic spice jars on a painted metal backsplash. Paint a thin sheet of steel to match your camper’s decor, then attach jars with magnetic lids for easy access while cooking.
This setup looks neat and keeps spices visible so you grab what you need quickly. It also reduces clutter in small kitchens and adds a pop of color when you choose clear or labeled jars.
PRO TIP
Use strong neodymium magnets on heavier jars and label the lids for fast identification. Test the paint finish to make sure magnets hold before you commit to the layout.
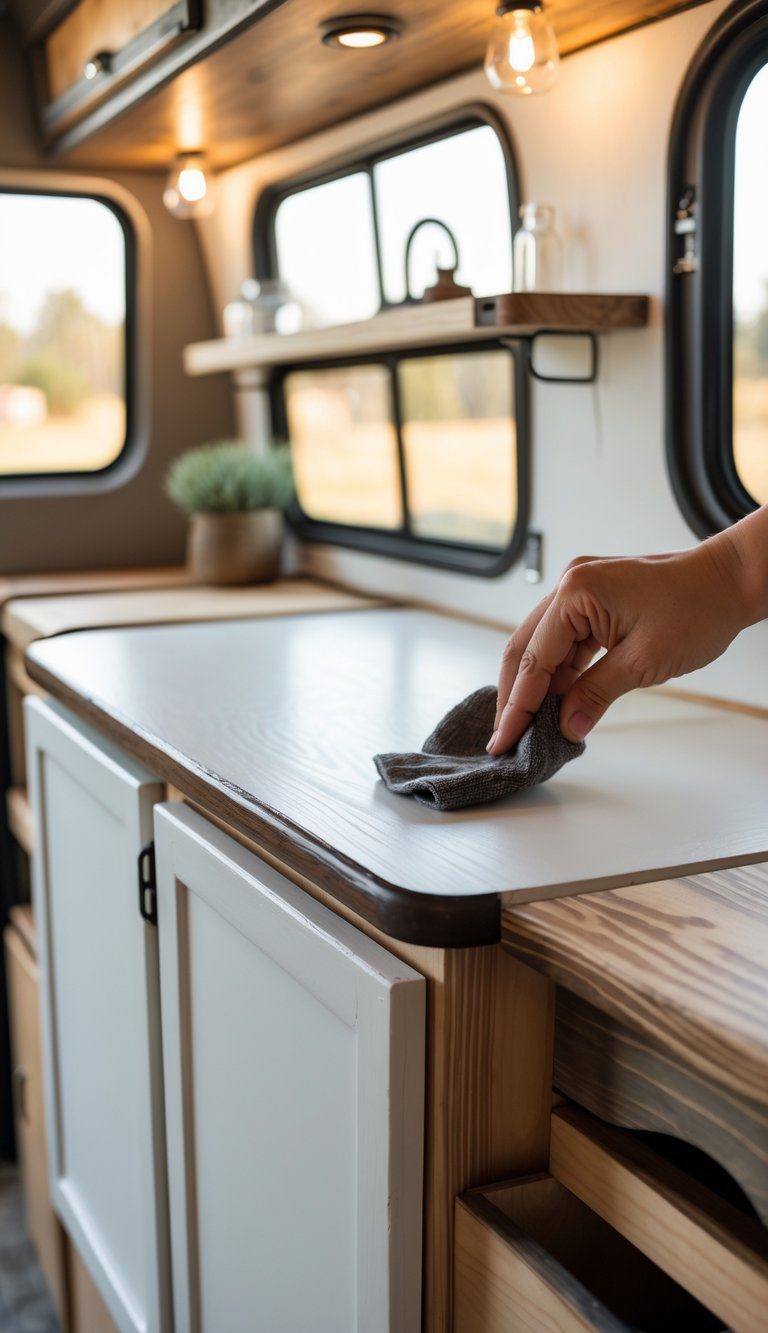
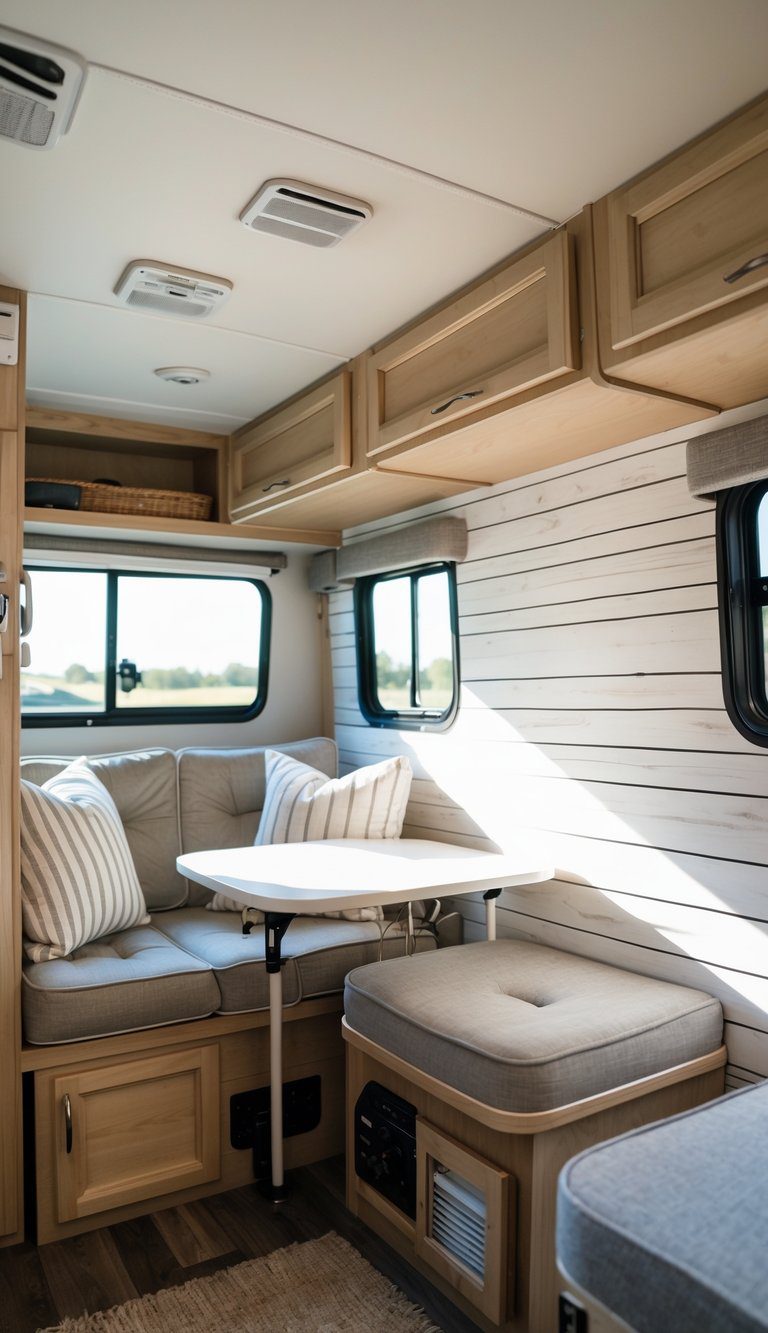
6) Install collapsible butcher block countertop (IKEA SÄLJAN hack)
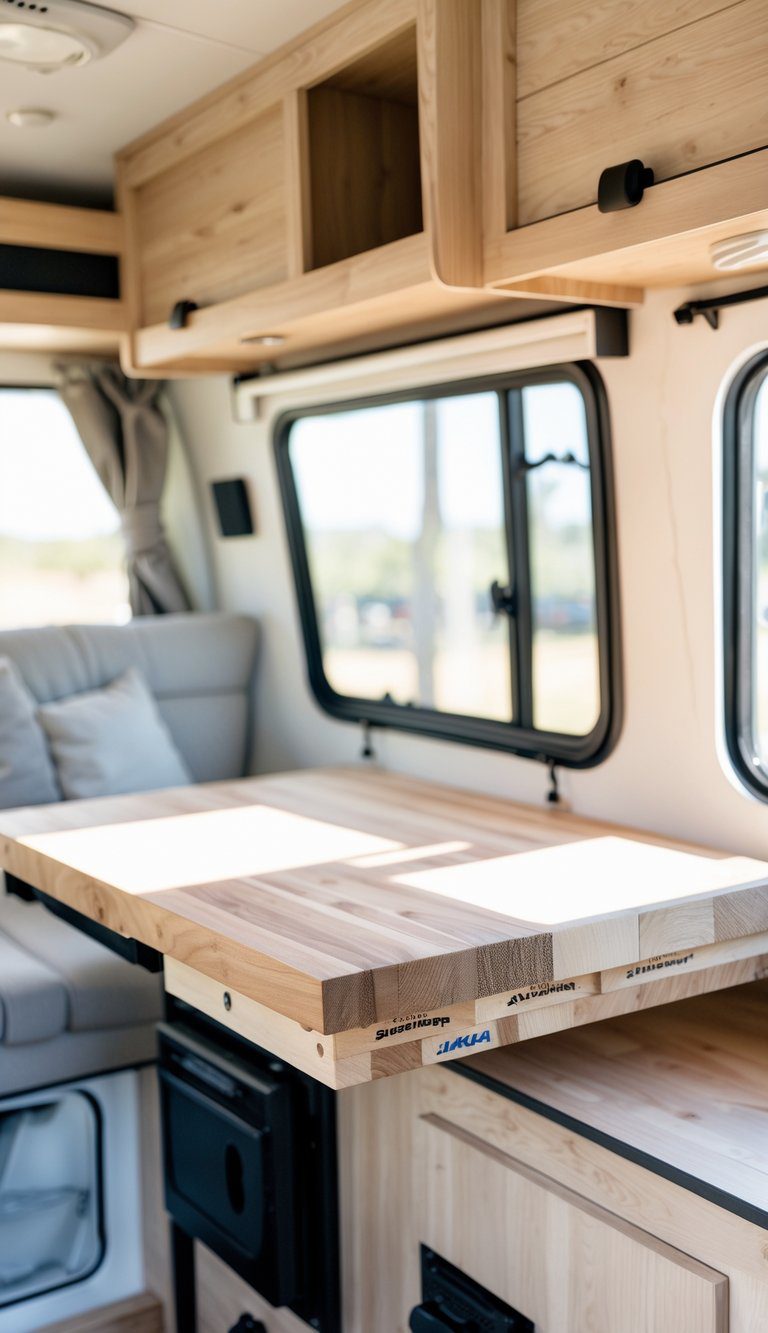
You can add a warm, sturdy prep surface without losing space by using an IKEA SÄLJAN butcher block as a collapsible counter. It’s light enough to lift and solid enough to chop if you seal it well.
Mount simple fold-down brackets under your existing counter or against a wall. When folded up, the butcher block gives you extra work area; fold it down for travel and storage.
Secure the block with screws or quick-release pins so it won’t shift while driving. Sand, stain, and seal the wood to resist moisture and stains.
PRO TIP
Cut the SÄLJAN to fit your opening before finishing it. A single coat of food-safe oil keeps it looking fresh and protects the wood.
7) Reupholster dinette cushions with outdoor fabric (Sunbrella)
You can give your dinette a fresh, durable look by recovering cushions with outdoor fabric like Sunbrella. It resists stains, fading, and mildew, so it holds up to spills and sunlight in a small camper.
Measure each cushion and cut the fabric with a little extra for seams. Use a heavy-duty zipper or Velcro for removable covers so you can wash them when needed.
If you don’t sew, try no-sew methods: fabric glue, iron-on hem tape, or professional upholstery tape work well. Replacing foam is optional but can make seats feel new again.
PRO TIP
Pick a patterned fabric to hide stains and choose a lighter color for a brighter space.
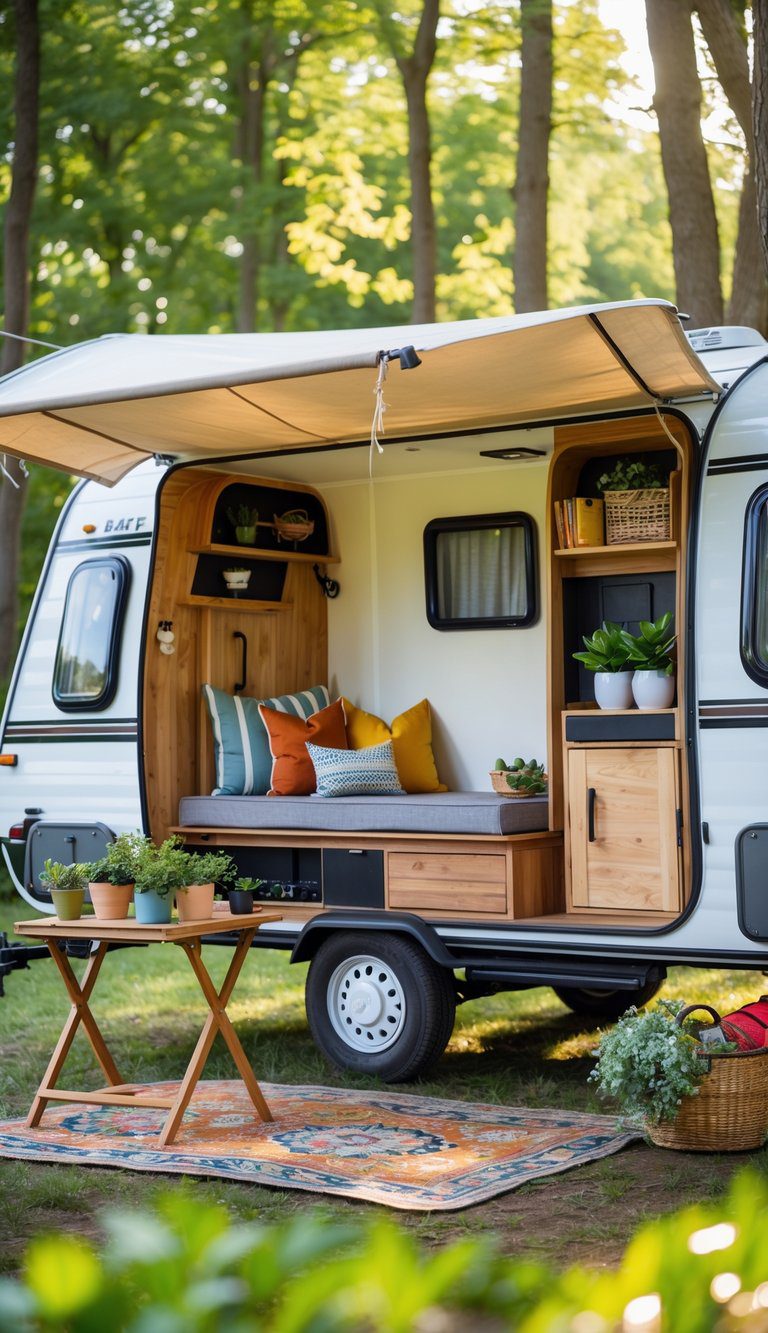
8) Build fold-down bedside shelves with hidden USB ports
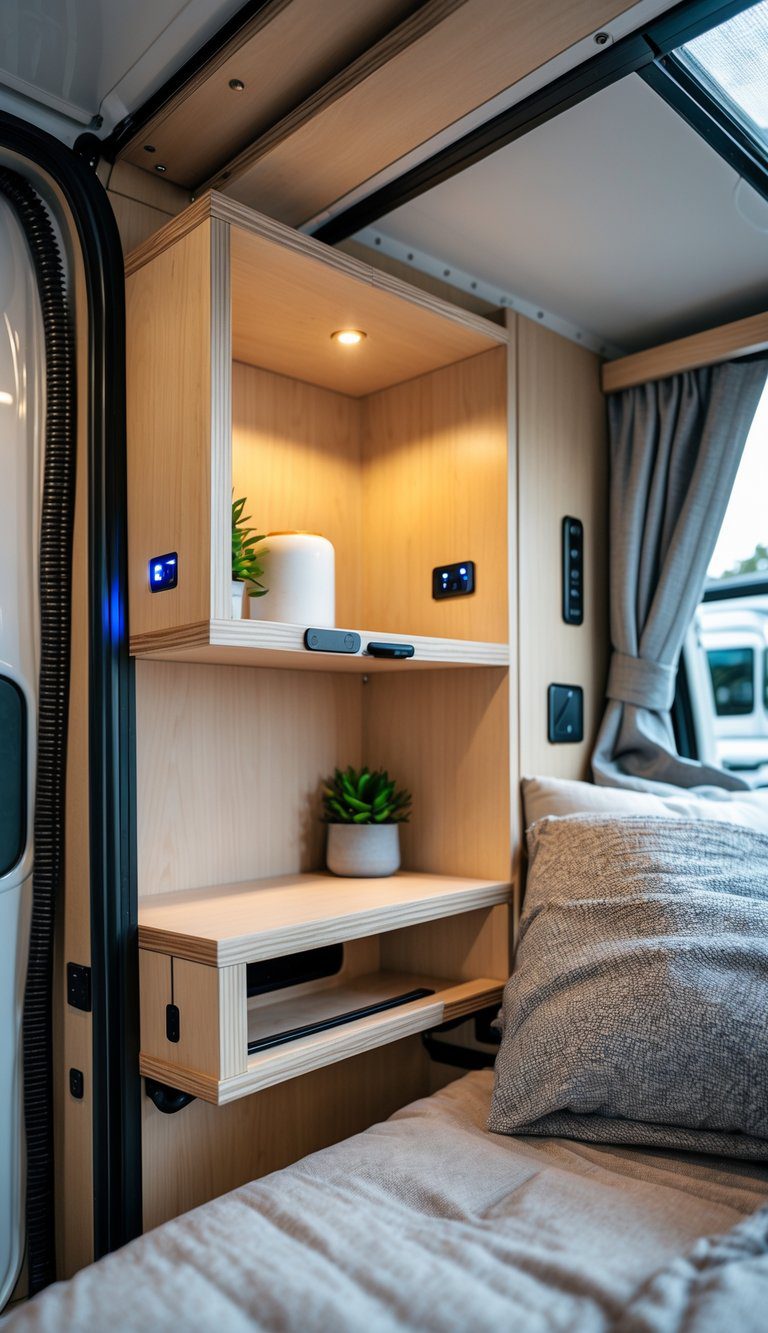
You can add small fold-down shelves next to bunks or the main bed to save space and hold a lamp, book, or phone. They stay out of the way when you fold them up, which helps in a tight pop-up camper.
Embed one or two USB ports in the shelf face to charge phones and lights without messy cords. Run wiring inside the wall and use a fuse or inline breaker for safety.
Choose lightweight plywood and simple piano hinges to keep weight low and installation easy. Paint or veneer the shelf to match your camper interior for a clean, built-in look.
PRO TIP
Cut a small notch or use a rubber grommet where cords pass through to protect wires and keep the look tidy.
9) Swap dated cabinet hardware for matte black pulls (Liberty Hardware)
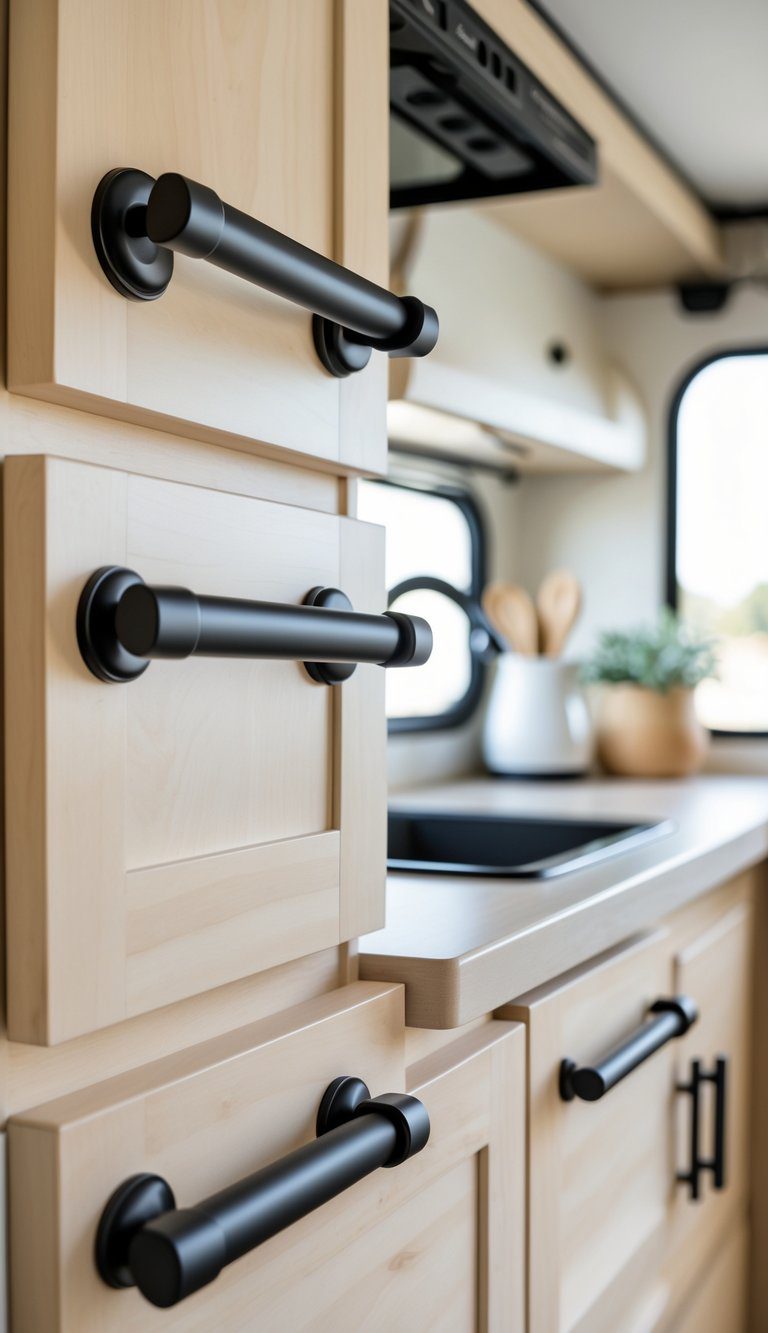
Changing cabinet knobs and pulls is fast and inexpensive. You can give your camper a modern, cohesive look by swapping worn or brass pieces for matte black pulls.
Matte black hides grime and pairs well with wood tones, white cabinets, and mixed metals. Look for Liberty Hardware options for reliable fit and simple styles that match most RV drawers and doors.
You can replace hardware with basic tools in under an hour for a small camper. Measure existing screw spacing first so new pulls line up, or fill and repaint any old holes before installing the new ones.
PRO TIP
Buy a few extra screws and a matching touch-up paint. That way you avoid delays and keep the finish consistent.
10) Create a removable shiplap accent wall with shiplap wallpaper
You can get the shiplap look without tools or damage by using peel-and-stick shiplap wallpaper. It peels off cleanly, so you can change the camper’s style or remove it before selling.
Measure the wall and buy a little extra for matching patterns. Apply slowly from top to bottom, smoothing bubbles as you go for a straight, real-looking finish.
Choose a light, matte finish to keep the camper bright and avoid glare. Faux shiplap adds texture and a focal point behind a bed or dinette without taking up space.
PRO TIP
Test a small patch on an out-of-sight area first to make sure the adhesive sticks and peels cleanly on your camper’s wall surface.
11) Upgrade to a 12V compressor fridge swap (Dometic CFX-40)
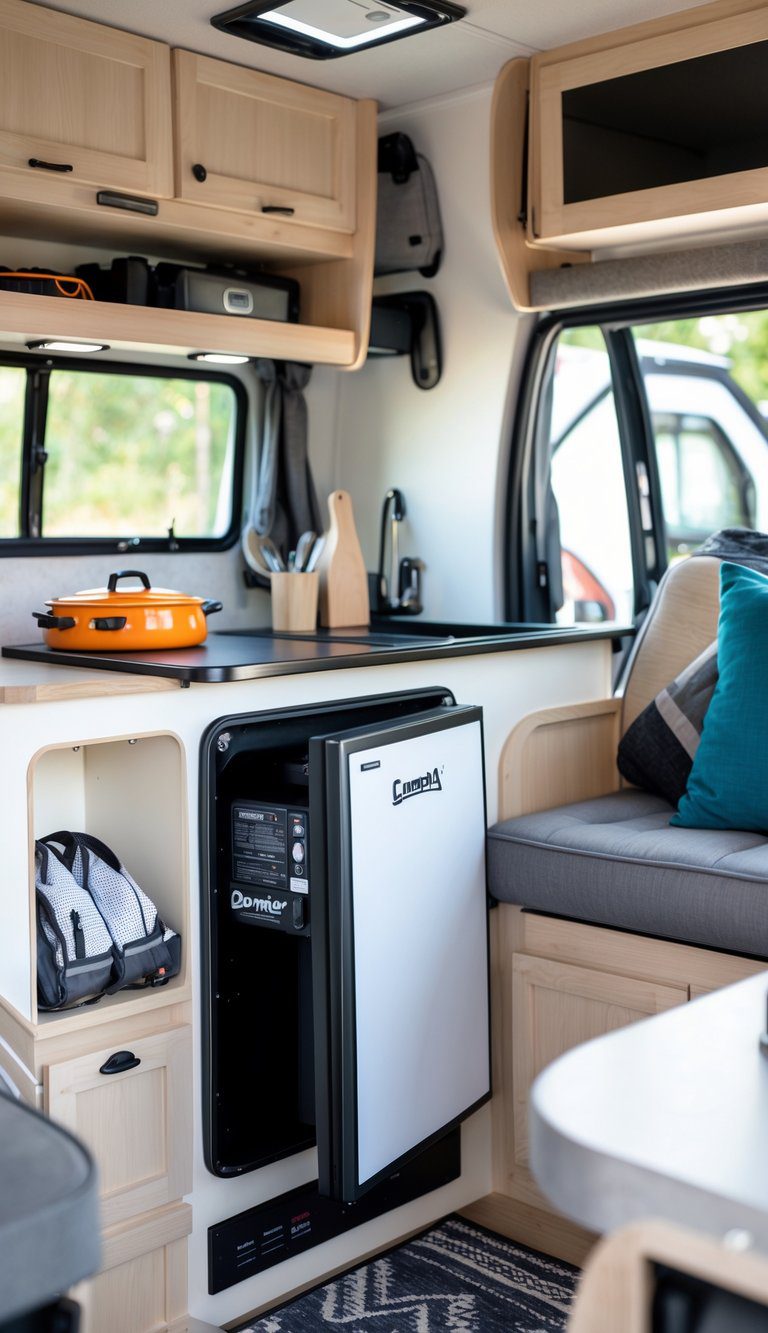
Swapping your old 3-way or absorption fridge for a 12V compressor unit like the Dometic CFX-40 gives more reliable cooling and uses less propane. You’ll get steady temps even in hot weather, and the compressor model runs well off a decent battery or solar setup.
The CFX-40 fits many pop-up camper cabinets and acts like a small portable fridge/freezer. Installation can be straightforward, but check ventilation, clearances, and secure mounting so it doesn’t shift while you travel.
You may need to block old external vents and rework the cabinet to keep the compressor compartment sealed. Plan wiring so the fridge ties into your 12V system with a proper fuse and, if needed, a battery isolator or DC-to-DC charger.
PRO TIP
Place the fridge near your battery bank and keep it shaded to improve efficiency and extend battery life.


