Last Updated on June 22, 2026
You can use the slow season to make practical upgrades that change how your RV feels and performs. Tackle projects that boost comfort, save energy, and add smart storage so your rig works better on every trip. This guide points you toward hands-on jobs that fit a mix of skills and budgets.
You’ll find ideas for electrical upgrades, smarter climate control, better kitchens and baths, and storage solutions that free up space. Follow simple, step-by-step projects to refresh surfaces, improve safety, and add modern conveniences so your next season starts with a stronger, more comfortable rig.
1) Install a Victron SmartSolar MPPT charge controller and rewire solar inputs
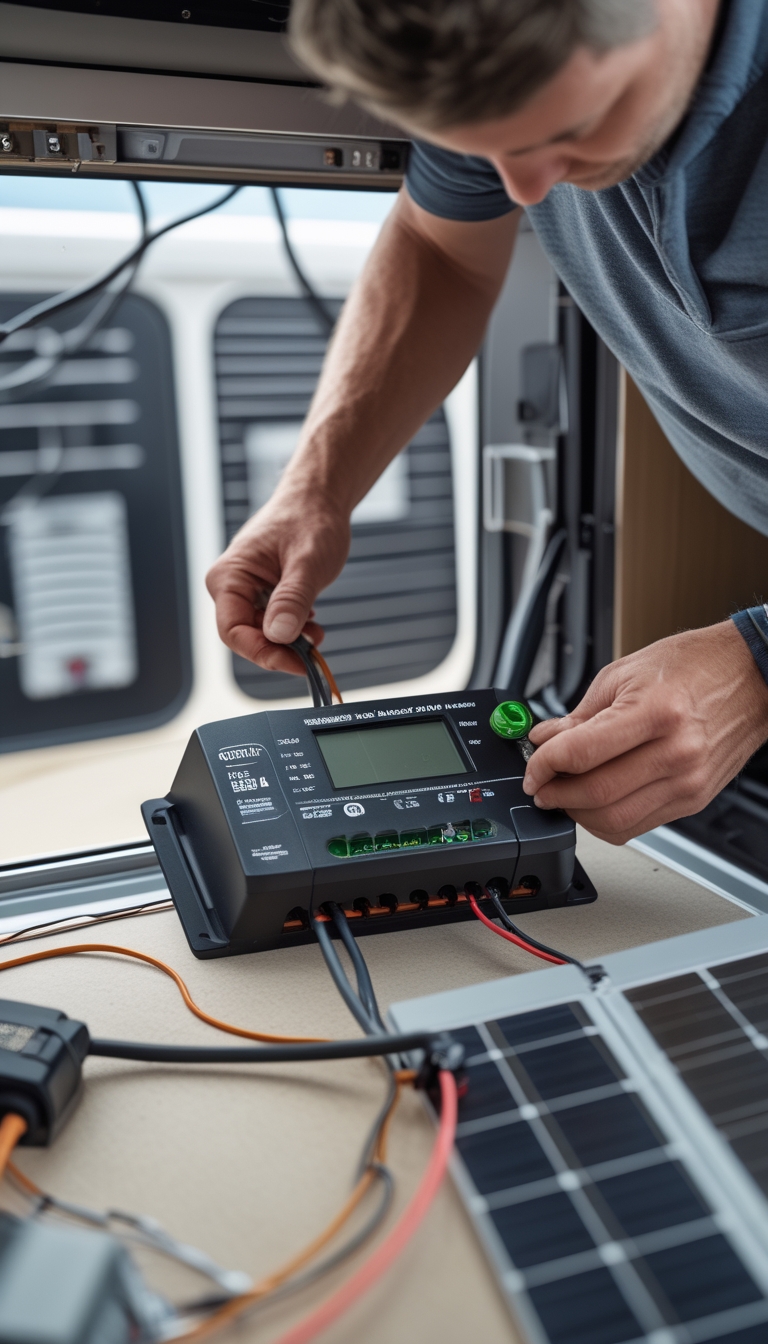
Installing a Victron SmartSolar MPPT improves how your panels charge the battery. You’ll get better power harvest and safer charging when wired correctly.
Mount the controller close to the battery bank and keep PV wiring short. Use proper fuses on the battery side and the correct gauge wire for the current to reduce voltage drop and heat.
Rewire PV inputs so each panel string has secure connectors and clear labeling. If your panels use MC4 plugs, match them or fit an adapter; for screw terminals, use tidy, corrosion-free terminations.
PRO TIP
Pair the controller with the VictronConnect app via Bluetooth. It makes setup, monitoring, and firmware updates simple and helps you fine-tune charge settings for your battery type.
2) Swap to Battle Born lithium RV battery bank (12V) with new BMS
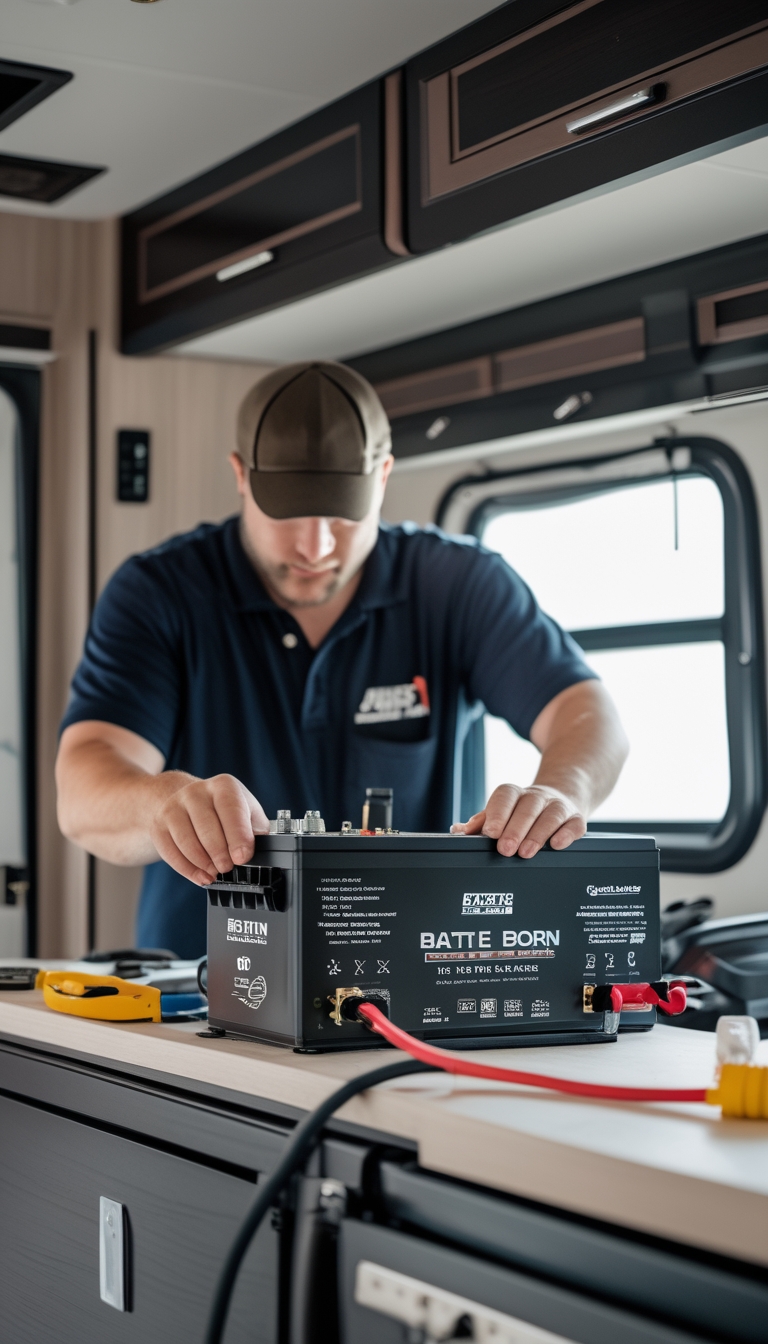
Switching to a Battle Born LiFePO4 bank gives you more usable capacity and faster charging. You can replace old AGMs with 12V Battle Born batteries if the physical fit and wiring work for your battery compartment.
Install a compatible battery management system (BMS) or use the built-in BMS option to protect against overcharge, overdischarge, and cell imbalance. Confirm charge settings on your inverter/charger and solar controller to match lithium chemistry.
Mount batteries securely and keep cables short with proper gauge and fused connections. If you’re unsure about wiring or settings, hire a qualified RV electrician to avoid damage.
PRO TIP
Label battery negatives and positives, and take photos before disconnecting. This saves time and prevents wiring mistakes.
3) Replace dated cabinet faces with painted shaker-style hardwood doors
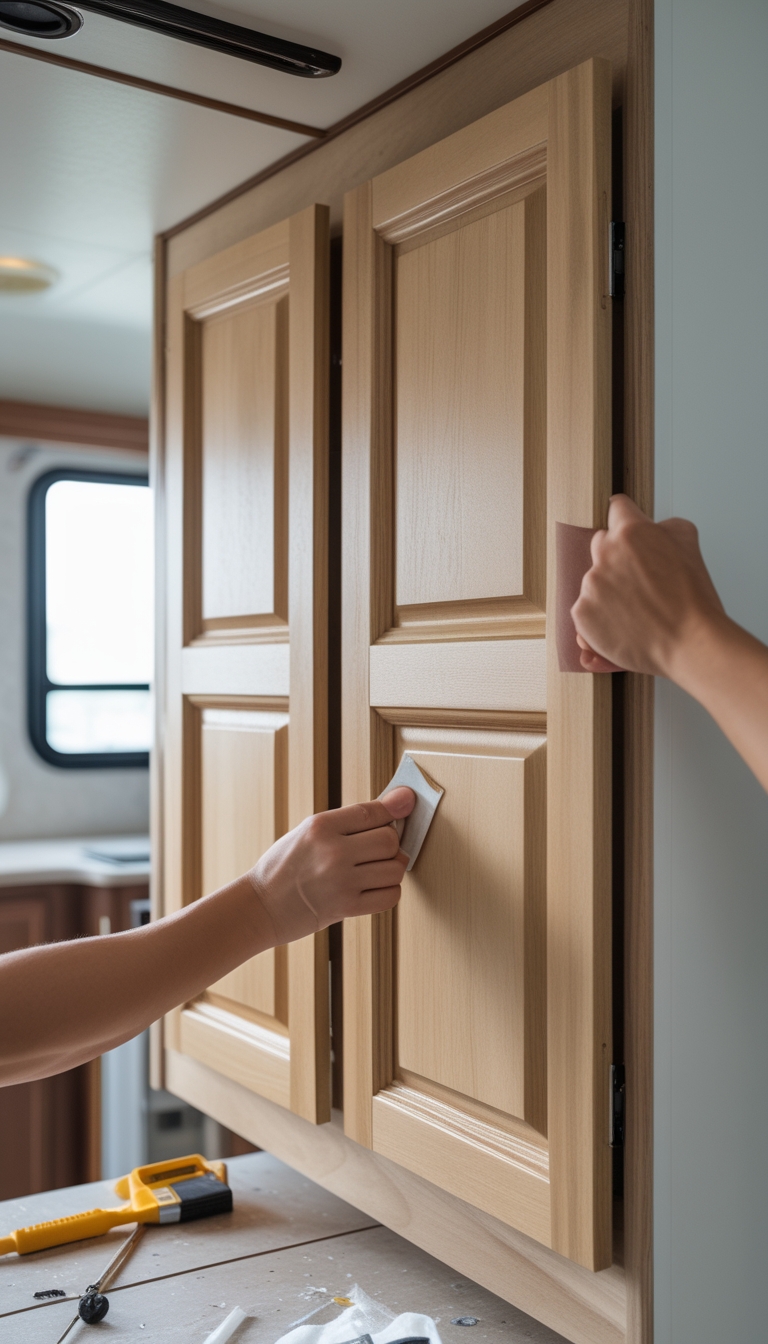
Swapping flat or worn cabinet faces for painted shaker-style hardwood doors gives your RV a fresh, modern look without a full remodel. You can reuse existing door frames or make new doors from hardwood plywood and simple rails and stiles.
Measure carefully and cut to fit; accuracy keeps gaps tight and hardware aligned. Sand, prime, and paint with a durable, water-resistant finish made for kitchens or boats to handle moisture and wear.
Installing new doors is a quick way to update the whole interior on a budget. You’ll notice cleaner lines and a more built-in feel that holds up on the road.
PRO TIP
Use soft-close hinges and consistent knob placement so doors line up and close quietly.
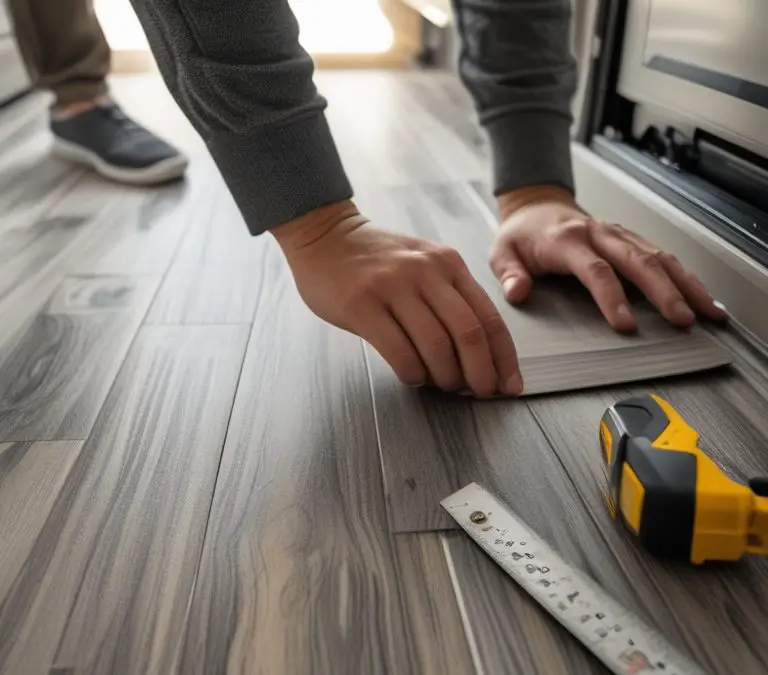
4) Install peel-and-stick waterproof vinyl plank flooring (e.g., LifeProof)
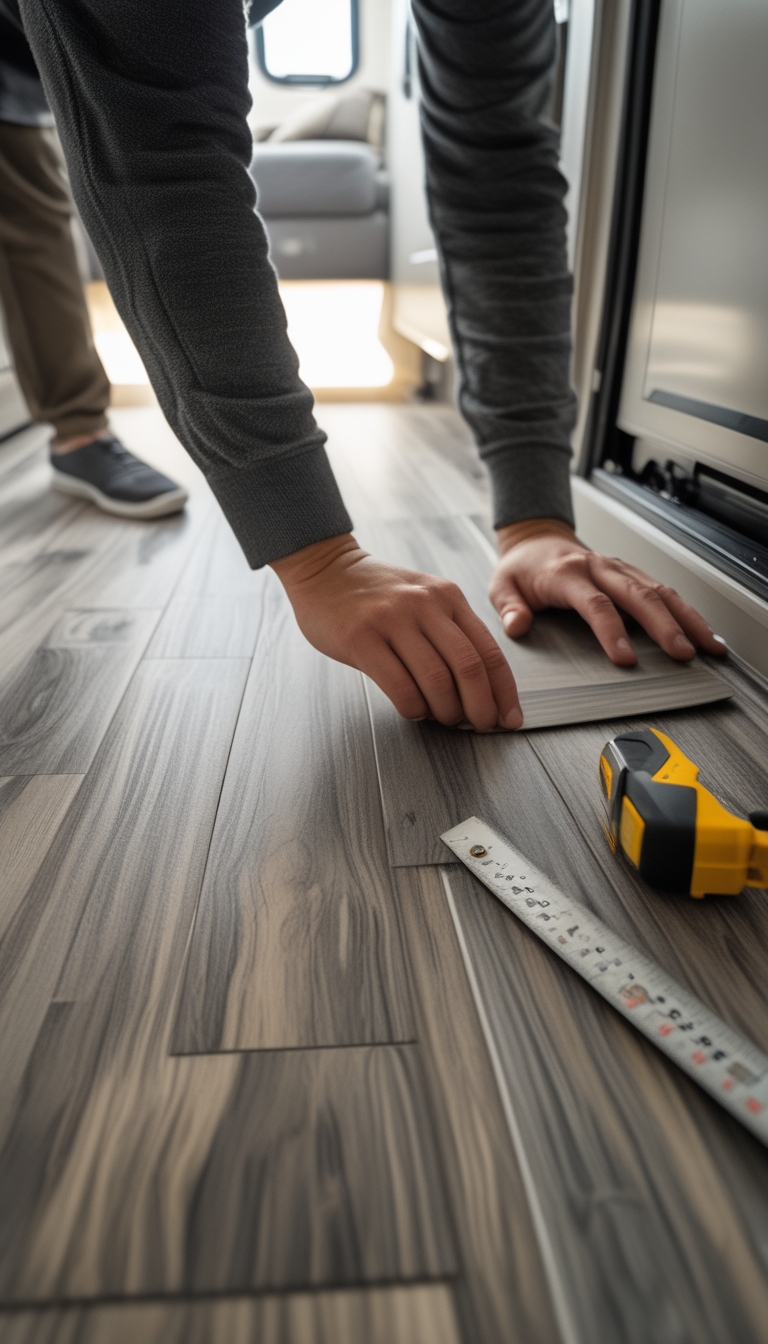
Peel-and-stick vinyl plank is a great way to refresh your RV floor without hiring a pro. You can install it over clean, dry surfaces and most existing floors, which saves time and mess.
Measure and plan your layout before peeling any backing. Stagger the plank seams like brickwork to make the floor stronger and look natural.
Leave a small expansion gap around edges so planks can move with temperature changes. Press each plank down firmly and roll seams to ensure a tight bond and no lifting.
PRO TIP
Work from the center toward the walls and trim as needed for a neat finish. Use a sharp utility knife for straight cuts and a hand roller to secure edges.
5) Add blackout roller shades and layered linen curtains in the living area
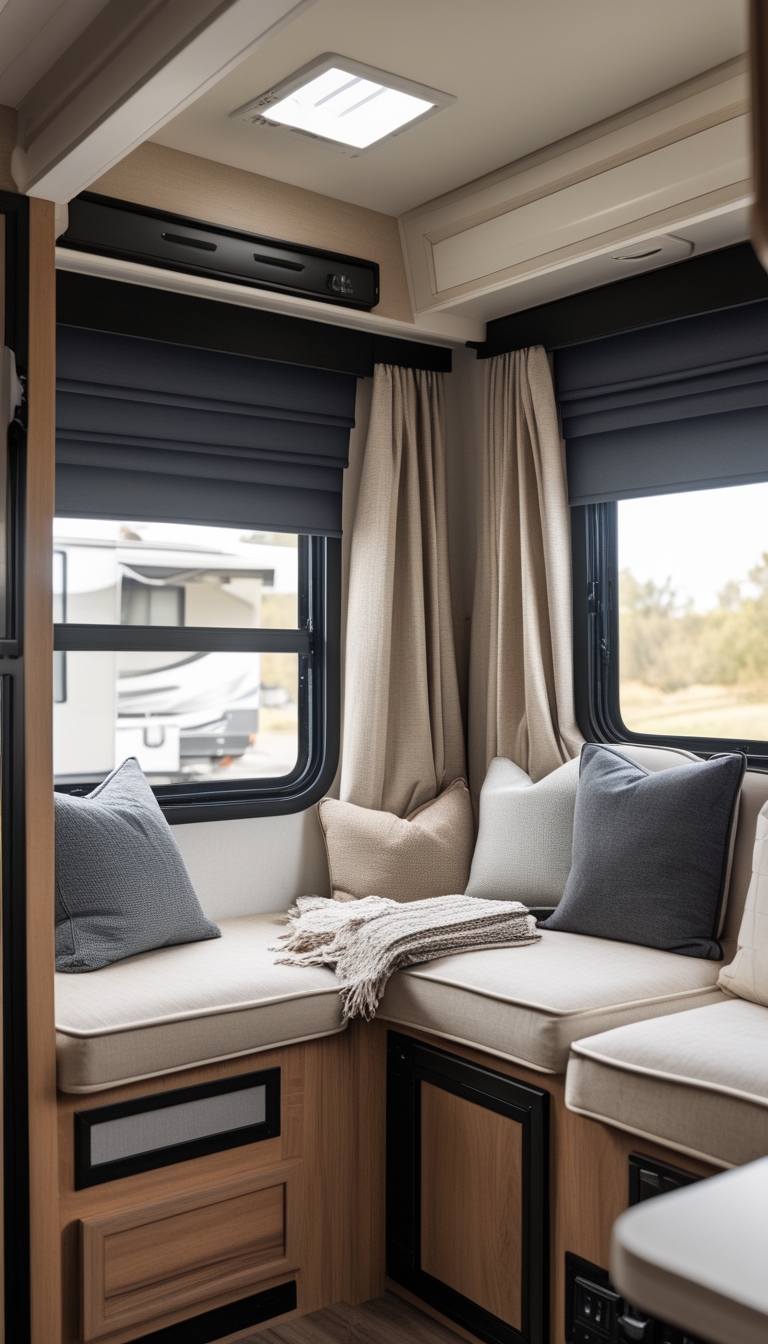
Install blackout roller shades first to block light and add privacy when you need it. They sit close to the window and help keep the RV cool or dark for naps and movie nights.
Hang lightweight linen curtains over the shades on a separate rod. Linen softens the room, adds texture, and still lets in a warm glow when the shades are up.
Use double rods or a track to keep the layers neat and easy to operate. Choose neutral colors to make the space feel larger and coordinate with cushions or rugs.
PRO TIP
Mount the roller shade inside the window frame if space is tight. This gives a cleaner look and lets the linen hang freely without bumping the shade.
6) Convert bench dinette into a multifunctional fold-down desk station
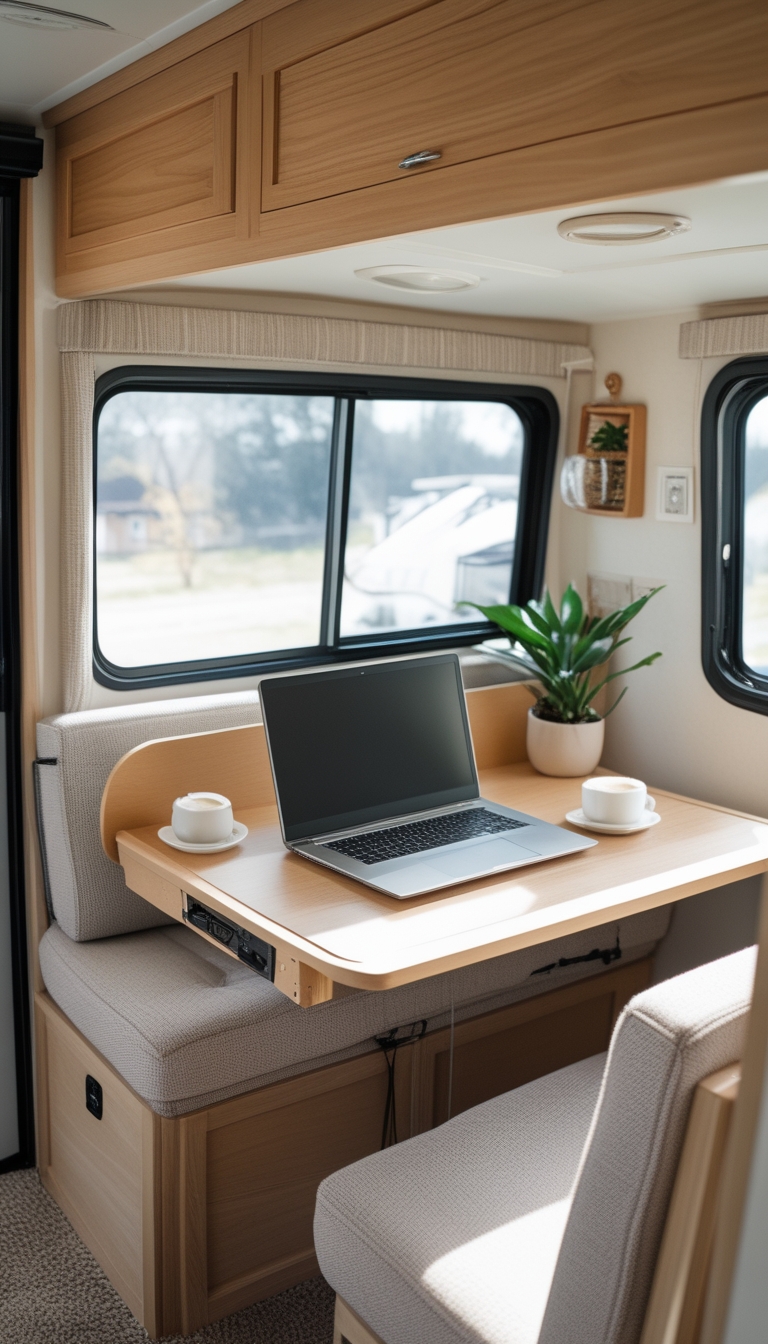
You can turn a dinette bench into a tidy work spot that folds away when not in use. Remove the table or repurpose it as a hinged desktop that drops down from the wall or out of the bench seat.
Add simple supports like folding legs or a piano hinge to hold the desk steady. Build a shallow storage shelf under the desktop for cables, a laptop, and notebooks. Cushion the bench for comfort and use removable covers for easy cleaning.
Keep the install lightweight and secure it with latches so it won’t move while driving. Aim for a desktop depth of 18–24 inches to fit a laptop and a mouse comfortably.
PRO TIP
Mount a small power strip with USB ports near the desk and route wires through a cable channel for a neat, safe setup.
7) Build under-bed storage drawers with soft-close slides
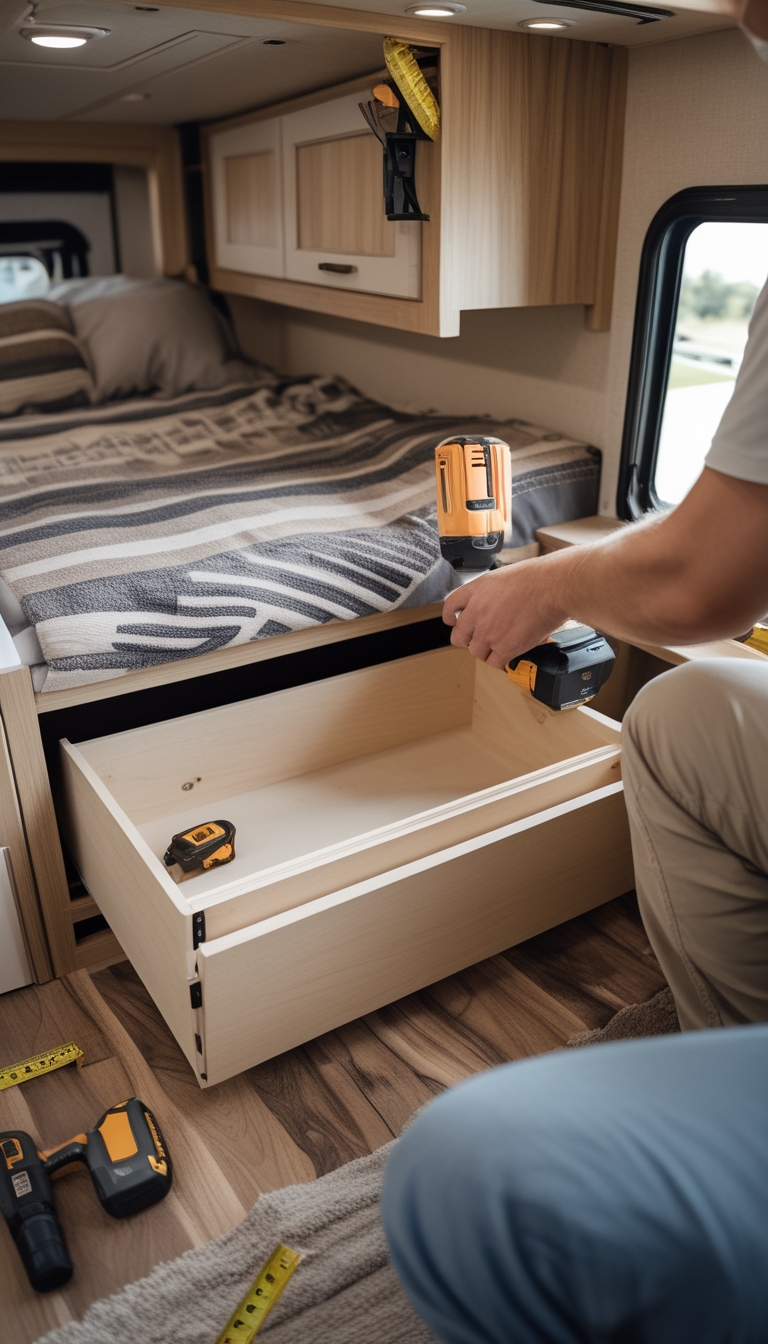
You can turn the wasted space under your RV bed into neat, easy-to-use storage. Build a box frame that fits the bed opening, add a drawer on extra-long soft-close slides, and you get smooth, gentle operation every time.
Choose plywood for the box and a solid front to match your RV interior. Install ball-bearing or soft-close slides so the drawer pulls out straight and stops quietly—great for small spaces at night.
Keep the drawer height low enough for clearance and add handles that won’t catch on bedding. Use casters only if you need rolling access; otherwise fixed slides give better load support.
PRO TIP
Measure twice and mock up the drawer with cardboard to test clearance before cutting wood.
8) Upgrade RV furnace thermostat to a smart thermostat (e.g., ecobee with adapter)
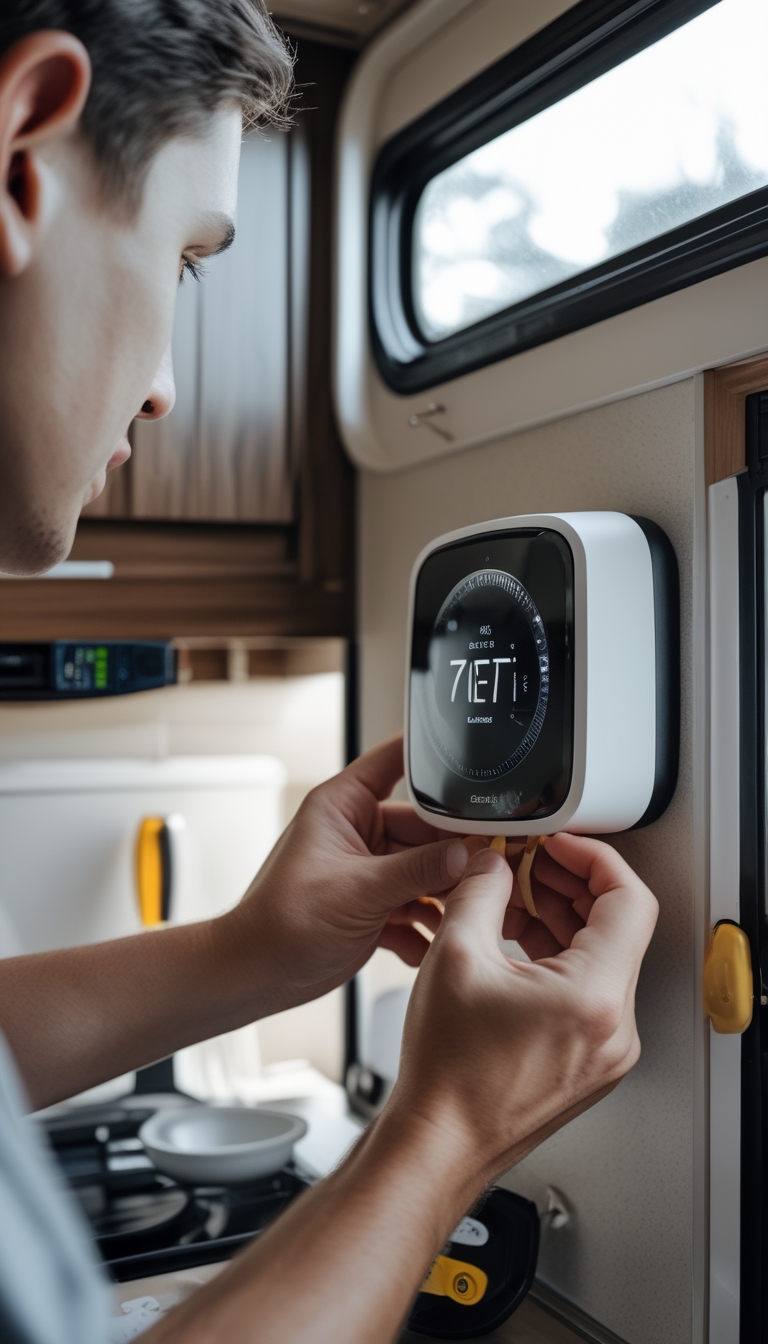
Upgrading your RV furnace thermostat gives you remote control and better scheduling. Many smart thermostats like Ecobee expect 24V power, while RV systems often use 12V, so you may need an adapter or a compatible model.
Check wiring and voltage before you buy. Some RV owners use a 24V adapter or a relay kit to make residential smart thermostats work with RV furnaces.
Install carefully and label wires to avoid mistakes. If wiring looks different from home systems, get help from an RV tech or electrician.
PRO TIP
Keep the old thermostat until you test the smart one. That way you can swap back quickly if something doesn’t work.
9) Refinish countertops using a solid-surface epoxy kit (stone-look finish)
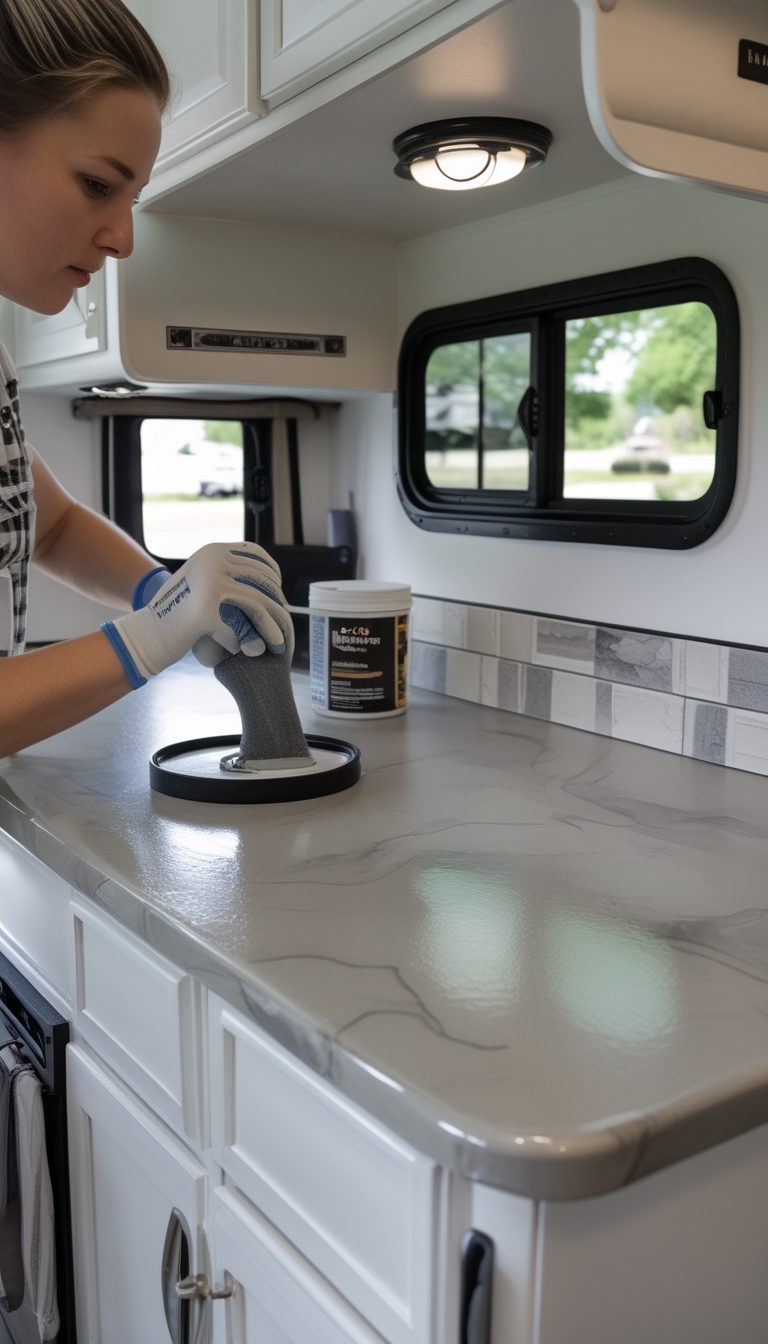
You can give tired RV counters a fresh, durable surface with a solid-surface epoxy kit. These kits mimic stone and hide scratches, while adding a glossy, modern look that resists stains and water.
Start by cleaning and sanding the old countertop so the epoxy sticks well. Mix the resin carefully and pour in thin layers to avoid bubbles; work quickly but methodically.
Use a plastic spreader and a torch or heat gun for a smooth finish. Let each coat cure fully before adding the next to build strength and depth.
PRO TIP
Tape edges and protect sinks or fixtures. Practice mixing and pouring on scrap wood first to get a feel for timing and flow.
10) Replace old RV toilet with a Thetford Aqua-Magic V or ceramic cassette toilet

If your RV toilet leaks, smells, or looks worn, swapping it out can make a big difference. Thetford’s Aqua-Magic V fits many rigs and uses a simple fresh-water flush that feels more like home.
Ceramic cassette toilets are another good choice if you want a more porcelain feel and easier cleaning. They often come as a single unit with a removable waste cassette, which makes emptying simpler at dump stations.
Measure bolt patterns and water hookups before you buy so the new toilet lines up with your floor and plumbing. You can reuse existing hoses and bolts if they match, or replace them during the swap for a fresher installation.
PRO TIP
Keep sealant and new gaskets handy. A tight seal prevents leaks and odors and saves you time later.
11) Install a propane leak detector and inline shutoff valve
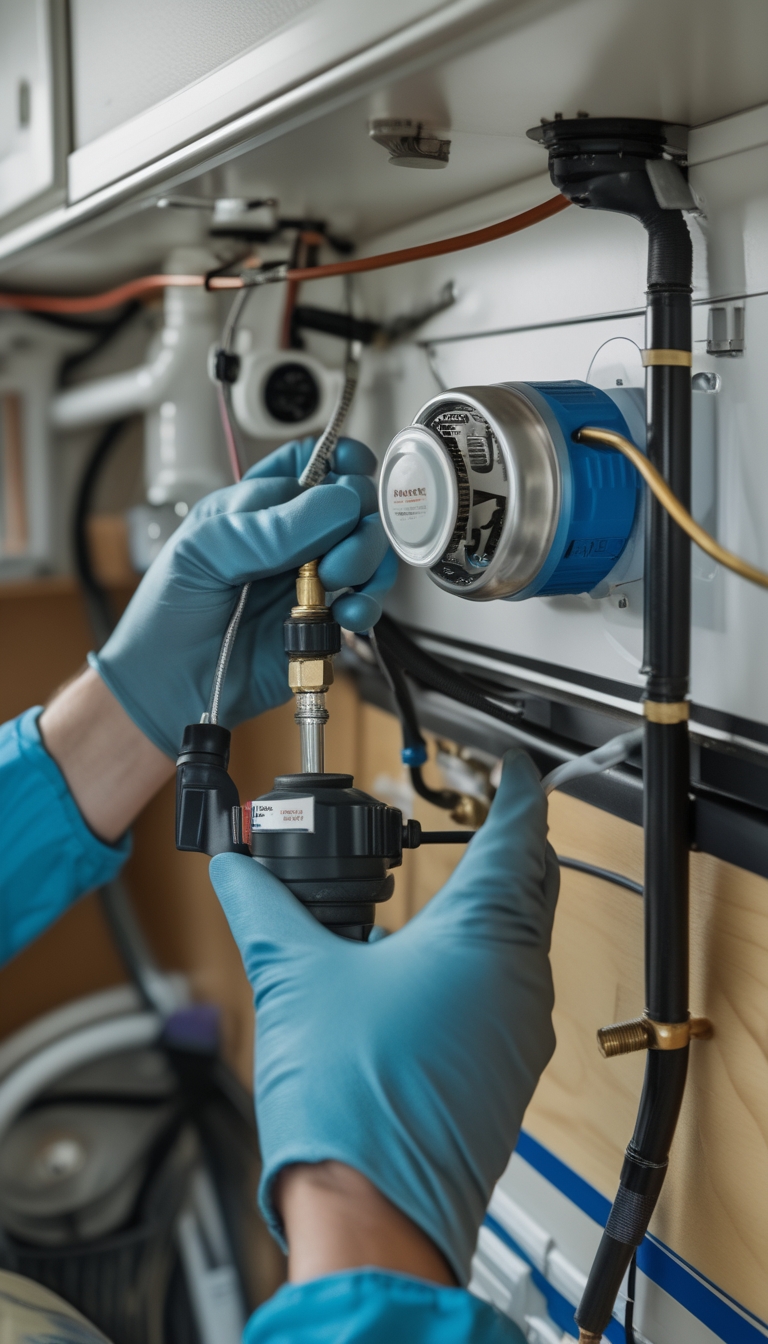
You should fit a propane/LP detector inside your RV where gas can collect, like near the floor in the kitchen or propane bay. Propane is heavier than air, so low placement helps the detector sense any leak quickly.
Add an inline shutoff valve or automatic emergency shut-off device on the cylinder line. This can stop gas flow if the detector senses a big leak, reducing fire and asphyxiation risk.
Follow the manufacturer instructions and local codes when installing both devices. If you’re unsure, hire a certified RV or propane technician to install and test them for safety.
PRO TIP
Test the detector monthly and replace its battery or unit as recommended.
12) Retrofit LED puck lighting and dimmable strips under cabinets
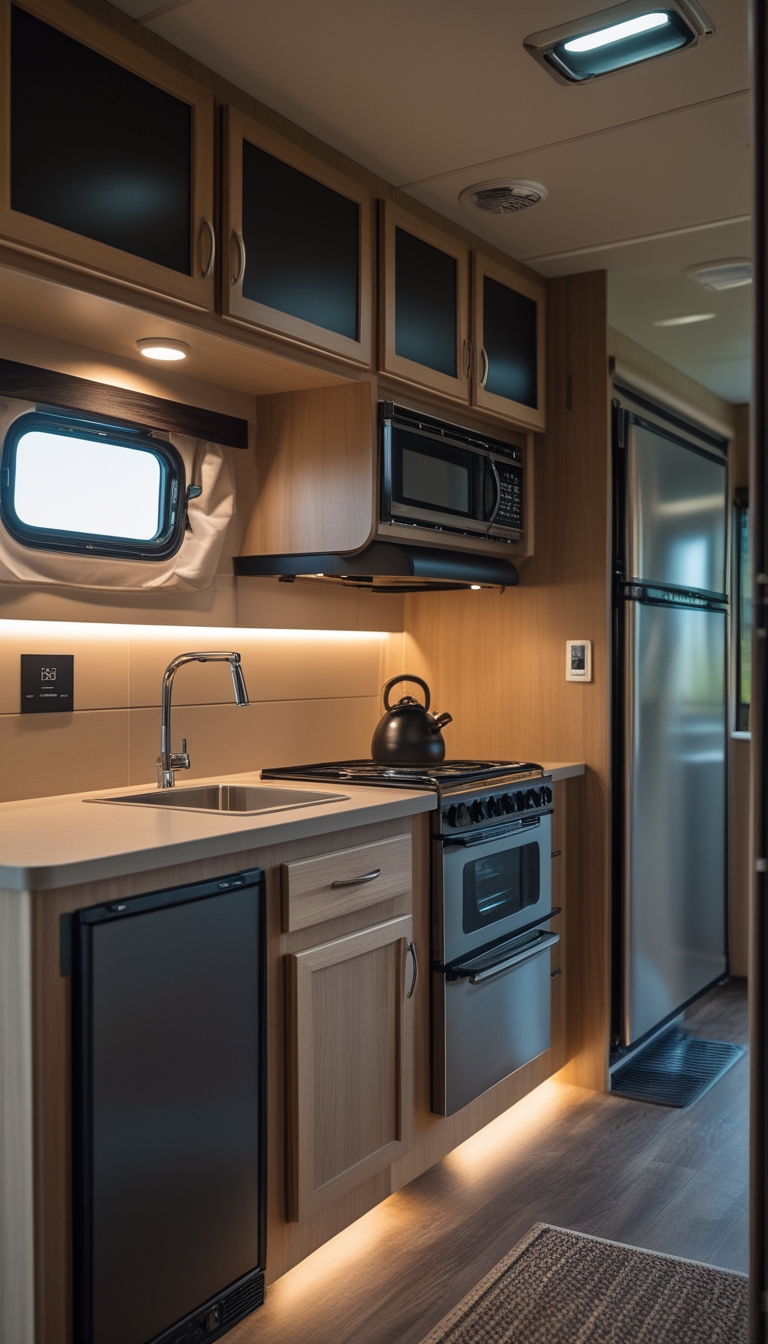
Swapping old lights for LED puck lights or dimmable strips gives your RV a cleaner, brighter look and uses much less power. You can mount slim strips under cabinets for even task light, or space pucks for focused beams over the counter.
Most LED strips stick on with adhesive and hardwire to a 12V supply, so the job is quick if you can access the cabinet underside. Pucks may need small holes or surface screws, but they hide well and cut shadows from cabinets.
Choose warm white for cooking areas and install a dimmer so you can lower brightness at night. Test placement with painter’s tape first to avoid moving lights after installation.
PRO TIP
Run wiring along cabinet seams and secure with clips to keep it tidy and vibration-resistant while you travel.
13) Create a galley spice rail and magnetic knife strip for organization
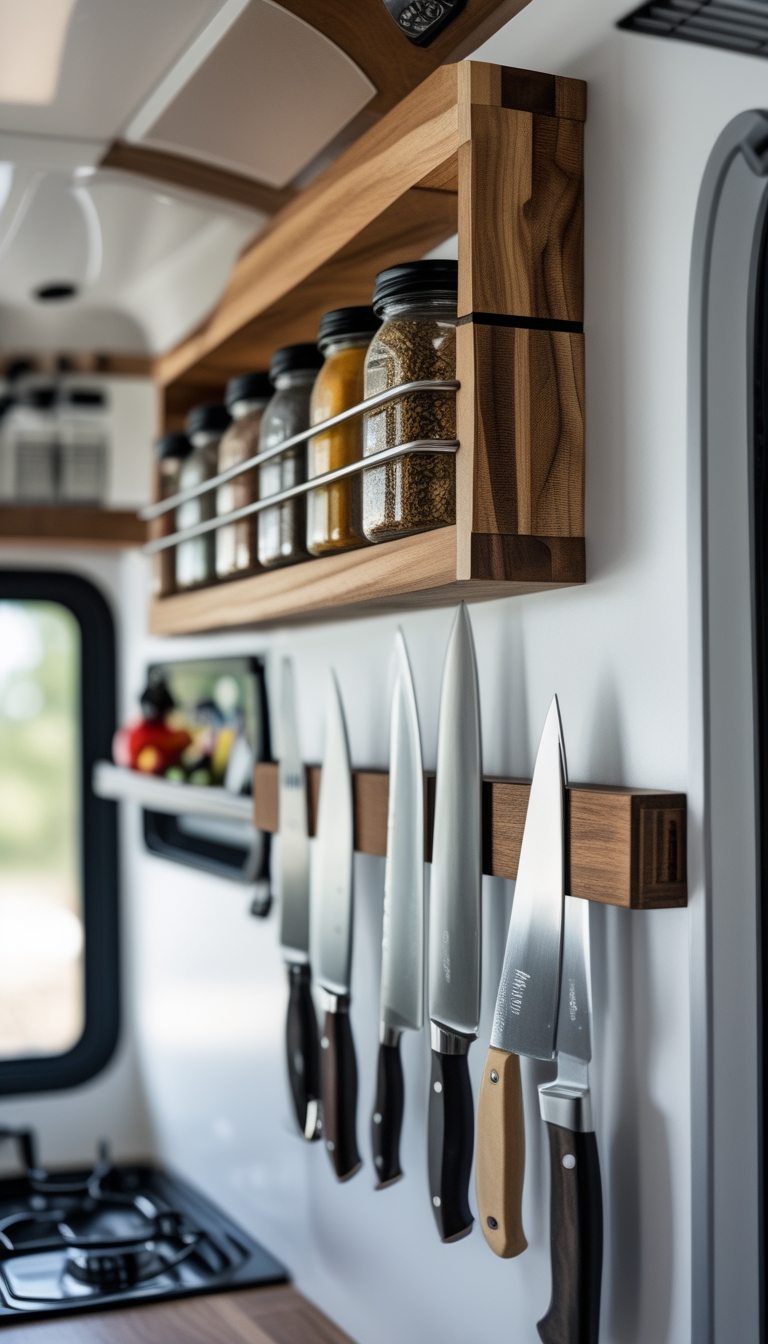
In an RV galley, every inch counts. Mount a narrow spice rail to the wall or cabinet face to keep jars within reach and free up shelf space.
Add a magnetic knife strip above your counter to store knives safely and save drawer room. Position it so handles don’t stick into walk paths and blades sit flat against the strip.
Use small metal spice tins or jars with magnetic lids for a tidy look and easy access. This combo keeps cooking tools visible and speeds up meal prep in tight quarters.
PRO TIP
Choose strong, thin neodymium magnets and mount to studs or use heavy-duty anchors for a secure hold.
14) Refurbish bathroom with a low-profile shower pan and new quick-drain valve
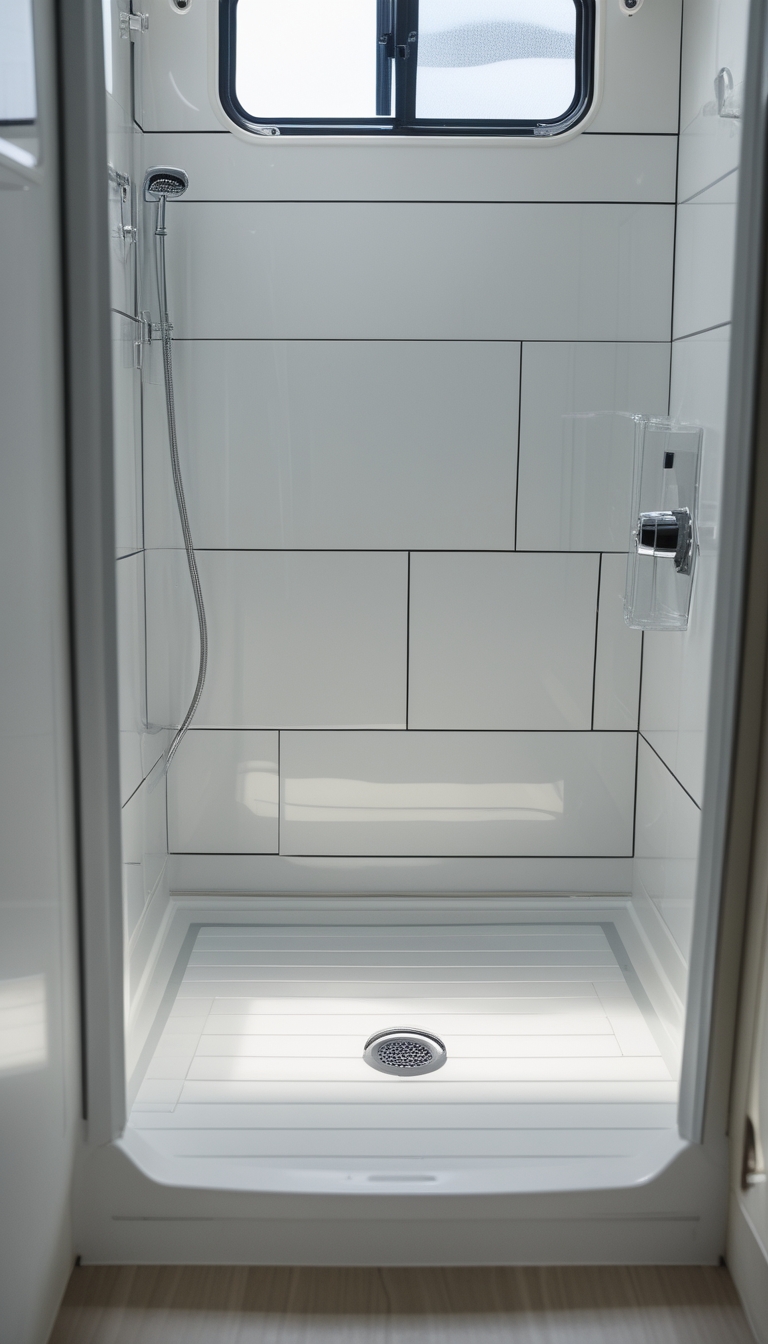
You can update your RV bathroom by swapping the old pan for a low-profile model. These pans sit close to the floor so stepping in is easier and the shower looks cleaner.
Fit the pan after the drain and subfloor are ready. A quick-drain valve speeds water removal and reduces standing water, which helps cut mold and odors.
Measure the drain location and cut the subfloor only as much as needed. Use a 2″ drain pipe and leave at least 1″ clearance around it for a proper fit.
Seal the pan with a compatible waterproof membrane to keep leaks out of your walls and floor. Tighten connections and test for leaks before you finish the trim work.
PRO TIP
Keep a small supply of marine-grade sealant and check drains yearly to avoid surprises on the road.
15) Rebuild entry steps with non-slip tread and a heavy-duty hinge kit
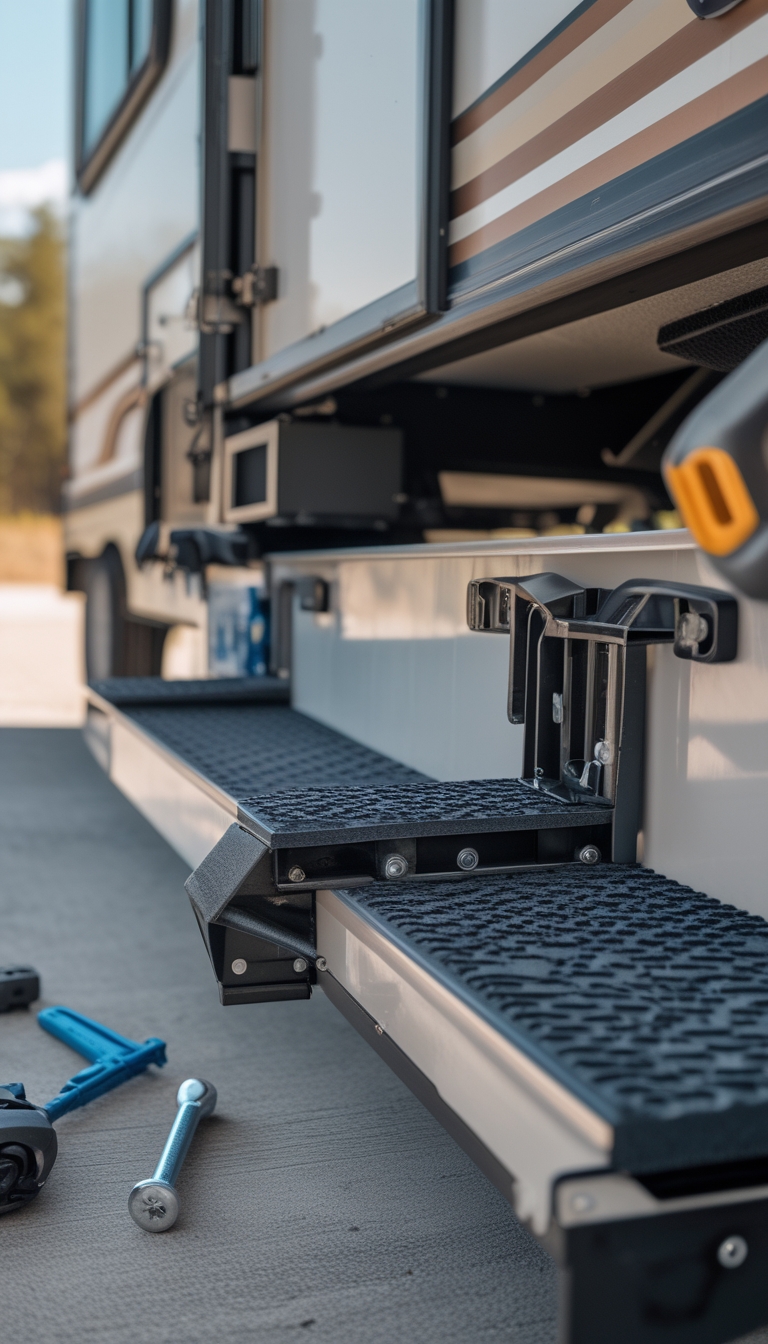
Replace worn steps to make your RV safer and easier to use. Start by removing old treads and checking the frame for rust or rot.
Fit a heavy-duty hinge kit so the steps fold and lock smoothly. Strong hinges reduce wobble and handle repeated use without failing.
Choose non-slip tread designed for outdoor use, like grit or rubber covers. These stay grippy in rain and snow and resist wear from boots and grit.
Measure carefully and trim treads to fit; use stainless fasteners to avoid corrosion. Test the step movement and locking mechanism before you hit the road.
PRO TIP
If the step frame has rust, sand and paint it with a corrosion-resistant coating before installing new parts.
16) Install a roof-mount 12V ventilator fan (e.g., Maxxair) with thermostat control
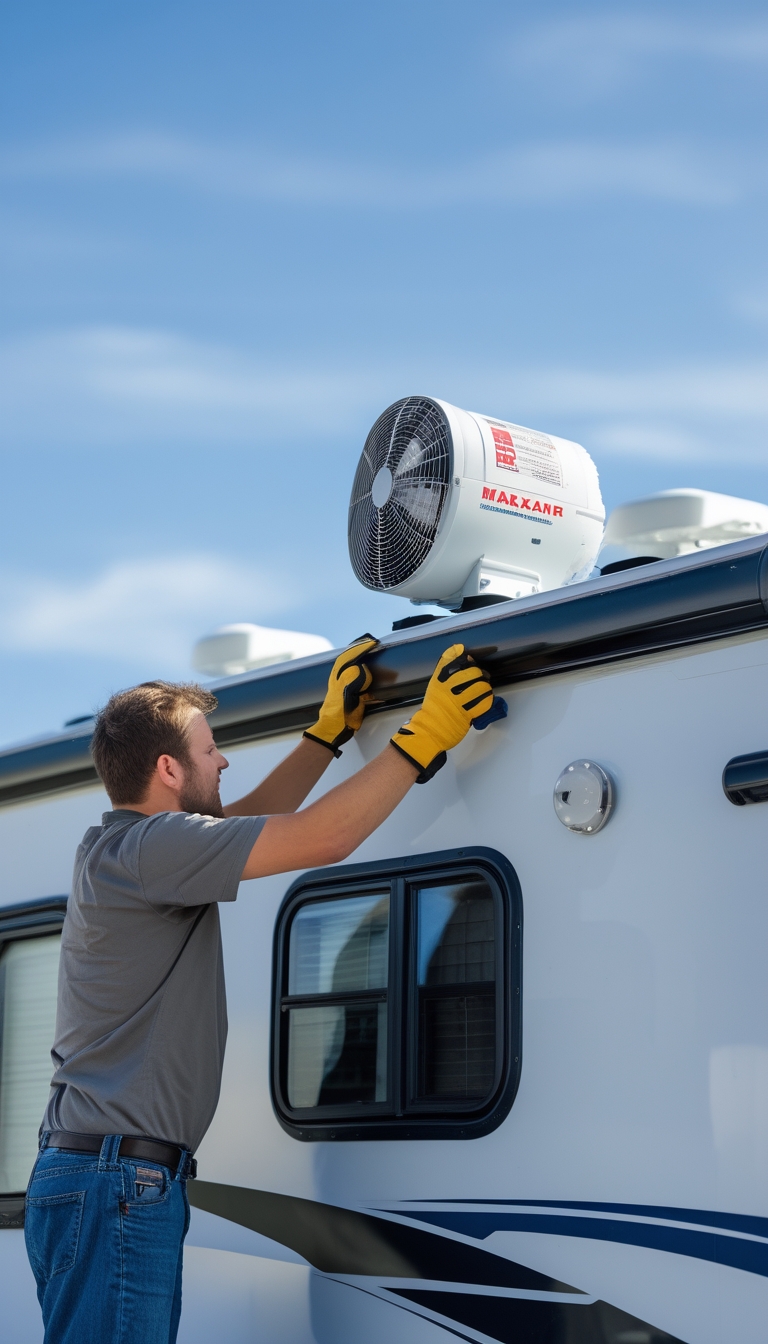
Installing a roof-mount 12V ventilator fan improves airflow and helps control humidity in your RV. You can fit many models into the standard 14″ x 14″ opening used on most vans and RVs. Measure first to confirm the opening matches the fan.
Wire the fan to your battery with a fuse and switch, and add a thermostat to keep temperatures steady. The thermostat turns the fan on only when needed, saving power and reducing noise. Follow the manufacturer instructions for a safe, weatherproof seal.
You can do most of this with basic tools and a friend to help lift the fan into place. If your roof opening differs, trim or adapt the garnish ring as directed by the fan instructions.
PRO TIP
Test the fan and thermostat before sealing the trim ring. This saves time and avoids redoing the roof seal.
17) Add an exterior pull-out griddle station with propane quick-connect
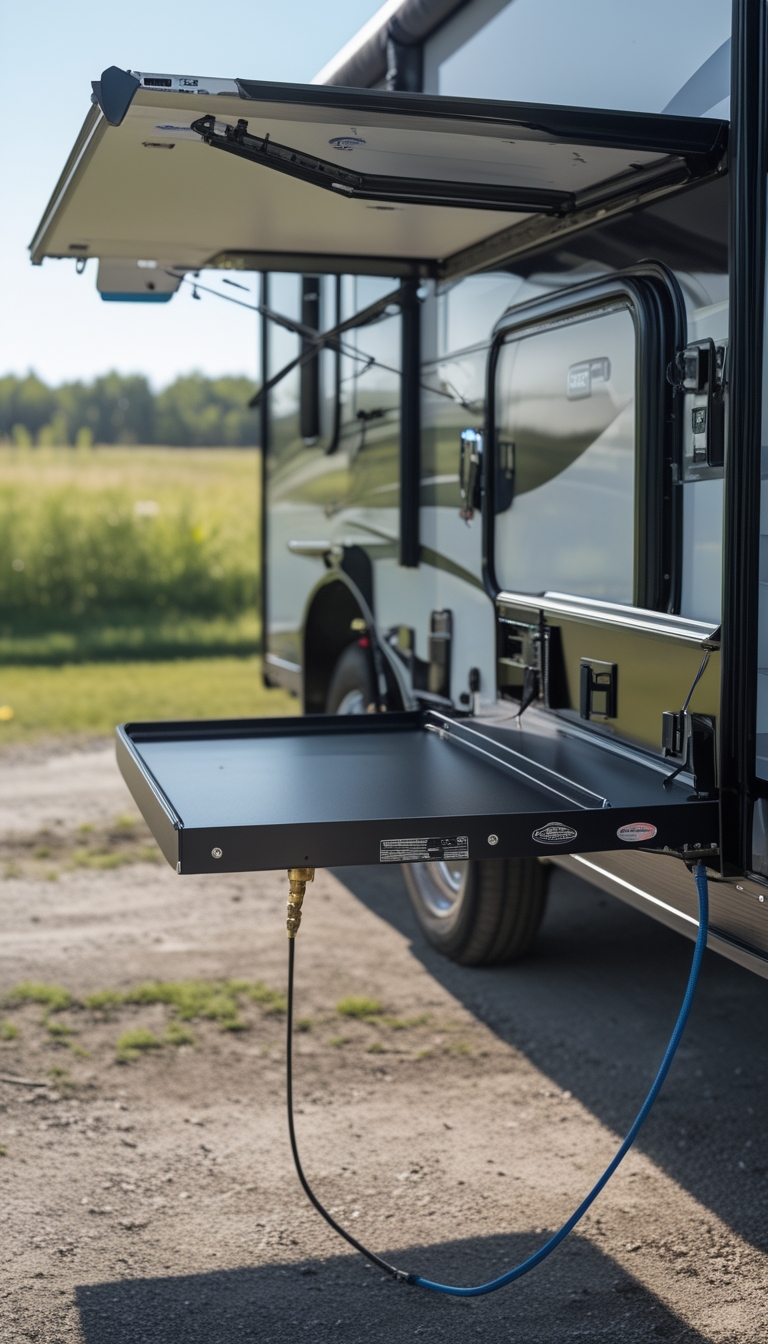
You can add a pull-out griddle to your RV for easy outdoor cooking. Mount a slide-out drawer under an exterior compartment and secure a tabletop griddle on it.
Install a propane quick-connect on your RV so you can hook straight into the onboard system. This avoids carrying small disposable bottles and lets you use the RV regulator for safer, steady fuel flow.
Make sure you remove the griddle’s regulator if the quick-connect uses the RV regulator. Use proper fittings and a certified hose rated for propane. If you’re unsure, hire a pro to do the gas work to meet codes and keep things safe.
PRO TIP
Choose a quick-connect kit with a shutoff and check valves. Measure the slide travel and ventilation before buying the griddle so it fits and stays cool.
18) Replace worn upholstery with marine-grade Sunbrella fabric covers
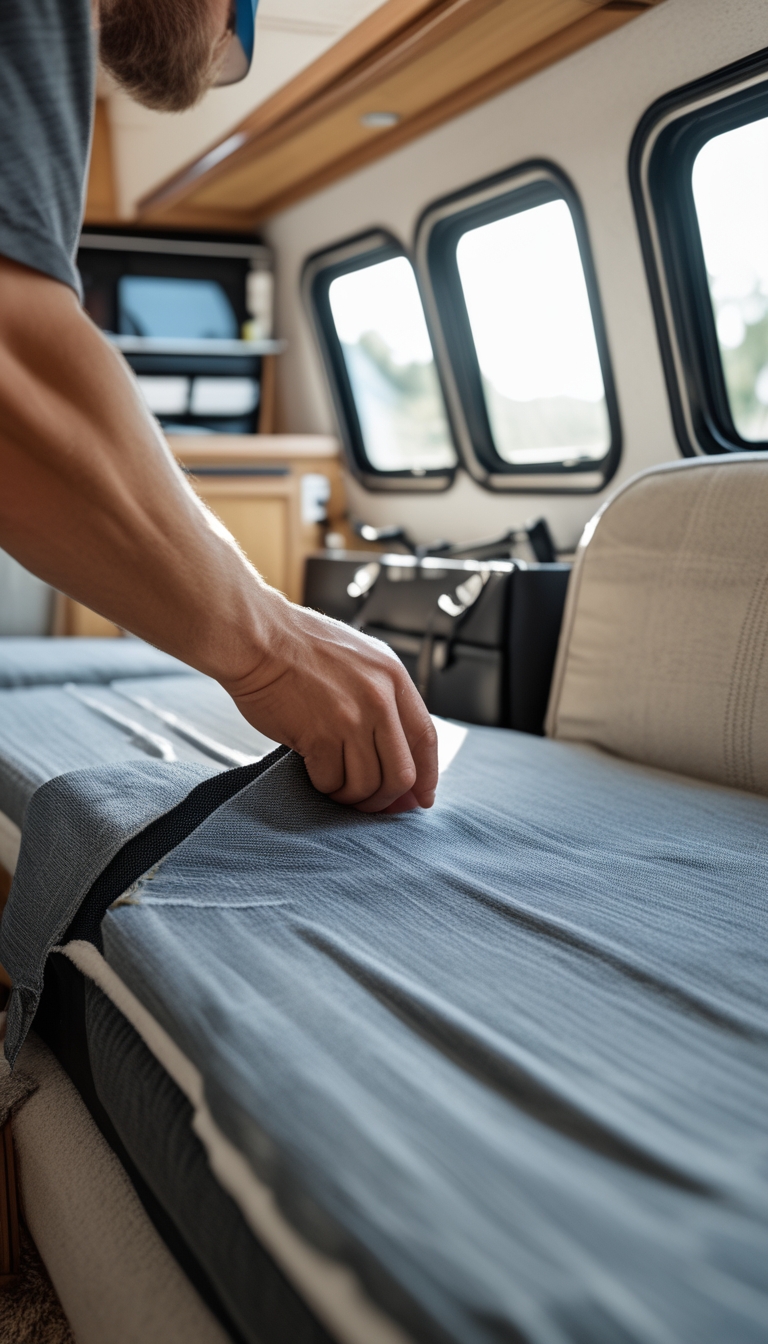
You can give your RV a clean, modern look by re-covering seats and cushions with Sunbrella marine-grade fabric. It stands up to sun, moisture, and frequent use, so your new covers last longer than ordinary fabrics.
Measure and cut carefully to fit each cushion. Use a durable thread and a tight stitch to resist wear and keep seams neat.
You don’t need pro tools to do this job. A basic sewing machine, scissors, and a few upholstery supplies will get you through most repairs.
PRO TIP
Choose darker colors or textured fabrics on high-use areas to hide stains and wear. Pre-wash your fabric and test a small area before sewing to avoid surprises.


